Mech-Mind Glue Detection IPC User Manual
This user manual applies to the Mech-Mind IPC-ORIG-GL2D/IPC-ORIG-GL2D-NIC industrial PCs (IPCs), collectively referred to as the "Glue Detection IPC".
The IPC-ORIG-GL2D/IPC-ORIG-GL2D-NIC IPCs are intended for scenarios that use 2D glue detection cameras.
1. Safety Instructions
-
To prevent electric shock or device damage, always turn off the AC power or unplug the power cord from the outlet before removing, re-installing, or configuring any circuit board.
-
Before moving the product, always unplug the AC power cord from the outlet.
-
To avoid unnecessary damage caused by frequent power cycling, wait at least 30 seconds after powering off before powering on again.
-
Upgrades and disassembly/assembly operations should be performed at an anti-static workbench, because some precision components are highly sensitive to electrostatic discharge (ESD). To reduce the risk of ESD damage, place product components on a grounded, static-free work surface without sliding them, and avoid unnecessary movement.
-
If an anti-static workbench is not available, reduce the risk of static electricity by wearing an anti-static wrist strap, touching the metal part of the chassis before touching components, keeping contact with the metal chassis while removing or inserting components, holding components only by their edges (especially circuit boards), and placing components on a grounded, static-free work surface without sliding them.
-
Ensure that the system has good heat dissipation and ventilation conditions.
-
Keep the device away from dust, moisture, and high-temperature environments.
-
The content of this user manual has been reviewed, and each step has been carefully checked during the writing process. If you have any questions or find any errors, please feel free to contact Mech-Mind.
-
This product must be installed, connected, used, and maintained by qualified professionals. Please ensure proper transportation, storage, installation, connection, usage, and maintenance to guarantee the safe operation of the product.
-
This product can operate independently without an Internet connection. If software updates, remote maintenance, or data synchronization are required, network access can be enabled as needed. By default, the product does not initiate any connection to external networks.
2. Technical Specifications
| Model | IPC-ORIG-GL2D | IPC-ORIG-GL2D-NIC |
|---|---|---|
Configuration |
||
CPU |
Intel i7-9700 3.00 GHz |
|
Memory |
16 GB DDR4 2666 MHz |
|
GPU card |
NVIDIA GeForce® RTX 3050 |
|
Storage |
1 TB SSD |
|
Operating system |
Windows 10 Professional |
|
Wireless network |
None |
|
Fan |
Yes |
|
IO interfaces |
||
Network ports |
6 x 1GbE |
8 x 1GbE |
USB ports |
4 x USB 2.0
|
|
Serial ports |
2 x RS232 COM |
|
Digital IO |
None |
|
Display interfaces |
Onboard: VGA, HDMI; discrete graphics card: HDMI, DP, DVI |
|
Mechanical features |
||
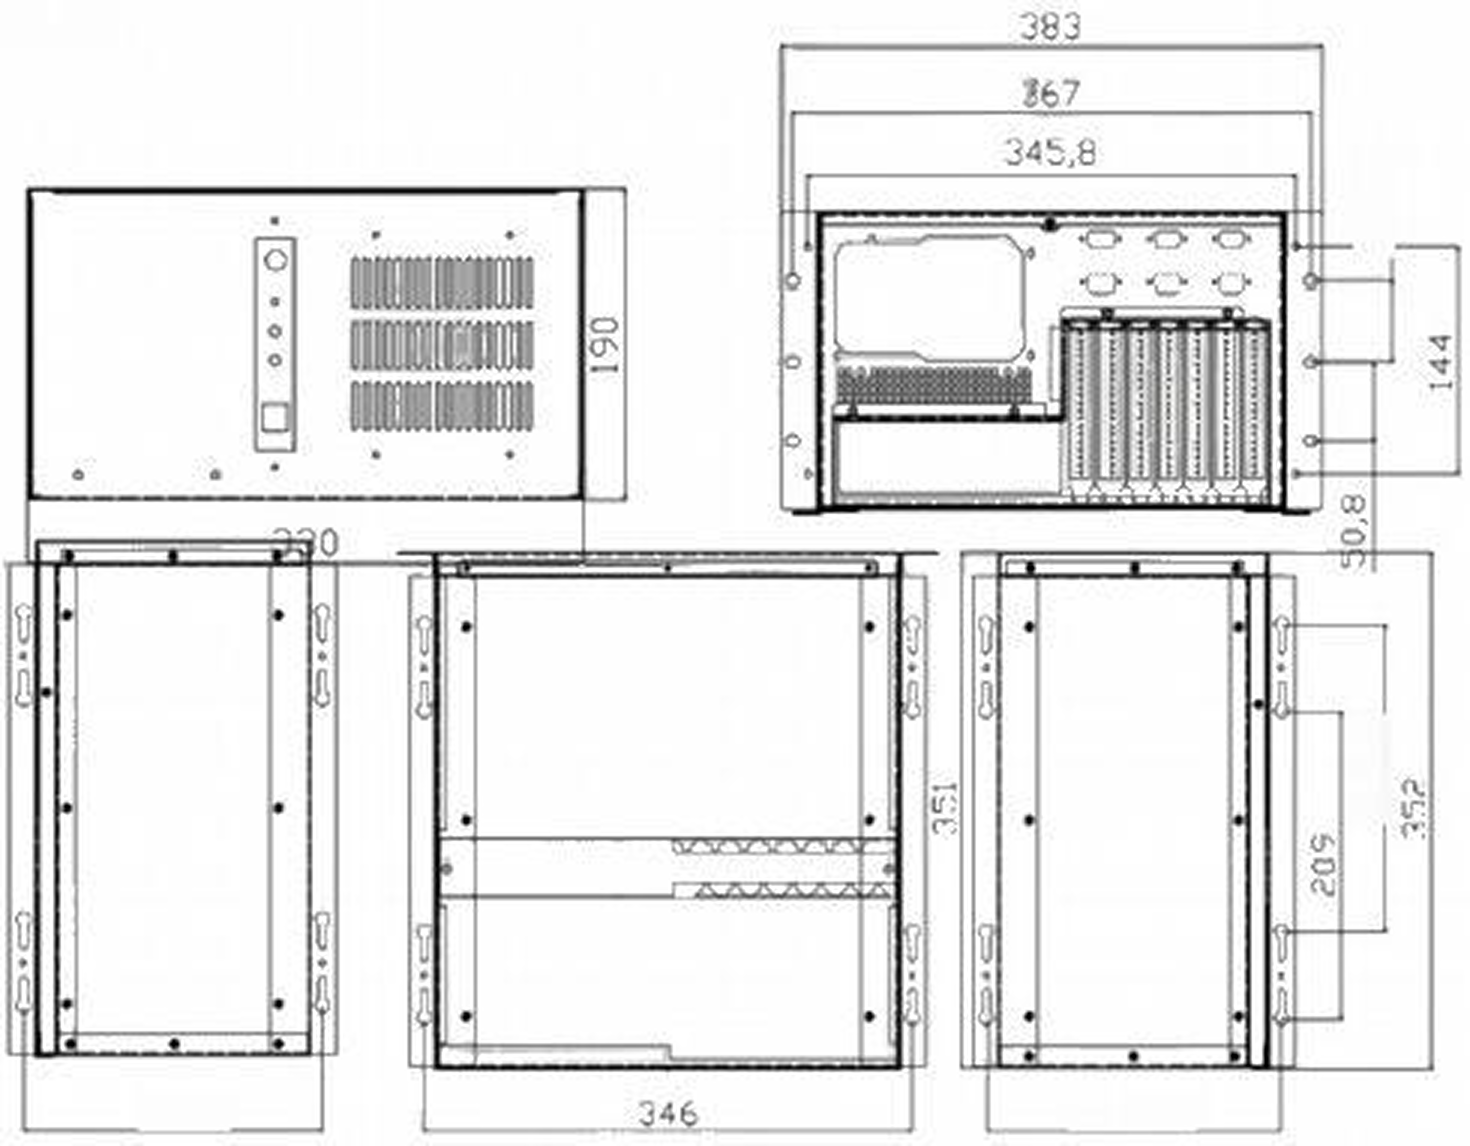
Dimensions (W x D x H) |
330 mm x 352 mm x 190 mm |
|
Weight (net) |
About 18 kg |
|
Electronics |
||
Power supply |
AC input: 100–240 V, 5 A, 50–60 Hz |
|
Rated power |
500 W |
|
Environmental |
||
Operating environment |
Operating temperature: -20°C to 60°C, temperature change rate ≤ 10°C/h; humidity: 10% to 95%; non-condensing; humidity fluctuation ≤ 15% RH/h |
|
Storage environment |
Storage temperature: -30°C to 70°C; humidity: 10% to 95%; non-condensing; moisture-proof measures required for long-term storage |
|
Heat dissipation space |
Must be installed inside a control cabinet, with at least 5 cm of ventilation clearance around the chassis to ensure smooth airflow |
|
Safety & Certification |
||
EMC certification |
FCC, ICES-003, CE-EMC, VCCI, KC |
|
Environmental compliance |
RoHS, WEEE |
|
Protection rating |
IP20 |
|
Warranty |
||
Warranty period |
Two years |
|
3. Product Overview
3.2. Product Views
3.2.1. Front View
The following figure shows the front panel of this product and the interfaces on it.
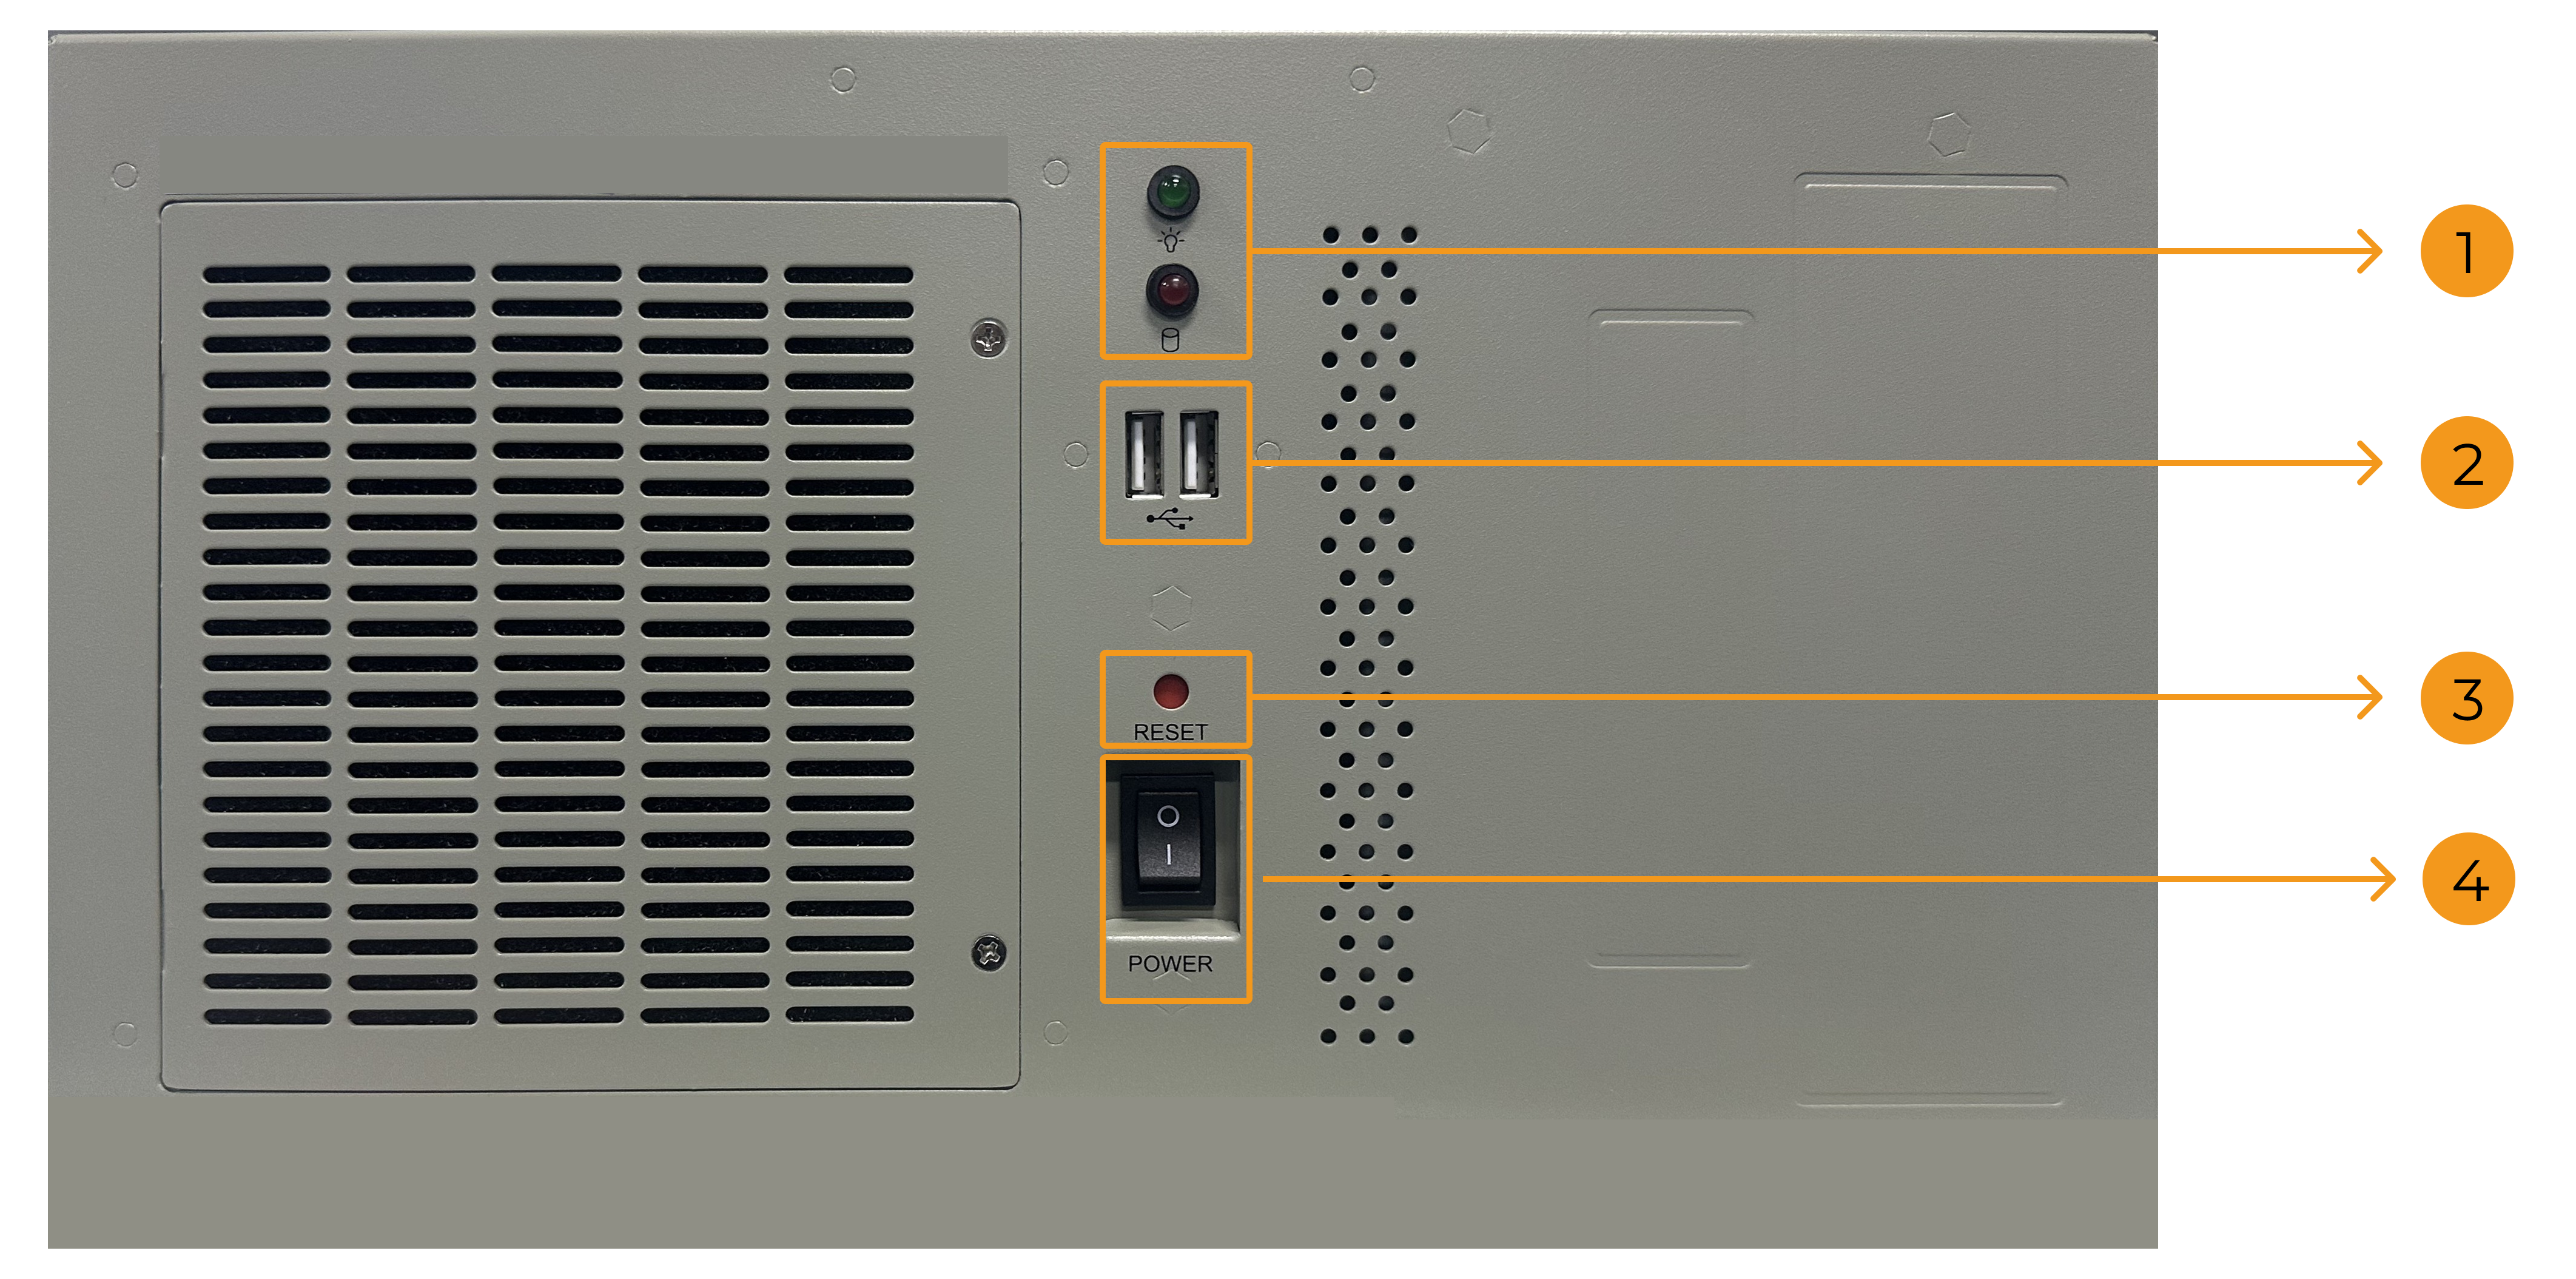
| No. | Description |
|---|---|
1 |
Power/Hard drive LEDs |
2 |
2 x USB 2.0 ports |
3 |
RESET button |
4 |
POWER switch |
The meanings of the LEDs are described in the following table.
| LED | Description |
|---|---|
Power LED (green) |
Indicates the device status.
|
Hard drive LED (red) |
Indicates the hard drive access status.
|
3.2.2. Rear View
The following figure shows the rear panel of this product and the interfaces on it.
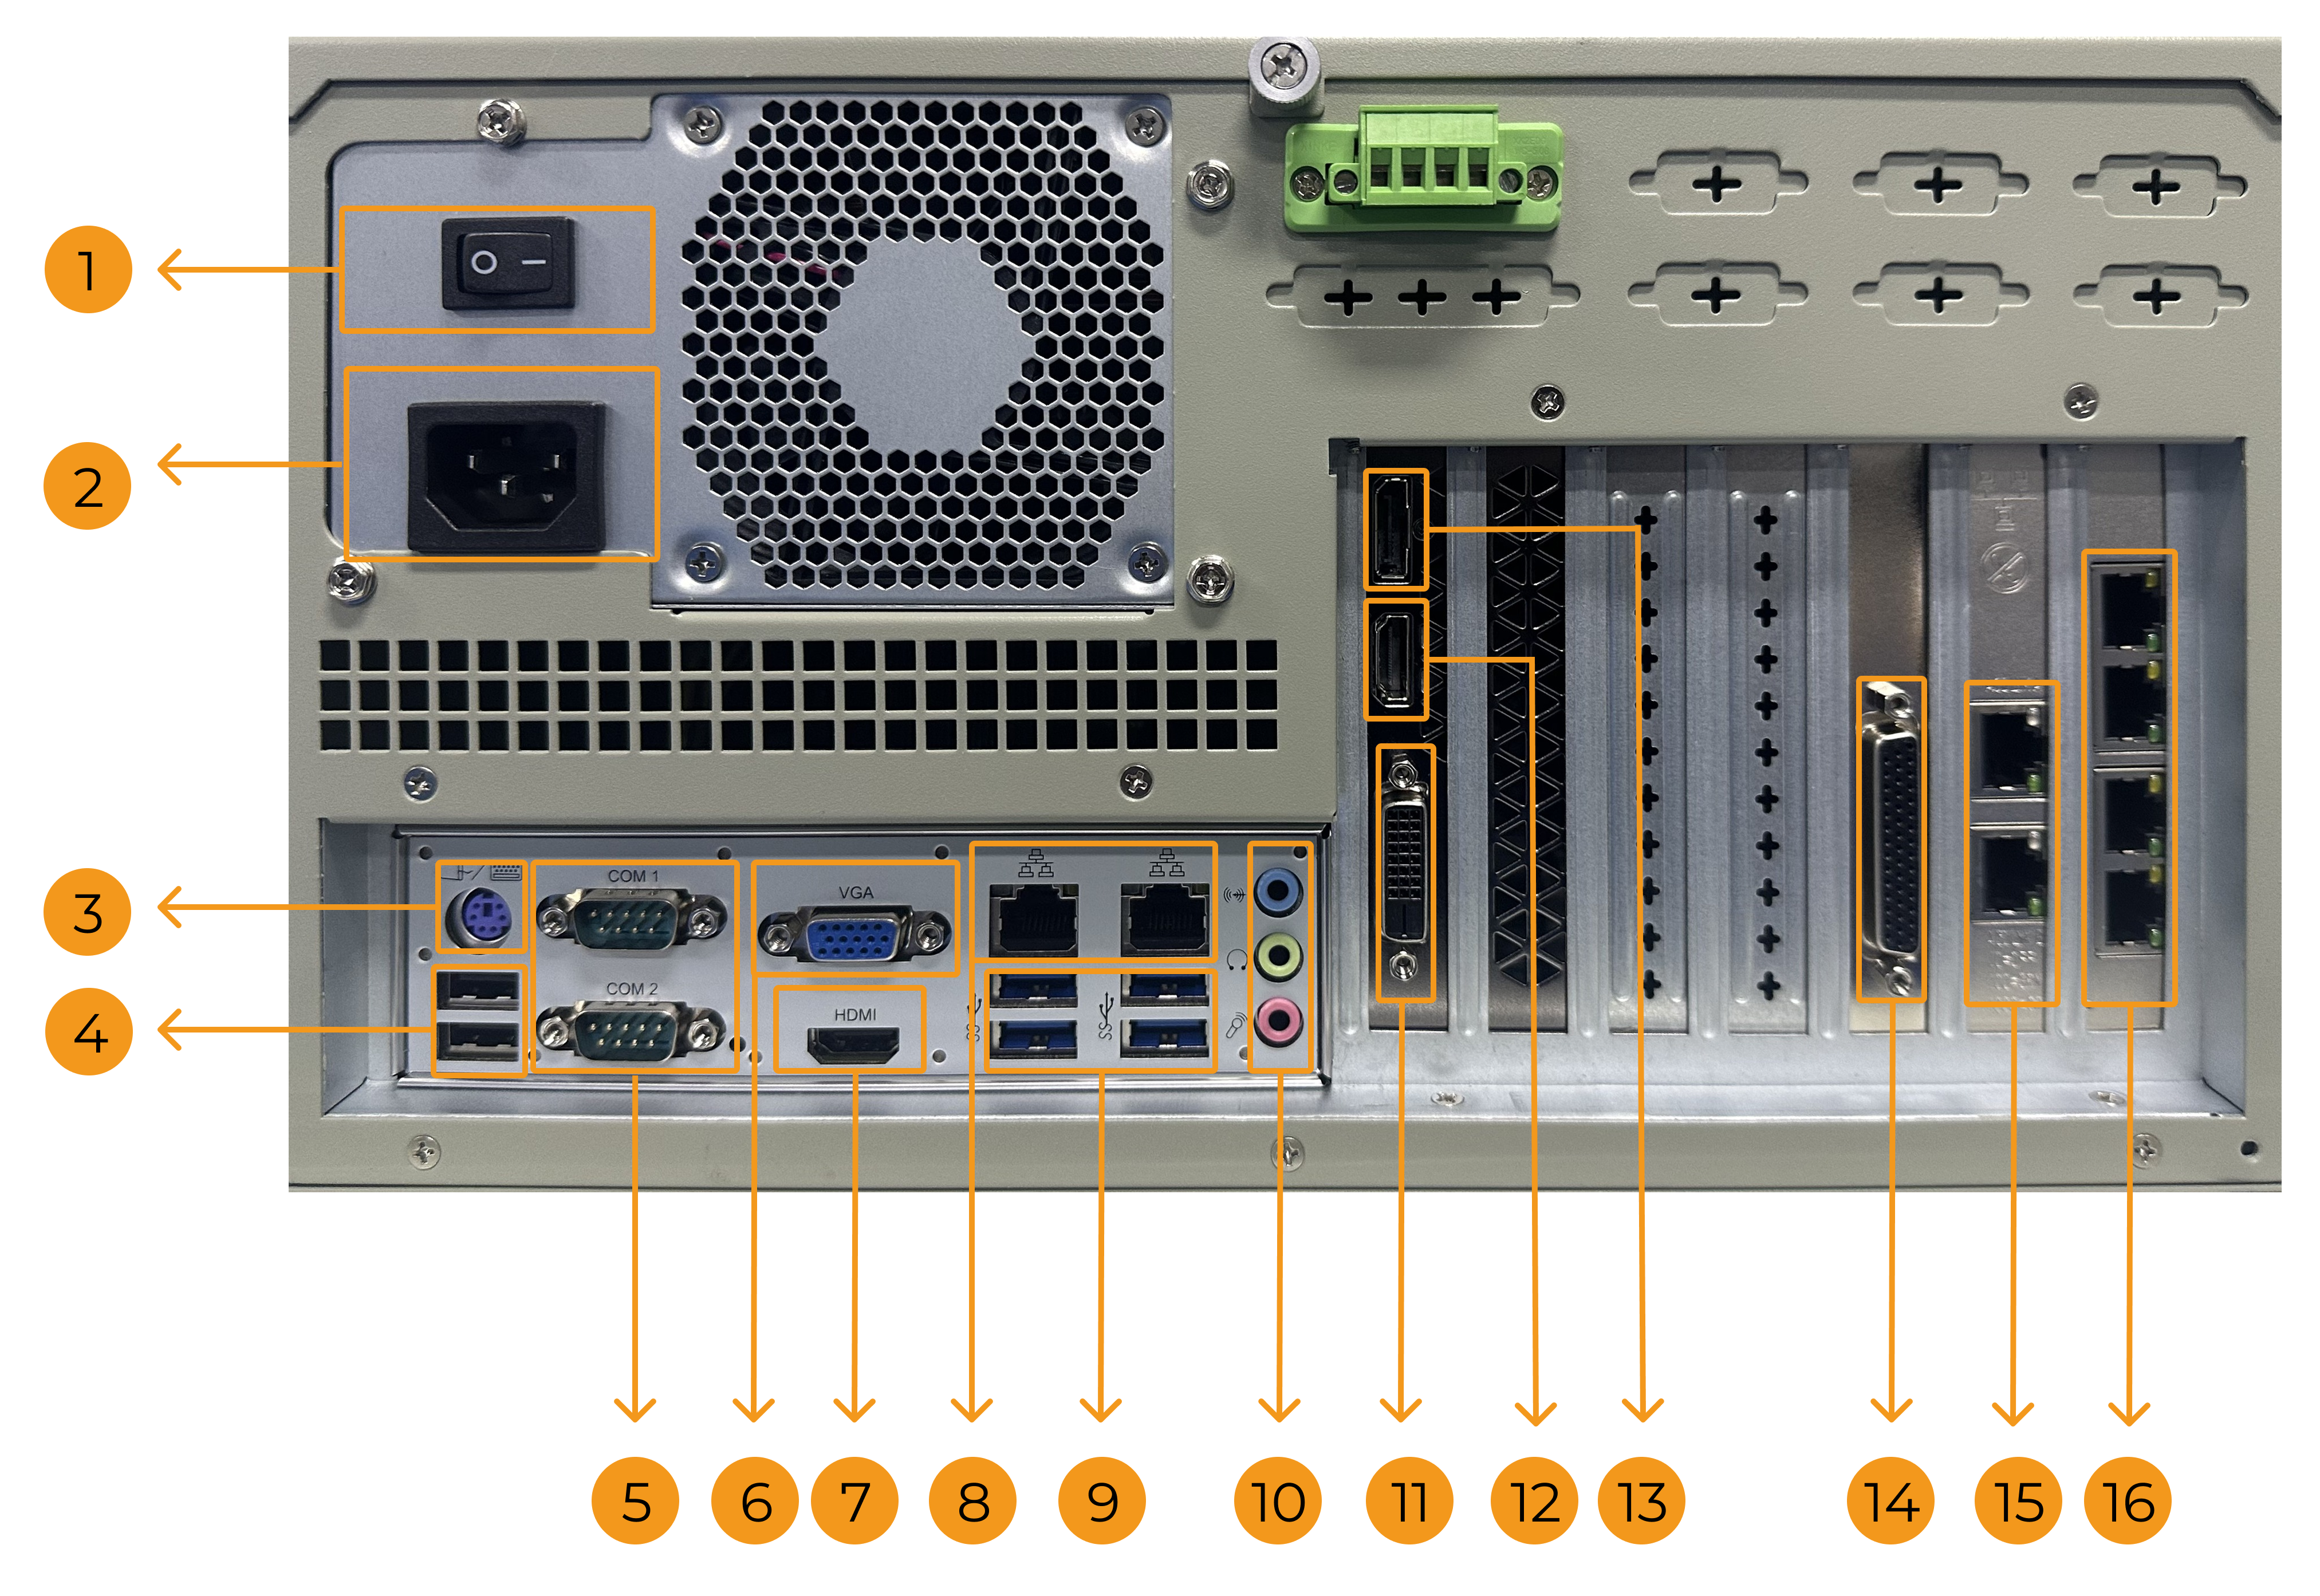
| No. | Description | No. | Description |
|---|---|---|---|
1 |
POWER switch |
2 |
Power connector |
3 |
Keyboard/mouse port (PS/2) |
4 |
2 x USB 2.0 ports |
5 |
2 x COM ports |
6 |
VGA port |
7 |
HDMI port |
8 |
2 x 1GbE network ports (onboard) |
9 |
4 x USB 3.0 ports |
10 |
Audio jacks |
11 |
DVI port (provided by the graphics card) |
12 |
HDMI port (provided by the graphics card) |
13 |
DP port (provided by the graphics card) |
14 |
Serial port card dedicated to glue detection cameras |
15 |
2 x 1GbE network ports (expansion, IPC-ORIG-GL2D-NIC model only) |
16 |
4 x 1GbE network ports (expansion) |
4. Installation
4.1. Unpacking Checklist
| If some of the components listed in the checklist below are missing, please do not proceed with the installation and contact Mech-Mind Technical Support. |
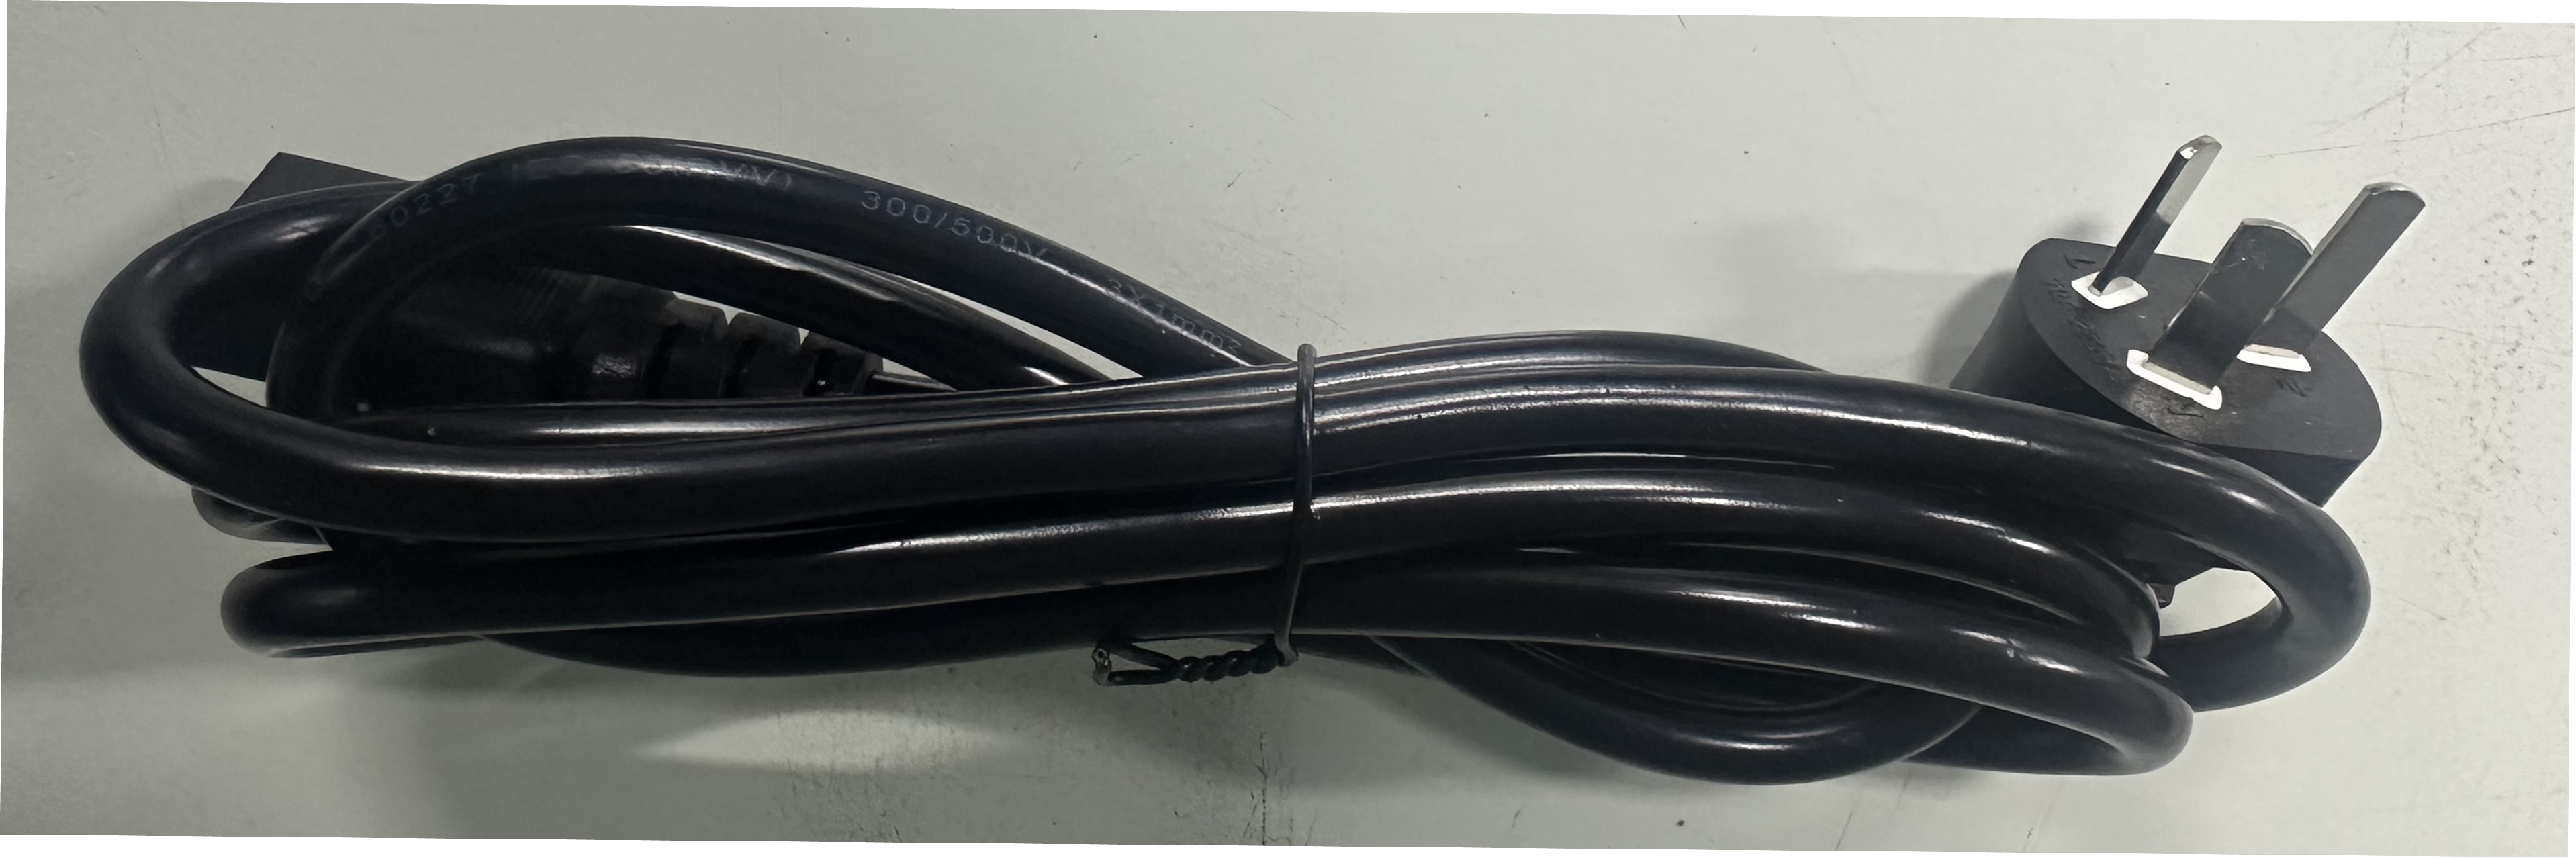
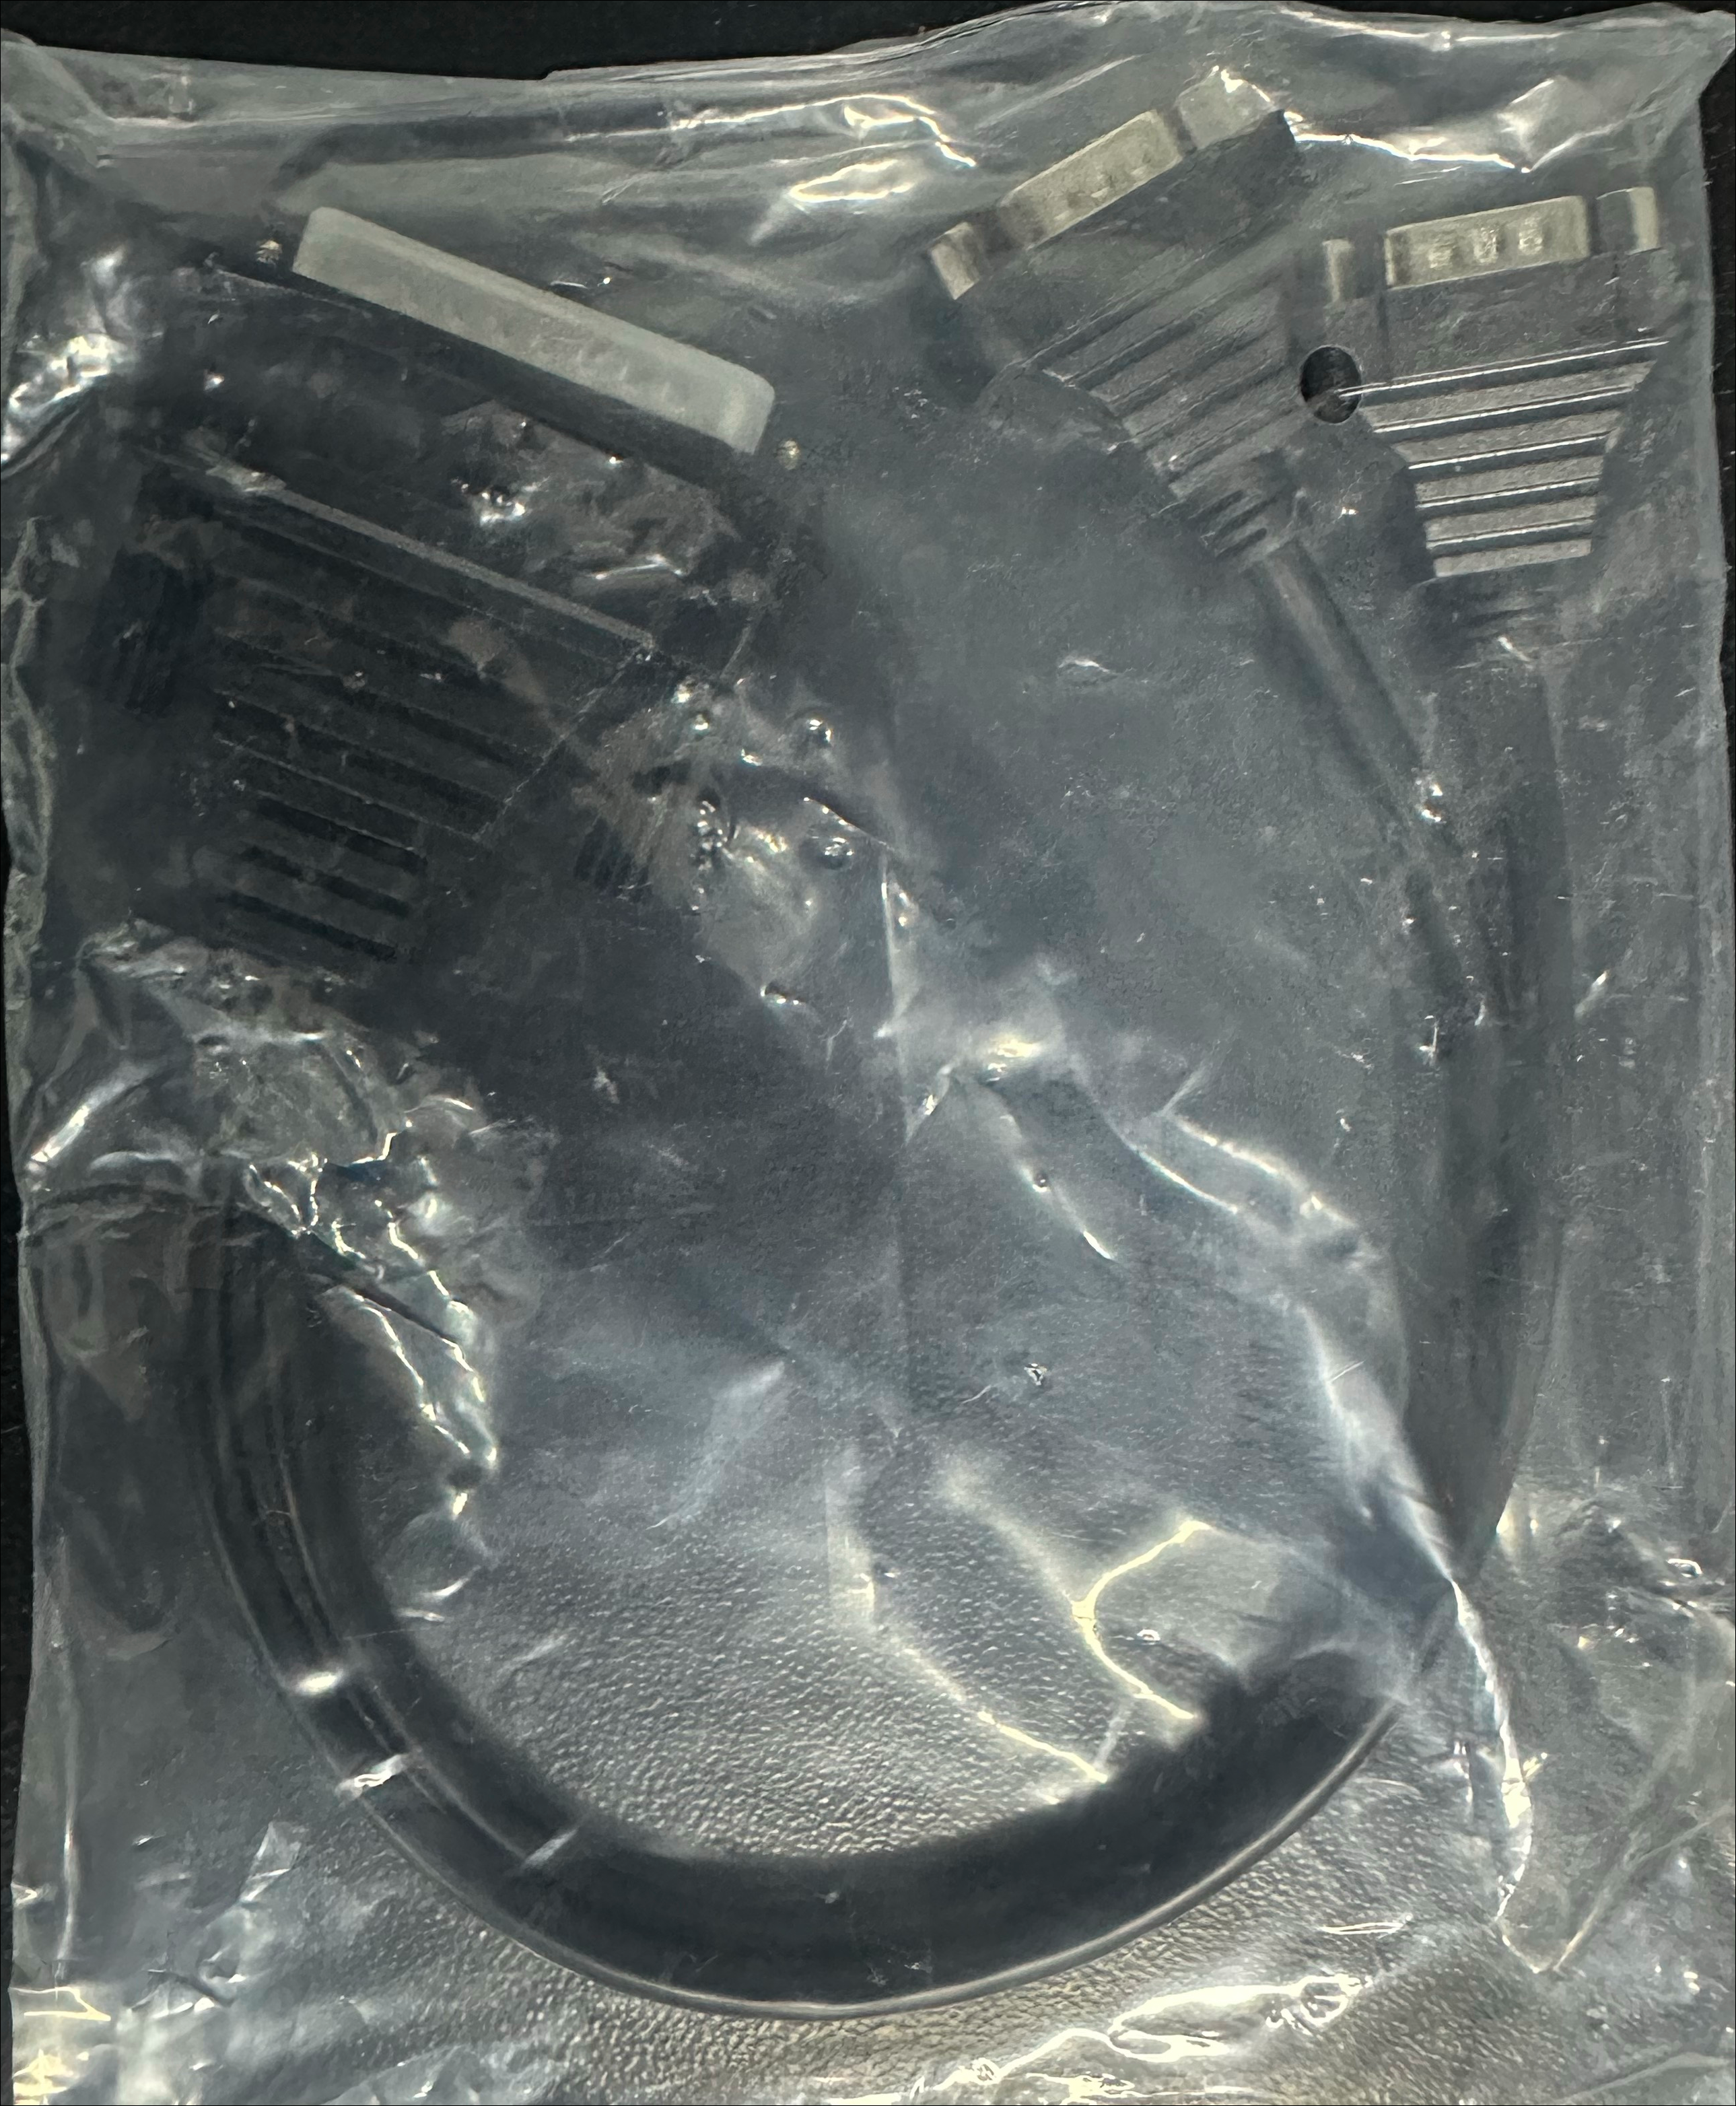
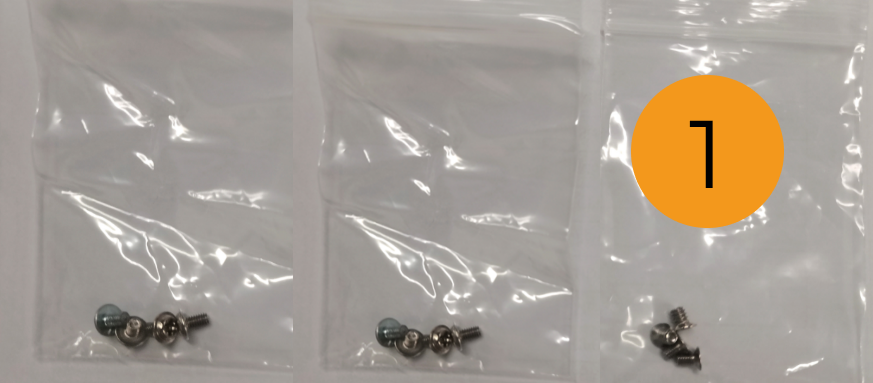
This product is shipped with the following components:
| No. | Item | Quantity | Illustration |
|---|---|---|---|
1 |
IPC-ORIG-GL2D/IPC-ORIG-GL2D-NIC |
1 |
|
2 |
Mounting bracket |
2 |
|
3 |
Power cord |
1 |
|
4 |
Serial port adapter cable |
1 |
|
5 |
Set screws (including retention screws marked 1) |
12 |
|
6 |
Product inspection report |
1 |
/ |

4.2. Installation Precautions
Before installing this product, please pay attention to the following installation precautions:
-
Read the user manual: The user manual for this product provides complete instructions on installation and configuration options. Please read it before installation.
-
DANGER! Disconnect power: Ensure that the power to the IPC is completely disconnected during the entire installation process. Failure to do so may result in electric shock or personal injury.
-
Qualified personnel: This product must be installed by qualified professionals.
-
Air circulation: When installing this product, ensure there is adequate airflow. The cooling ventilation openings of this product must not be obstructed. Leave a gap of at least 5 cm around the product to prevent overheating.
4.3. Mount the IPC with Mounting Brackets
To mount the IPC onto a wall or other surface using the two mounting brackets, follow the steps below.
-
Turn the IPC over.
-
Align the retention screw holes in each bracket with the corresponding retention screw holes on the bottom surface.
-
Secure the brackets to the IPC by inserting retention screws into each bracket.
-
Drill holes into the intended mounting surface.
-
Align the mounting holes on both sides of the mounting bracket with the pre-drilled holes.
-
Use screws (prepared by yourself) to secure the IPC to the target mounting surface.
You can also place the IPC flat inside a control cabinet.
5. External Interface Description
5.1. Power Connector
The power connector connects to a 100–240 V AC, 50–60 Hz, 5 A power supply through the power cord.
5.2. Network Ports
Network ports allow the IPC to connect to an external network.
To connect the IPC to an external network, follow these steps:
-
Find the network ports on the IPC.
-
Align the RJ45 connector on the network cable with one of the network ports.
-
Insert the RJ45 connector into the network port.
Each network port on the IPC has two status light-emitting diodes (LEDs). The activity/link LED indicates the connection status or activity of the port, and the speed LED indicates the connection speed.
The meanings of the network port LEDs are described in the following table.
| LED | Status | Description |
|---|---|---|
Activity/Link LED |
Off |
No connection |
Yellow |
Connected |
|
Blinking |
Sending/receiving data |
|
Speed LED |
Off |
Connection speed: 10 Mbps |
Green |
Connection speed: 100 Mbps |
|
Orange |
Connection speed: 1 Gbps |
6. Maintenance and Cleaning
Follow the instructions below to maintain and clean this product.
6.1. Cleaning Precautions
Before cleaning any part or component of this product, read the following instructions carefully.
-
The interior of this product does not require cleaning. Prevent liquids from entering the product interior.
-
When using a vacuum cleaner to clean this product, take care around all removable small components.
-
Disconnect the power supply before cleaning this product.
-
When cleaning this product, do not use solvents or chemicals that may cause allergic reactions.
-
Do not eat, drink, or smoke near this product.
-
Clean the dust filter at the air inlet regularly to prevent dust accumulation from affecting heat dissipation.
6.2. Cleaning Tools
Some components of this product can only be cleaned with special tools. The following is a list of items used to clean this product.
-
Cloth: Use a soft, clean cloth to clean this product.
-
Water or medical alcohol: A cloth dampened with water or medical alcohol can be used to wipe this product.
-
Vacuum cleaner: Using a vacuum cleaner designed for computer dust removal is one of the best ways to clean this product.
-
Cotton swabs: Cotton swabs dampened with alcohol or water are ideal for cleaning hard-to-reach areas. Lint-free cotton swabs (such as foam swabs) are preferred.
7. Obtain Support
If you need technical support, please contact Mech-Mind Technical Support in any of the following means:
-
Email: service@mech-mind.net
-
Community: community.mech-mind.com