Set Camera IP Address and Connect to Camera
To ensure that Mech-Eye Viewer can connect to the camera successfully, it is recommended to set the IP addresses first. Please make sure that the following IP addresses are in the same subnet and are unique.
After setting the IP addresses, you can connect to the camera. Once the camera is connected, you can set a custom name for it for easy recognition of different devices.
|
If the camera to which you want to connect is not displayed in Mech-Eye Viewer, please refer to Troubleshooting. |
Set Camera IP Address
You can set a static IP address for the camera, or dynamically assign the IP address.
Set Static IP address
| Record the set camera IP address for future reference. |
Follow these steps to set a static IP address for the camera:
-
Open Mech-Eye Viewer, select the info card of the camera to be connected, and click
 in the upper right of the card to open the IP Configuration window.
 -
Select Set as Static IP.
-
Based on the IP address and subnet mask displayed in Computer IP Configuration, select IP Address Class, and enter the camera IP address and subnet mask.
-
The IP address must be unique.
-
The Computer IP Configuration section displays the IP address and subnet mask of the computer Ethernet port connected to the camera.
-
IP Address Class options: Class A 10.x.x.x, Class B 172.16.x.x, Class C 192.168.x.x, and Customized.
-
-
Click Apply to apply the modified IP configuration.
After you click Apply, it will take about 5 min for Mech-Eye Viewer to check the availability of the new IP address.
Using dynamic IP address
Follow these steps to dynamically assign an IP address to the camera:
-
Open Mech-Eye Viewer, select the info card of the camera to be connected, and click
in the upper right of the card to open the IP Configuration window. -
Select Set via DHCP and click Apply.
| If you want to set the IP address of the computer Ethernet port connected to the camera, please refer to Set IP Address on Computer. |
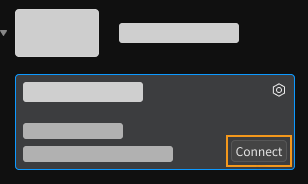
Connect to Camera
When the camera info card displays the Connect button, click this button to connect to the camera.
| For the very first time that the camera is connected to the computer, it may take up to a few minutes for the camera to show up in Mech-Eye Viewer. |
If other content is displayed, please complete the corresponding action according to the following table, and then connect to the camera.
| Displayed content | Description |
|---|---|
Upgrade button |
Click this button to upgrade the software or the camera firmware first. |
Connected |
camera is already connected to the GenICam client or another computer. Please disconnect camera from the GenICam client or the other computer first. |
|
Hover the cursor here to check the cause and solution, and resolve the issue according to these. |
Set a Custom Name
The camera name can be used to distinguish different devices, clarifying the usages and locations of the devices, and more. Please set the custom name according to your actual needs. The custom name will be displayed in the Device List.
After connecting to the camera, on the left of the data acquisition area, click ![]() or Set device name to set a custom name.
or Set device name to set a custom name.
|
Change MTU Size
In the Administrator account, you can change the MTU Size of the camera.
MTU stands for maximum transmission unit, which is the largest data package that can be transmitted by a network. The unit of the MTU size is byte (B), and the default MTU value of the camera is 1500.
If the camera is connected to the computer directly or connected through an industrial network switch / router, and the requirement on the acquisition speed is high, you can set the MTU Size to 9000. Meanwhile, please enable the jumbo frame function on the computer and network switch / router.
| If the network condition is not good (For example, a low bandwidth router is used), setting the MTU Size to 9000 may lead to Mech-Eye SDK crashing due to data transmission issues. |
Once the camera is connected, you can start acquiring data. The next topic introduces the actions for acquiring data and viewing the obtained data.