Adjust 3D Exposure Settings
The values of Exposure Multiplier and Exposure Time in the 3D Parameters category influence the depth data quality and data acquisition time.
If the depth map and point cloud have missing parts, or the data acquisition time needs to be shortened to improve the cycle time, you can read this chapter and adjust the values of Exposure Multiplier and Exposure Time in the 3D Parameters category.
| The 2D image/2D images (depth source) acquired in the Flash exposure mode will be used to help determine whether the 3D exposure settings are appropriate. For detailed descriptions, refer to 2D Flash Exposure Mode. |
Exposure Multiplier and Time
The values of Exposure Multiplier and Exposure Time in the 3D Parameters category should be set according to the material type of the target object surface:
-
When the target object surface is made of a single material, usually complete depth data can be acquired with one exposure.
-
When the target object surface has both reflective/light-color and non-reflective/dark-color areas, you can set Fringe Coding Mode to Reflective.
The following camera modes have the Reflective option: DEEP-GL, LSR S-GL, LSR L-GL, LSR XL-GL, NANO ULTRA-GL, PRO S-GL and PRO M-GL.
If high acquisition speed is required, or the camera model in use does not have the Reflective mode, you can set the Fringe Coding Mode to Accurate or Fast and set multiple exposures to acquire complete depth data.
One Exposure
When the target object surface is made of a single material, adjust parameters following the steps below:
-
Set the value of Exposure Multiplier in the 3D Parameters category to 1.
-
Set the parameters listed in the table below in the 2D Parameters category according to the camera model in use.
Model Parameter Settings 2D image type DEEP-GL, LSR S-GL, LSR L-GL, and LSR XL-GL
Set Exposure Mode in the 2D Image (Depth Source) subcategory to Flash, and set Flash Acquisition Mode to Fast.
2D image (depth source)
NANO-GL, NANO ULTRA-GL, PRO S-GL, and PRO M-GL
Set Exposure Mode to Flash, and set Flash Acquisition Mode to Fast.
2D image
Other models
Set Exposure Mode to Flash.
-
Click
 in the data acquisition area to trigger one round of data acquisition, and then check the depth map and point cloud.
-
If the depth map and point cloud have missing parts, proceed to step 4.
-
If the depth map and point cloud are complete, proceed to step 5.
-
-
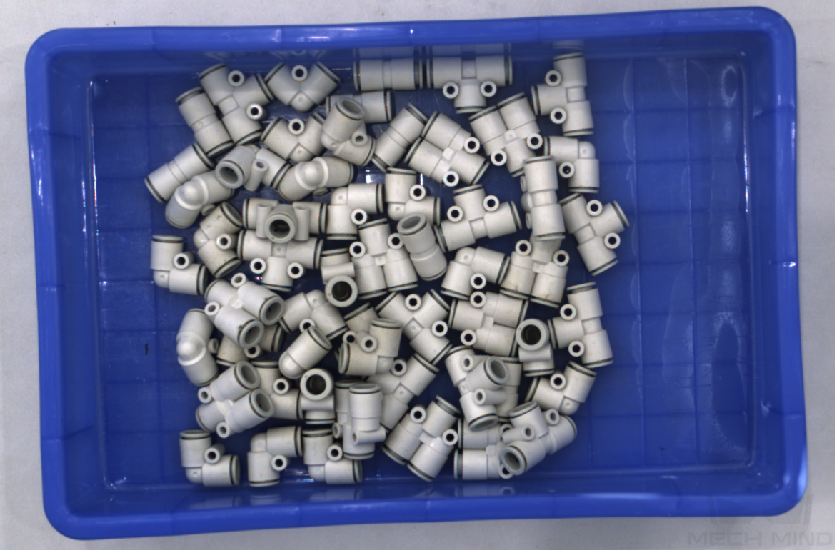
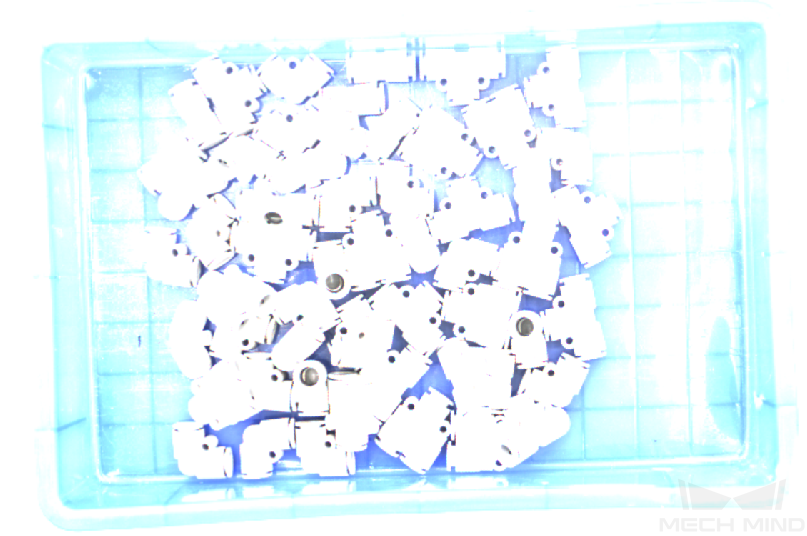
Adjust the value of Exposure Time in the 3D Parameters category according to the brightness of the 2D image/2D images (depth source).
-
If the 2D image/2D images (depth source) is bright, decrease the value and repeat step 3 to4.
-
If the 2D image/2D images (depth source) is dark, increase the value and repeat step 3 to4.
Too dark Good Too bright 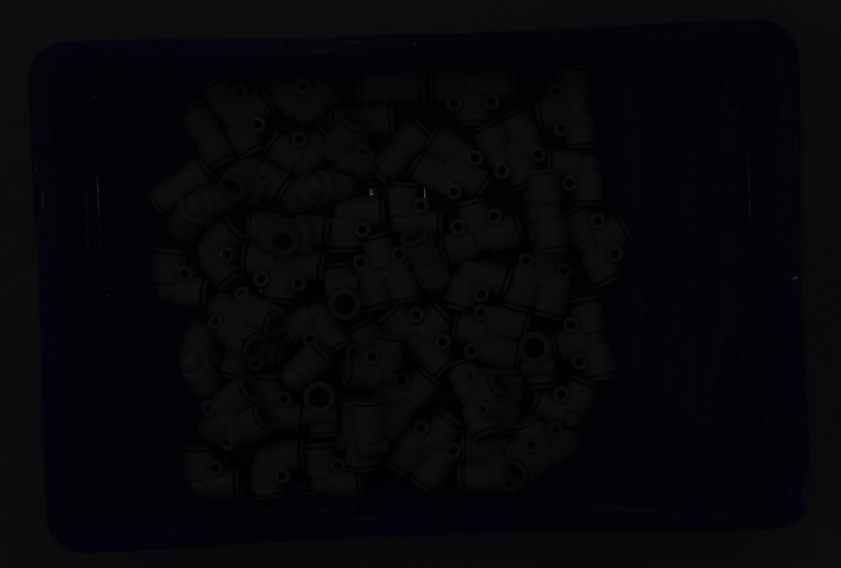
-
-
Set Exposure Mode in step 2 to the required value.
Multiple Exposures
When the target object surface has both reflective/light-color and non-reflective/dark-color areas, adjust parameters following the steps below:
-
Determine the exposure time for the most reflective or brightest area following the steps for conducting one exposure, and record the time.
-
Determine the exposure time for the least reflective or darkest area following the steps for conducting one exposure, and record the time.
-
Set the value of Exposure Multiplier to 2.
Generally, complete depth data can be acquired with two exposures.
-
Set the values of Exposure Time and Exposure Time 2 to the exposure times recorded in step 1 and step 2.
-
Click
in the data acquisition area to trigger one round of data acquisition, and then check the depth map and point cloud.-
If the depth map and point cloud are complete, the parameter adjustment is finished.
-
If the depth map and point cloud have missing parts, proceed to step 6.
-
-
Determine the exposure time for the area where the depth data is missing following the steps for conducting one exposure, and record the time.
-
Set the value of Exposure Multiplier to 3.
-
Set the values of Exposure Time, Exposure Time 2 and Exposure Time 3 to the exposure times recorded in step 1, step 2 and step 6.
-
Click
in the data acquisition area to trigger one round of data acquisition, and then check the depth map and point cloud.-
If the depth map and point cloud are complete, the parameter adjustment is finished.
-
If the depth map and point cloud have missing parts, repeat step 1 to 5.
-