AI Binary Classification Tool
Introduction
The AI Binary Classification Tool is an efficient visual binary classification tool that supports custom labeling, training, and inference for OK and NG image categories. By completing the wizard-style configuration process, users can quickly implement the full workflow from image acquisition to deep learning inference. This tool is typically used in scenarios such as front-back orientation verification or presence detection for a single type of target object.

-
Acquire images: Acquire image data for learning. It is recommended to cover typical conditions in the actual production environment to ensure image quality and diversity and improve the model’s deep learning inference accuracy.
-
Set ROI: Select the target area in the acquired images, reducing the impact of irrelevant regions on the inference results and preparing for subsequent image labeling.
-
Label images: Assign categories to images within the target region, enabling the tool to complete model training and result inference based on the labels.
-
Model validation and optimization: Use the acquired images to validate the model’s inference effectiveness and set inference rules or add more labeled images as needed.
Usage Workflow
After entering the tool, click New button in the upper-right corner of the model list on the left to create and enter a new model configuration process.
Acquire Images
Acquire image data for training the model.
-
Confirm that the input port of the current Step is connected to image data.
-
When entering the tool, the camera will automatically acquire one image for model training. You can click the Acquire once button at the bottom of the tool to acquire new image data for model training.
|
When acquiring images, it is recommended to cover typical variations at the production site, including:
Diverse images help the model adapt to the actual environment and improve inference accuracy. |
Set ROI
After acquiring images, you need to frame the area of the image to be detected or recognized on the captured image, reducing the impact of irrelevant regions on the inference results and preparing for subsequent image labeling.
|
-
Open the ROI setting interface.
Click the Edit button to enter the ROI setting interface.
-
Set the ROI.
Select the "Rectangle" or "Circle" selection tool to drag and draw the ROI in the visualization area. Please accurately select the target area based on the actual position and shape of the target object, avoiding irrelevant backgrounds.
-
When selecting the target area, you can select only the area containing key features.
-
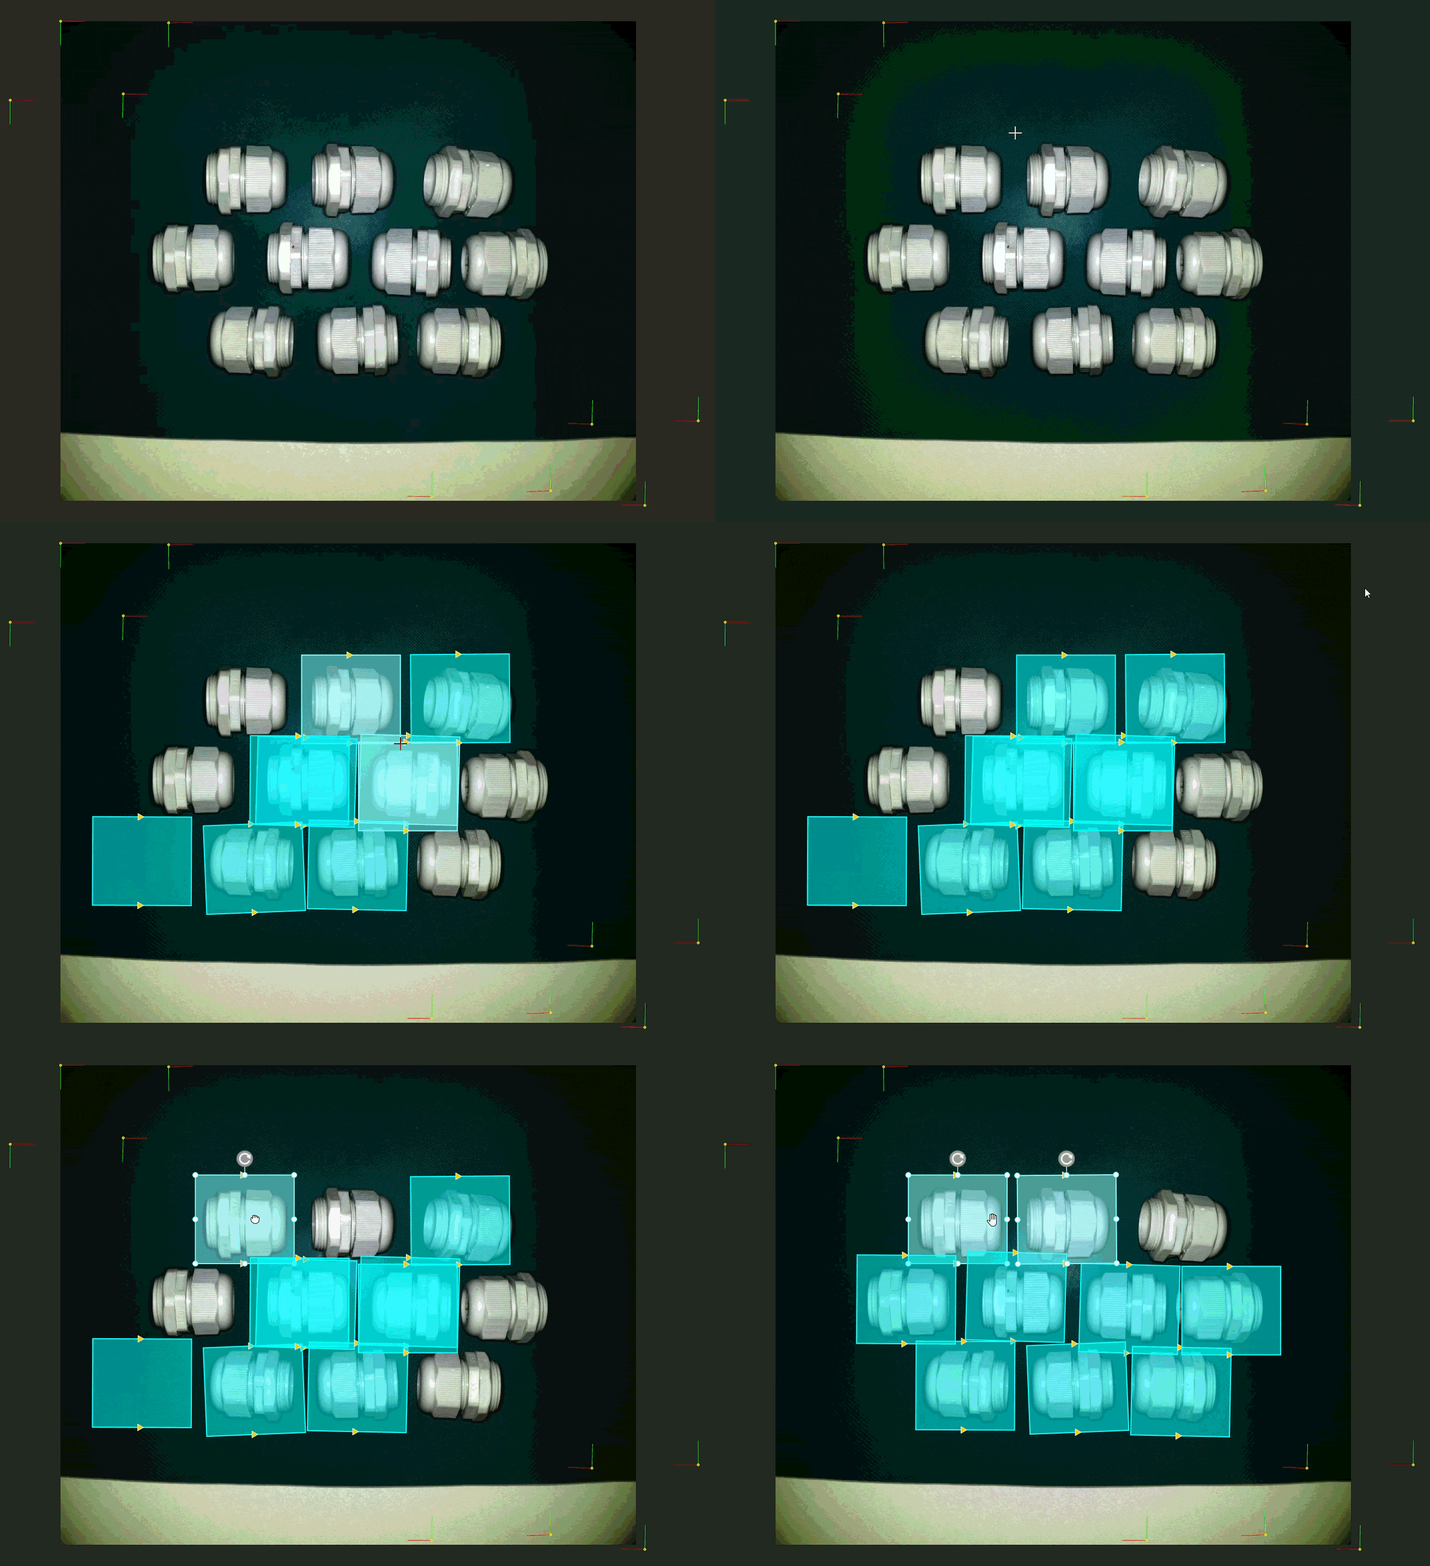
If you need to manually select multiple ROIs, it is recommended to draw one ROI first, then generate other ROIs by copying and pasting to ensure consistent size for each target area, improving the stability of model training and inference accuracy.
-
When the “Object Pose” port has input, there is no need to manually create multiple ROIs. The user only needs to draw one ROI, and the system will automatically generate the remaining ROIs based on the alignment parameters for recognition.
If the automatically generated ROI positions are offset, you typically only need to move the first ROI to the correct target object position, and the remaining ROIs will automatically align to the corresponding target objects based on their respective alignment parameters, without the need to adjust each one individually.
-
-
Set mask region (optional).
When there are irrelevant interferences such as reflections, shadows, or fixed backgrounds within the target area, you can set mask regions to exclude them, avoiding impact on model training and result inference.
Click the Set mask region button, and use the "Polygon" selection tool to draw the mask region in the visualization area: click the left mouse button to add polygon vertices, and click the right mouse button to close the polygon and complete the selection.
-
Save the ROI settings.
-
After the setting is completed, click Save and apply to apply the ROI configuration.
|
When the masks of the target area and mask region completely overlap, only the topmost layer supports editing. |
Label Images
After setting the ROI, assign a class to the image within it. The tool updates the model based on the labeling results and outputs inference results after images are captured or labeled.
-
Labeling the current image.
In the visualization area, select the target ROI that has been outlined, and in the label class options on the right, click the Label images button for the OK or NG class to complete labeling of a single target. Each class supports labeling up to 30 images.
Each time you click the Label images button, the tool updates the model based on the current labeling results and performs inference on the current image. You can check whether the inference result meets expectations above the parameter configuration area.
-
This tool uses fixed OK and NG classes for labeling. You can define their business meaning according to actual requirements. For example, you can label "front side" or "present" as the OK class, and "back side" or "absent" as the NG class.
-
-
Acquire new images and continue labeling.
Click the Single acquisition and inference button to acquire new images. Each time you click this button, the tool will capture a new image and perform inference based on the current model.
Based on the inference results of the new image, continue selecting the target region and click the Label images button for the OK or NG class to proceed with labeling.
Note that at least one image should be labeled for the OK class; if the NG class includes multiple situations, it is recommended to label at least one image for each situation to cover the typical cases of that class.
-
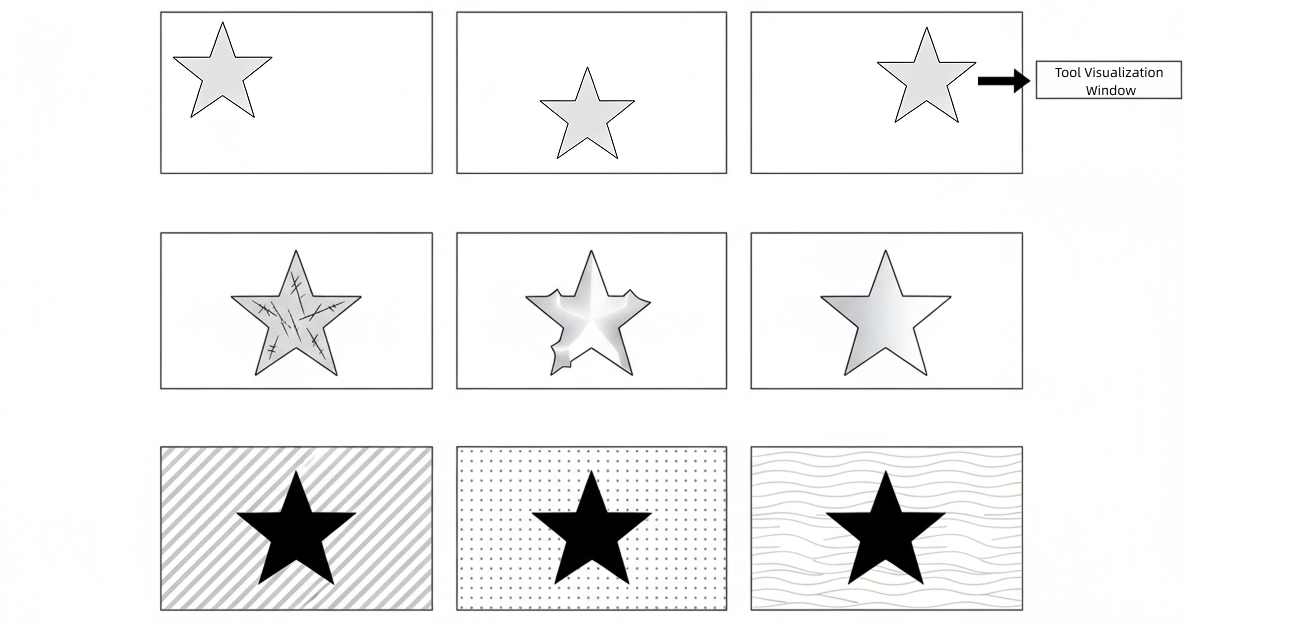
When labeling, it is recommended to label images for both OK and NG classes simultaneously, covering multiple shooting conditions (such as position offset, stains, scratches, deformation, color tone, or background differences). The more thorough the labeling, the stronger the model’s adaptability.
-
Avoid labeling images with ambiguous classes to prevent affecting the model’s learning performance.
-
If there is uncertainty in lighting or target object angles in the actual production scenario, you can enable the “Adapt to brightness changes” or “Adapt to rotation changes” options in Advanced settings. The system will automatically apply slight rotation and brightness adjustments to the labeled images to generate more virtual images under different conditions for model training, thereby helping to expand training content and improve the model’s generalization ability.
-
Model Validation and Optimization
After completing the above labeling operations, you can use the inference images to verify the model’s performance and set inference rules or supplement labeled images according to actual conditions.
-
View inference results.
After labeling the images, click the Single Capture and Inference or Continuous Capture and Inference button to view the inference results based on the current model, and determine whether the results meet expectations.
-
Set inference rules (Optional).
If the inference results are basically correct but the judgment rules do not meet actual needs, you can adjust the judgment criteria by setting inference rules, thereby improving the accuracy and applicability of the inference results.
After modifying the inference rules, the tool will update the model based on the current inference rules and perform a single inference on the current image. You can view the inference results in the parameter configuration area above.
Parameter Description Confidence threshold
Parameter description: Sets the minimum confidence threshold for classification results. The system first selects the class with the highest confidence as the initial classification result. If its confidence is below the specified threshold, the result is classified as NG.
Default value: 0.5
Tuning instructions: It is recommended to use the default value.Heatmap
Parameter description: When enabled, a visual heatmap of the model’s attention areas is overlaid on the image. The deeper (or warmer) the color, the higher the model’s attention to the features in that area.
Default value: Off.
Tuning instructions: Typically, the heatmap should be concentrated on feature positions within the target area, such as edges, defects, or textures. It can be used to help judge the model’s focus areas.
If the heatmap distribution is too scattered or concentrated in irrelevant areas, it may indicate that the model has not correctly learned the effective features. In this case, it is recommended to return to the previous steps and supplement more diverse images to update the model. Judgment Settings
Parameter description: When there are multiple target regions in the image, selecting "All OK" means the verification result will only be displayed as OK if all target regions are identified as the OK category; selecting "At Least One OK" means the verification result will be displayed as OK if any target region is identified as the OK category.
Value list: All OK, At Least One OK
Default value: All OK
Tuning instructions: Please select the appropriate judgment settings based on actual needs.
-
Add more labeled images (optional).
If the inference results still do not meet expectations, or the model has not covered certain typical scenarios, you can continue to acquire images and label them. The tool will update the model based on the new labeling results.
+ It is recommended to prioritize labeling images with inference errors, low confidence, or scenarios not covered by the model. Repeat image acquisition, labeling, and inference results viewing until the inference results meet expectations.
+
|
If adding labeled images does not improve inference results, import the acquired images into Mech-DLK and train the model there to obtain a better model. |
At this point, the model configuration is completed. After closing the tool window, select the model from the "Model Name" parameter drop-down list to use it for classification in subsequent inference Steps.