Point Cloud Loss
Possible causes
The reason of point cloud loss can be any of the following:
-
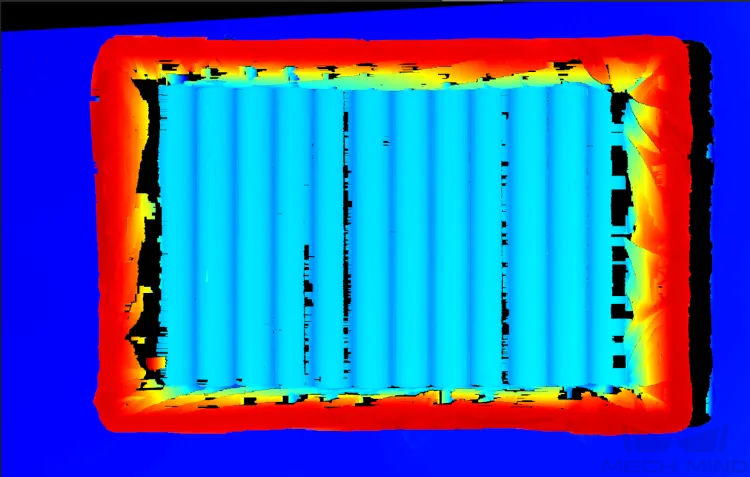
Intense ambient light disrupts the structured light projected onto the surface of the target object, leading to inaccuracy in the calculated depth data.
2D image Point Cloud 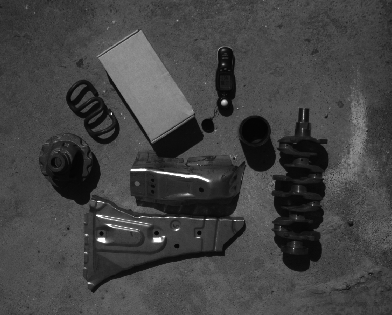
-
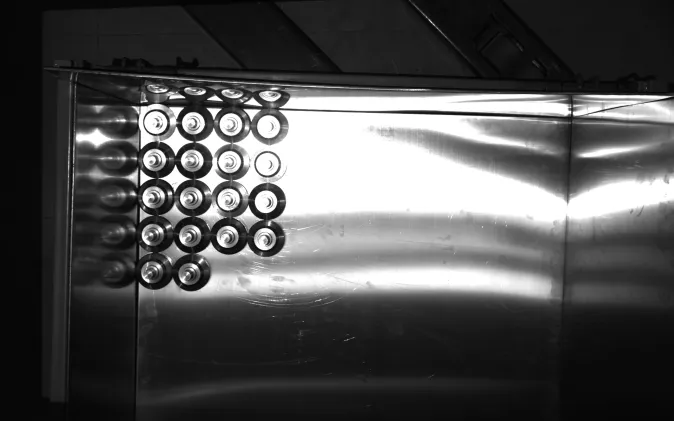
Specular reflection occurs on the surface of the target object.
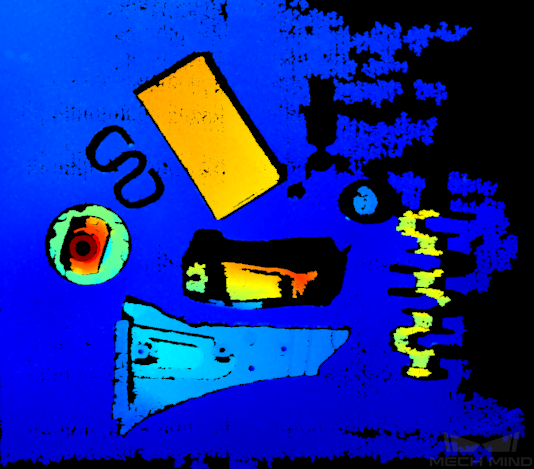
Object Point Cloud 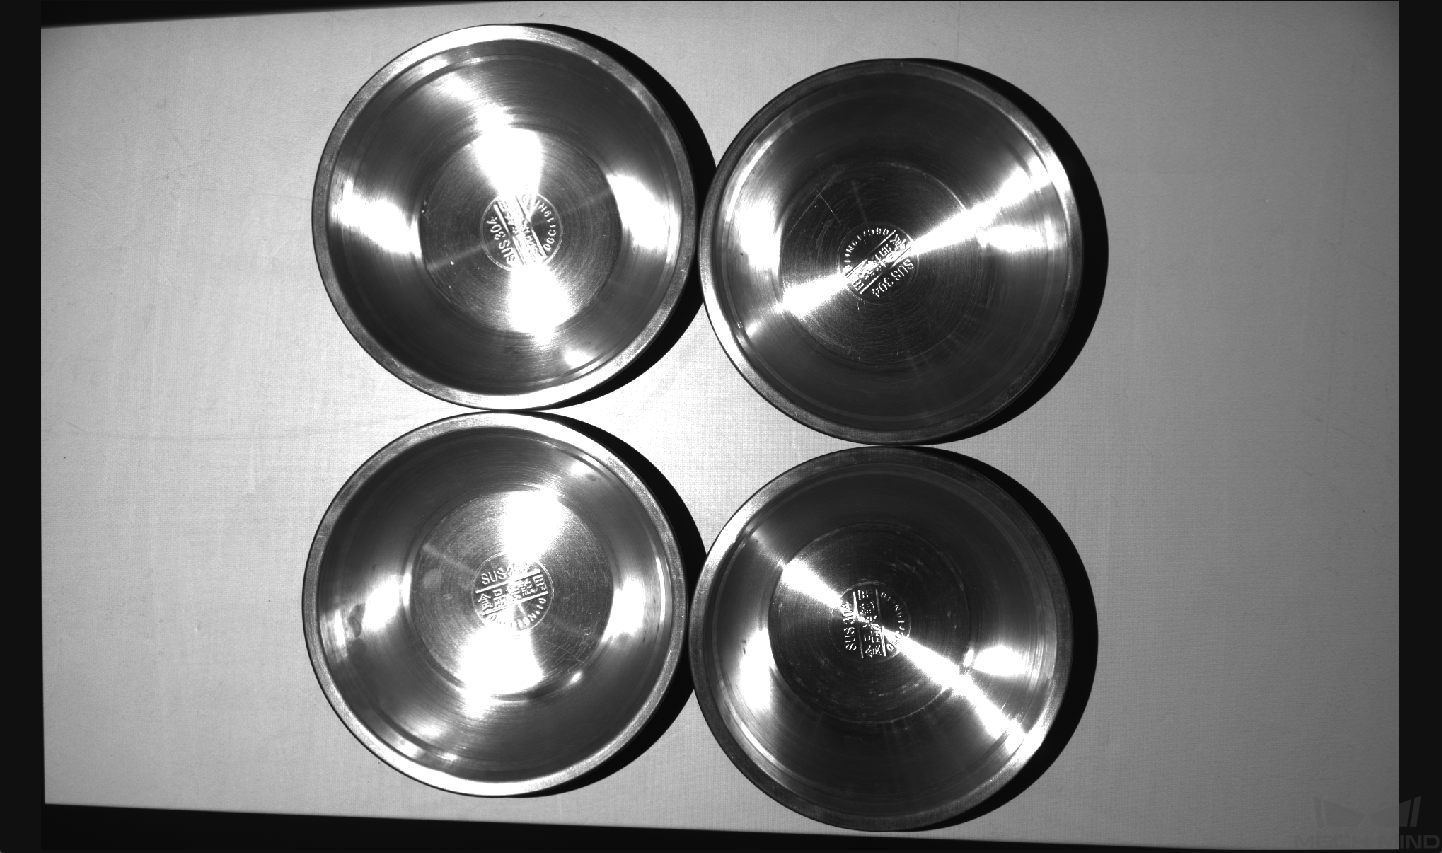
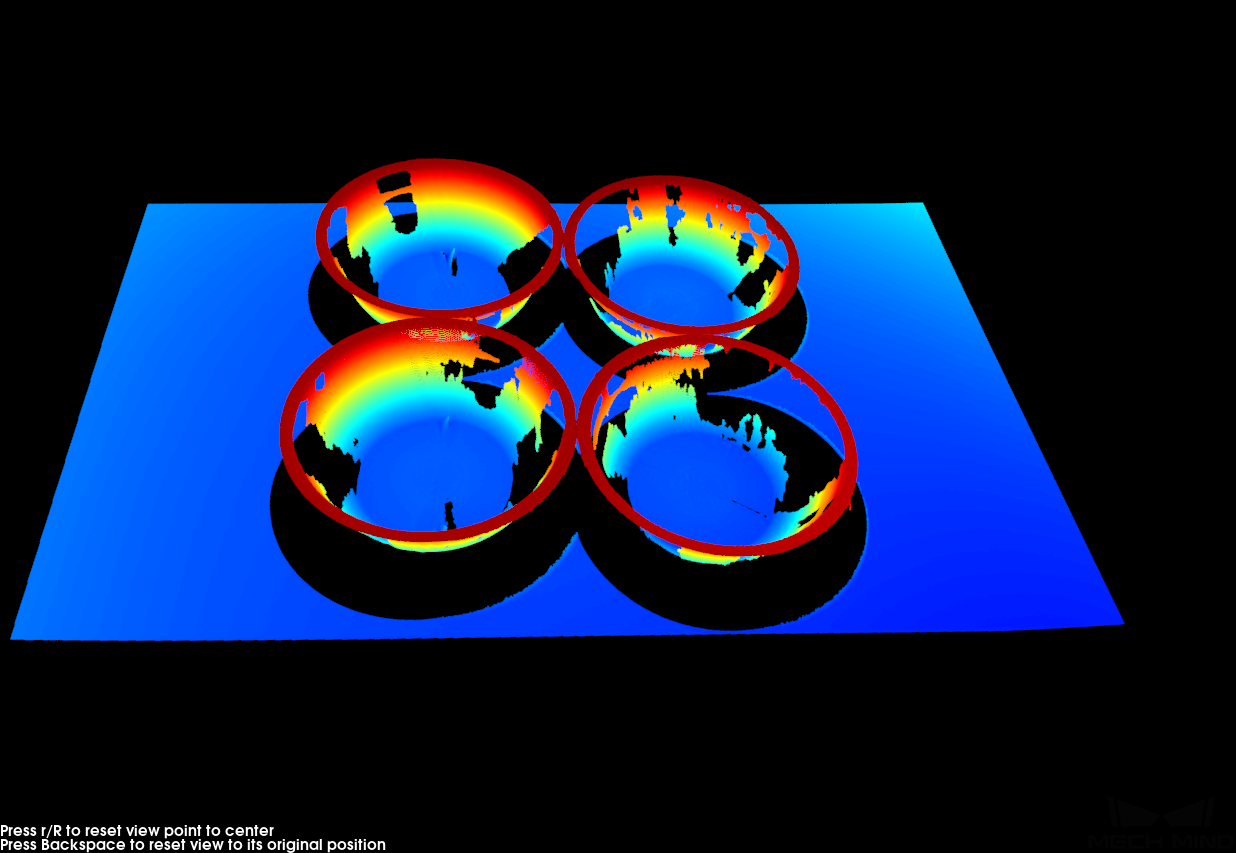
-
The complex shape of the target object leads to interreflection, or interreflection occurs between the target object and the bin wall.
Object Point Cloud 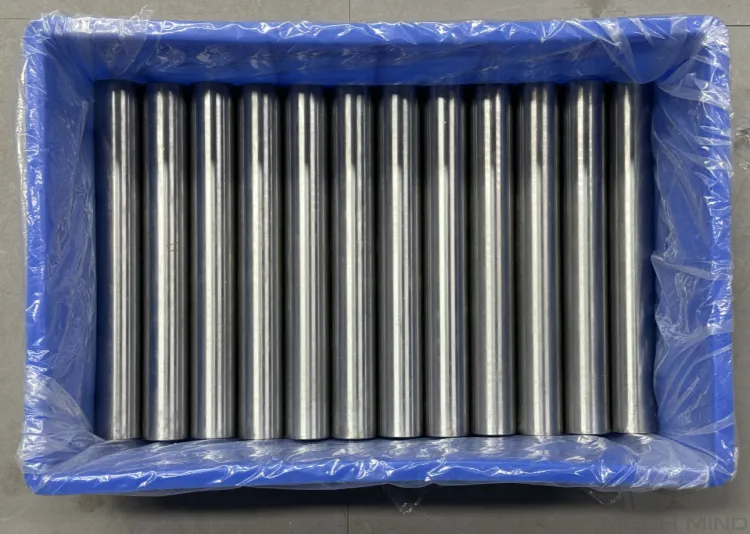

Solutions
Follow these steps to troubleshoot the issue:
-
Clean the camera lens. Then acquire data again and check the point cloud quality.
-
If the point cloud is complete, the troubleshooting is finished.
-
If the issue persists, go to the next step.
-
-
Figure out the possible cause(s) of point cloud loss according to the working conditions, and check the solutions in the corresponding section(s) following the table below.
Point cloud loss can be the common result of several causes.
Working conditions Possible causes The workstation is near to a window or the light of the workplace is intense.
The target object has shiny surfaces.
The target object has complex shapes and shiny surfaces, or the bin is shiny.
-
Click
 in the data acquisition area to trigger one round of data acquisition.
-
If the point cloud is complete, the troubleshooting is finished.
-
If the issue persists, contact Technical Support.
-
Point Cloud Loss Caused by Intense Ambient Light
Try the following solutions:
-
Cover the light source with a light shield.
-
Decrease the exposure time in the 3D Parameters category.
-
Increase the brightness of the structured light: Increase the value of Light Brightness or Laser Power according to the camera model in use following the table below.
Model Parameter Settings NANO, NANO ULTRA, PRO XS, PRO S, PRO M, and UHP-140
Adjust Light Brightness in the Projector subcategory of the 3D Parameters category.
DEEP, LSR S, LSR L, and LSR XL
Adjust Laser Power in the Laser subcategory of the 3D Parameters category.
-
If DEEP, LSR S, LSR L, or LSR XL is in use, you can switch to the guru level, and then adjust the projection range of the structured light.
-
Decrease the value of Laser Frame Amplitude in the Laser Projection Frame Control subcategory of the 3D Parameters category.
After decreasing this parameter value, the projection area of the structured light will narrow. The camera cannot capture data outside the projection area.
-
Increase the value of Laser Frame Partition Count in the Laser Projection Frame Control subcategory of the 3D Parameters category.
-
This parameter is unavailable when Fringe Coding Mode in the 3D Parameters category is set to Reflective.
-
A larger value of this parameter will result in slower acquisition.
-
-
-
Reduce the working distance by moving the camera or the target object.
-
Avoid the intense ambient light by adjusting the position or angle of the camera.
Adjust parameter settings again after moving the camera or target object.
Point Cloud Loss Caused by Specular Reflection
Specular reflection can result in underexposed or overexposed areas on the surface of the target object, thus leading to point cloud loss in these areas.
-
When point cloud loss is caused by specular reflection, try the solutions below:
-
If DEEP, LSR S, LSR L, LSR XL, NANO ULTRA, PRO S, or PRO M is in use, set the value of Fringe Coding Mode to Reflective.
-
If Fringe Coding Mode is not set to Reflective, adjust 3D exposure settings in the 3D Parameters category.
-
-
If specular reflection only results in overexposed areas on the surface of the target object, you can also try the solutions below:
-
Decrease the brightness of the structured light: Decrease the value of Light Brightness or Laser Power according to the camera model in use following the table below.
Model Parameter Settings NANO, NANO ULTRA, PRO XS, PRO S, PRO M, and UHP-140
Adjust Light Brightness in the Projector subcategory of the 3D Parameters category.
DEEP, LSR S, LSR L, and LSR XL
Adjust Laser Power in the Laser subcategory of the 3D Parameters category.
-
Reduce the amount of light reflected onto the sensor by adjusting the position or angle of the camera or the target object.
-
-
If specular reflection only results in underexposed areas on the surface of the target object, you can also try the solutions below:
-
Increase the amount of light reflected onto the sensor by adjusting the position or angle of the camera or the target object.
Adjust parameter settings again after moving the camera or target object.
-
Point Cloud Loss Caused by Interreflection
Try the following solutions:
-
If DEEP, LSR S, LSR L, LSR XL, NANO ULTRA, PRO S, or PRO M is in use, set the value of Fringe Coding Mode to Reflective.
-
If Fringe Coding Mode is not set to Reflective, adjust 3D exposure settings in the 3D Parameters category.
If interreflection from the bin wall leads to point cloud loss, try the solutions below:
-
Switch to the Guru level, and decrease the value of Laser Frame Amplitude in the subcategory Laser Projection Frame Control of the 3D Parameters category.
-
Cover the bin wall with a black cloth.
-
Change to a less reflective bin.
-
Move the bin horizontally to a position directly below the camera.
This solution can prevent interreflection between the target object and up to two adjacent walls of the bin.
-
Lift the camera so that the bin fills the whole FOV.
Adjust parameter settings again after moving the camera or target object.