Rotation Calibration
Rotation calibration is used to establish the rotation mapping and output the rotation center based on translation calibration.
|
Rotation calibration must be based on an existing and valid translation calibration file. If no translation calibration file is available, first complete translation calibration and save the calibration result as described in Translation Calibration. |
Before performing rotation calibration, complete the related configuration described in Preparation Before Calibration.
Enter Rotation Calibration
-
From the menu bar, select to open the Calibration Tool window.
-
On the Select calibration method page, select Rotation calibration, and then enter the rotation calibration workflow.
Connect to Camera
-
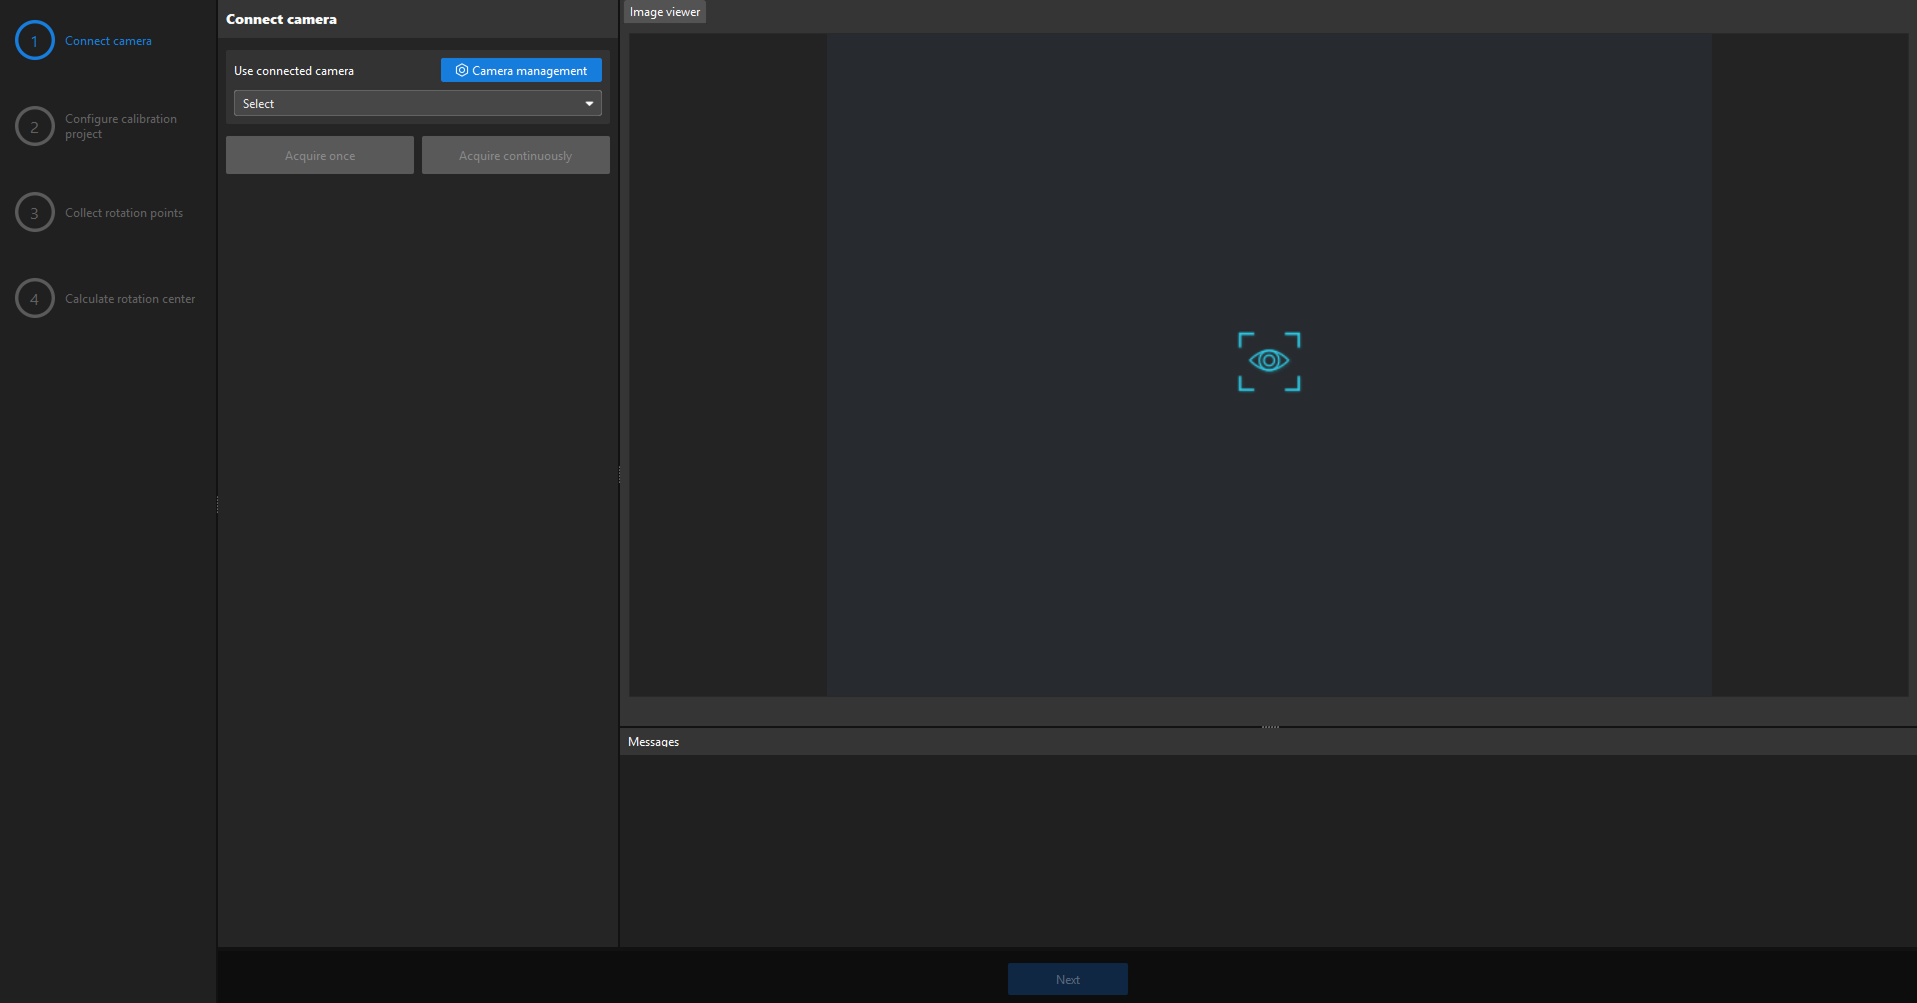
On the Connect to camera page, select a connected camera.
-
(Optional) Click Acquire once or Acquire continuously to confirm that the camera can acquire images properly.
-
Click Next.
Configure Calibration Project
-
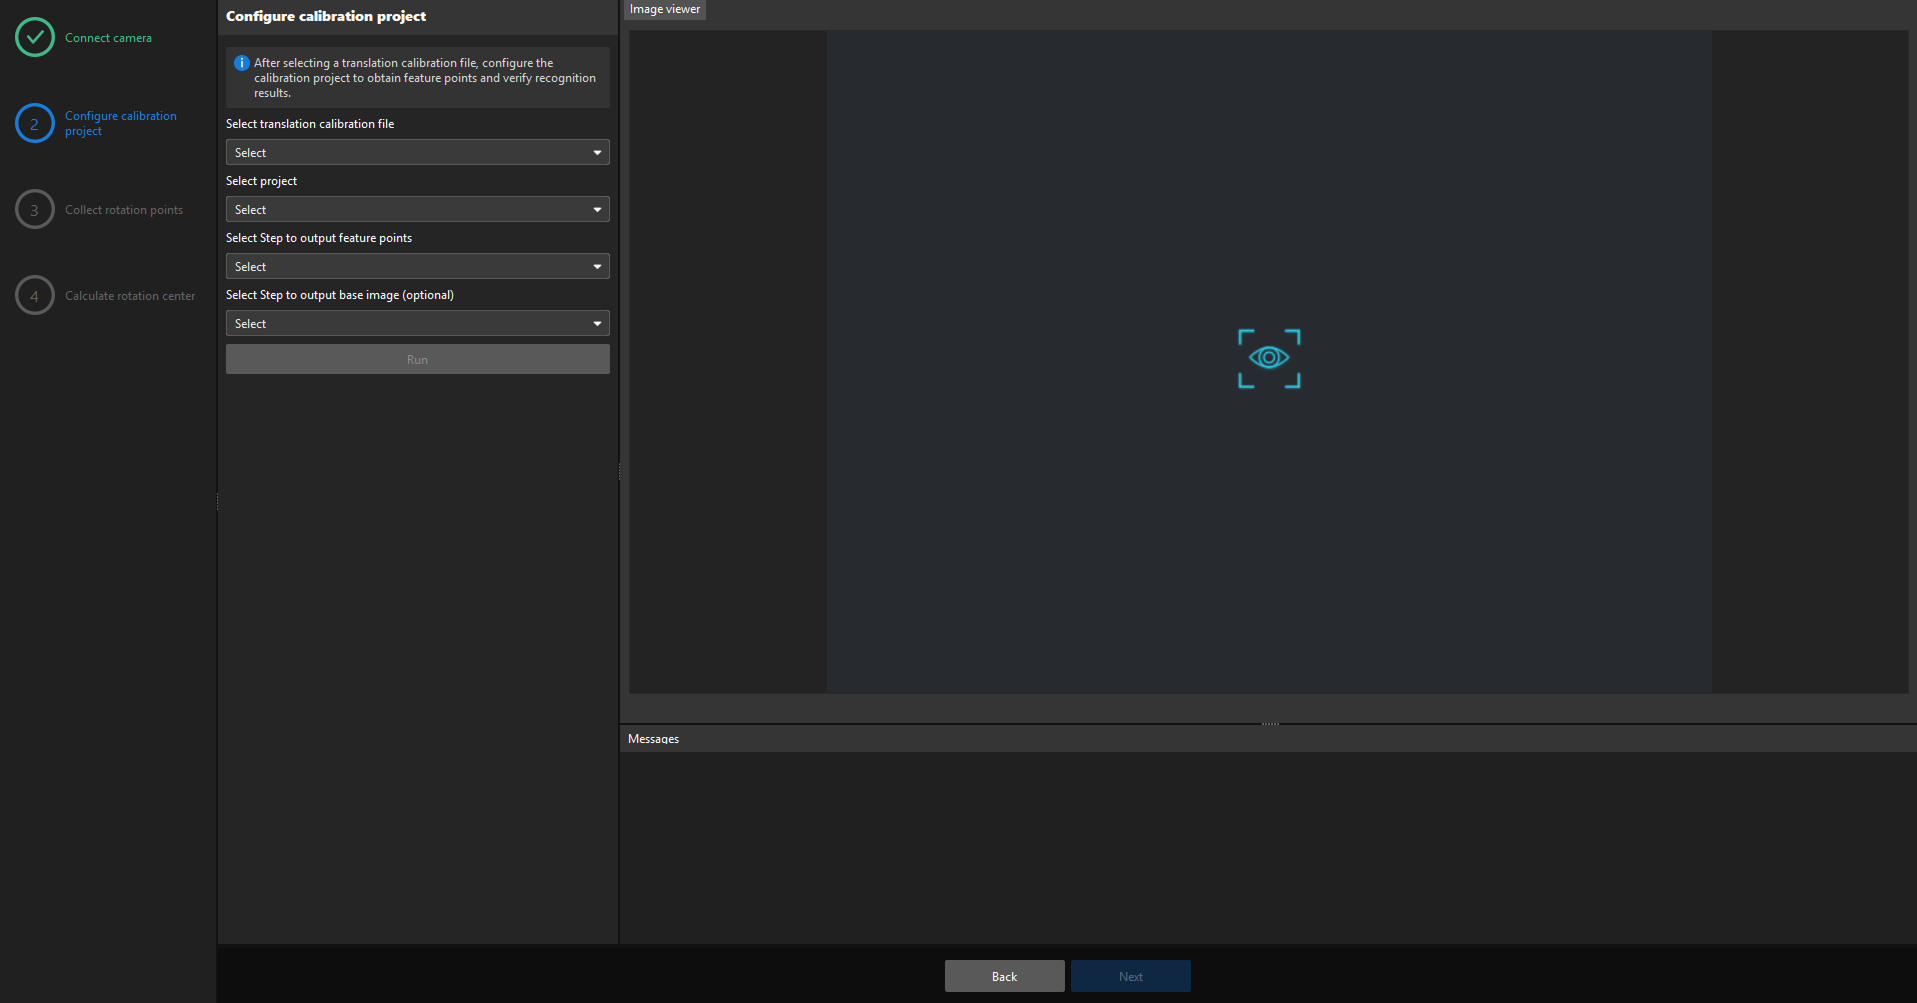
On the Configure calibration project page, select the completed and saved translation calibration file.
-
Select the project used for rotation calibration.
-
Select the Step that outputs feature points.
-
(Optional) Select the Step that outputs the base image.
-
(Optional) Click Run to confirm that the project can stably recognize and output a single valid feature point.
-
Click Next.
Acquire Rotation Points
You can use Automatic calibration or Manual calibration to acquire rotation points.
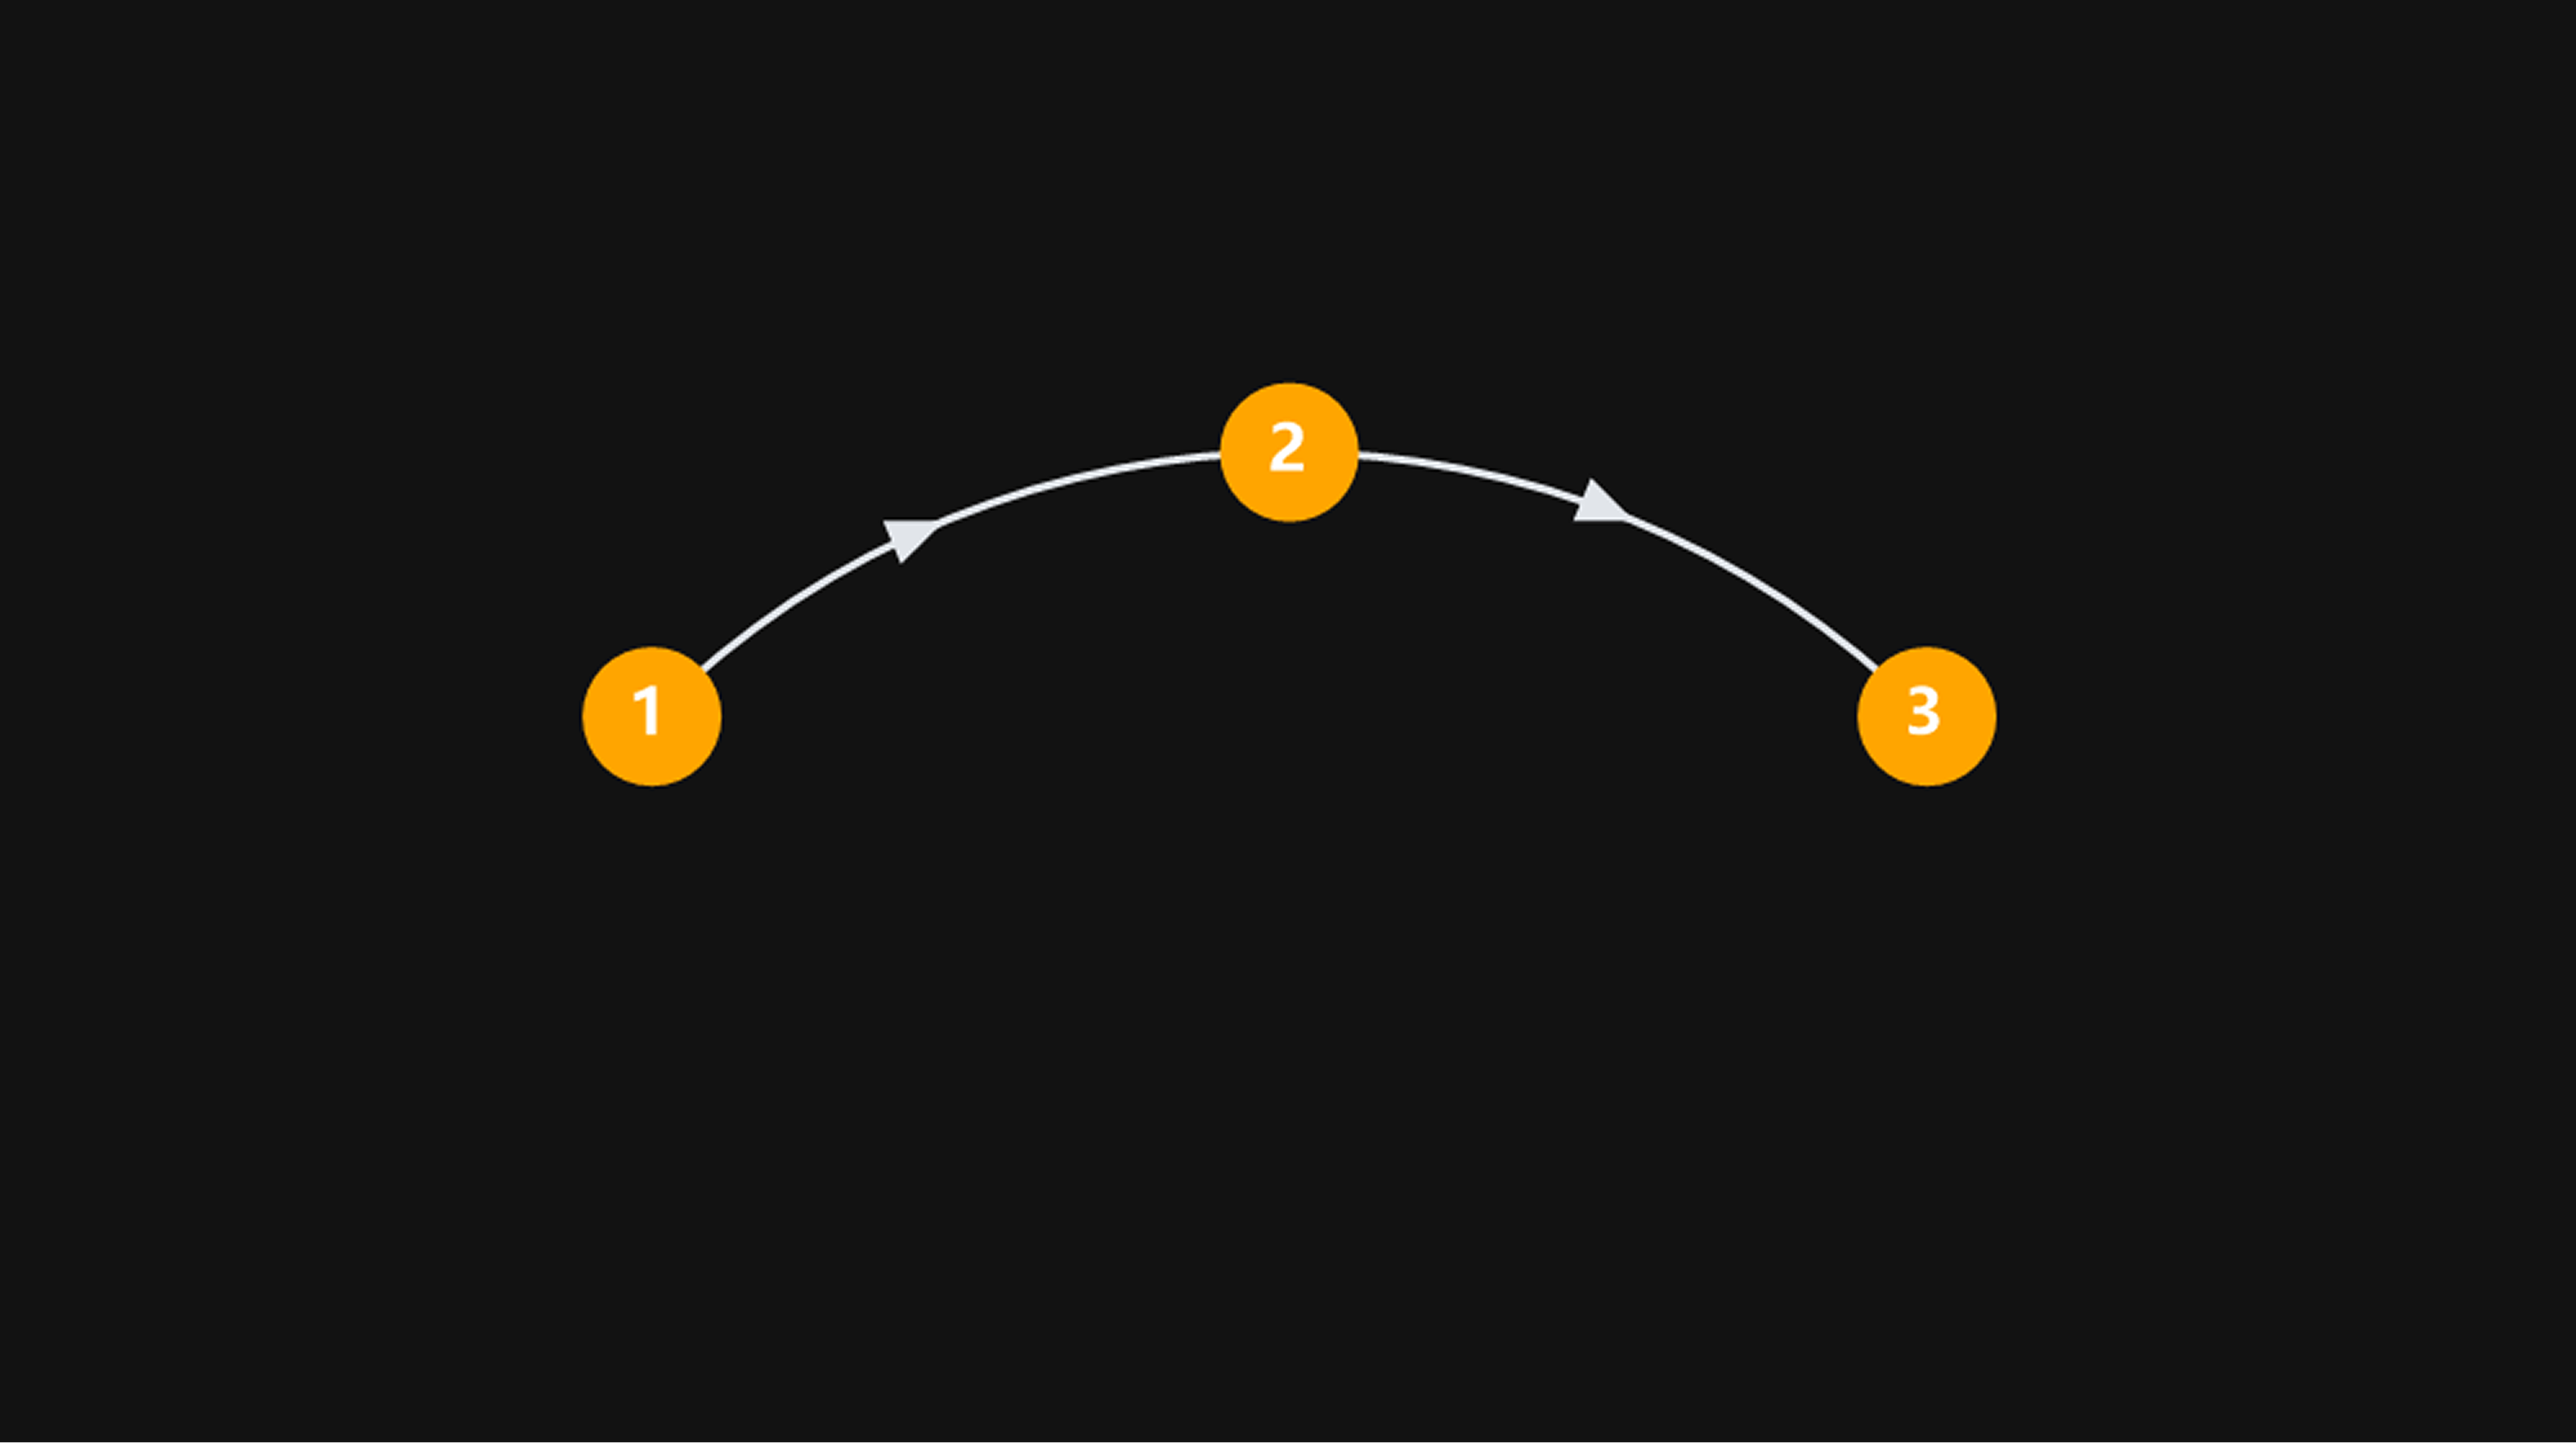
| Acquire at least 3 rotation positions, and ensure that the acquired positions are evenly distributed around the center. |
The figure below shows an example of the rotation angles and acquisition sequence. Adjust the actual rotation angles and acquisition sequence based on site conditions.
-
Automatic Calibration
-
Manual Calibration
-
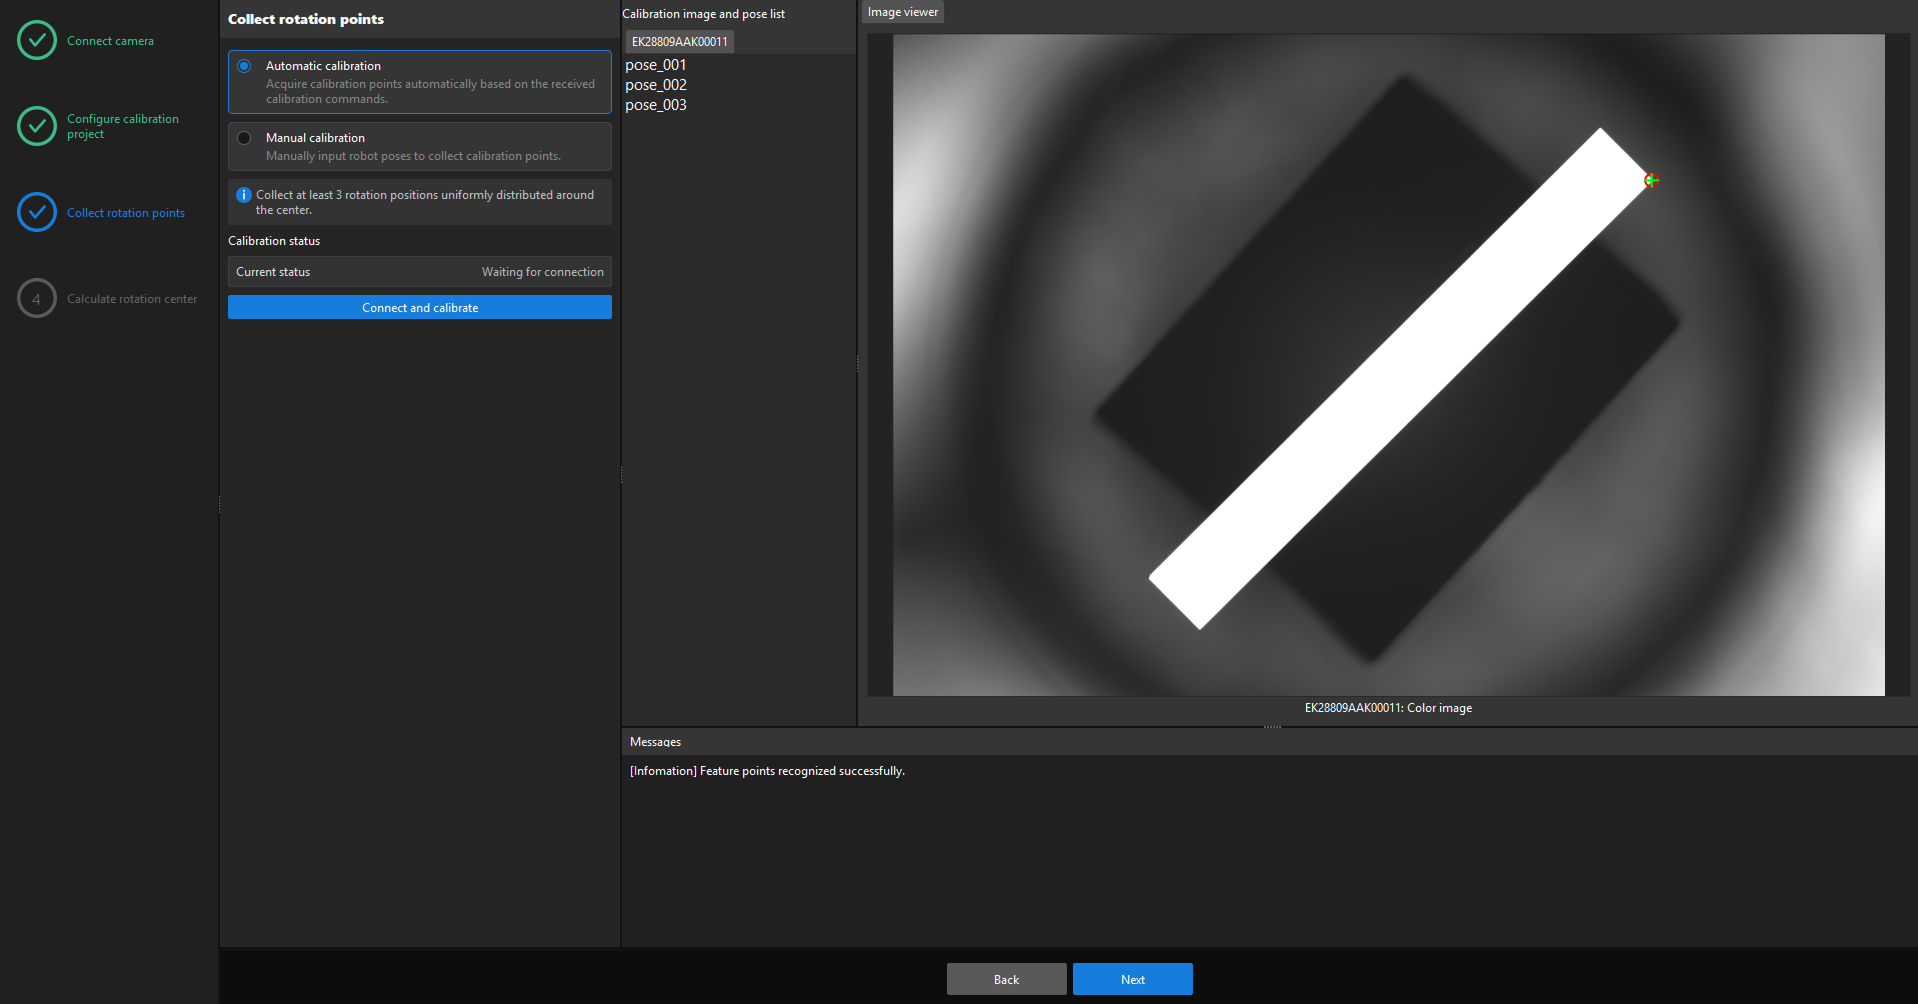
Select Automatic calibration.
-
Click Connect and calibrate, and wait for the software to establish a communication connection with the external device.
-
According to the command format defined in the Calibration communication configuration, rotate the machine to the first acquisition position through the external device and send the Start command. The software acquires the first calibration point according to the machine pose in the command.
-
Rotate the machine to the other acquisition positions in sequence, and send the Continue command at each position. The software acquires calibration points according to the machine pose in the command.
-
Rotate the machine to the last acquisition position and send the End command. The software acquires the last calibration point according to the machine pose in the command.
-
After the acquisition is completed, click Next.
-
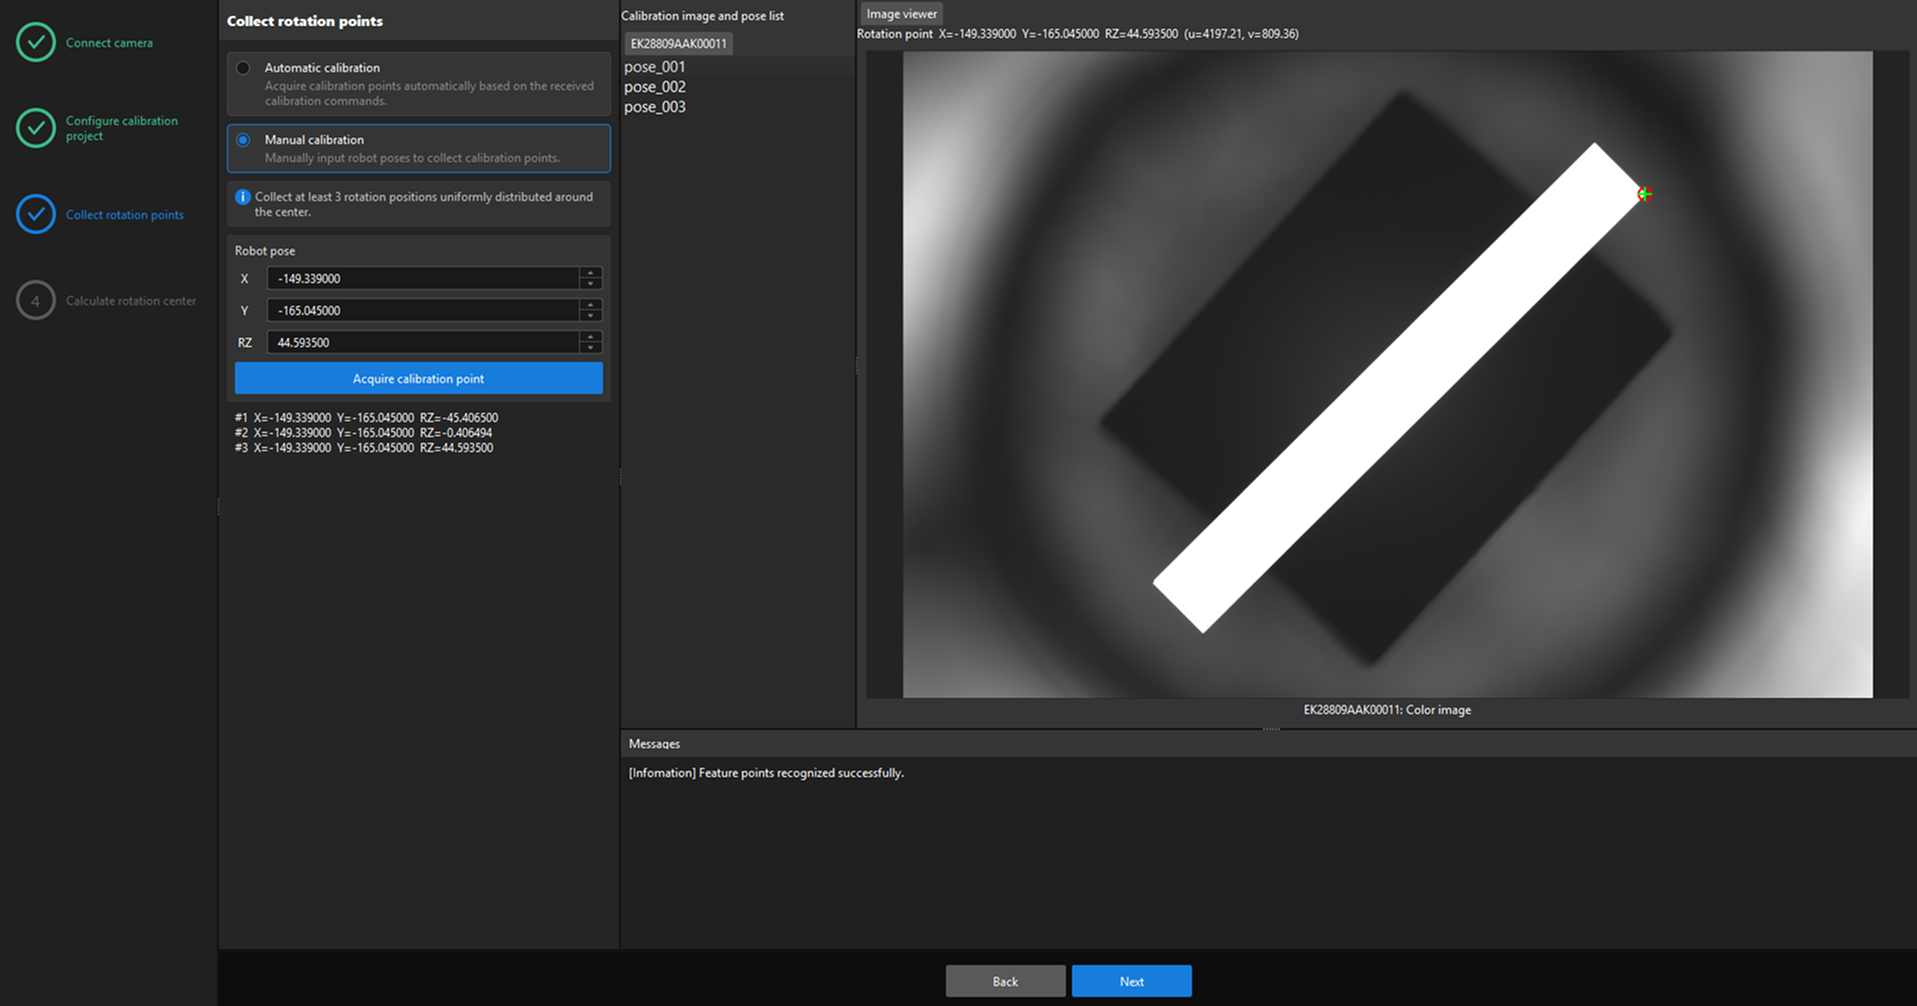
Select Manual calibration.
-
Control the machine to rotate to an acquisition position, and enter the corresponding X, Y, and RZ values for that position in the Robot pose area.
-
Click Acquire calibration point.
-
Repeat rotating the machine, entering the pose, and acquiring calibration points until the acquired positions are evenly distributed around the rotation center and at least 3 points have been acquired.
-
After the acquisition is completed, click Next.
Calculate Rotation Center
-
Click Calculate rotation center.
-
View Rotation calibration error, Rotation center, Rotation radius, and Error visualization, and confirm that the calibration result meets project requirements.
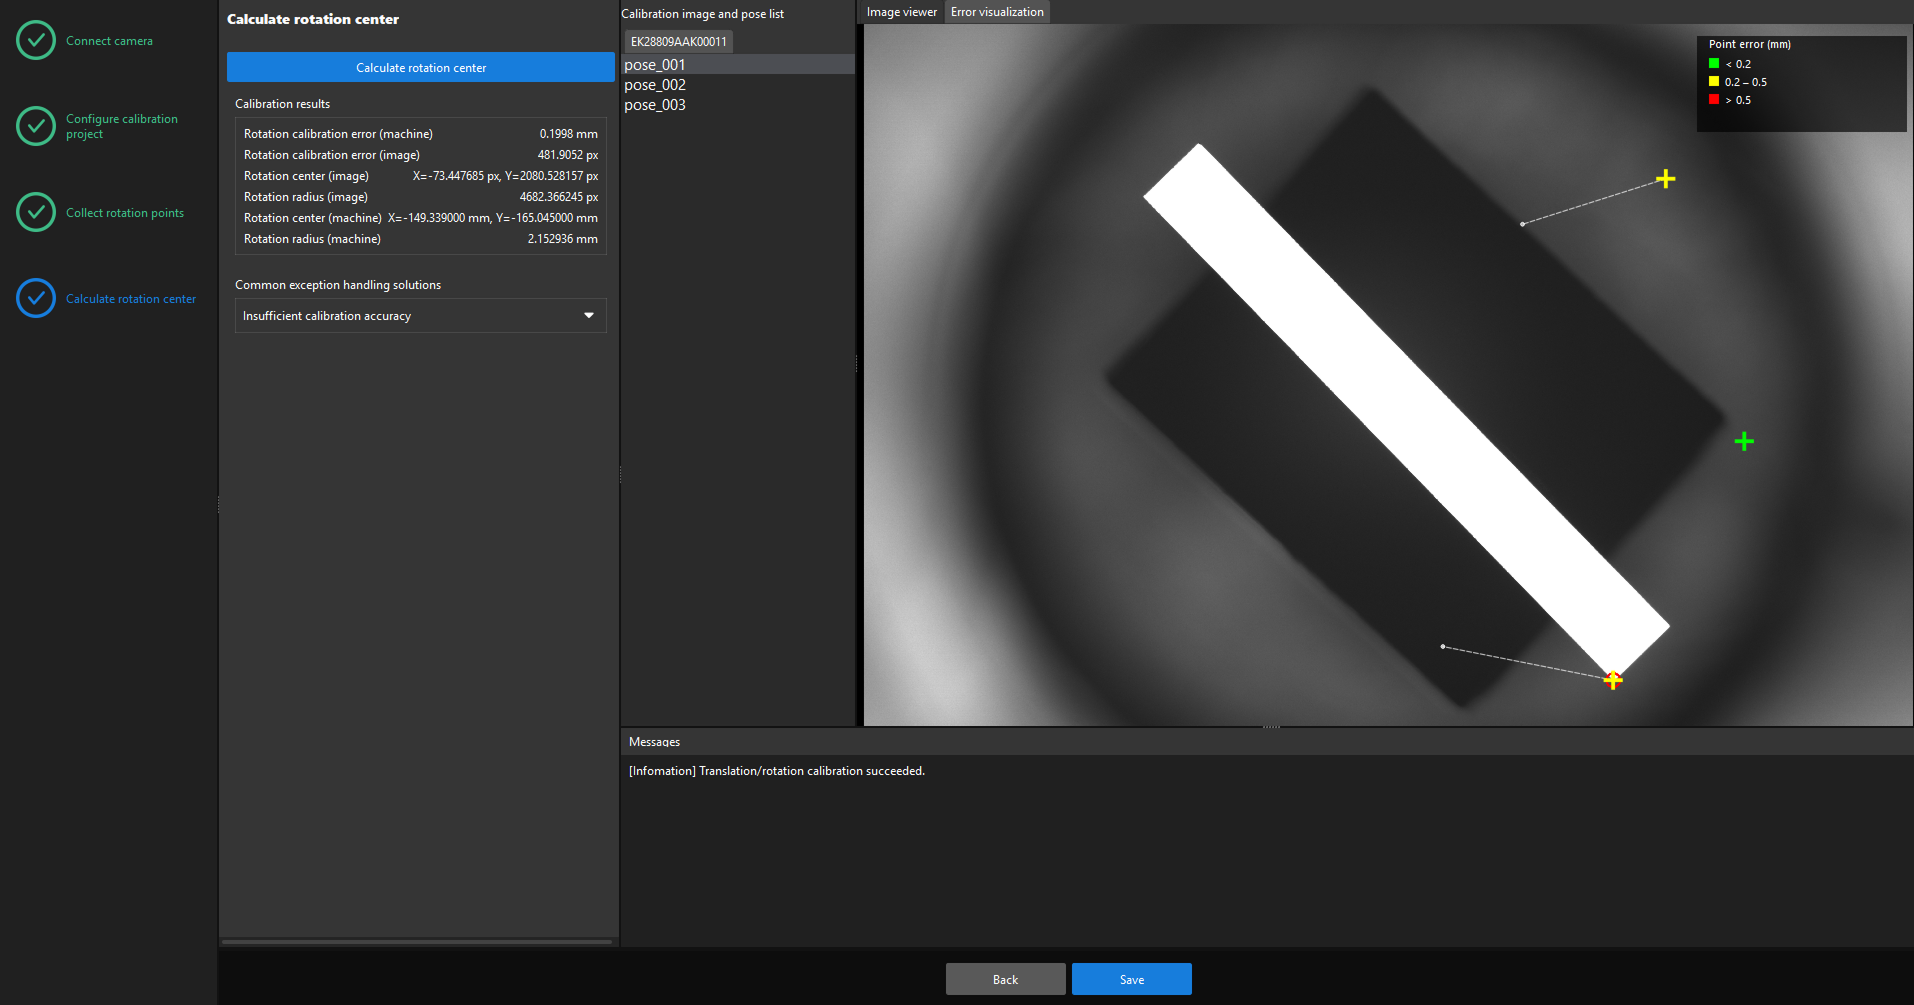
The calibration result parameters are described as follows:
Parameter Description Rotation calibration error (machine)
Indicates the error between the points acquired for rotation calibration and the calibration result, expressed in the machine coordinate system, in mm. A smaller value indicates a more accurate calibration result.
Rotation calibration error (image)
Indicates the error between the points acquired for rotation calibration and the calibration result, expressed in the image coordinate system, in px. A smaller value indicates a more accurate calibration result.
Rotation center (image)
Indicates the position of the calculated rotation center in the image coordinate system, in px.
Rotation radius (image)
Indicates the radius of the circle fitted from the rotation acquisition points in the image coordinate system, in px.
Rotation center (machine)
Indicates the position of the calculated rotation center in the machine coordinate system, in mm.
Rotation radius (machine)
Indicates the radius of the circle fitted from the rotation acquisition points in the machine coordinate system, in mm.
Point error (mm)
Indicates the deviation between the calibration point position converted by using the calibration result and the actual acquired position, in mm. Different colors indicate different error ranges. For the specific ranges, refer to the legend in the interface.
-
If the calibration accuracy does not meet the requirements, check the calibration point distribution, feature recognition stability, and the accuracy of the entered poses. Then add more poses and recalculate.
-
If the calculation fails, confirm that enough valid points have been acquired and that the translation calibration file is valid, and then recalculate.
-
Click Save, enter the file name, and then save the calibration result.
|
The file name supports only letters, numbers, and underscores, and must be fewer than 16 characters. |
This completes the rotation calibration process.