Strategy of Adding Pick Points
A pick point is the position on the object that can be gripped by the robot. When the target object can be picked in multiple ways, especially in random picking scenarios, it is recommended to configure various picking strategies so that target objects with different poses can be picked, thus enhancing the picking success rate.
This topic introduces the picking strategies provided in the Target Object Editor.
Configure Multiple Pick Points
As shown in the figure below, the sides, ends and edges of the square tube can all be picked by the magnetic gripper. Therefore, you can add pick points at the above positions.

When configuring multiple pick points, you can change their order by dragging the pick points on the pick point list. During picking, the pick points are evaluated according to their order on the list.

Configure Pick Point Array
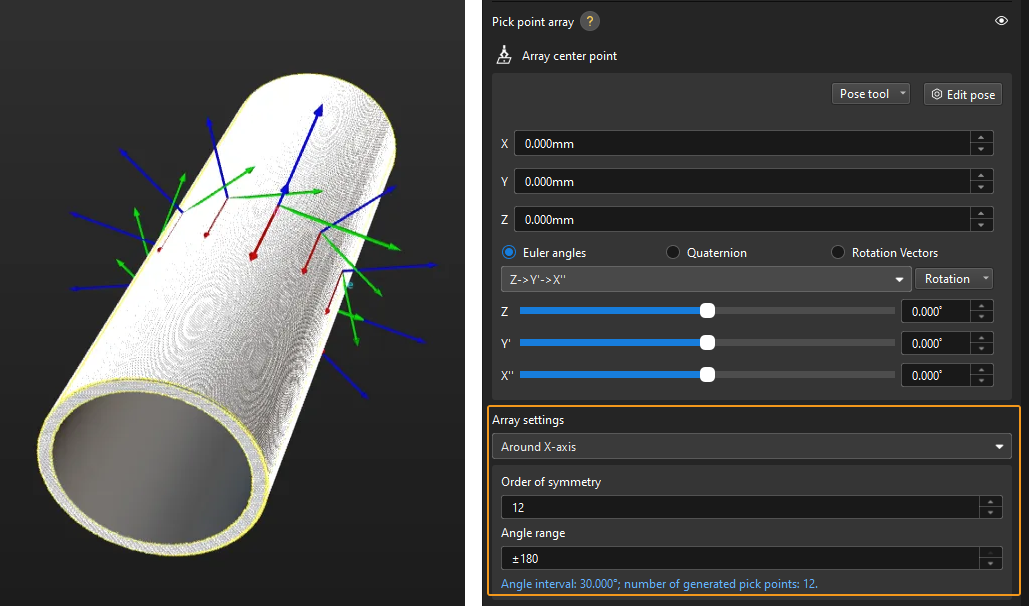
For axisymmetric target objects, you can set an array of pick points. For example, the pick point array in the point cloud model for a tube is shown below.

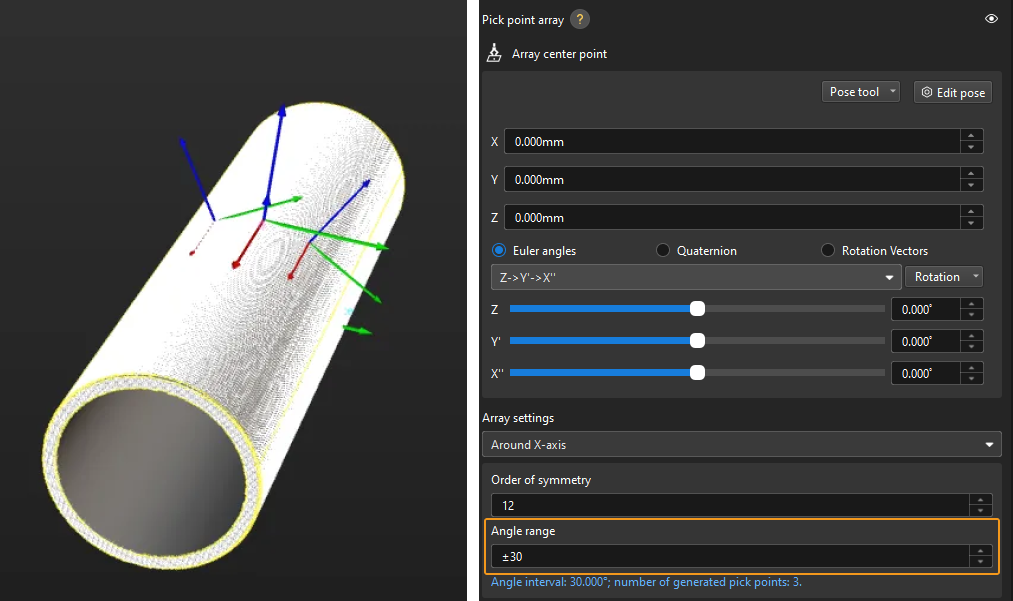
In practice, pick points with a downward Z-axis are often invalid and will affect path planning. Therefore, you should narrow down the Angle range. It is generally recommended to keep the range within ±90°. For example, when configuring a pick point array for randomly placed tubes, the angle range value is set to ±30° in the figure below.

Configure Picking Relaxation
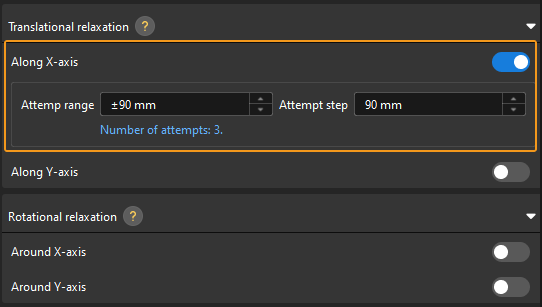
In practice, to ensure that the gripper still can grip the target object after the pick point moves along or rotates around the X- or Y-axis, you can configure the Translational/Rotational relaxation in the Target Object Editor. In the figure below, the gripper still can pick the tube when the pick point moves along the X-axis.

The corresponding configuration is shown below.
