ABB RobotWare 7 Automatic Calibration
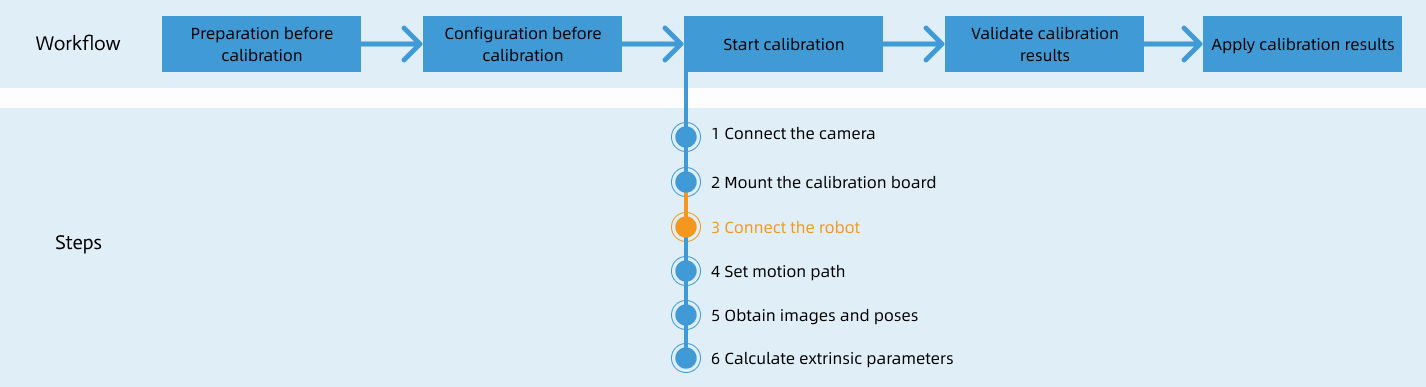
After you set up Standard Interface communication, you can connect the robot to perform automatic calibration. The overall workflow of automatic calibration is shown in the figure below.
Special note
During the calibration procedure, when you reach the Connect the robot step and the Waiting for robot to connect... button appears in Mech-Vision, perform the steps below on the robot side. After you perform the steps, proceed with the remaining steps in Mech-Vision.
|
1. Install Calibration Add-in
-
On a computer with RobotStudio installed, download the ABB Calibration Add-in.
-
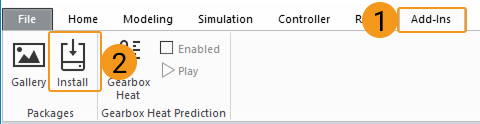
Open RobotStudio, then navigate to . In the pop-up window, select the calibration add-in downloaded in the previous step, and click Open.
-
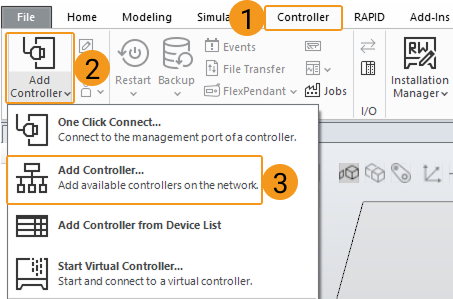
Navigate to In the pop-up window, add an available controller on the network according to your setup. For detailed instructions, please refer to the ABB RobotStudio official manual.
-
Import the installed add-in to the controller. The procedure for importing the add-in may vary depending on your RobotStudio version. Please follow the instructions below, and if none of the methods succeed, contact Technical Support.
For RobotStudio versions earlier than 2024, click this line to view detailed instructions.
-
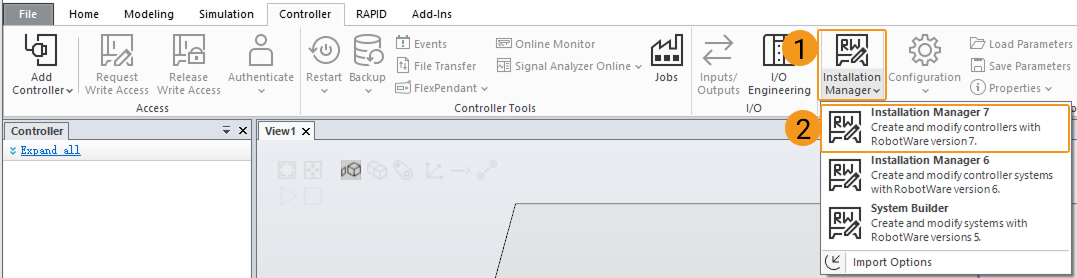
Navigate to .
-
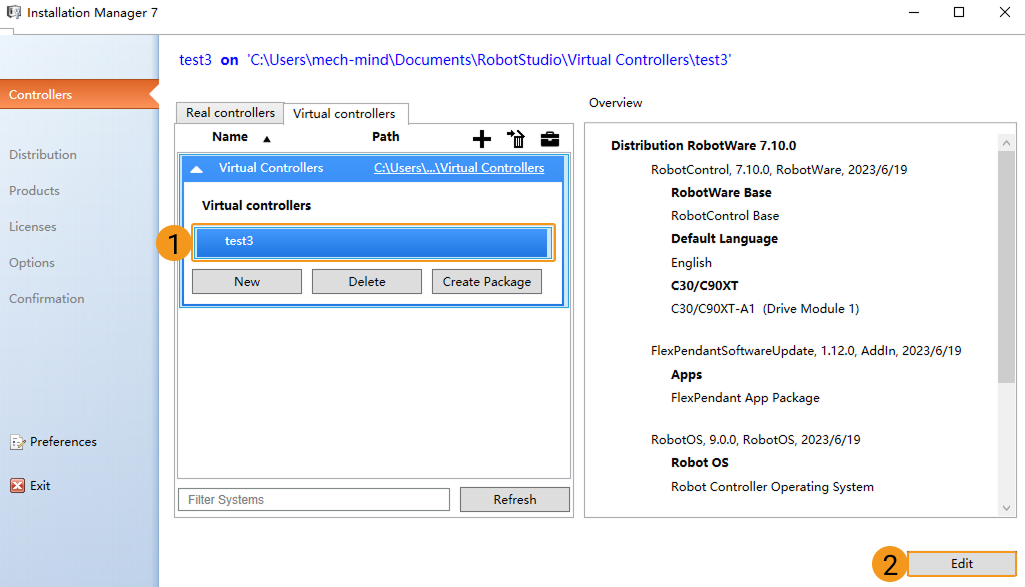
In the pop-up window, select the controller in use and click Edit.
-
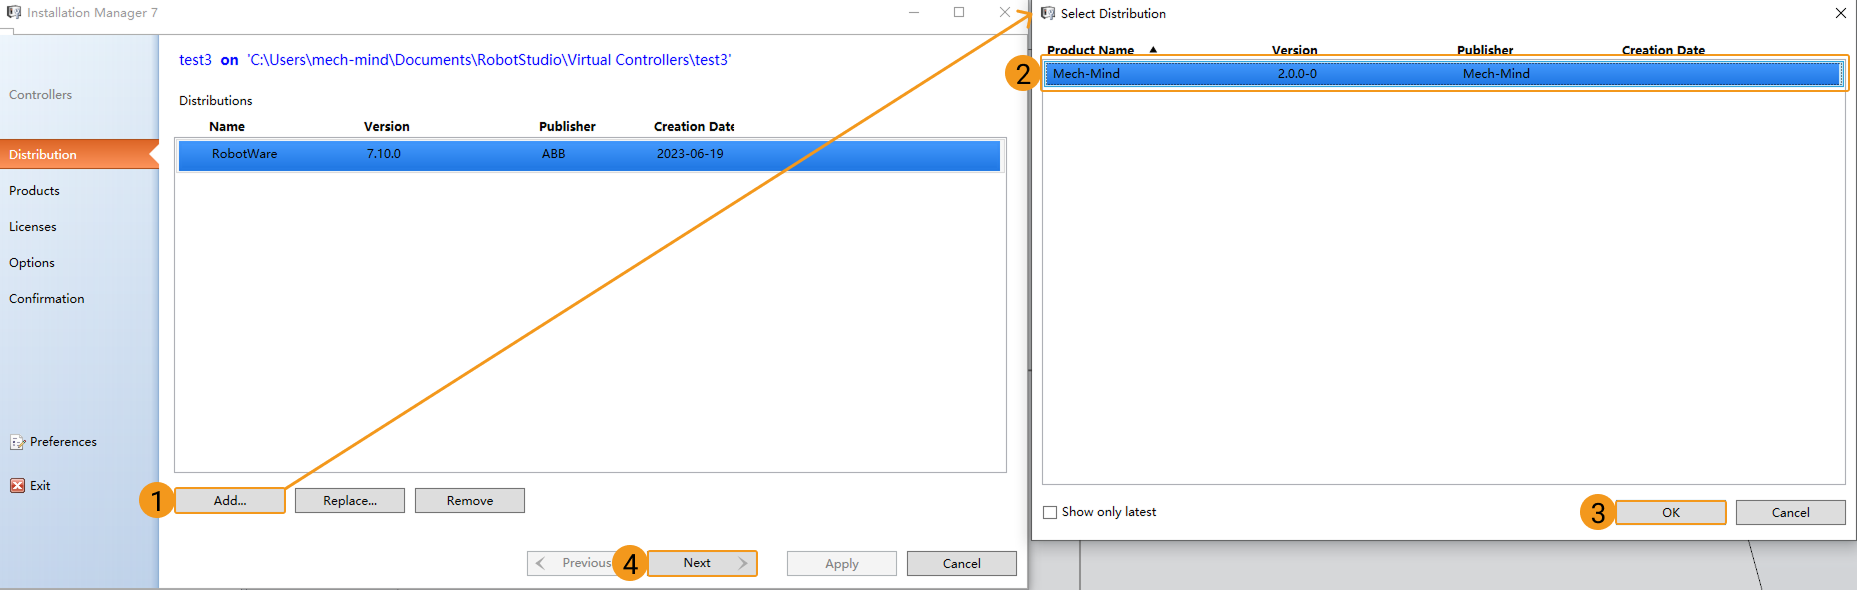
Follow the steps indicated in the diagram in the pop-up window.
-
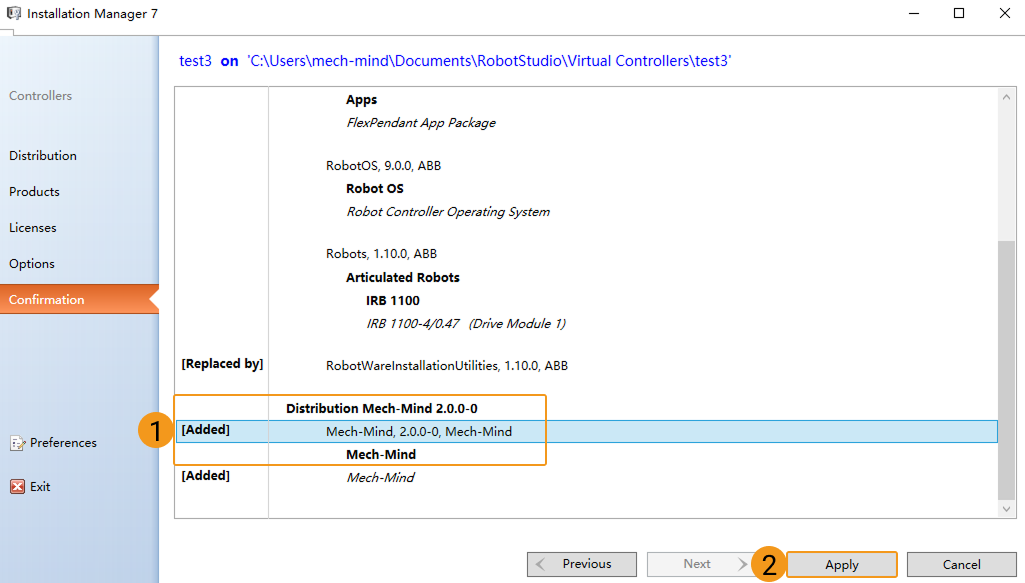
Follow the steps in the wizard window, clicking Next step by step until the Next button is disabled, as shown in the figure. After confirming that the add-in has been added, click Apply, and then close the window.
For RobotStudio versions 2024 or later, click this line to view detailed instructions.
-
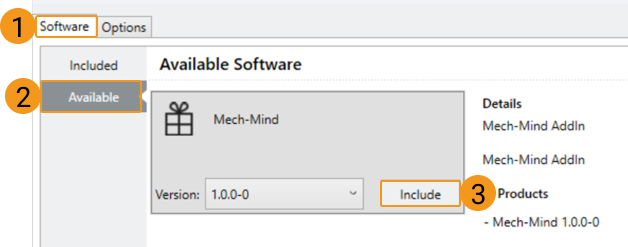
Navigate to .

-
Follow the steps indicated in the diagram in the pop-up window.
-
After confirming that the add-in has been added, click Apply and reset.
Resetting may erase any existing RAPID programs and data. To preserve your RAPID programs and data, please create a backup before performing the reset. 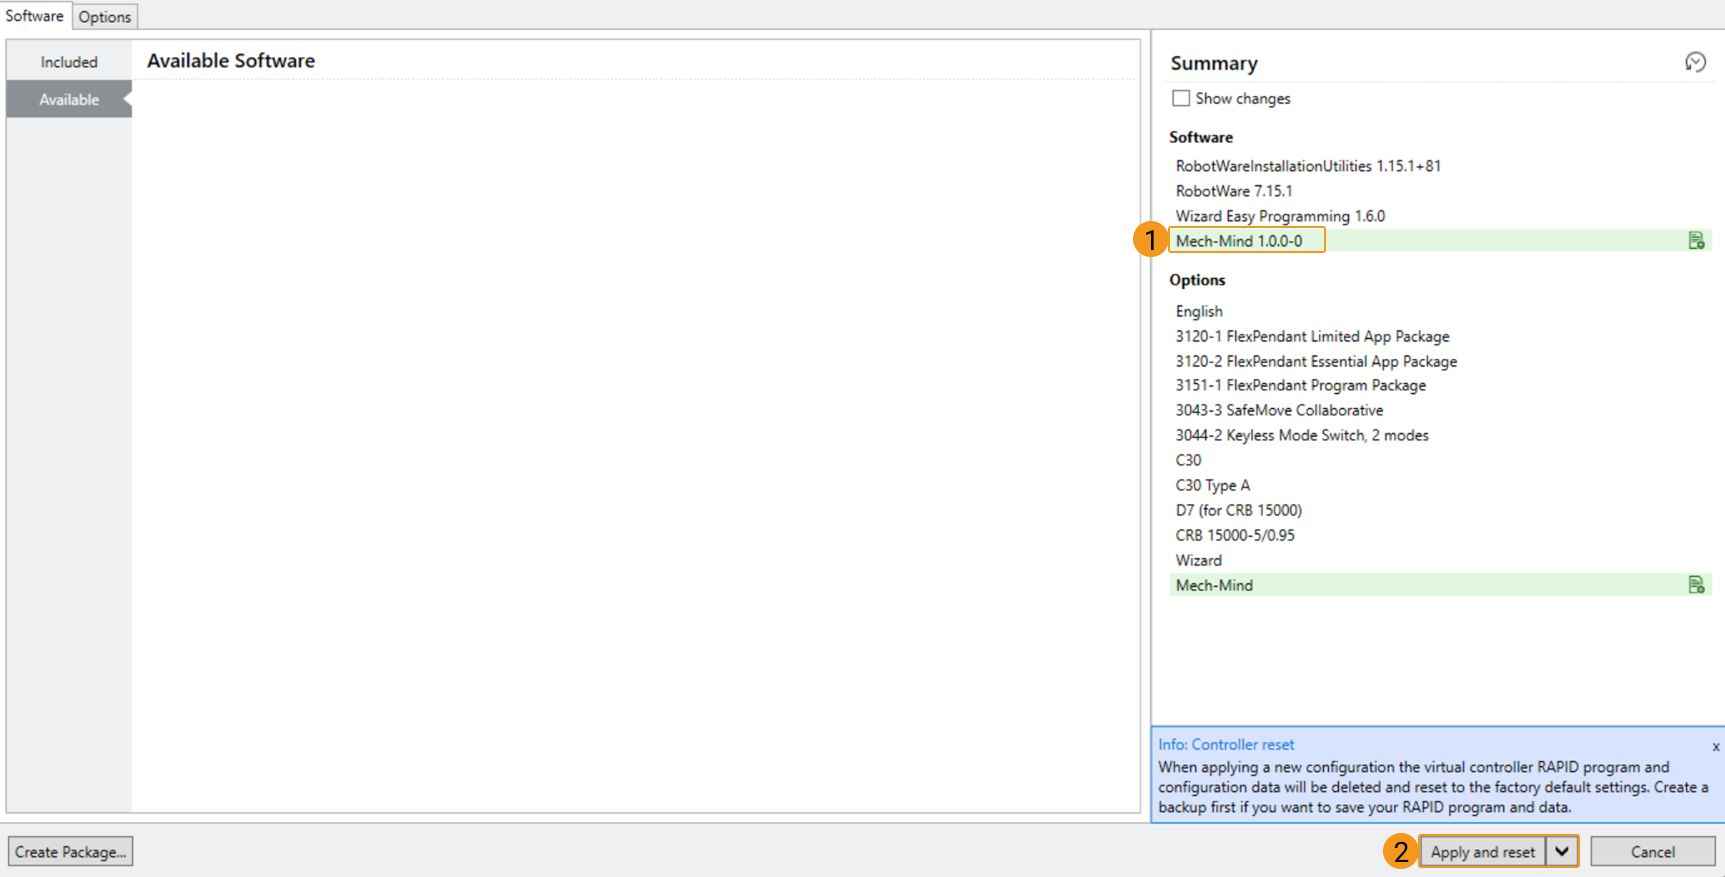
-
2. Set Communication Parameters
-
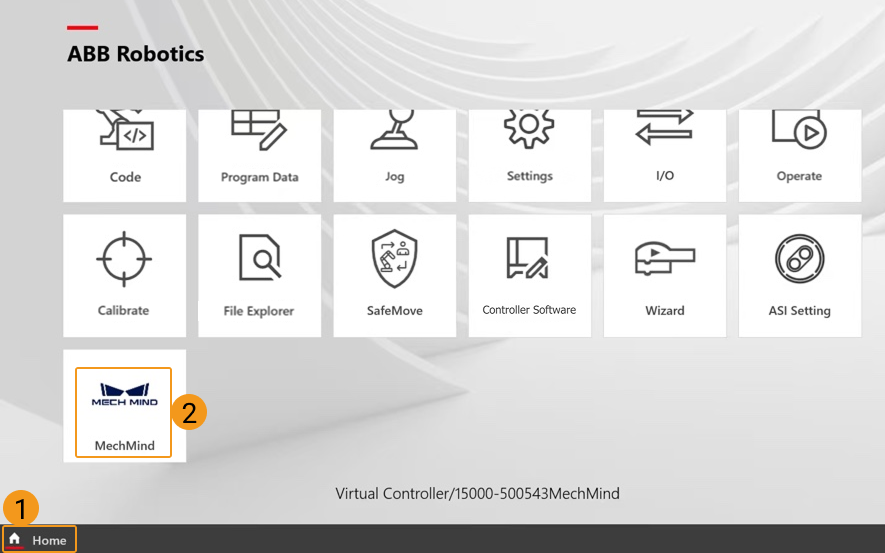
On the Home screen of the teach pendant, click MechMind to access the installed calibration add-in.
-
Click Settings. Set Port to the port number configured in the Robot Communication Configuration in Mech-Vision, and set IP Address to the IPC IP address. Then click Save.
-
Show Debug Information in teach pendant: If enabled, debug information during the calibration process will be displayed in the teach pendant operator message log.
-
Show Received Data in teach pendant: If enabled, the status codes in the responses sent by the vision system will be displayed in the teach pendant operator message log.

-
3. Teach Calibration Start Point
-
In manual mode, start the motors and manually move the robot to the calibration start point.
You can use the position of the robot in the Check the Point Cloud Quality of the Calibration Board step as the calibration start point.
-
On the teach pendant, navigate to to save the current robot position as the calibration start point.
After teaching the calibration start point, if the robot is later at a different position, click Move to return the robot to the taught calibration start point. 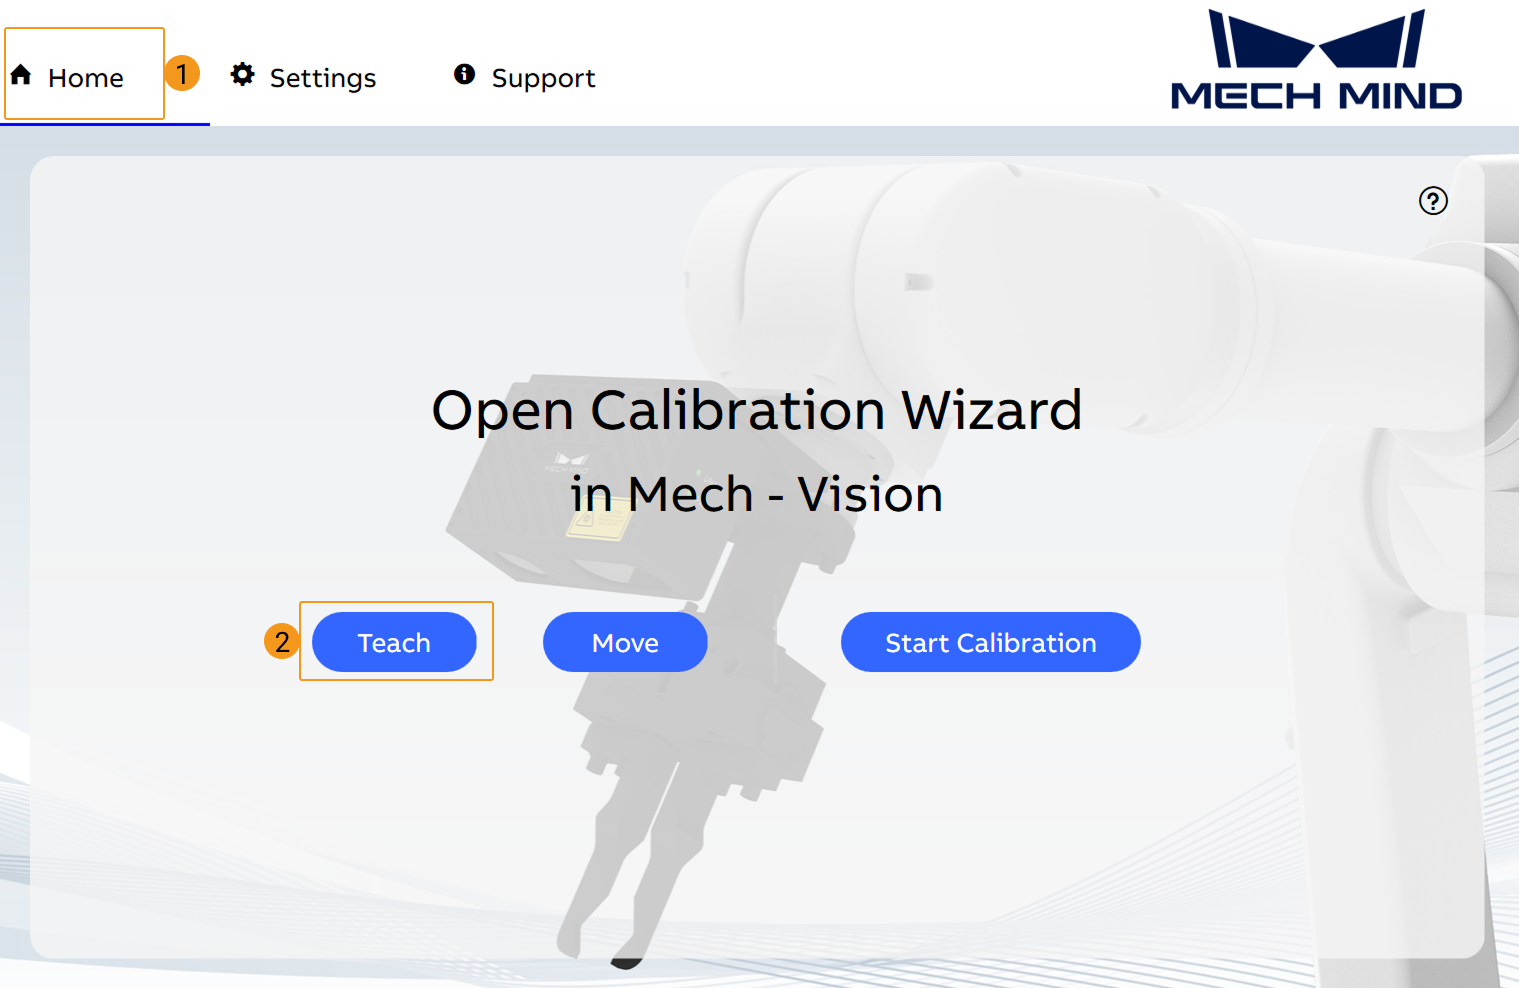
4. Run Calibration Program
-
Switch to automatic mode, and then start the motors.
-
On the teach pendant, click Start Calibration to run the calibration program.
Before performing this step, ensure that the Calibration interface in Mech-Vision displays the Waiting for the robot to connect… button. 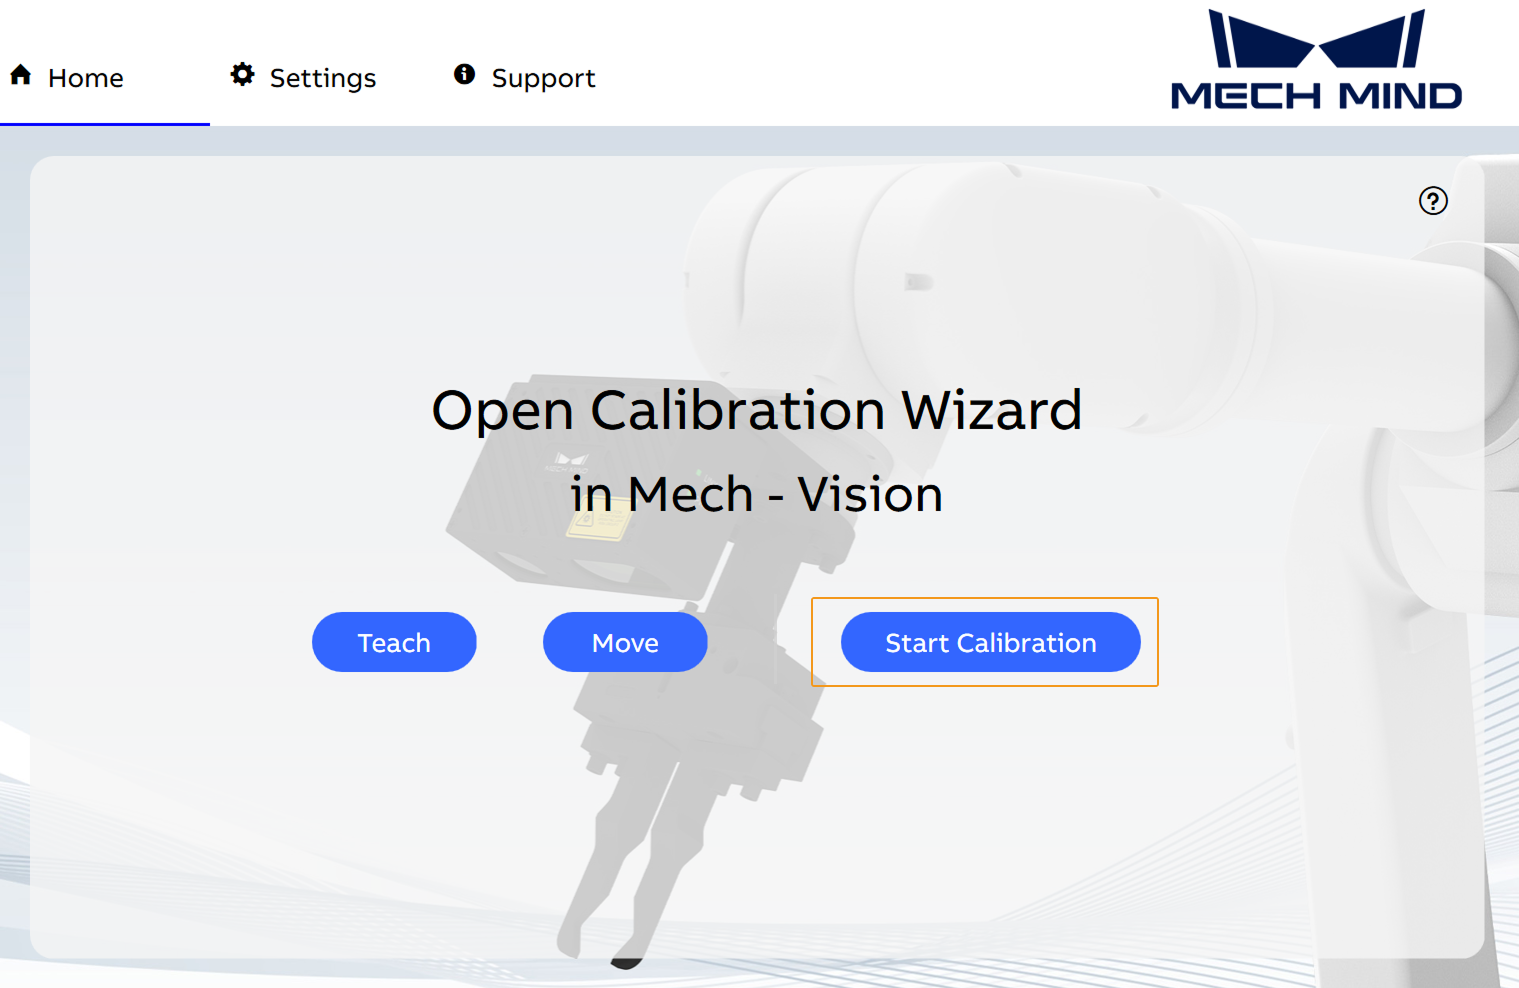
-
When, in the Calibration window in Mech-Vision, the current status changes to connected and the button Waiting for the robot to connect... changes to Disconnect robot, click Next at the bottom.

-
Perform Step 4 of Start calibration (which is Set motion path) and the subsequent operations based the following links.
-
If the camera mounting mode is eye to hand, see this document and proceed with the relevant operations.
-
If the camera mounting mode is eye in hand, see this document and proceed with the relevant operations.
-