Use the Instance Segmentation Module
This document provides sample data for irregular sheet metal parts (click to download) and walks you through training a model using the Instance Segmentation module. The overall process consists of six steps: data collection, data processing, data labeling, model training, model validation, and model export.
| You can also use your own data. The overall workflow is the same, but the labeling stage is different. |
Data Acquisition
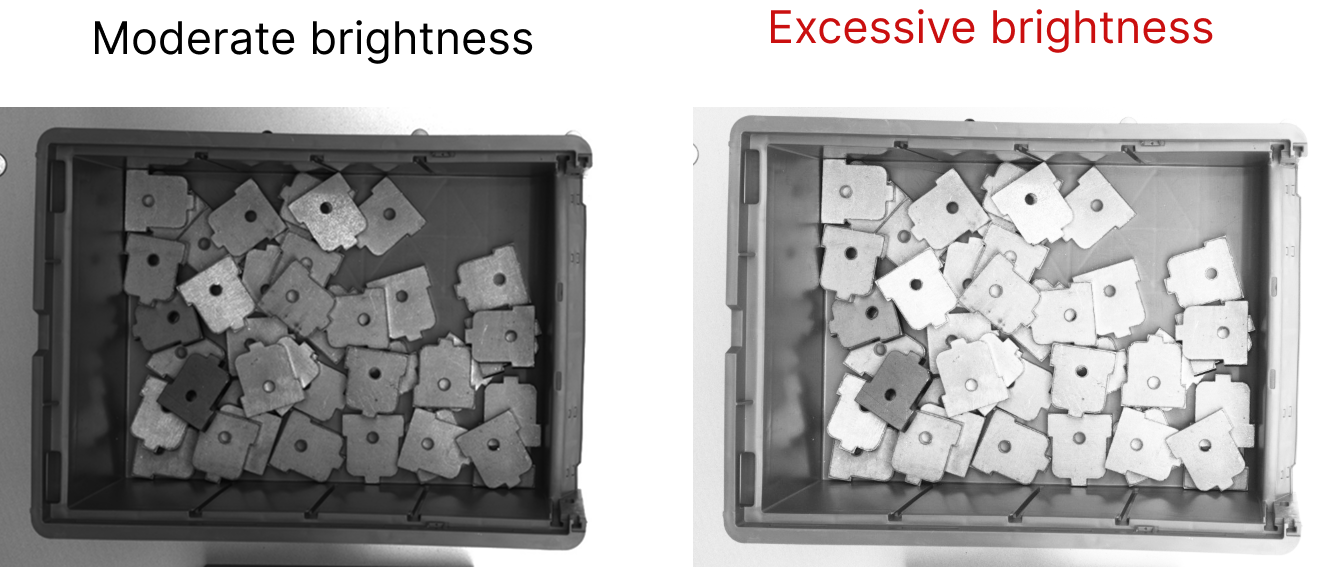
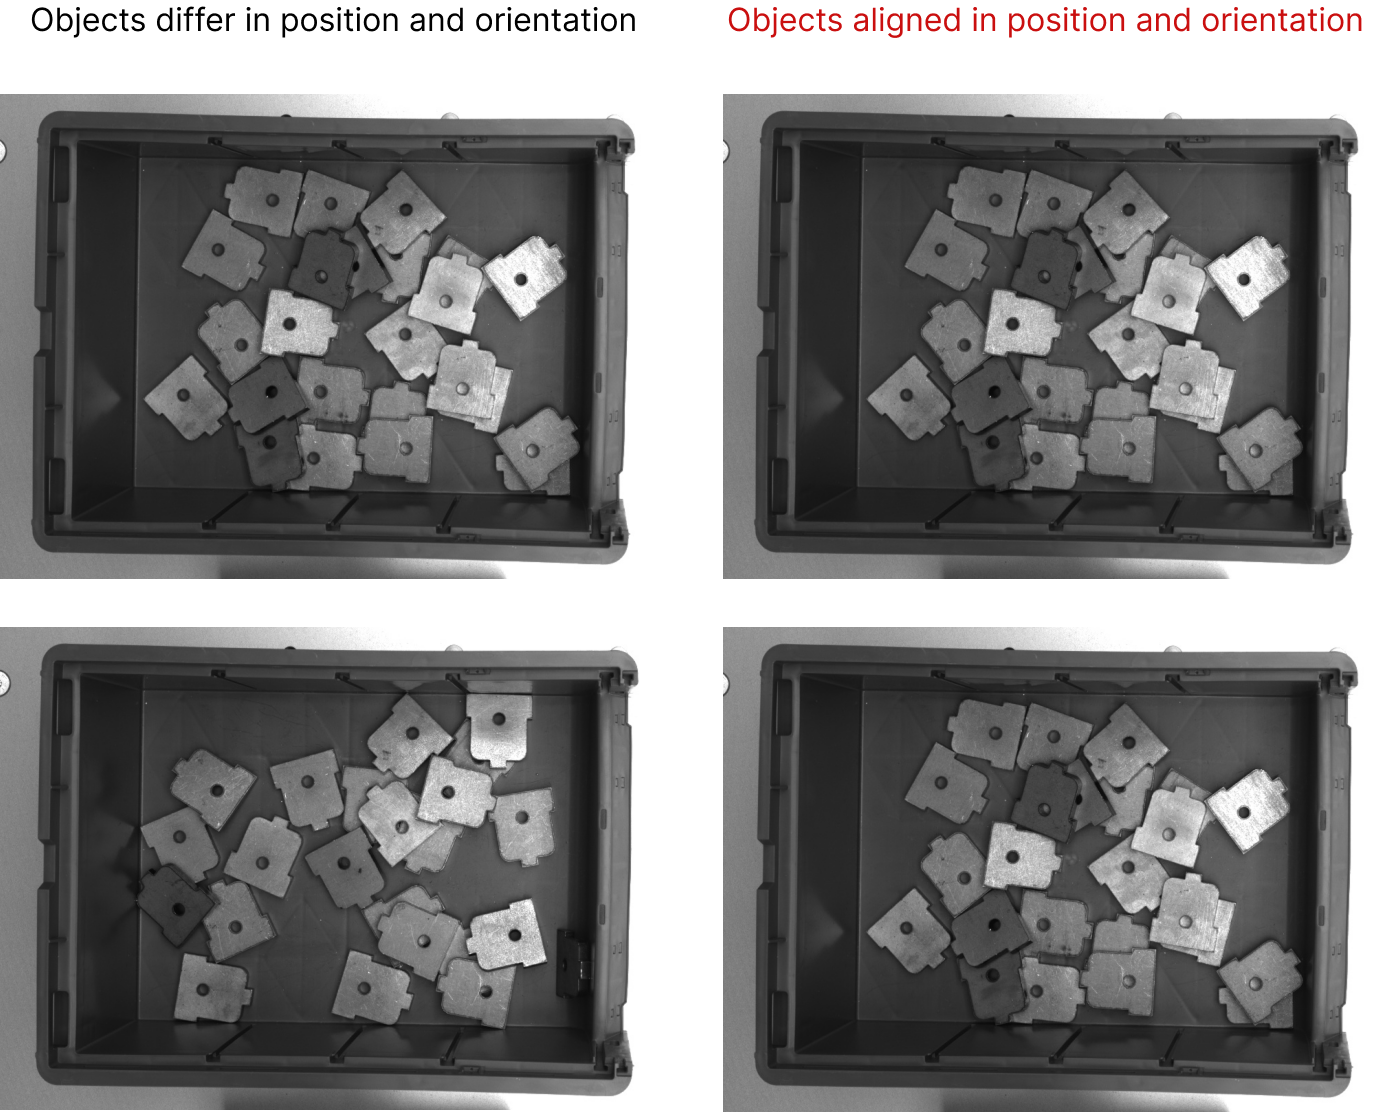
Please strictly follow the Data Acquisition Standard when collecting image data for your application. To improve image quality, adjust the 2D exposure and white balance settings as needed for the project. Additionally, changing the placement and orientation of the objects helps enhance data diversity and improve model generalization. Once image collection is complete, select and keep only high-quality images that meet the standards for labeling and training.
Data Processing
-
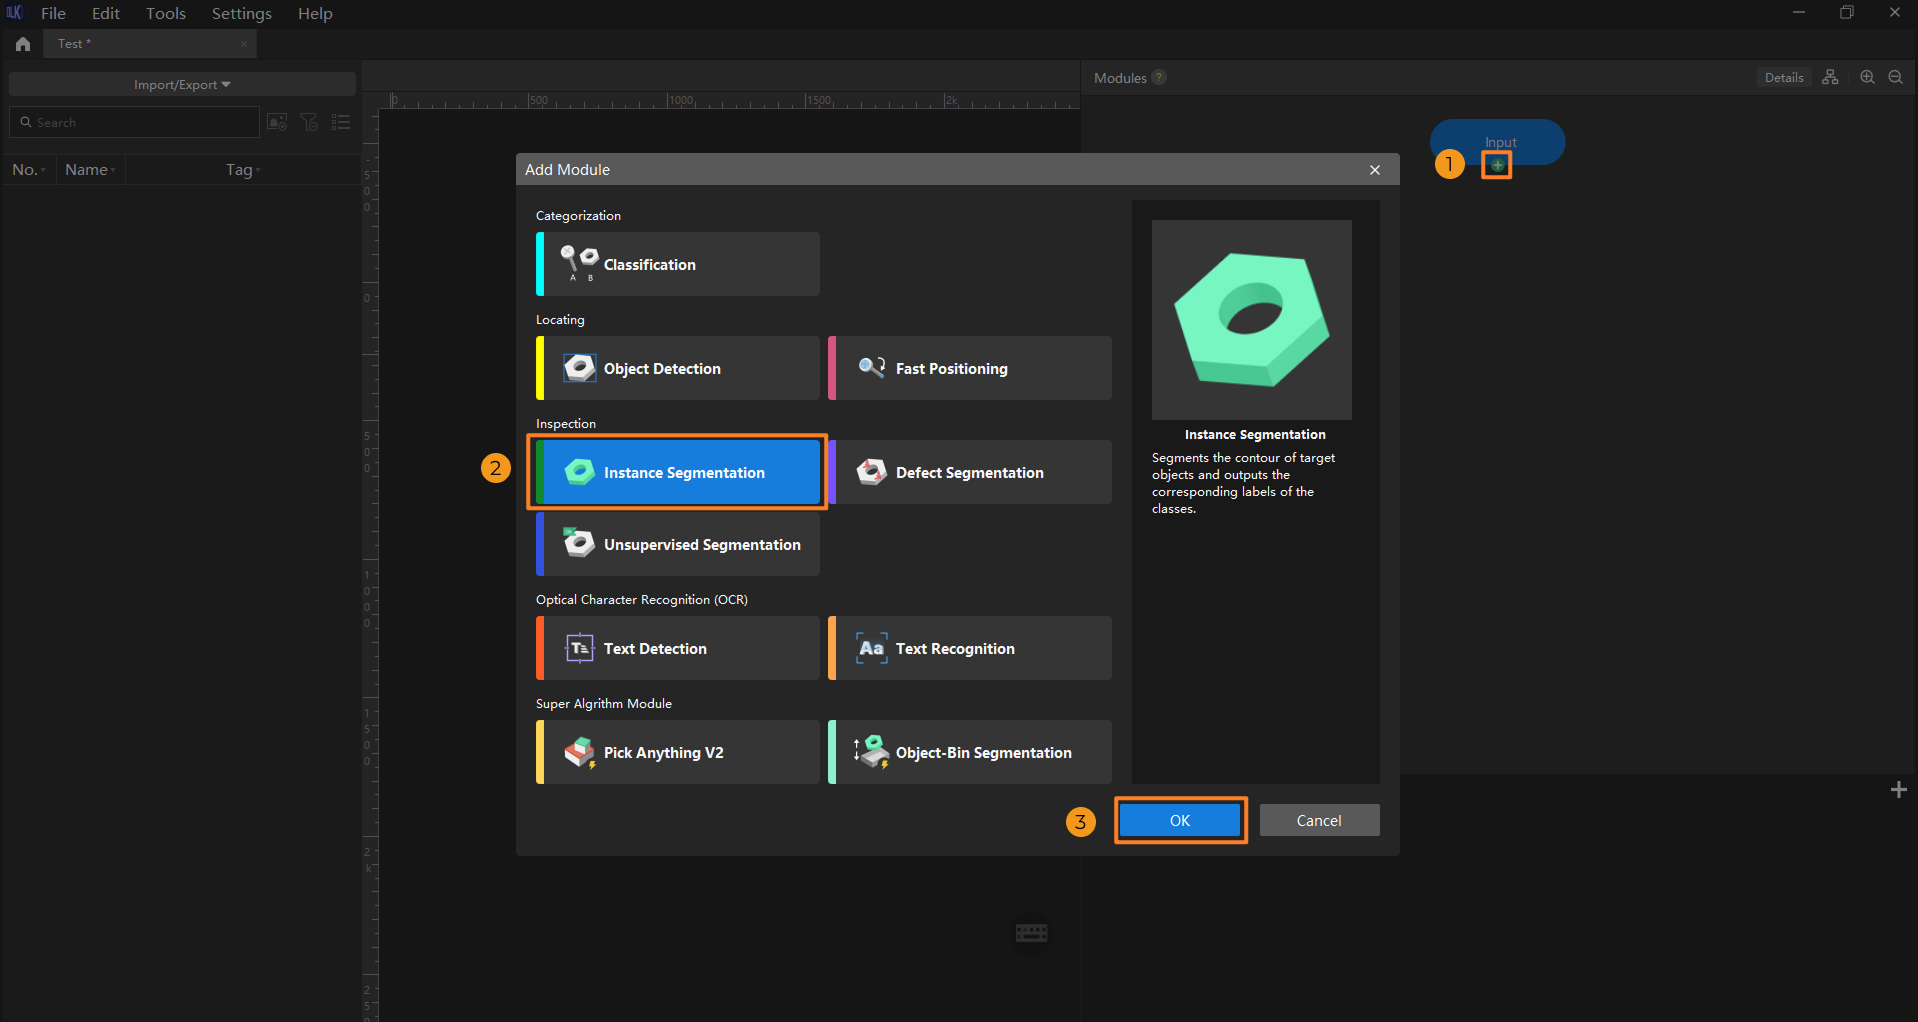
Create a new project and add the Instance Segmentation module: Open Mech-DLK, click New Project in the interface, name the project, and select a directory to save the project. In the main interface, click the + button under the Input module, and select the Instance Segmentation module in the Add Module window.
-
Import image data: Import the acquired image data or decompress the data file provided in this article. You can use one of the following methods to import image data:
-
Method one
Drag and drop images or files into the image list area to import them. Importing datasets by dragging is not supported.
-
Method two
On the top of the image list, click the Import/Export button. Select the import method based on the data type:
-
Import from Previous Module: Import images from the previous module.
-
Import Images: Import one or more images.
-
Import Folder: Import all images in the folder (images in the subfolders are not included).
-
Import Dataset: Import datasets in the DLKDB format (.dlkdb) (which are datasets exported from Mech-DLK) and the COCO format.
-
-
-
Select an ROI: Click the ROI tool icon
 and adjust the frame to select the bin in the image as an ROI. Then, click the application icon
  in the lower right corner of the ROI to save the setting. Setting the ROI can avoid interferences from the background and reduce processing time.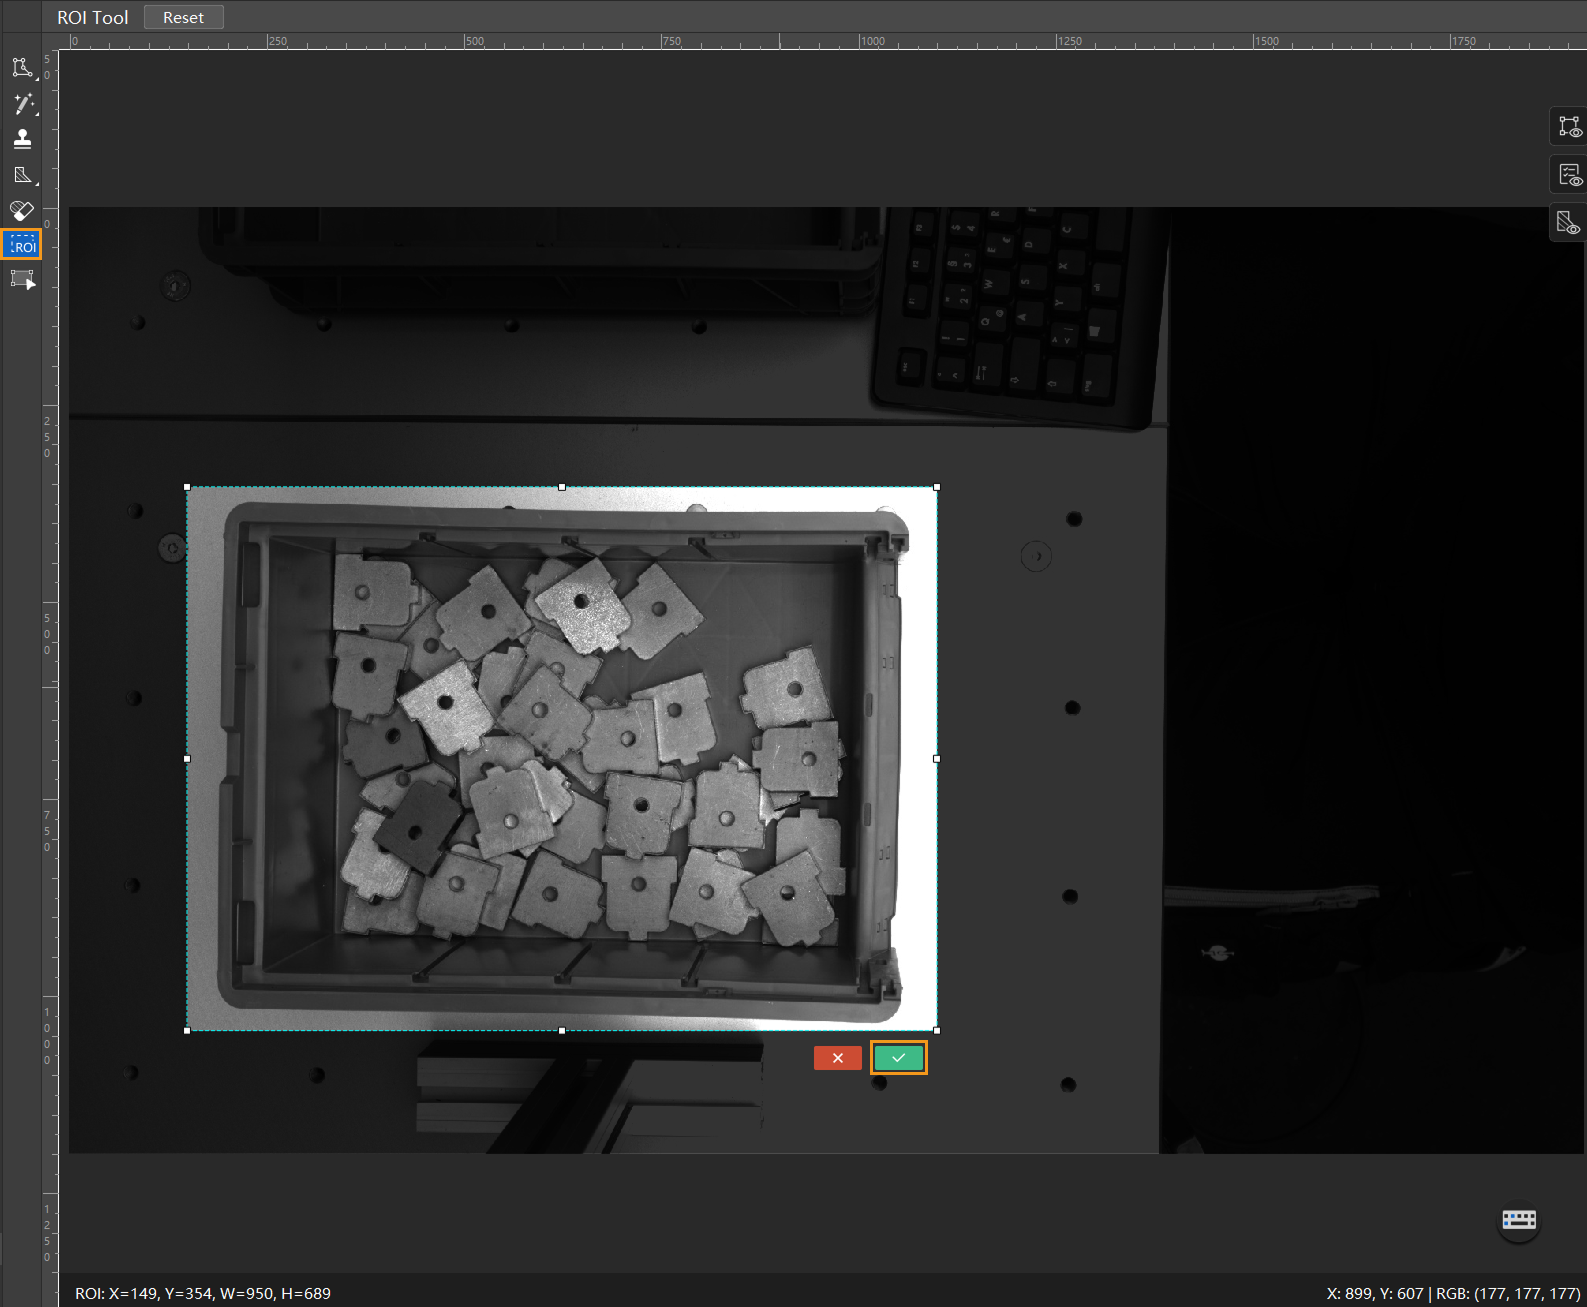
-
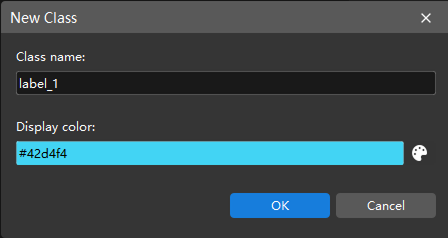
Create classes: Select Labeling and click the + New button in the Classes panel to create classes based on the type or characteristics of different objects. The project requires identifying only one type of object, with no need to differentiate front/back sides or similar characteristics, so one class will suffice. If multiple types of objects need to be recognized, you can create several classes based on the object characteristics and name them accordingly.
When you select a class, you can right-click the class and select Merge Into to change the data in the current class to another class. If you perform the Merge Into operation after you trained the model, it is recommended that you train the model again. 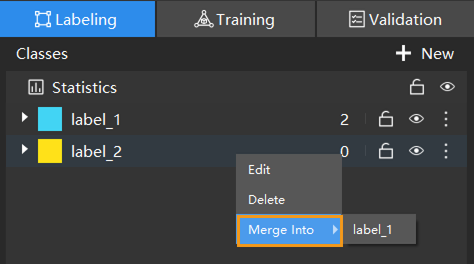
Data Labeling
Please strictly follow the Data Labeling Standard when labeling.
-
Apply unified labeling rules: Label only the topmost exposed objects in this scenario. Ensure that each object has a visible pick point, minimal occlusion at both ends, and sufficient distance from the bin walls.
You can hold down the Ctrl key and scroll the mouse wheel up to zoom in on the image for more precise labeling. -
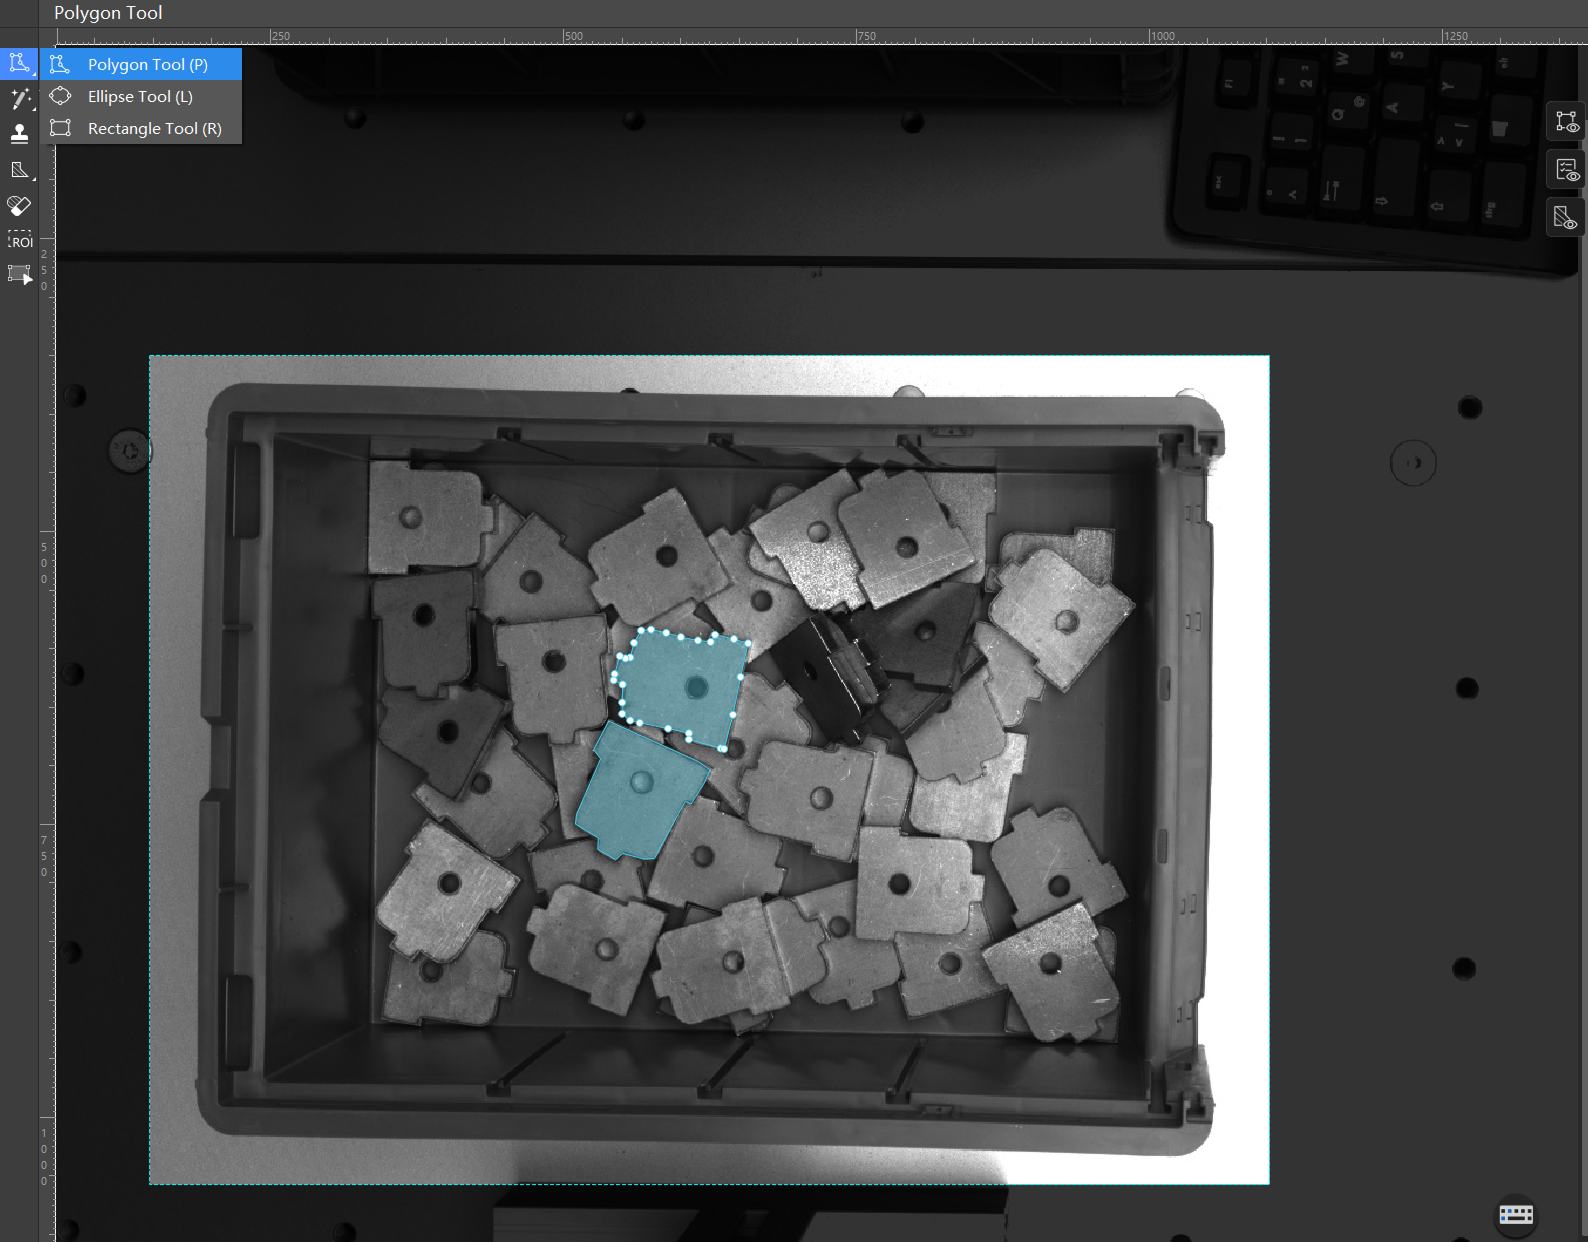
Label data: Press and hold the left mouse button or right-click the polygon tool icon
 on the left toolbar, and then select a labeling tool.
In this scenario, the objects have irregular shapes, so the polygon tool is used to set multiple anchor points to draw a polygon. With a large volume of image data, it’s not necessary to label everything. You can start by accurately labeling a small subset for training (for example, labeling 10 images in this scenario). At the same time, prioritize labeling images that show clear differences in object positions and other characteristics.
For more information about how to use labeling tools, see Use Labeling Tools. -
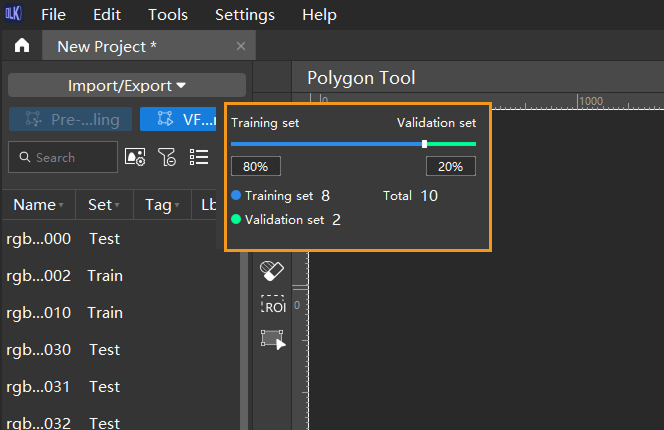
Split training and validation sets: Move labeled images to the training set and split 80/20 for training and validation. Typically, 80% of the data is allocated for training and 20% for validation in common scenarios. The software will automatically split the labeled images that have been moved to the training set into 80% for training and 20% for validation.
Model Training
-
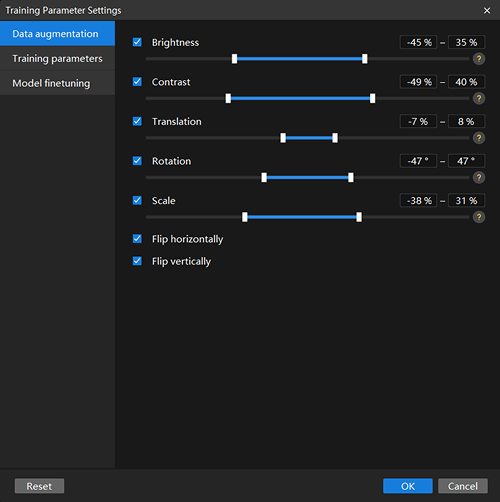
Configure data augmentation parameters: Ideally, training data should reflect various conditions encountered in real production environments. For example, in this project, the image data should capture different lighting conditions on-site.
-
In this scenario, the lighting was relatively bright during image collection, so reducing the Brightness slightly can help improve model stability and performance.
-
Since the objects have low color contrast with the background, it is recommended to adjust the Contrast parameter to help the model identify the objects more accurately.
-
Objects on the top layer in the bin are randomly stacked with multiple translation, rotation, and flip poses. To ensure the model recognizes all these variations, adjust the Translation, Rotation, Flip Horizontally, and Flip vertically parameters.
-
The image data in this scenario includes objects with similar sizes, so the Scale parameter can be adjusted accordingly.
-
-
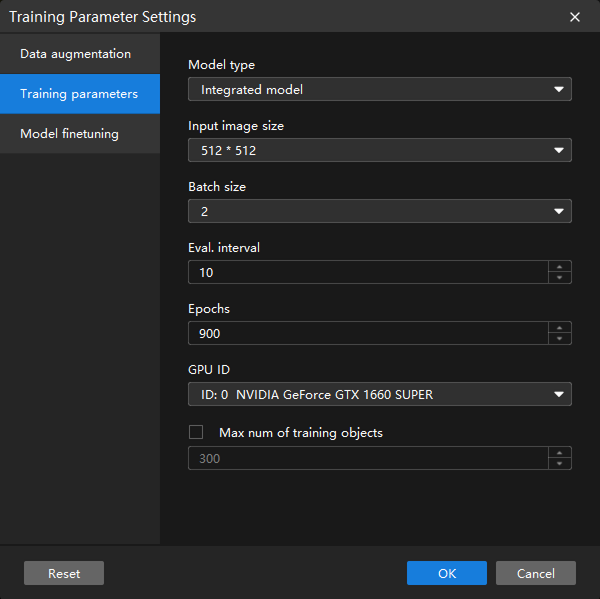
Configure training parameters:
-
Model type refers to the model type selected during training. This parameter is only visible in the Instance Segmentation module.
-
Integrated model: Suitable for most regular scenarios.
-
Tightly packed long object model: Suitable for scenarios where objects are densely spread or have elongated shapes.
-
-
Input image size refers to the width and height in pixels of the images fed into the model during training. Larger image sizes generally lead to higher model accuracy but slower training speeds. To balance training time and clarity of labels and object details, consider reducing the image size appropriately. The default values can be used for this scenario.
-
Epochs refers to the total number of training iterations for the model. Since the object characteristics in this scenario are relatively complex, it is necessary to increase the number of training epochs.
-
Keep all other parameters at their default values.
-
Model finetuning is not involved in this scenario; the default settings can be used.
-
Click OK to save the settings.
For detailed explanations of each parameter, see Parameter Description.
-
When the input image size meets the requirements, using a smaller size can help speed up model training and inference.
-
Larger input image sizes help better fit the contours of validation and defect areas, improving model accuracy, but they also increase the number of training epochs and training time.
-
-
-
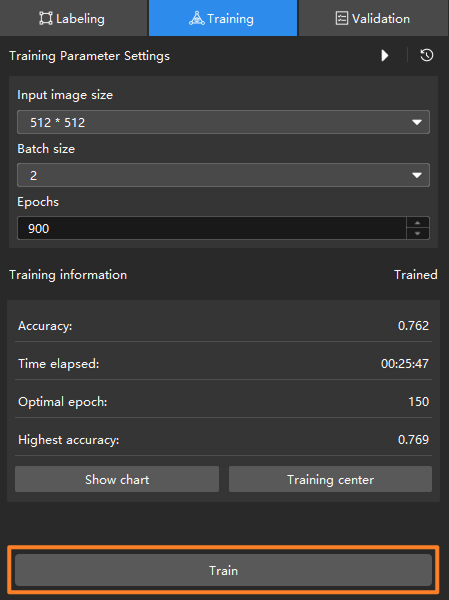
Start training: Click the Train button under the Training tab to begin training the model.
-
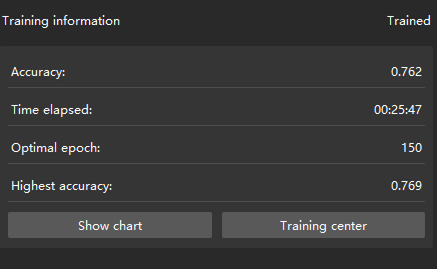
Monitor training progress through training information: On the Training tab, the training information panel allows you to view real-time model training details.
-
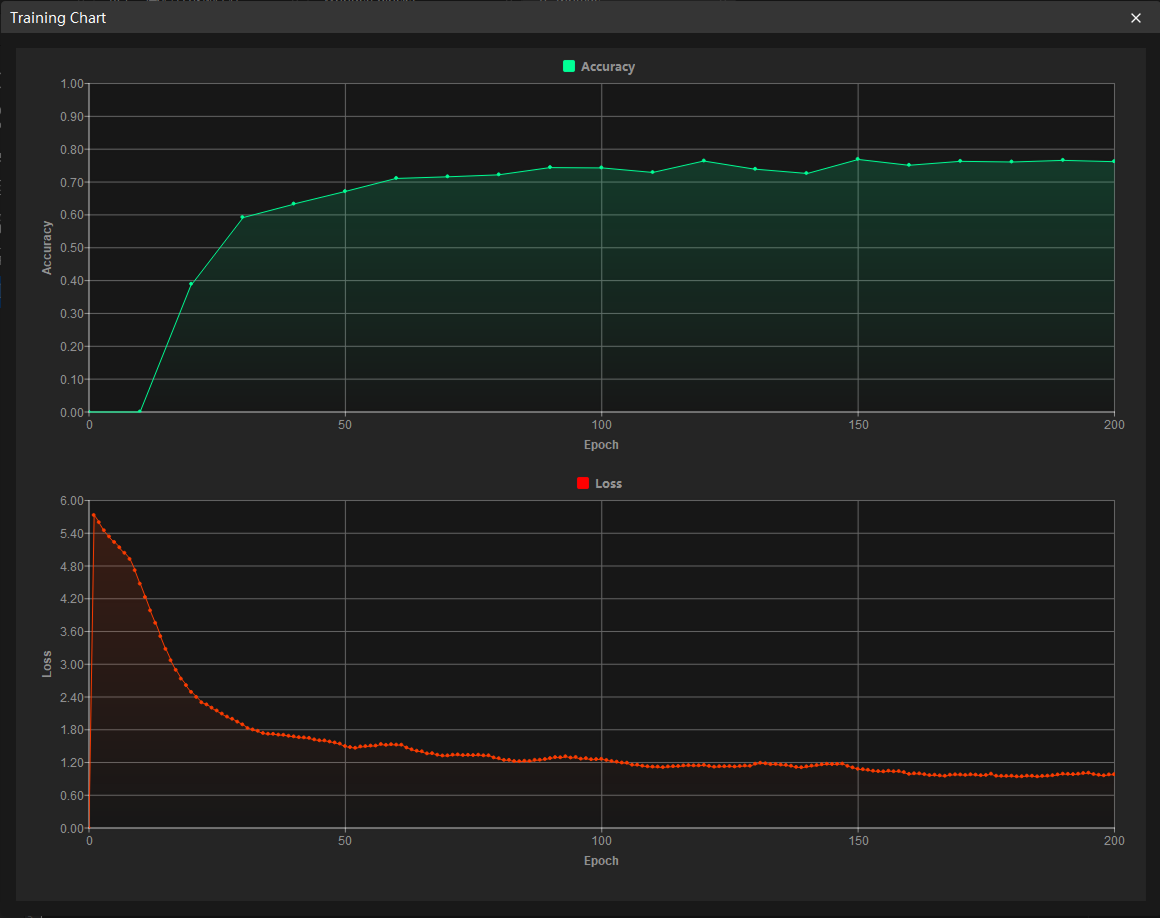
View training progress through the Training Chart window: Click the Show chart button and the Training center button under the Training tab to view real-time changes in the model’s accuracy and loss curves during training. You can wait for the model training to complete and then check the Highest accuracy parameter and the validation results on the test set to evaluate the model performance. An overall upward trend in the accuracy curve and a downward trend in the loss curve indicate that the current training is running properly.
Model Validation
-
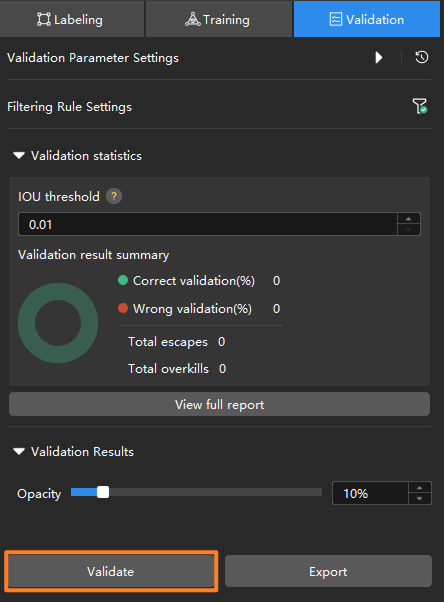
Validate the model: After training is completed, click the Validate button under the Validation tab to validate the model.
-
Check the model’s validation results in the training set: After validation is complete, you can view the validation result quantity statistics in the Validation statistics section under the Validation tab.
-
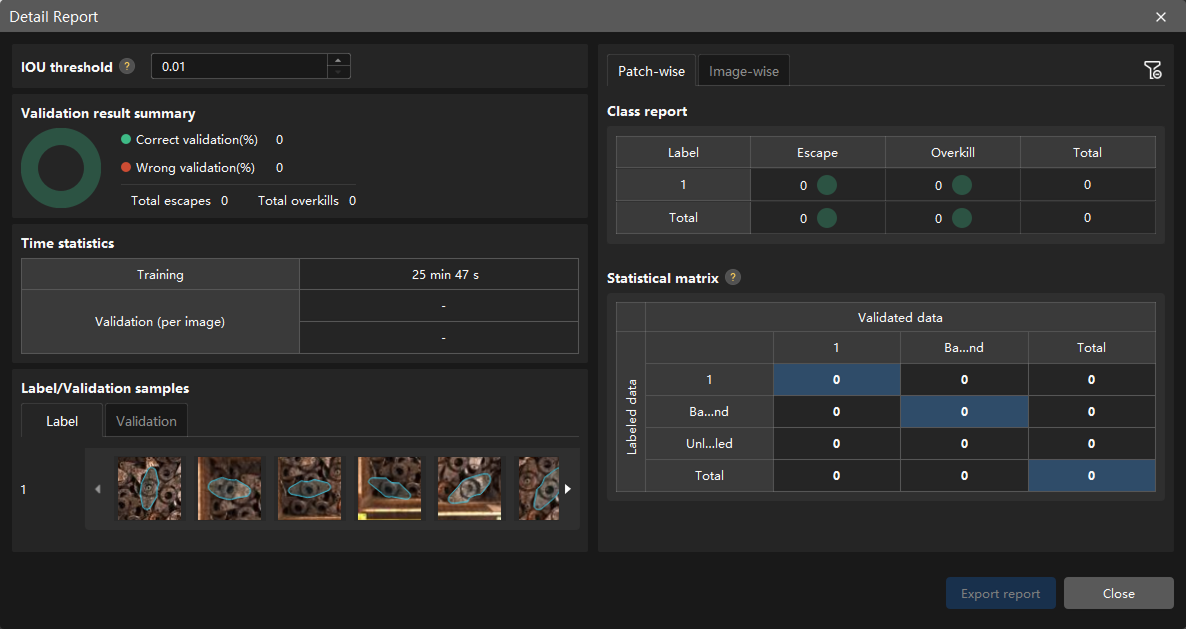
Click the View full report button to open the Detailed Report window and view detailed validation statistics.
-
The Statistical matrix in the report shows the correspondence between the validated data and labeled data of the model, allowing you to assess how well each class is matched by the model.
-
In the matrix, the vertical axis represents labeled data, and the horizontal axis represents predicted results. Blue cells indicate matches between predictions and labels, while the other cells represent mismatches, which can provide insights for model optimization.
-
Clicking a value in the matrix will automatically filter the image list in the main interface to display only the images corresponding to the selected value.
-
Check the training and validation sets. Also, focus on the test set since it is used to assess the model generalization during validation.
-
To address escapes, additional labels can be added. However, it is important to label both detected and undetected data within the entire image before including the full image in the training set for retraining and validation.
-
To address overkills, post-processing methods are commonly used, such as filtering data by setting confidence thresholds during model application.
-
-
When the model shows no escapes or overkills on the training set, it indicates that the model has initially acquired generalization capability.
You don’t need to label and move all images that have escapes or overkills in the test set into the training set. You can label a portion of the images, add them to the training set, then retrain and validate the model. Use the remaining images as a reference to observe the validation results and evaluate the effectiveness of the model iteration. You can also click the Export report button at the bottom-right corner of the Detailed Report window to choose between exporting a thumbnail report or a full-image report. 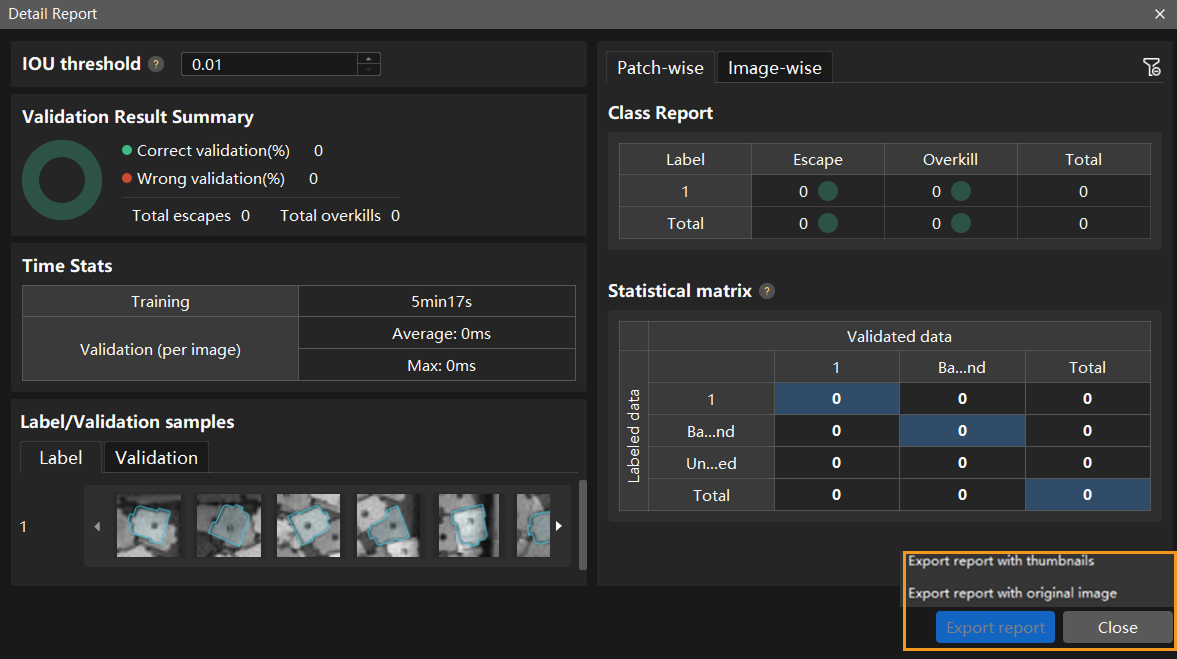
-
-
Restart training: After adding newly labeled images to the training set, click the Train button to restart training.
-
Recheck model validation results: After training is complete, click the Validate button again to validate the model and review the validation results on each dataset.
-
Fine-tune the model (optional): You can enable developer mode and turn on Finetune in the Training Parameter Settings dialog box.
-
Continuously optimize the model: Repeat the above steps to continuously improve model performance until it meets the requirements.
Model Export
Click Export. In the pop-up dialog box, select a directory to save the exported model, and click Export.
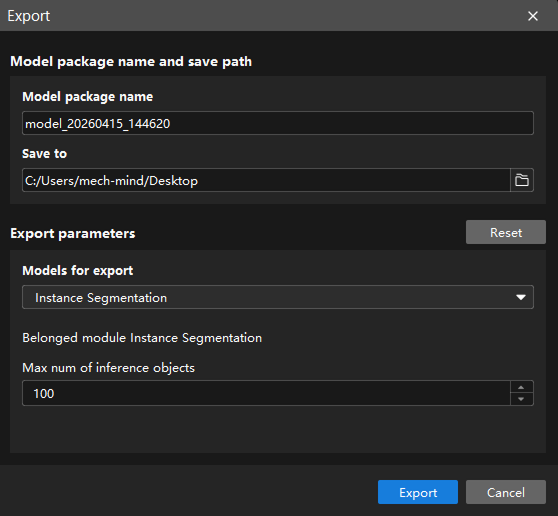
The exported model can be used in Mech-Vision, Mech-DLK SDK and Mech-MSR. Click here to view the details.