Use the Fast Positioning Module
Please click here to download an image folder of connectors. In this topic, we will use a Fast Positioning module and train a model to rotate the connectors in the images to a uniform orientation.
| You can also use your own data. The usage process is overall the same, but the labeling part is different. |
-
Create a new project and add the Fast Positioning module: Click New Project in the interface, name the project, and select a directory to save the project. Click
 in the upper right corner of the Modules panel, select Fast Positioning, and click OK.
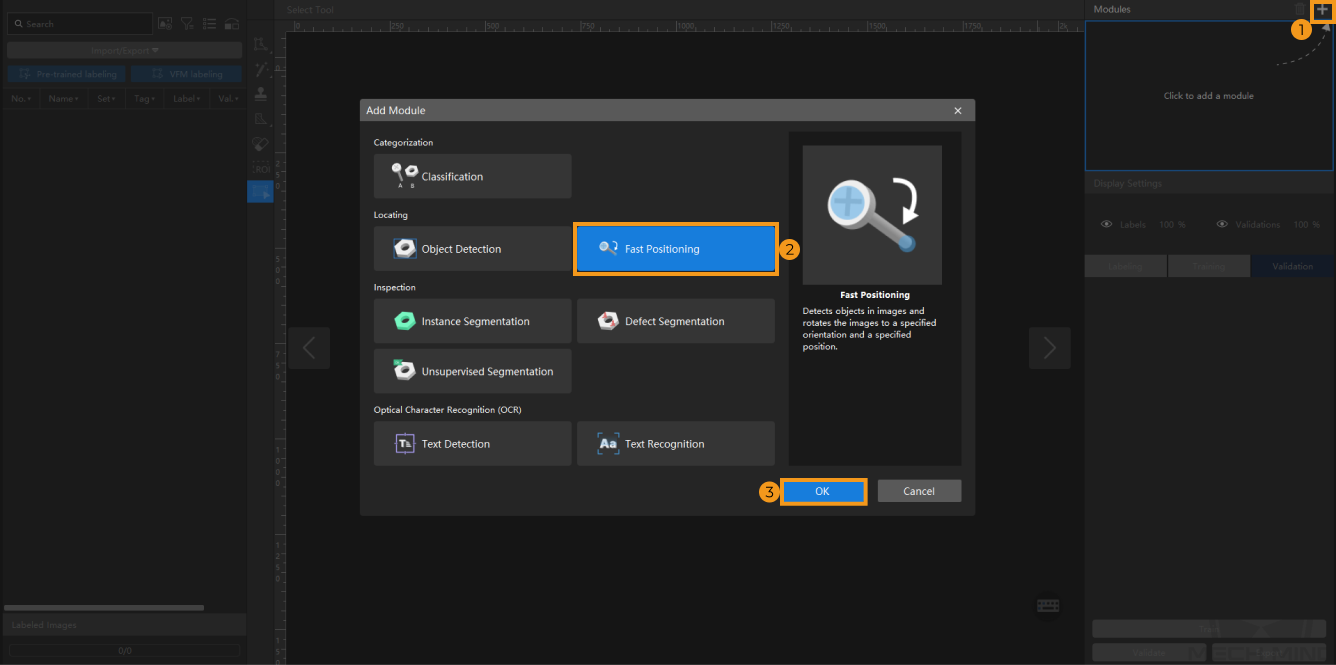
-
Import the image data of connectors: Unzip the downloaded file. Click the Import/Export button in the upper left corner, select Import Folder, and import the image folder.
![][align="center"](_images/fast-positioning/example-projects-load-images.png)
When you select Import Dataset, you can only import datasets in the DLKDB format (.dlkdb), which are datasets exported from Mech-DLK. -
Label images: The Fast Positioning module provides two default label classes feature1 and feature2. In the labeling toolbar, click
 , and label the first feature on the image. After the first label is finished, the system automatically switches to the feature2 class. Then, label the second feature on the image. Each class can contain only one label. If you need to modify an existing label, select the corresponding class in the Classes column and draw a new label. The new label will automatically replace the original one. Repeat the operations to label all images. Click here to view how to use labeling tools.
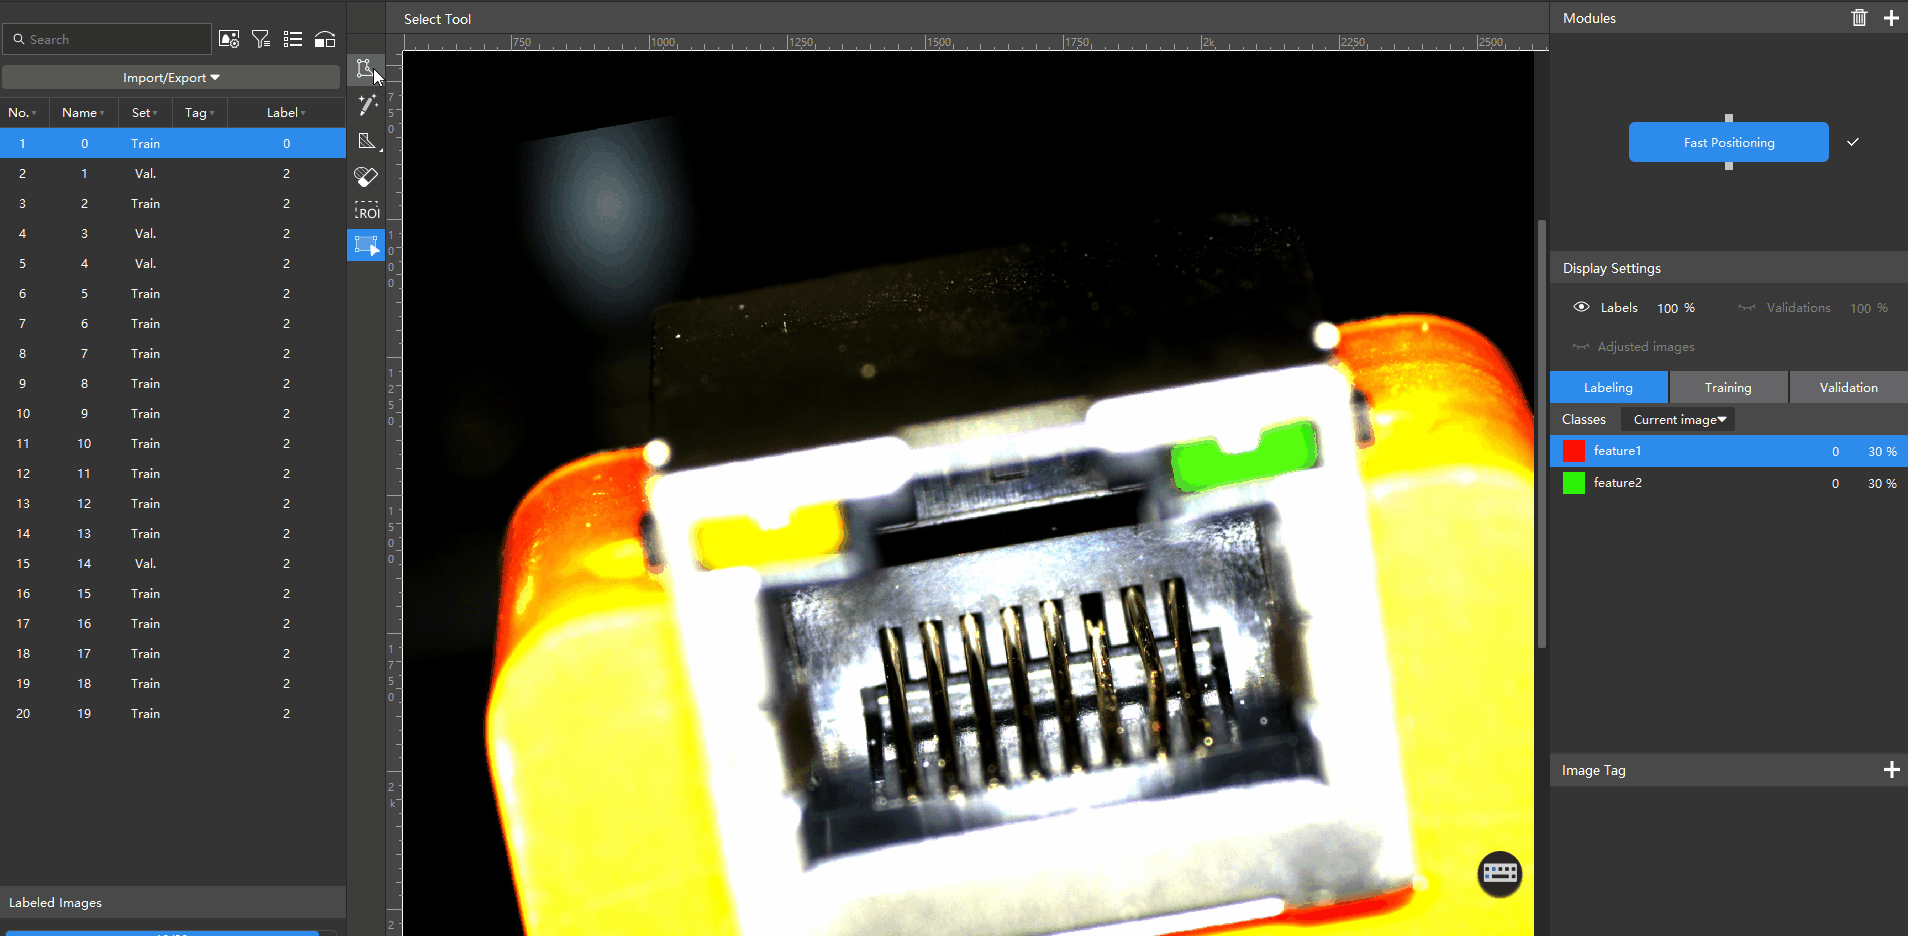
-
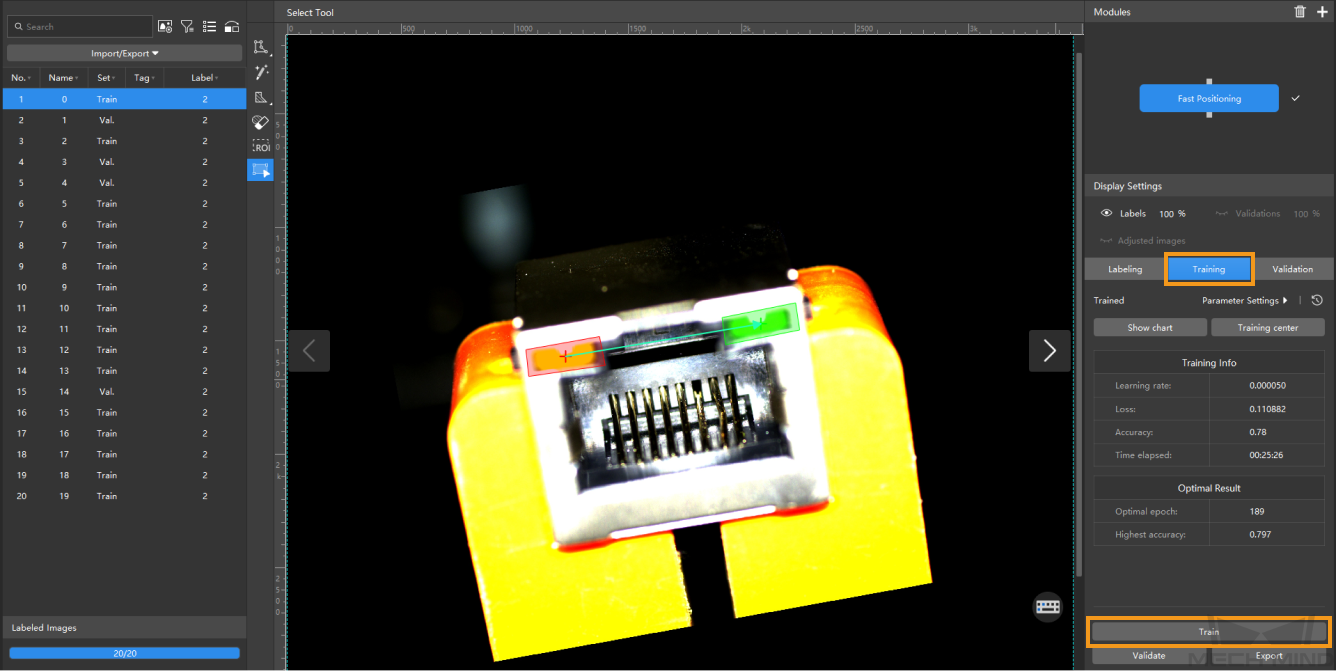
Train the model: Switch to the parameter bar of Training and click Train.
-
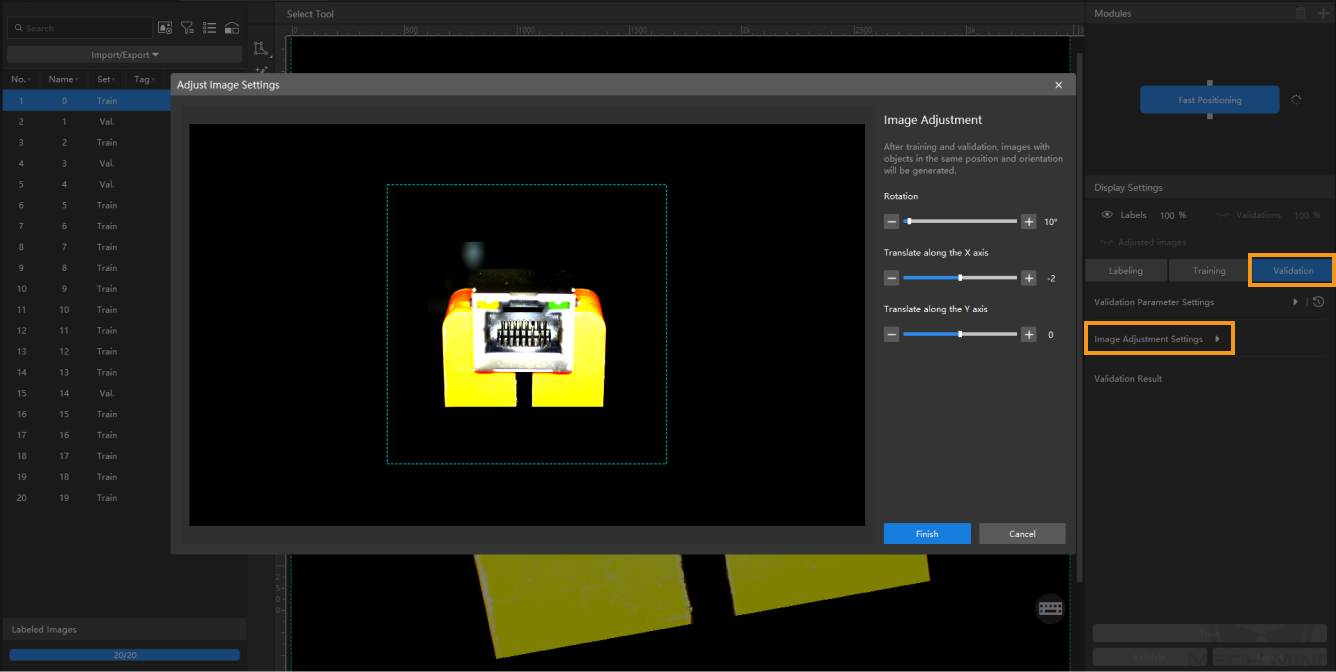
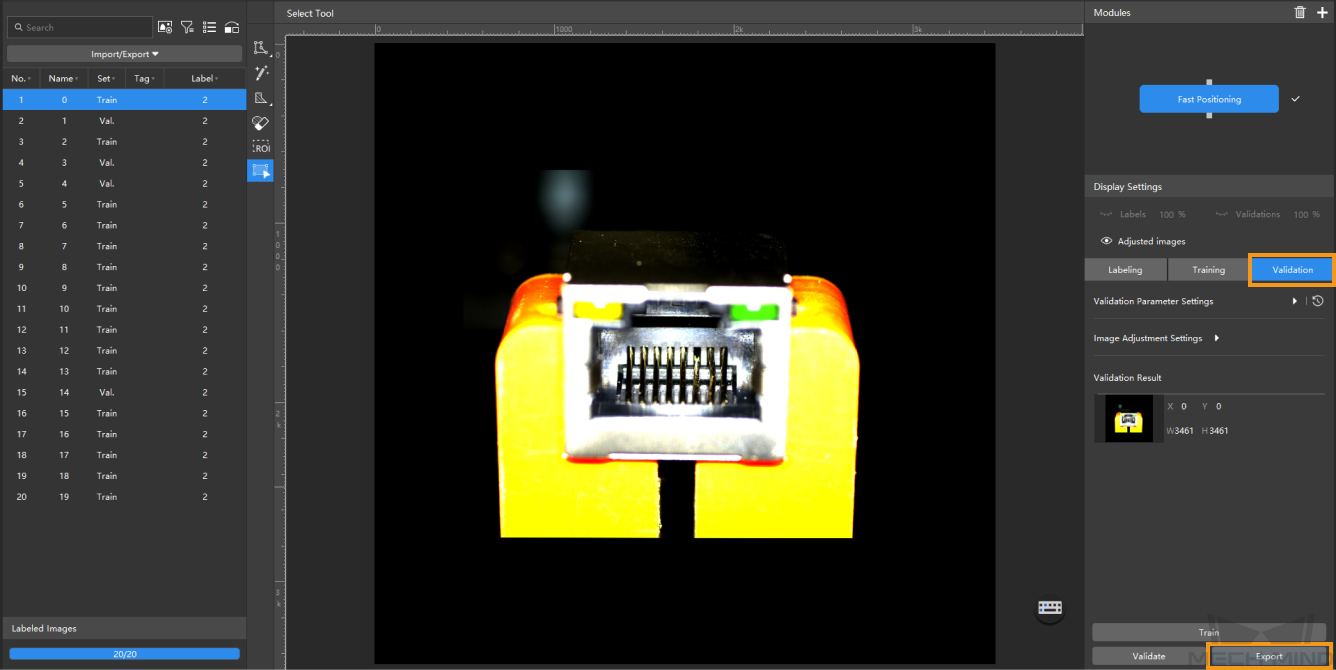
Adjust images: After the training is completed, in the Validation tab, click Image Adjustment Settings. Drag the slider or click - and + to adjust the image to an expected orientation and position, and click Finish to confirm settings.
-
Validate the model: Click Validate to validate the model and check the results.
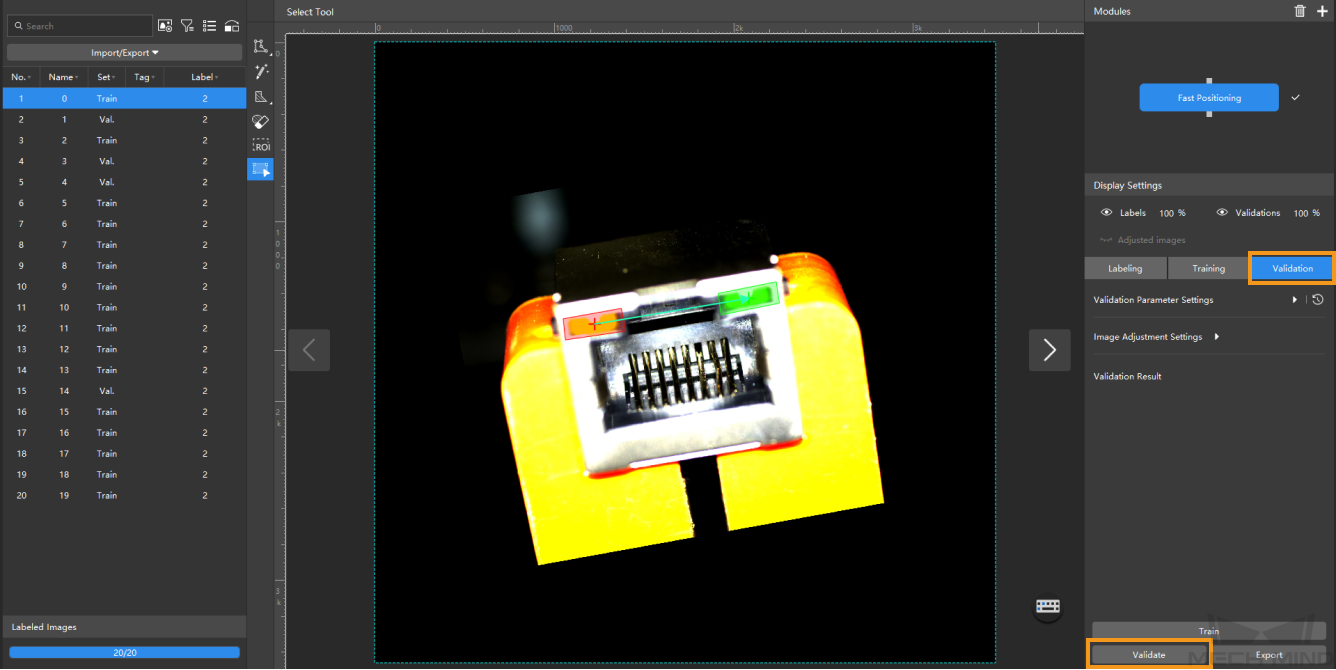
After validation, you can view the fast positioning results of the selected image in the parameter bar of Validation. You can also click Adjusted images in the Display Settings area. In this way, the original image is switched to the image that has undergone pose correction.
-
Export the model: Click Export and select a directory to save the trained model.
The exported model can be used in Mech-DLK SDK. Click here to view the details.