Use the Fast Positioning Module
Please click here to download an image dataset of connectors. In this section, we will use a Fast Positioning module and train a model to rotate the connectors in the images to a uniform orientation.
| You can also use your own data. The usage process is overall the same, but the labeling part is different. |
-
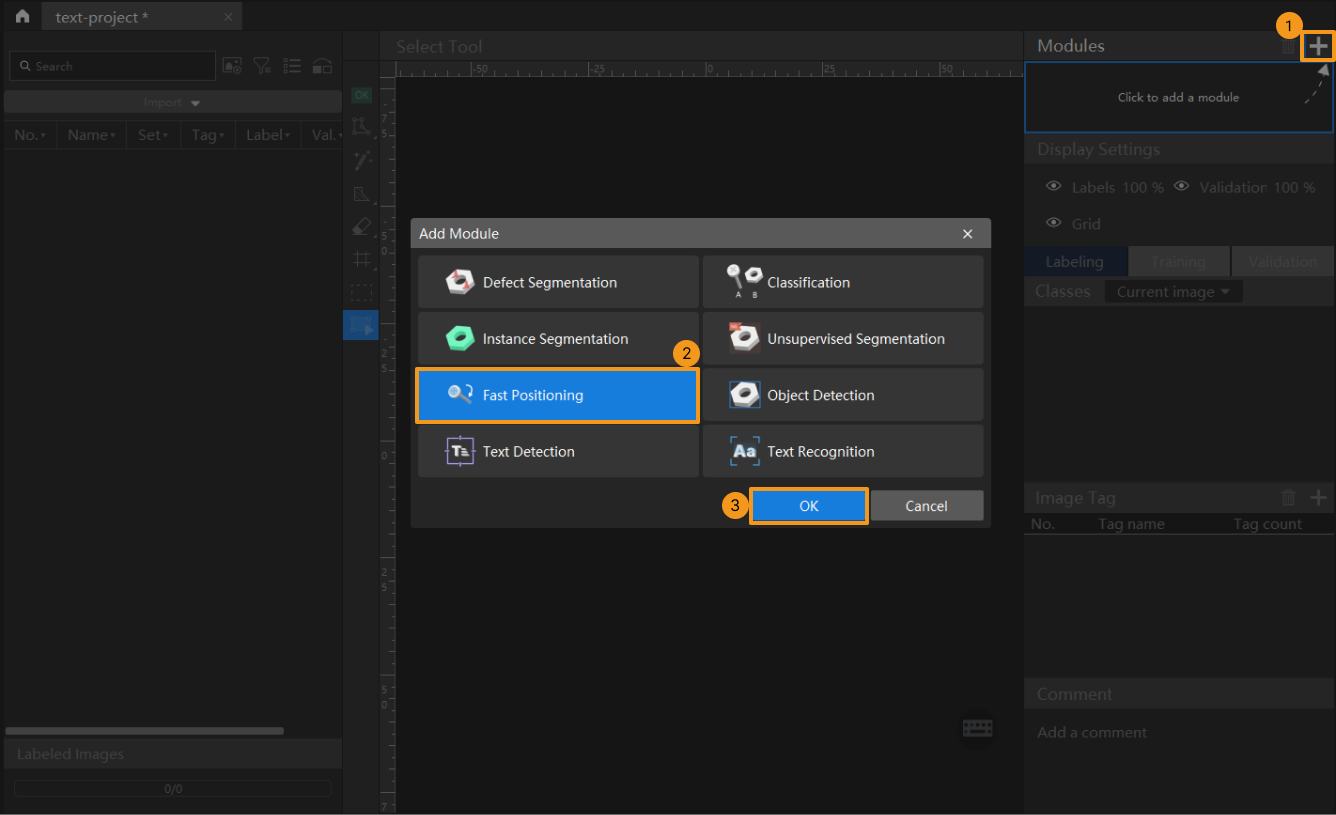
Create a new project and add the Fast Positioning module: Click New Project in the interface, name the project, and select a directory to save the project. Click
 in the upper right corner of the Modules panel, select Fast Positioning, and click OK.
-
Import images: Click and select the downloaded image dataset of connectors.
![][align="center"](_images/fast-positioning/example-projects-load-images.png)
-
Set a template: Click Set template.
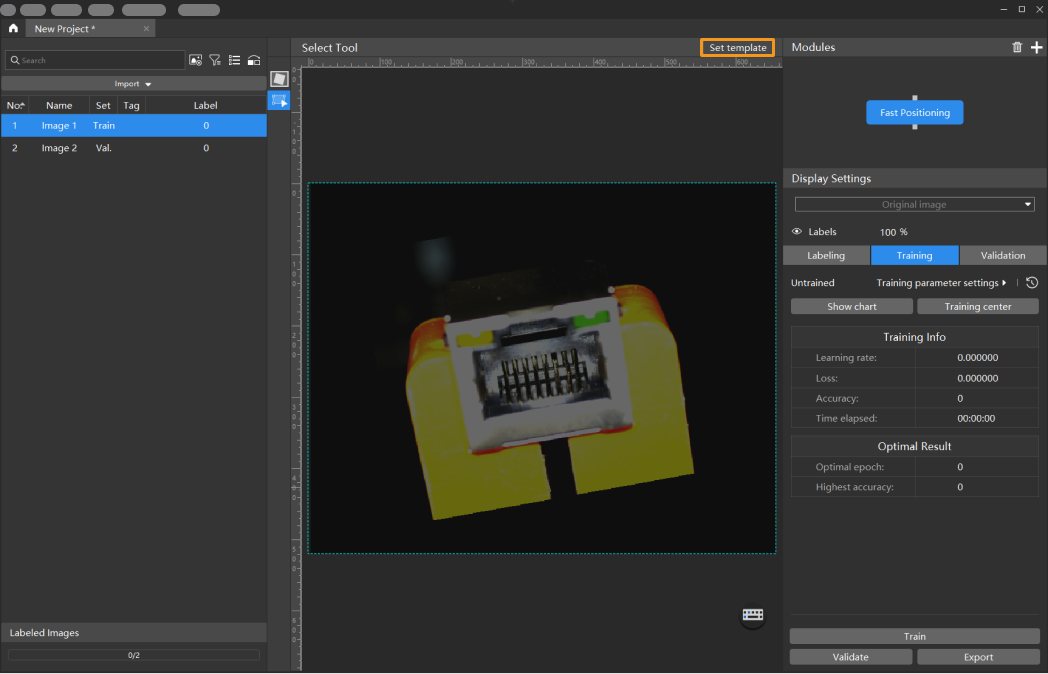
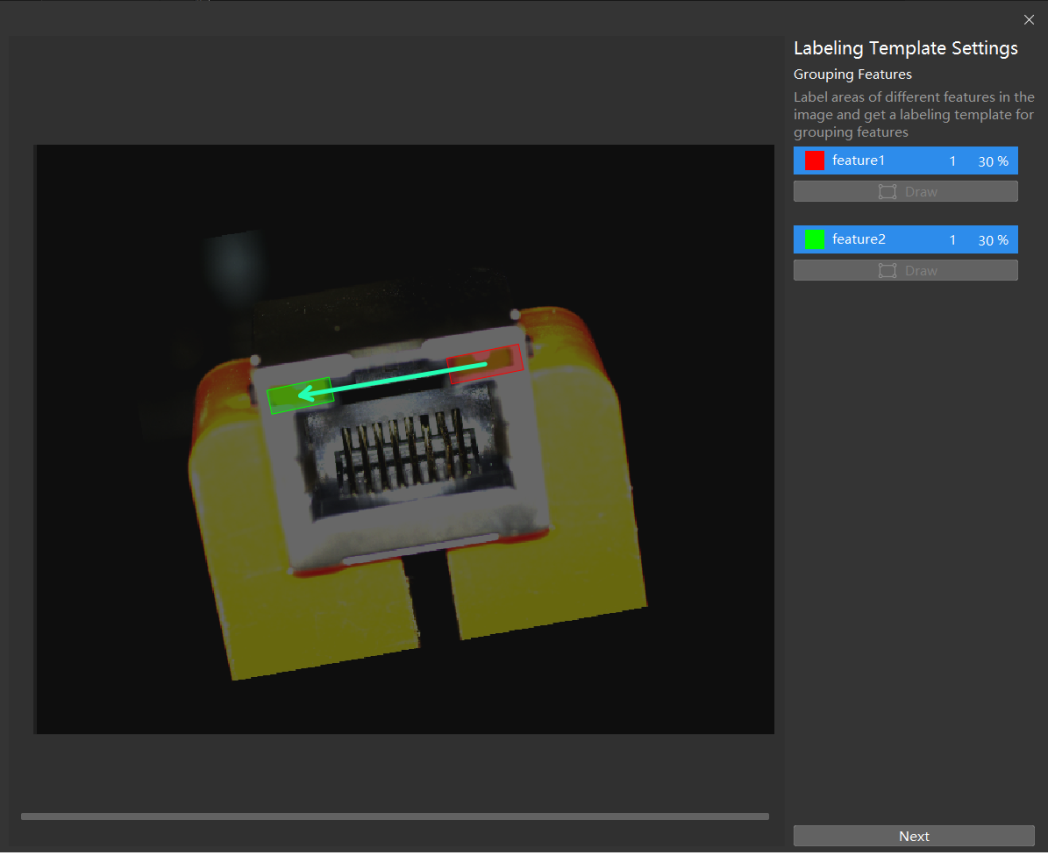
Click Draw under feature1 to select the first feature and then click Draw under feature2 to select the second feature. Select
 of the feature frame to adjust the expected image orientation. Click Next upon the setting.
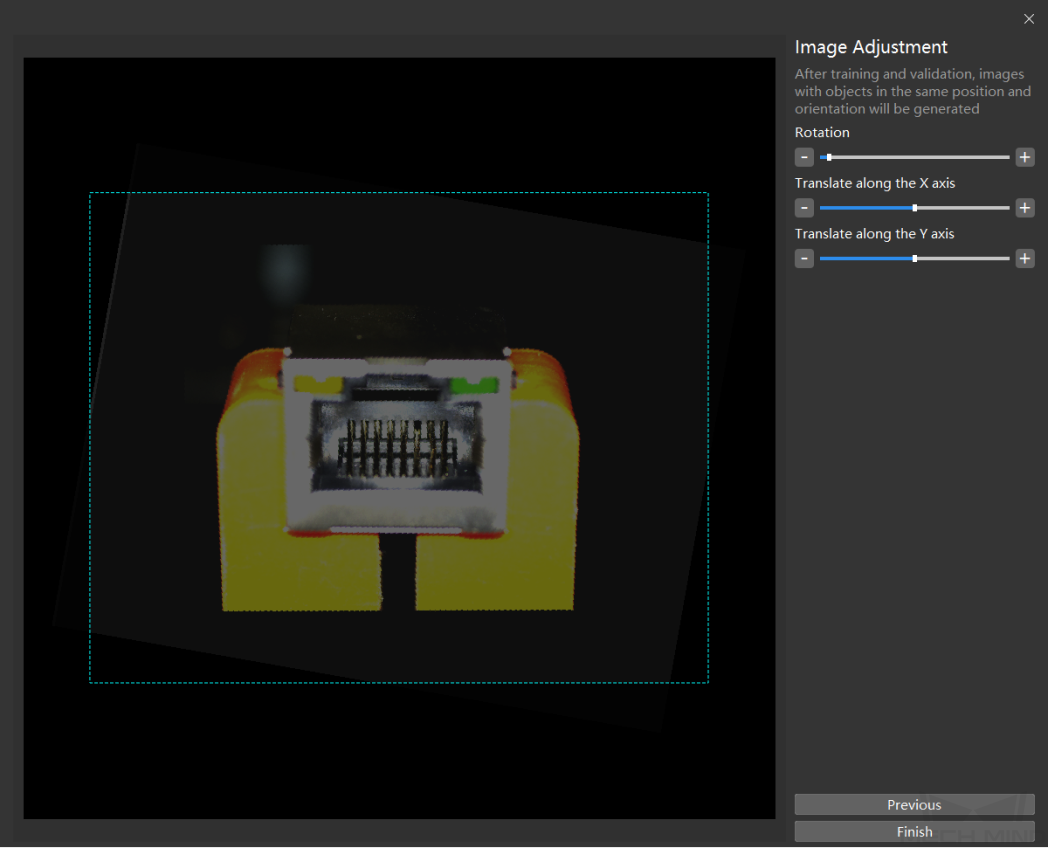
Drag the slider or click − and + to adjust the image to an expected orientation and position, and click Finish to confirm settings.
-
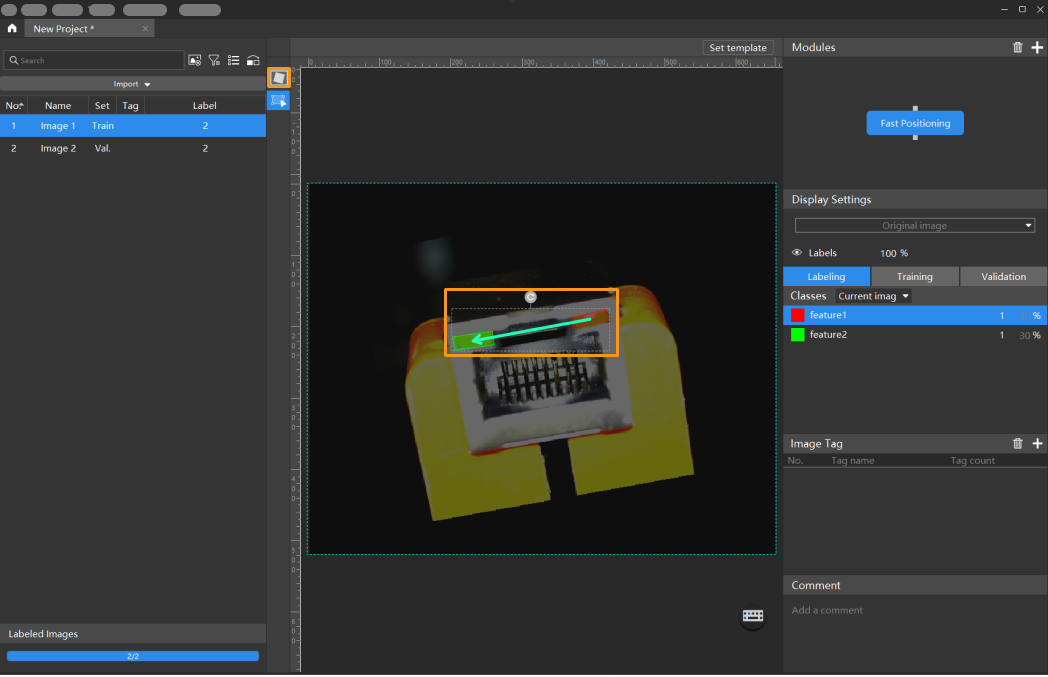
Modify the labeling: Click
 and then click Set template. You can translate and rotate the feature frames to cover both features. Repeat the operations to label all images. Click here to view how to use labeling tools.
-
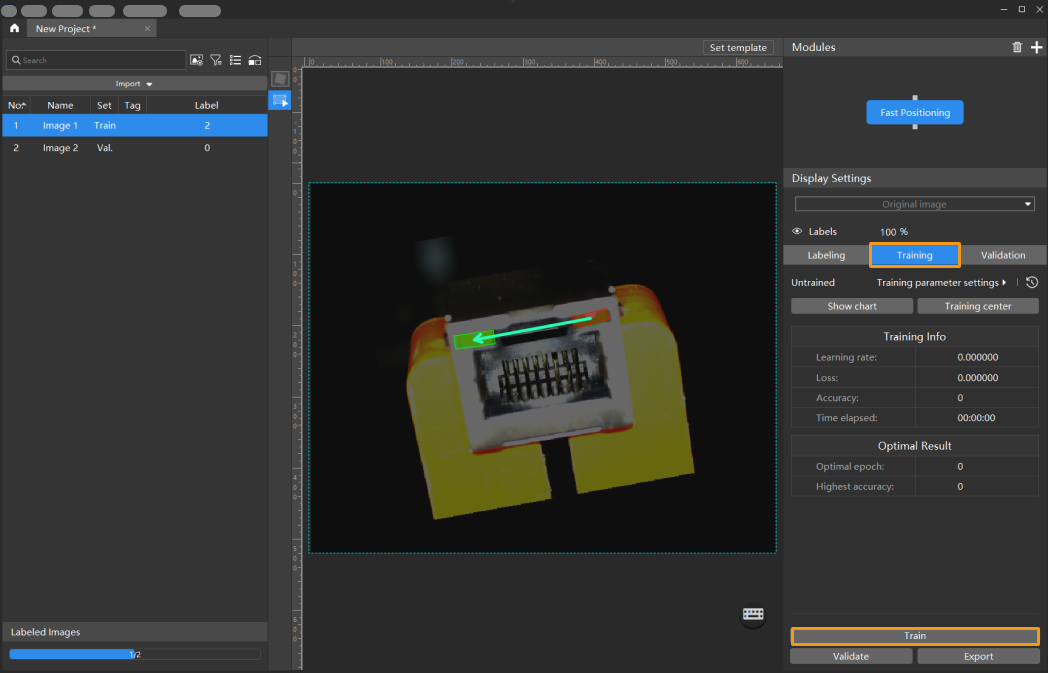
Train the model: Switch to the parameter bar of Training and click Train.
-
Validate the model: After the training is completed, click Validate to validate the model and check the results.
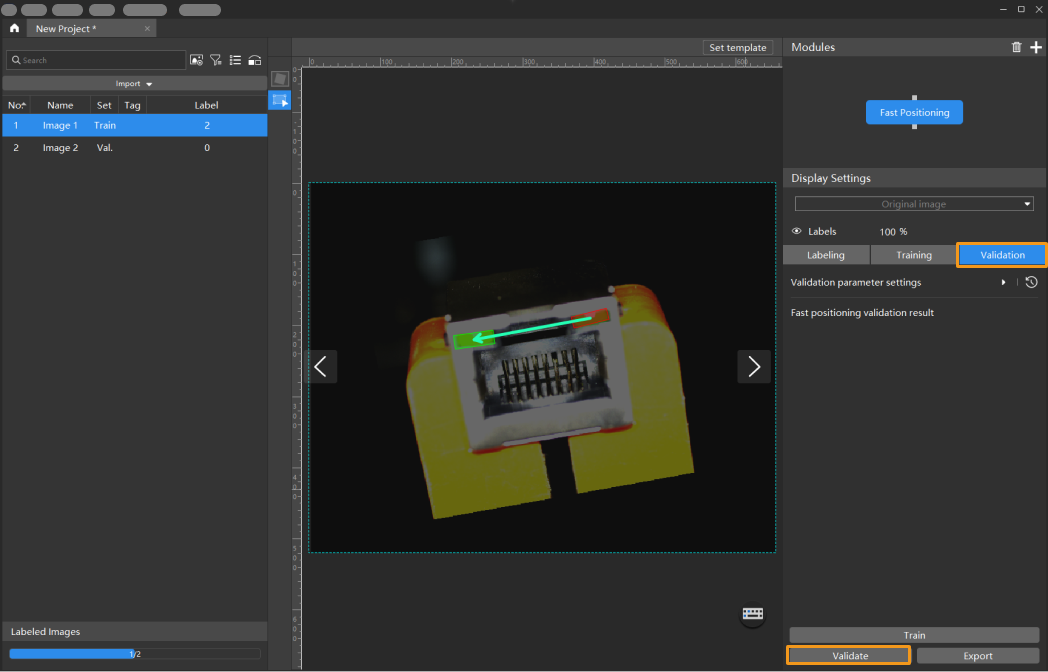
After validation, you can view the fast positioning results of the selected image in the parameter bar of Validation. You can also click ▼ on the right side of Original image to switch to the Inference Result. In this way, the original image is switched to the image that has undergone pose correction.
-
Export the model: Click Export and select a directory to save the trained model.
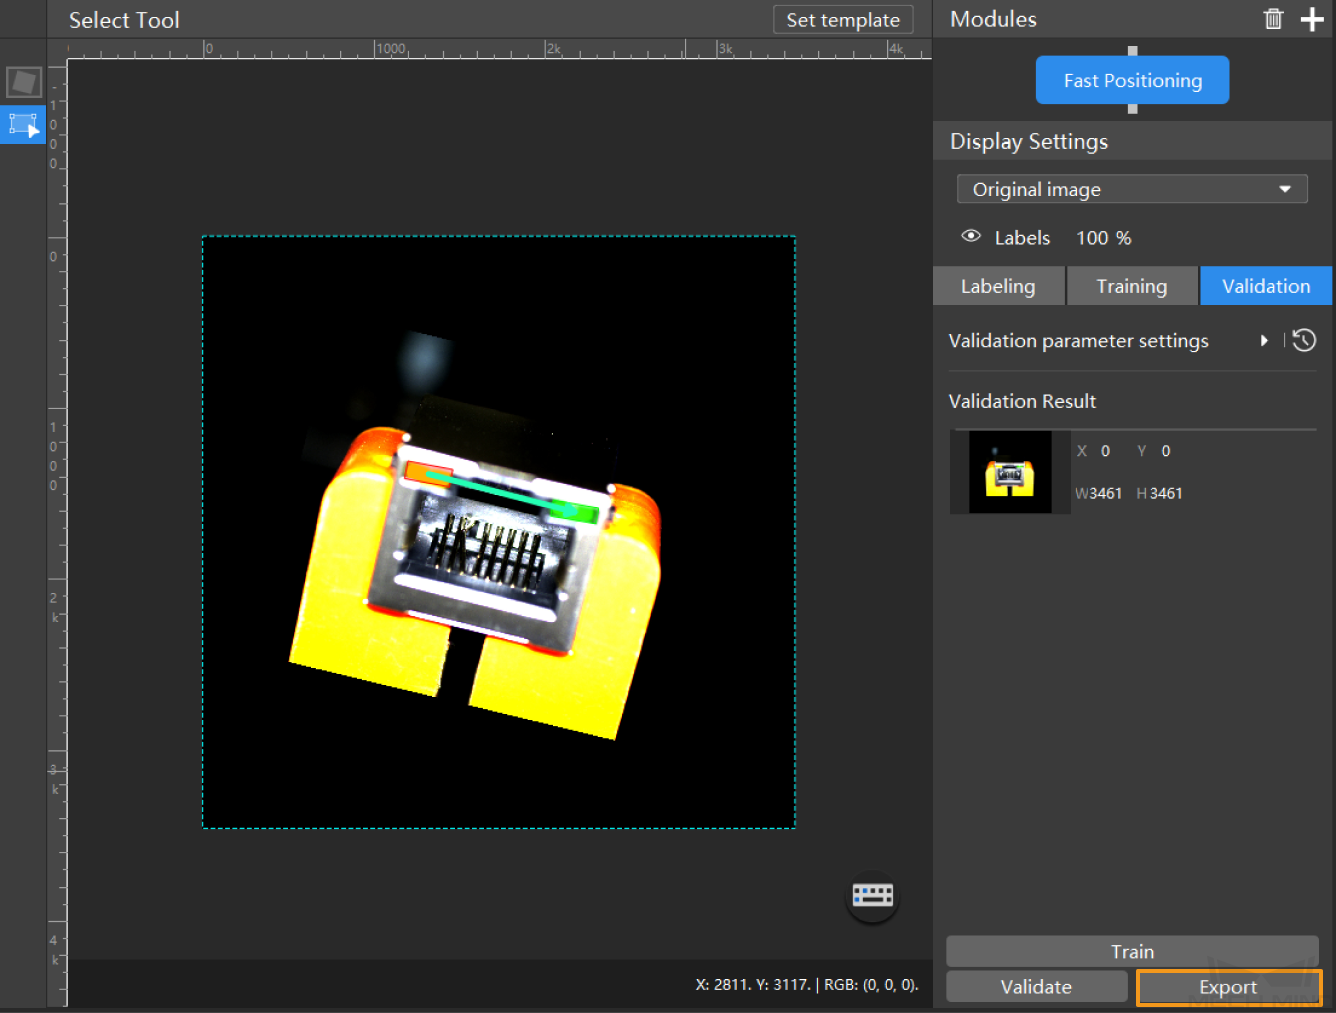
The exported model can be used in Mech-Vision and Mech-DLK SDK. Click here to view the details.