Introduction to Labeling Tools
OK Label
Use the OK Label ![]() to label an image as OK.
to label an image as OK.
-
Select an image from the image list and then click the OK Label on the toolbar. The image will be labeled as OK.
Defect Labeling Tools
Defect labeling tools can label the defects in images to provide the information required by deep learning training.
You can choose among the following labeling tools built in the software according to actual needs.
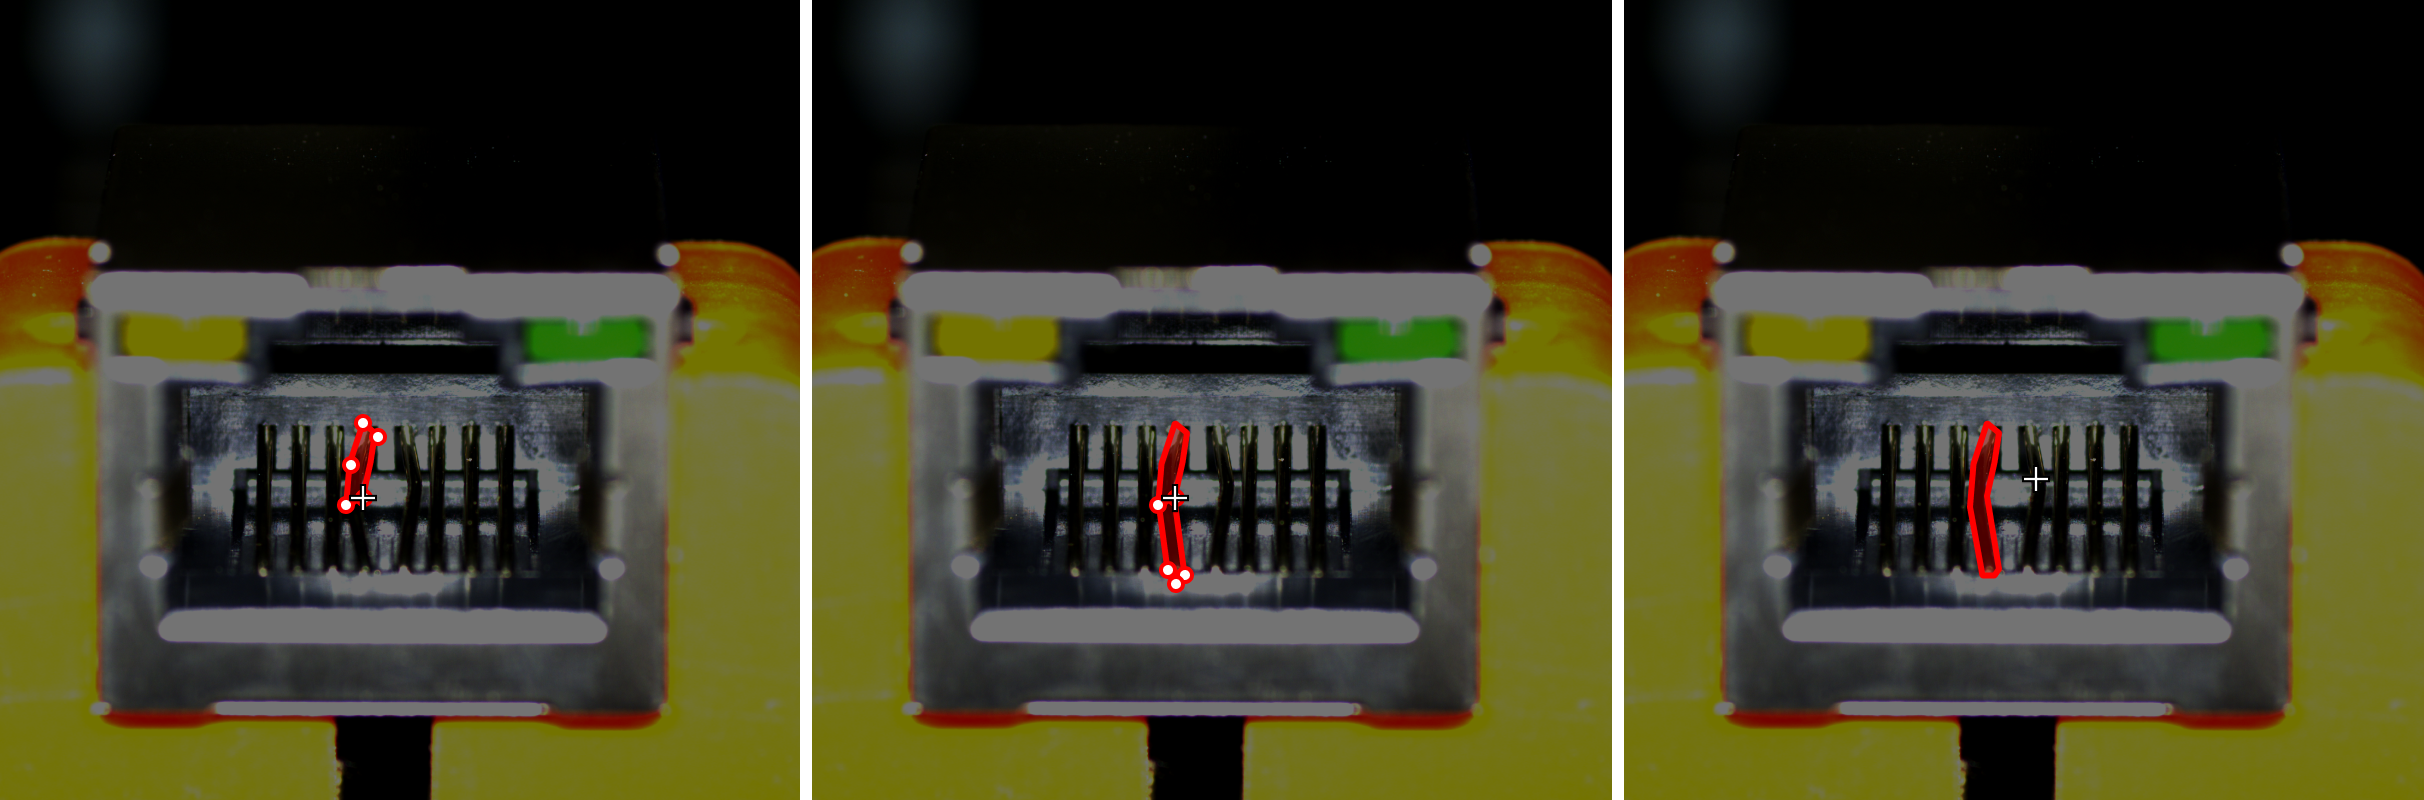
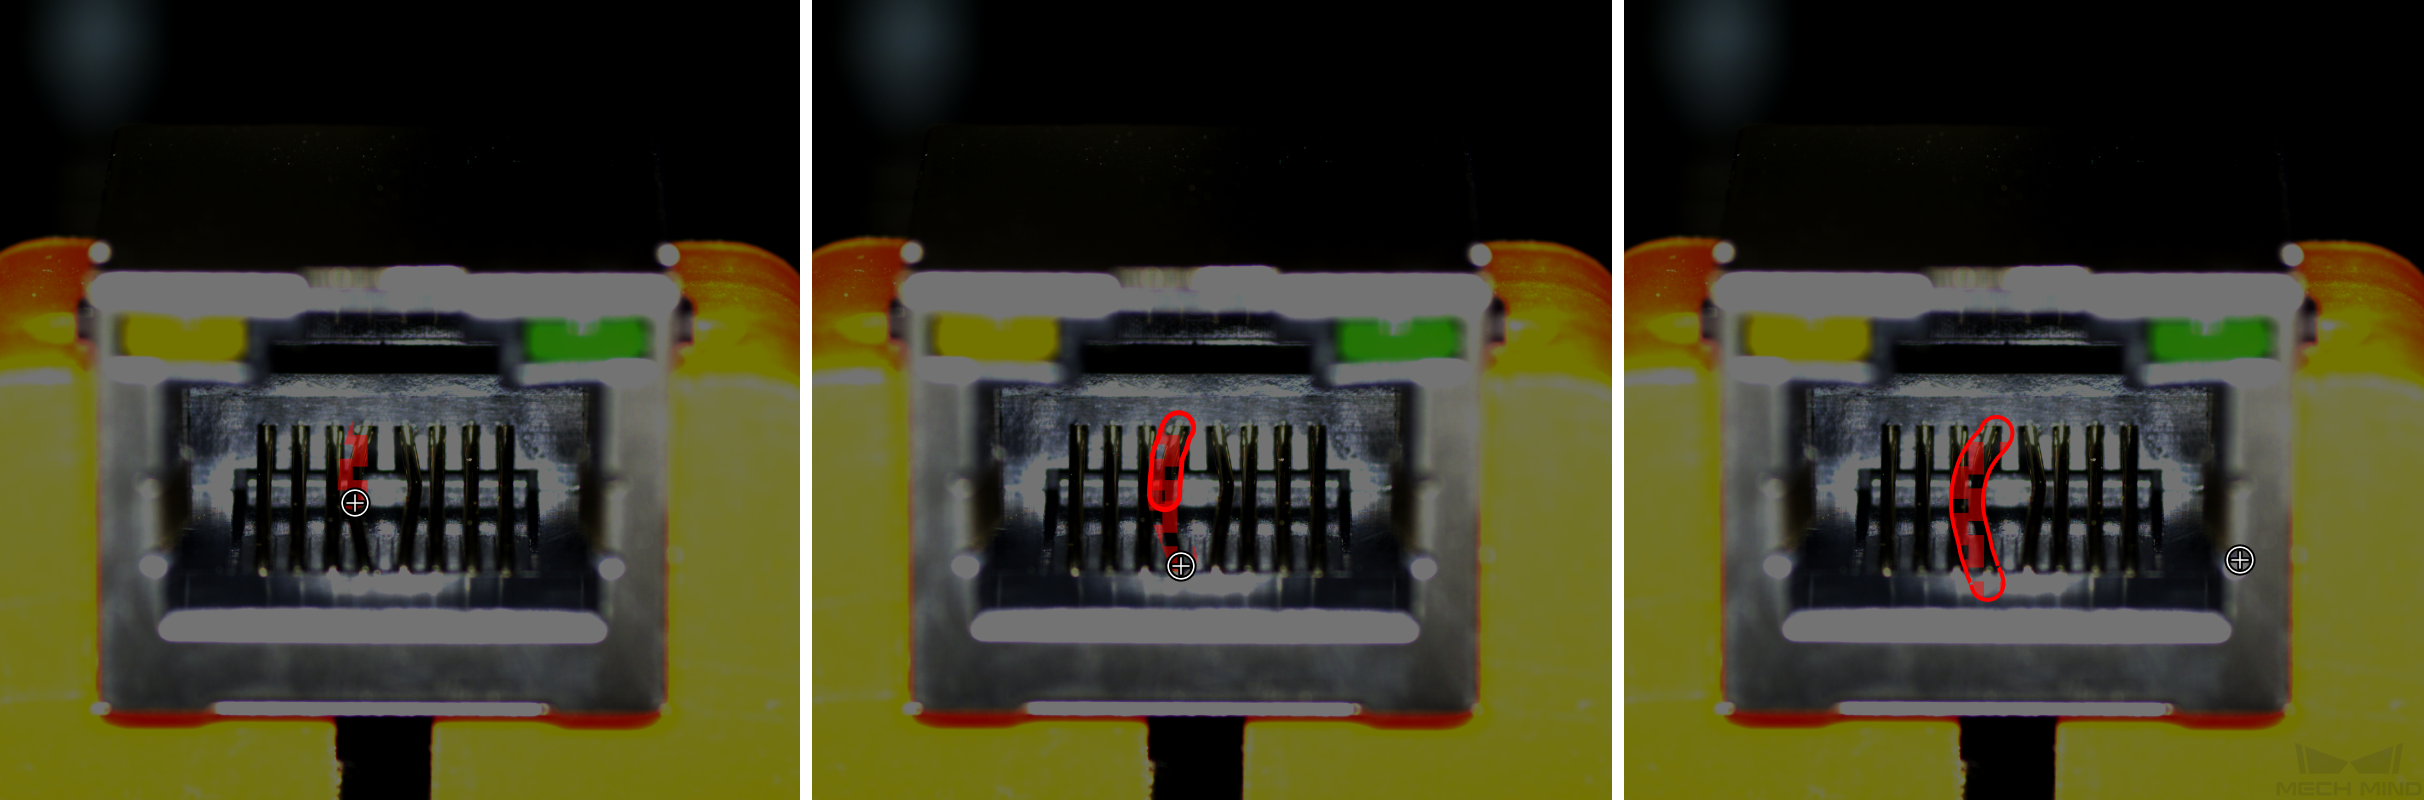
Polygon Tool
The Polygon Tool can draw polygon labels with more vertices, which is suitable for regular defects.
-
Click
 (or press P on the keyboard).
 -
Click the first position (vertex) in the selection area, then click the second one, third one, etc., to draw the labels, and right-click to finish.
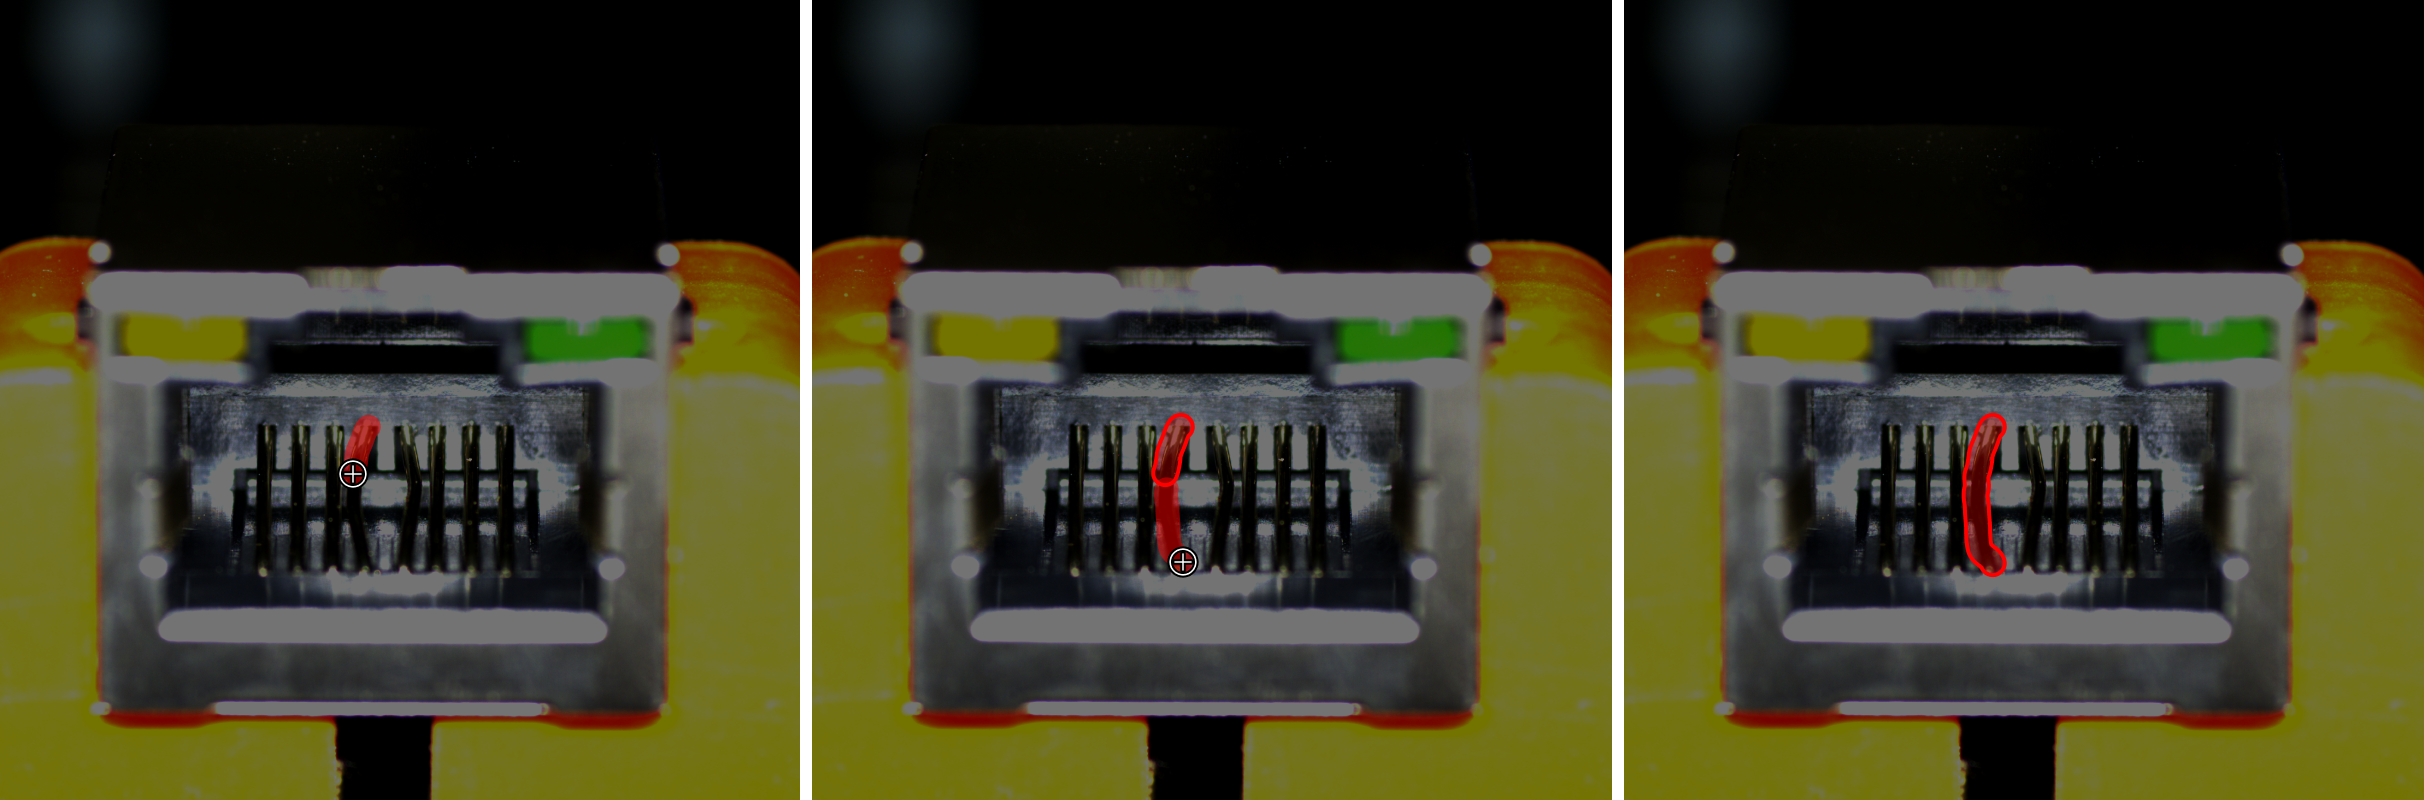
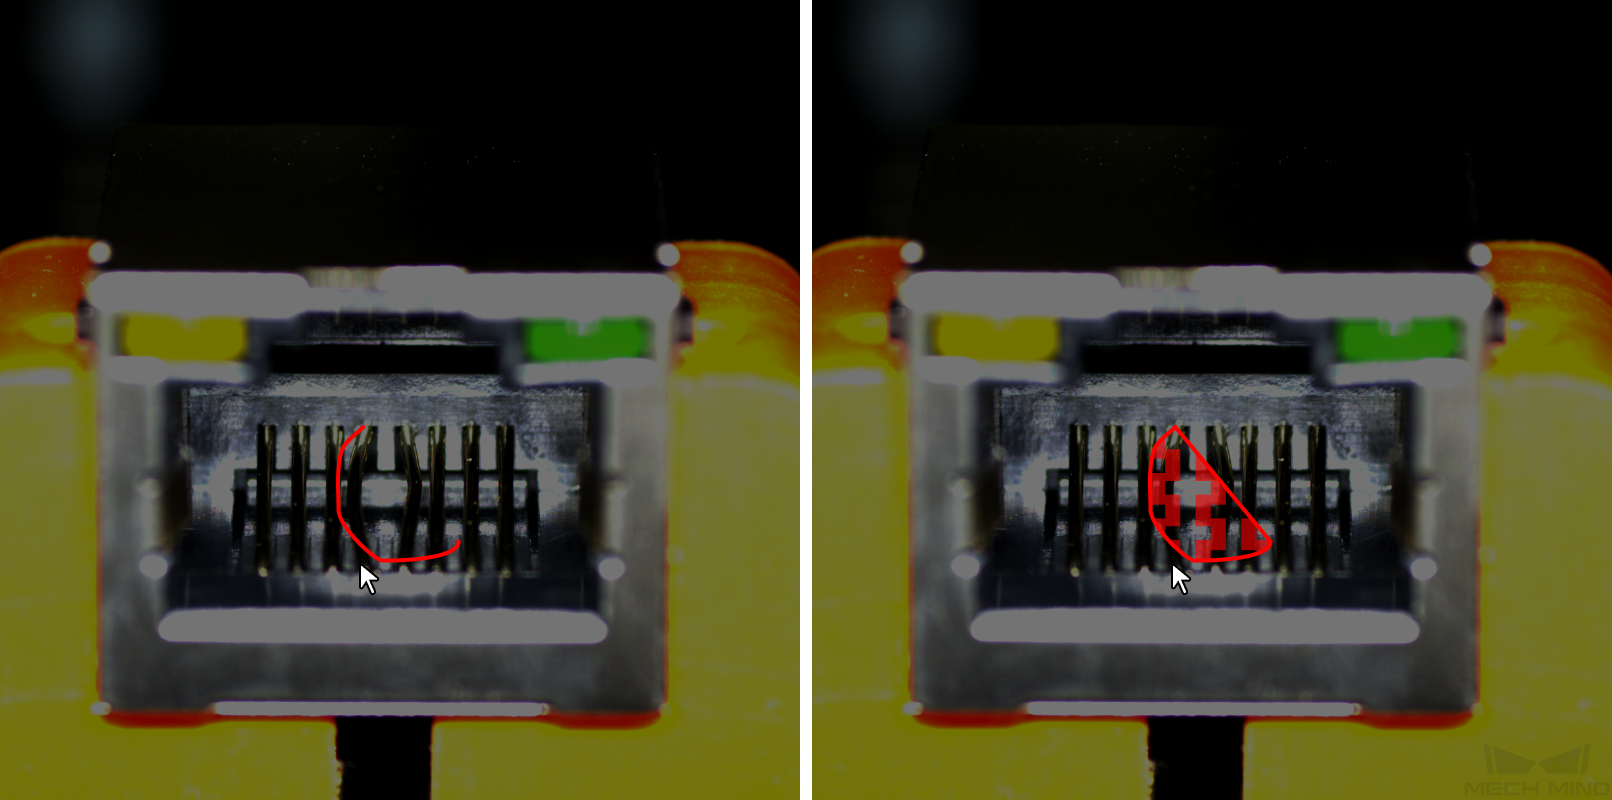
Brush Tool
Use the Brush Tool to draw labels of any shape. This tool is suitable for defects with complex shapes.
-
Right-click
and then click  (or press B on the keyboard).
 -
Adjust the slider to set the thickness of lines according to the size of defects.
-
Long press the left mouse button in the selection area, move in any direction, and then release the left mouse button to finish the drawing.
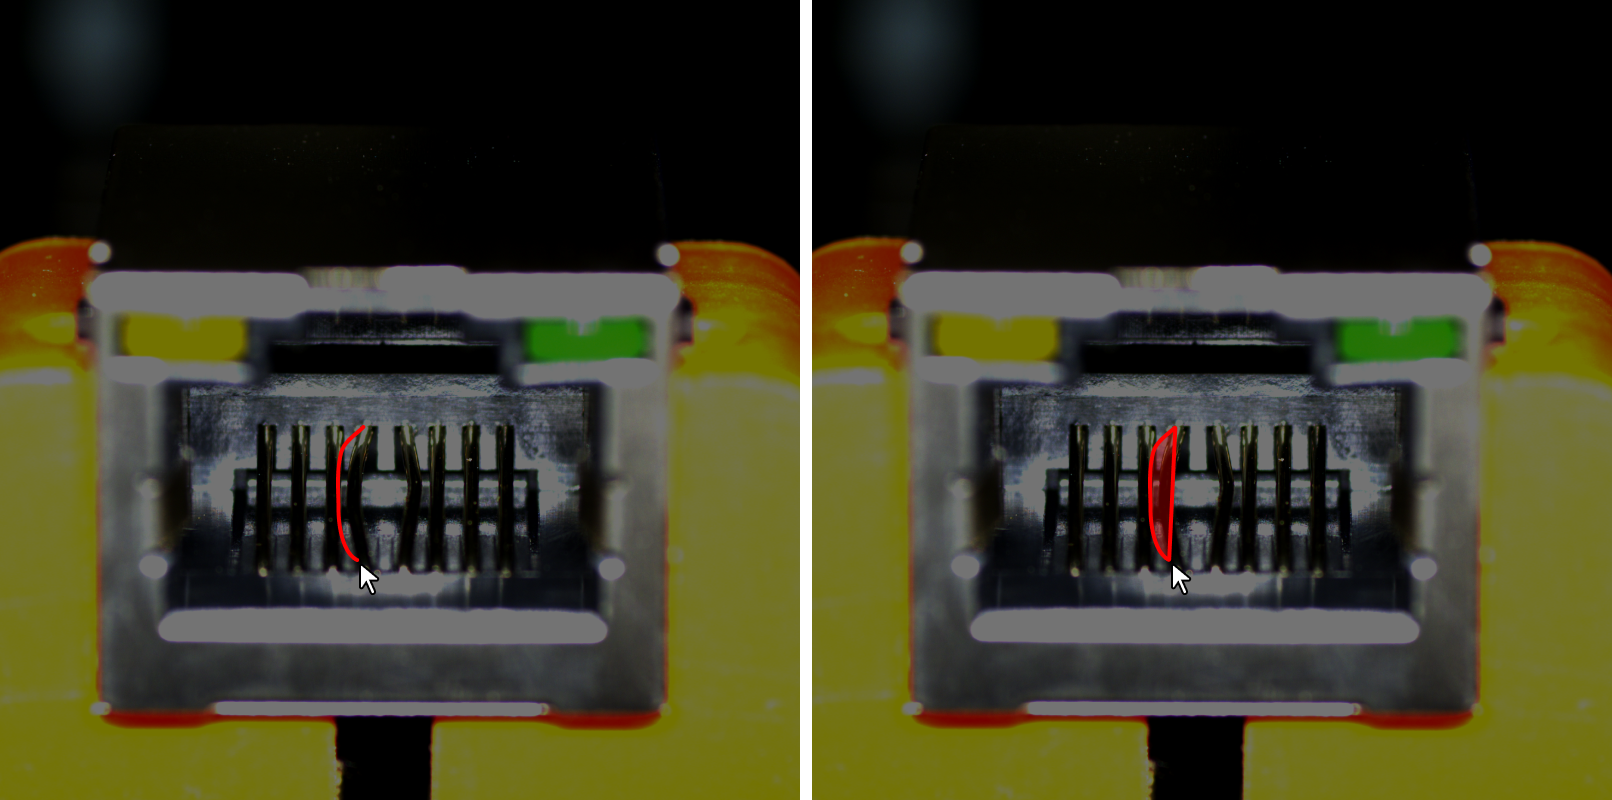
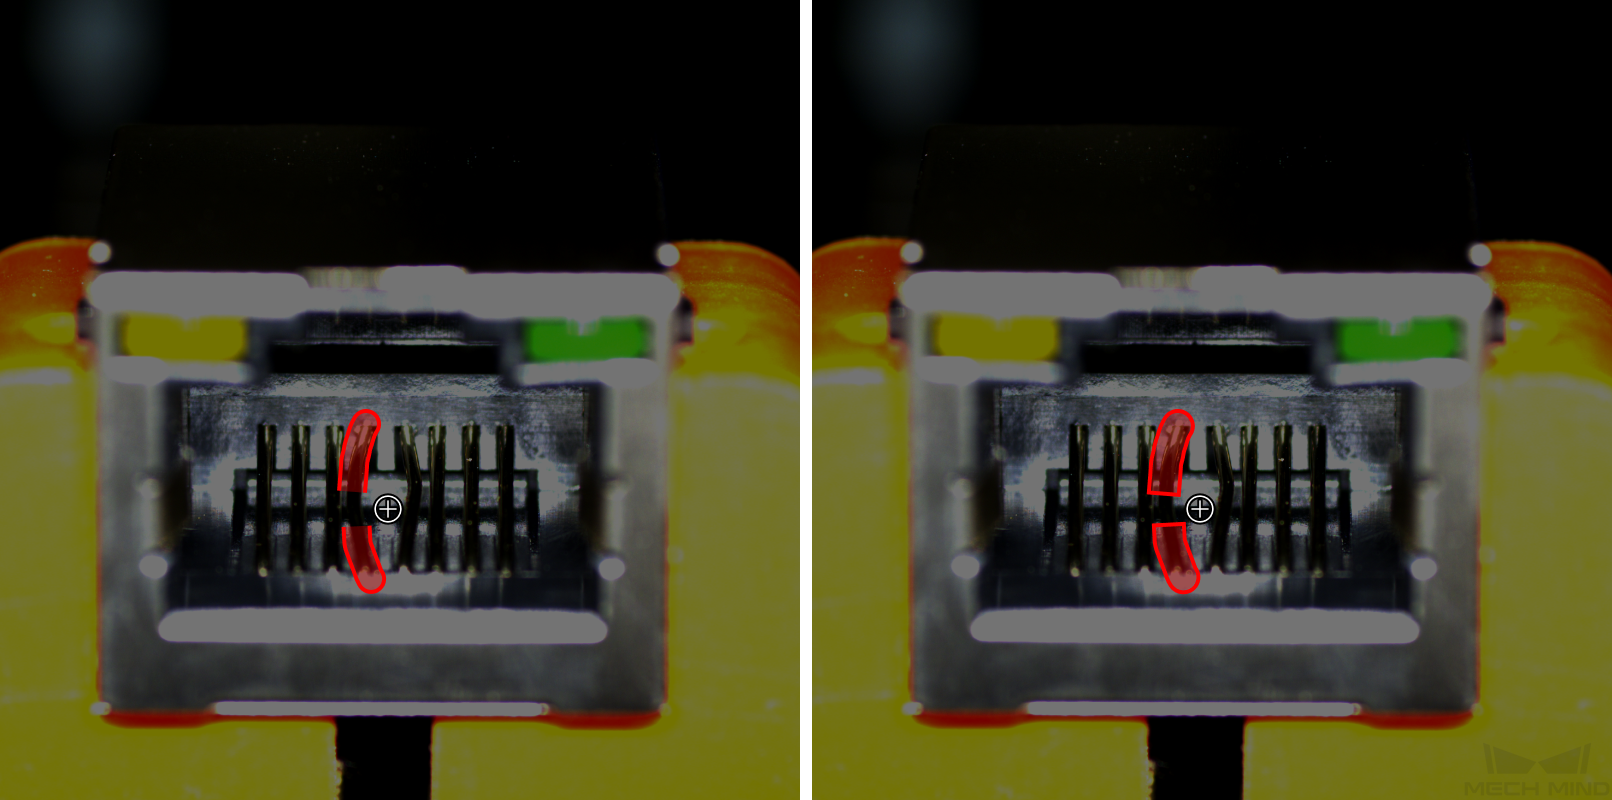
Autofill Lasso Tool
Draw arbitrarily shaped labels by forming closed shapes with brush paths. This tool is used for defects with complex shapes.
-
Right-click
and then click  (or press A on the keyboard).
 -
Adjust the slider to set the thickness of lines according to the size of defects.
-
Long press the left mouse button in the selection area and move in any direction to form closed shapes with the starting point and thus finish the drawing.
Mask Tool
If there are some irrelevant parts that may interfere with model training/inference, you can use the Mask Tool to cover such parts. The masked parts will not be involved in training/inference. For example, the object surface features that should not be judged as defects but are similar to defects, need to be masked out.
You can choose among the following three mask tools built in the software according to actual needs.
|
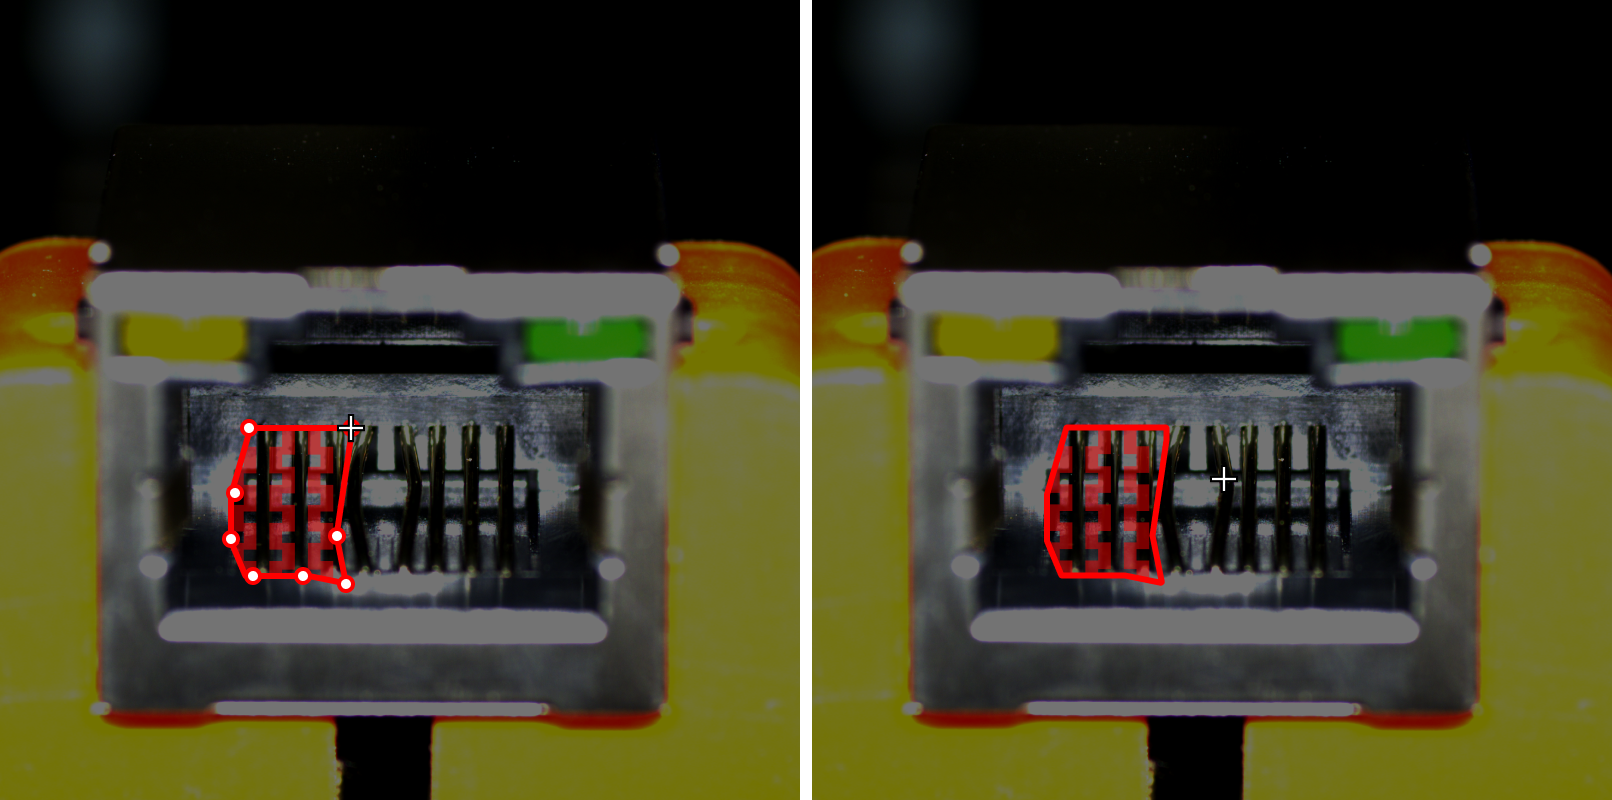
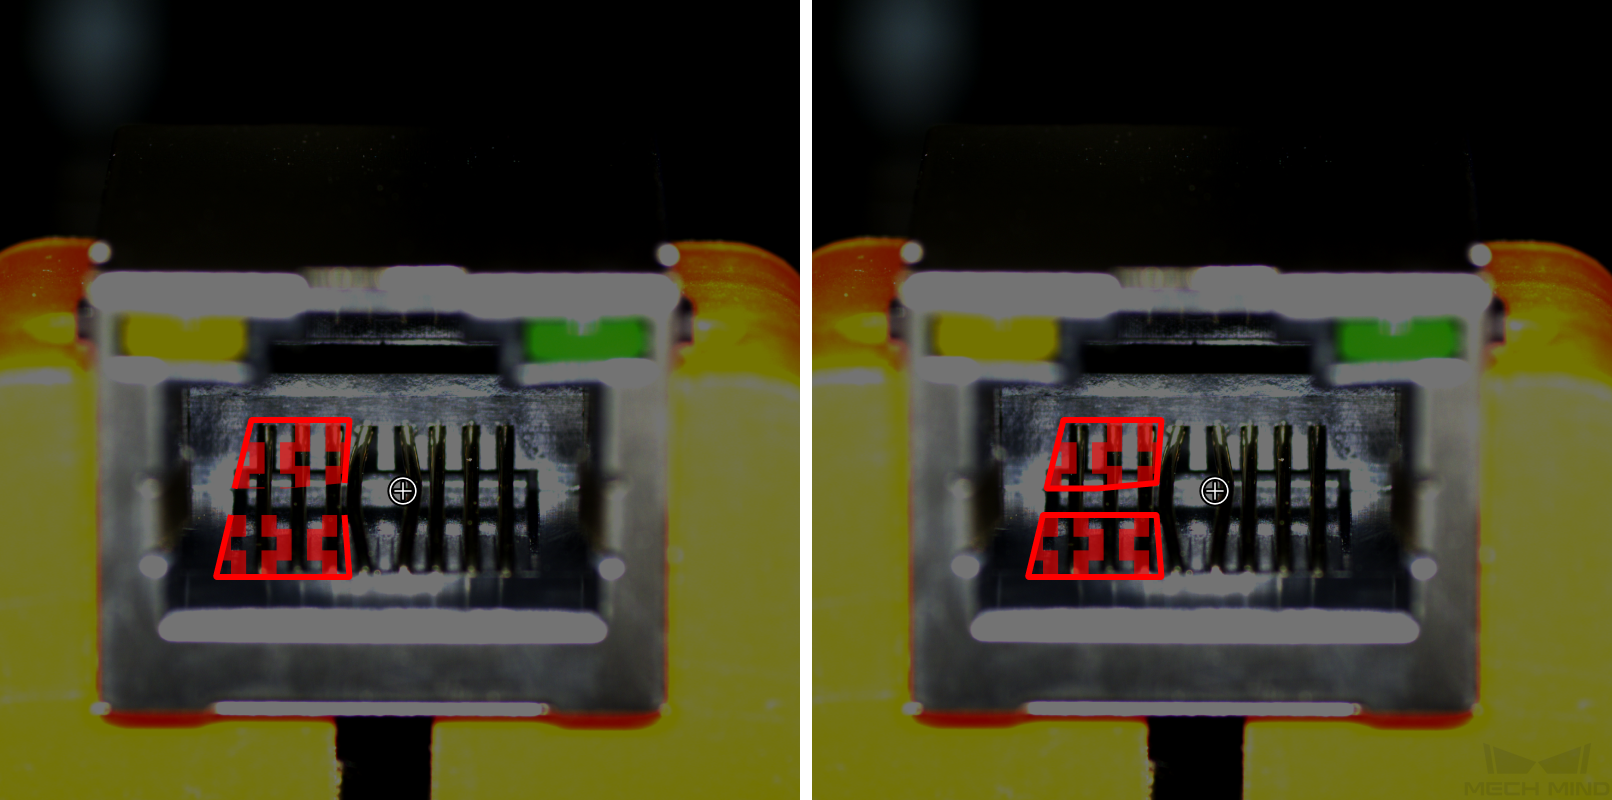
Mask Polygon Tool
-
Click
 (or press Shift + P on the keyboard)
 -
Set Mask Type and Mask fill.
-
Click the first position (vertex) in the selection area, then click the second one, third one, etc., to draw the labels, and right-click to finish.
Labeling Eraser Tool
The Labeling Eraser Tool can be used to erase the labeled region.
-
Click
 (or press E on the keyboard)
 -
Long press the left mouse button in the selection area and move in any direction.
Adjust the slider to change the eraser size.
Mask Eraser Tool
The Mask Eraser Tool can be used to erase the masks.
-
Right-click
and then click  (or press Shift + E on the keyboard)
 -
Long press the left mouse button in the selection area and move in any direction.
Adjust the slider to change the eraser size.
Grid Cutting Tool
In industrial inspection scenarios, if the size of images captured by the camera is large, smaller defects may be inconspicuous. If training in such a case is performed, defects are difficult to detect. You can use the Grid Cutting Tool to cut the large images into cell images of the same size according to the set dimension. Defect labeling should be completed for all images before the application of this tool.
-
Click
 (or press U on the keyboard).
 -
Set Rows and Columns and then click Apply.
-
Place the cursor in the parameter boxes and then scroll the mouse wheel.
-
Enter values in the parameter boxes.
Note that the number of rows and columns should not be too large, or else the number of cell images after cutting is great, which slows down subsequent inference.
-
Grid Selection Tool
Right-click ![]() and then click
and then click ![]() (or press I on the keyboard) to open the Grid Selection Tool. By default, the cell images with defect labels are checked, which will be added into the training/validation set. You can select cell images with and without defects on demand.
Click the Preview button in the upper right corner of the selected image to preview the cell images.
(or press I on the keyboard) to open the Grid Selection Tool. By default, the cell images with defect labels are checked, which will be added into the training/validation set. You can select cell images with and without defects on demand.
Click the Preview button in the upper right corner of the selected image to preview the cell images.
-
Select defects: Select all the cell images containing defects to put into the training/validation set.
-
Select all: Select all the produced cell images into the training/validation set, and set those containing no defects to OK.
-
Clear selection: Clear the selections on cell images.