Set up Standard Interface Communication with KUKA (KSS 9.x)
This guide shows how to load the Standard Interface program files to a KUKA robot (KSS 9.x), and set up the Standard Interface communication between Mech-Mind Vision System and the robot.
| In this section, you will load the Standard Interface program and the configuration files to the robot system to establish the Standard Interface communication between the vision system and the robot. |
Preparation
Check Hardware and Software Versions
|
The models and versions listed below are tested and can be used. For other models and versions, you may refer to this guide for operation. If any issues occur, please contact Mech-Mind Technical Support. |
-
Number of robot axes: 6
-
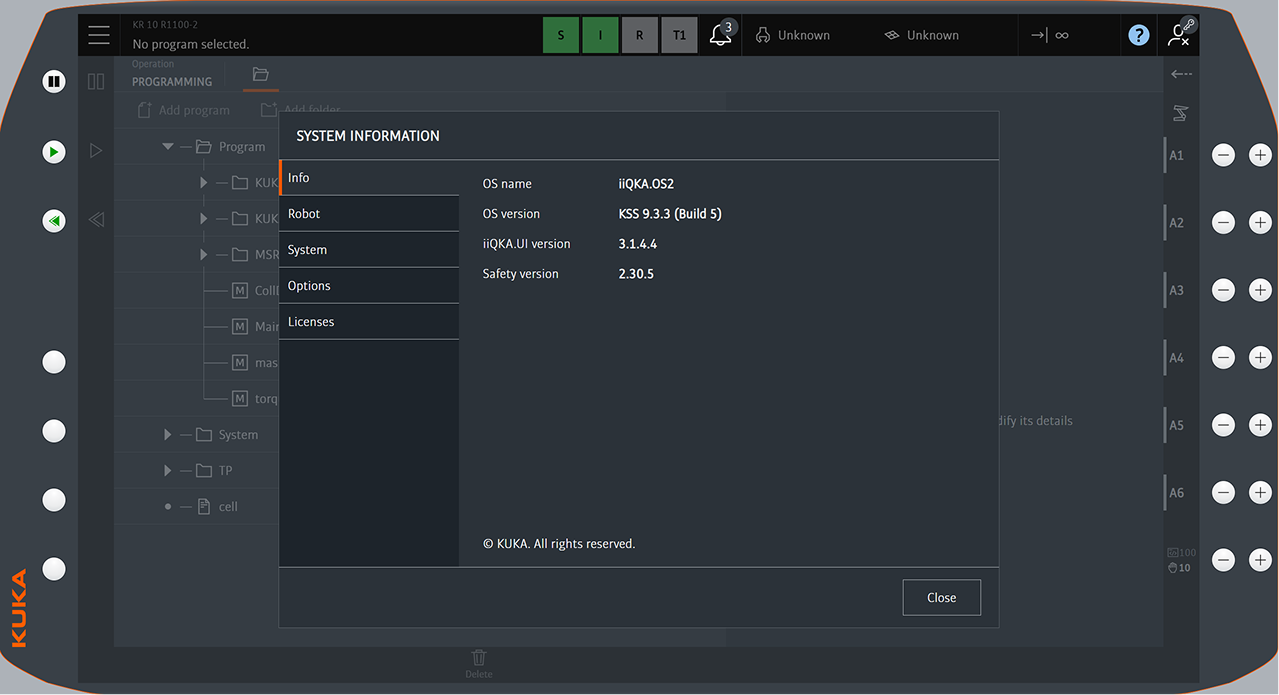
Controller system software version: KSS 9.2 or above
Click here for instructions
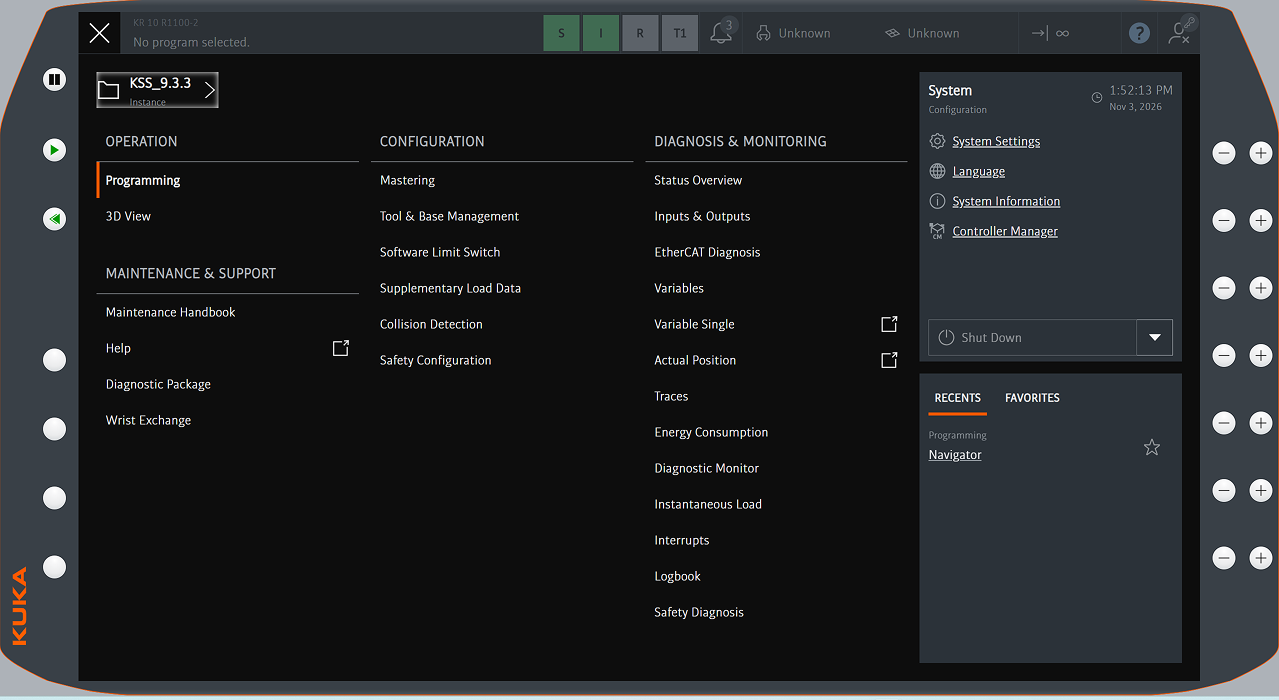
On the teach pendant, select to view the system version.
-
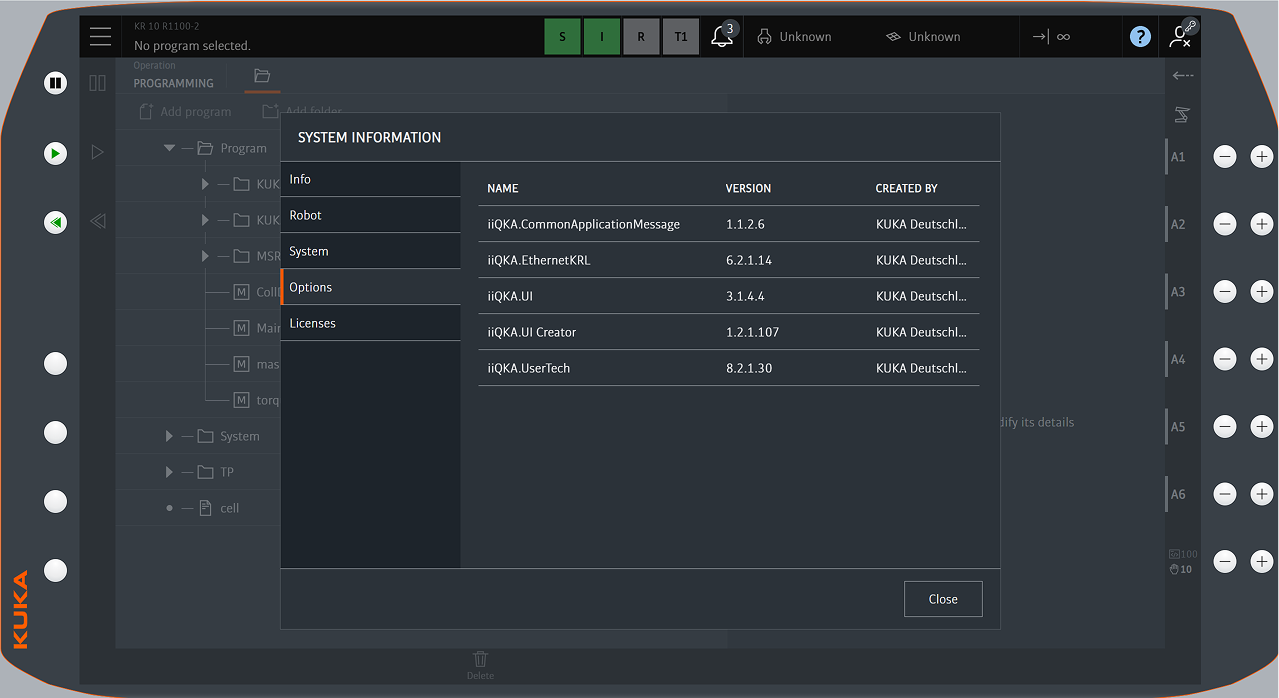
Add-on software package: Ethernet KRL (V6.1.2.12 or above)
Click here for instructions
On the teach pendant, select to view the version information of Ethernet KRL.
-
Offline programming and simulation software (iiQWorks.Sim): iiQWorks.Sim 1.2 or above needs to be installed on the IPC or computer used for loading the program files.
|
The operations on the teach pendant in this section are demonstrated with KSS 9.2. The operations may vary with different versions of the teach pendant. |
Set up the Network Connection
Connect the Hardware
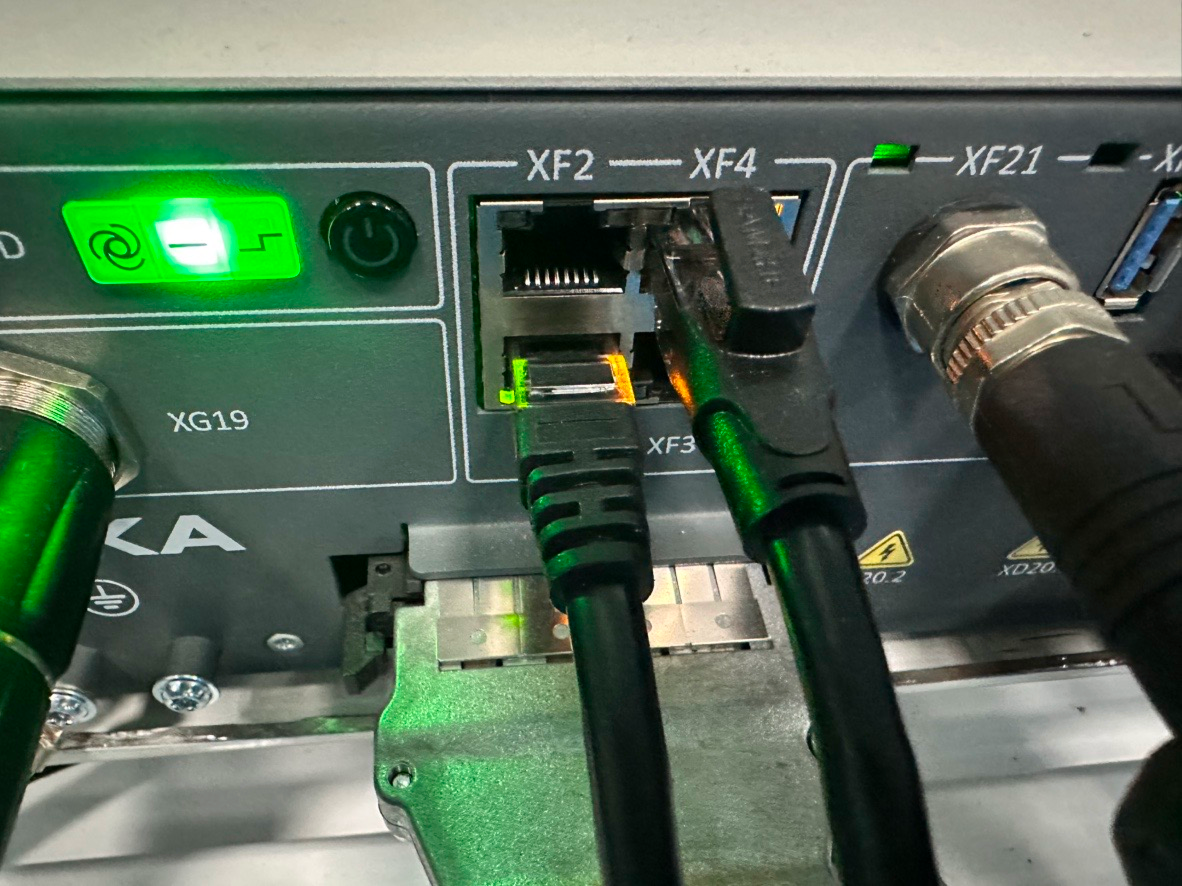
Plug one end of the network cable into the network port of the IPC, and plug the other end into port XF4 of the robot controller.
Switch to the Administrator User Group
-
Tap the User/SPOC display.
-
Select the “Administrator” user group.
-
Enter the password (the default password is “kuka”), and then click Login to confirm.
Set the IP Address
-
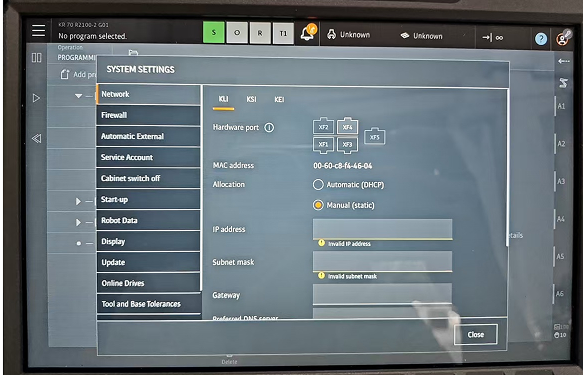
On the teach pendant, select to open the System Settings interface.
-
Select , confirm that the hardware port XF4 is connected, set Allocation to Manual (static), and then specify the IP address and Subnet mask.
-
In the IPC, set the IP address of the IPC.
The IP address of the IPC must be in the same subnet as that of the robot. That is, the network portions and subnet masks of both IP addresses must be the same. For example, 192.168.100.169/255.255.255.0 and 192.168.100.170/255.255.255.0 are in the same subnet.
Connect the Robot via iiQWorks.Sim
-
Open the iiQWorks.Sim software on the IPC.
-
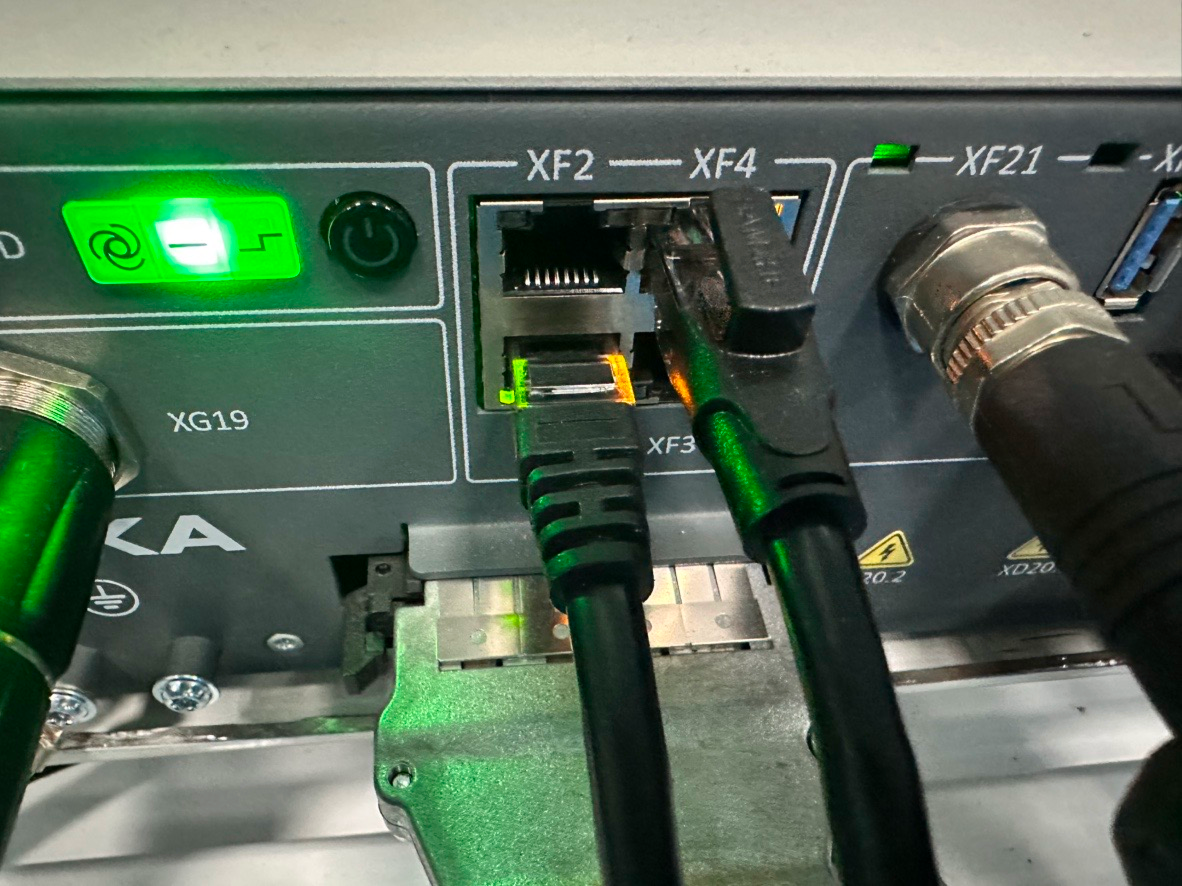
Plug one end of the network cable into the network port of the IPC, and plug the other end into port XF1 of the robot controller. The IPC will automatically obtain the network port information.
-
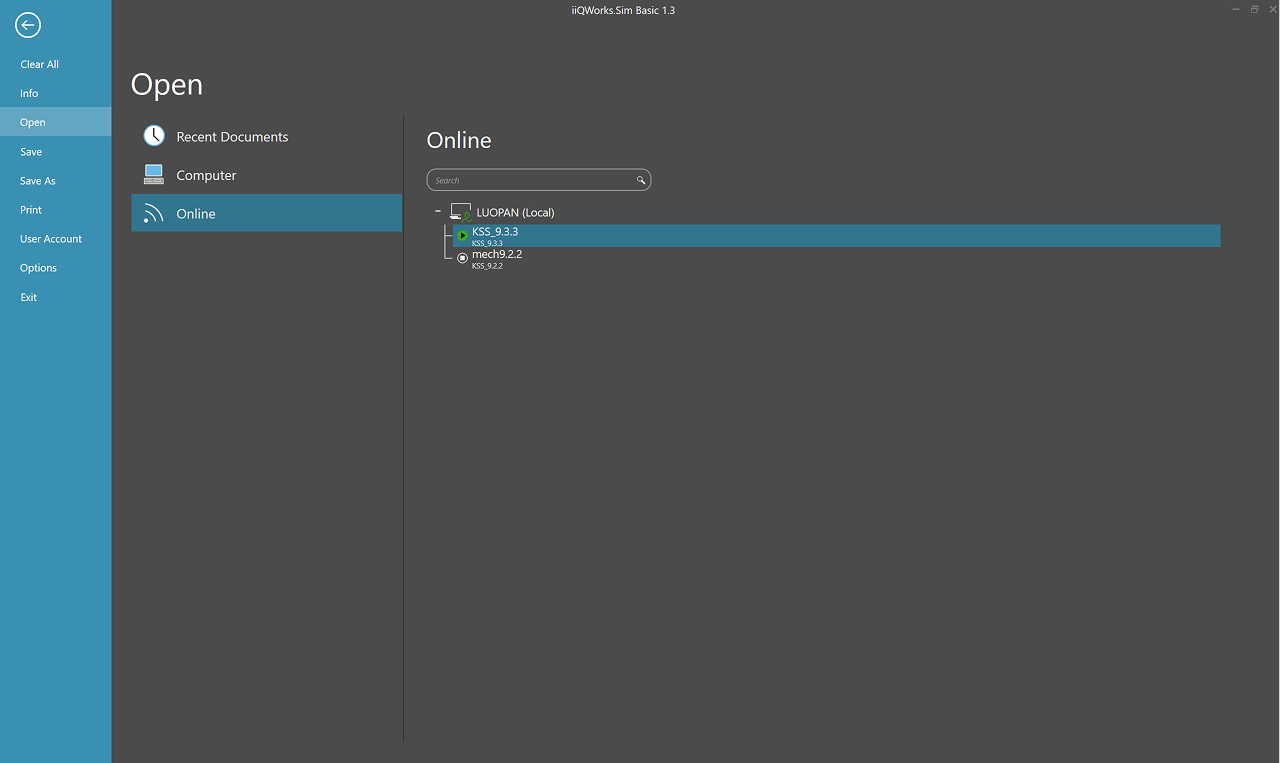
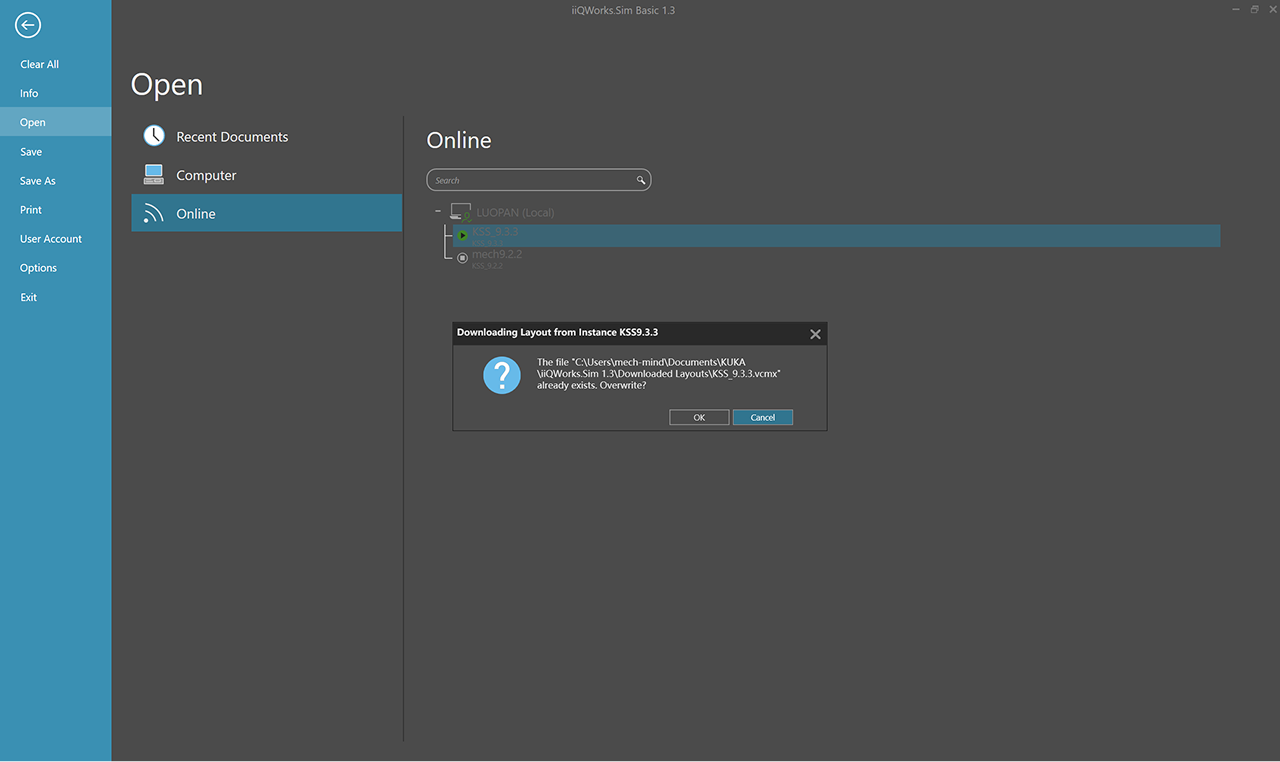
Select to view the online robots.
-
Double-click the robot to be connected. In the dialog box that appears, click OK to complete the connection.
Set up Robot Communication Configuration
-
Open Mech-Vision. You may enter different interfaces. Create a new solution according to the instructions below.
-
If you have entered the Welcome interface, click New blank solution.

-
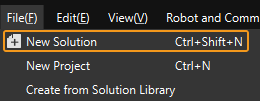
If you have entered the main interface, click on the menu bar.
-
-
Click Robot Communication Configuration on the toolbar of Mech-Vision.
-
In the Robot Communication Configuration window, complete the following configurations.
-
Click the Select robot drop-down menu, and select Listed robot. Click Select robot model, and select the robot model that you use. Then, click Next.
-
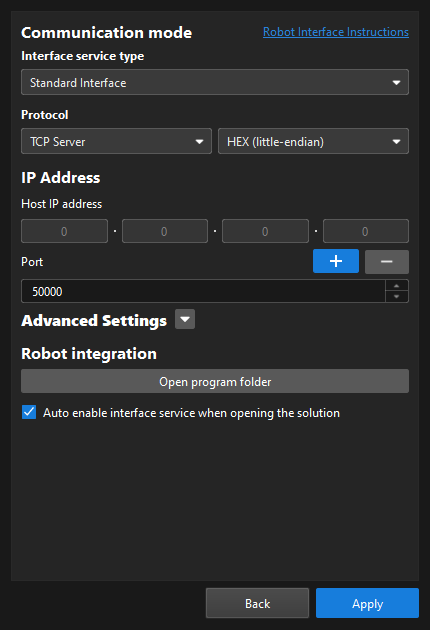
In the Communication mode section, select Standard Interface for Interface service type, TCP Server for Protocol, and HEX (little-endian) for the protocol format.
-
It is recommended to set the port number to 50000 or above. Ensure that the port number is not occupied by another program.
-
Under Robot integration, click Open program folder.
The files needed for subsequent loading will be copied from this folder. Do not close this folder. -
(Optional) Select Auto enable interface service when opening the solution.
-
Click Apply.
-
-
On the main interface of Mech-Vision, make sure that the Robot Communication Configuration switch on the toolbar is flipped and has turned blue.

Prepare Program Files
On the IPC, you can find the program folder in the Communication Component/Robot_Interface/KUKA/KUKA_V9 path in the installation directory of Mech-Vision and Mech-Viz.
If you use another computer to load the program files, copy the program folder from the IPC to that computer first.
|
The
|
Load the Program Files to the Robot
-
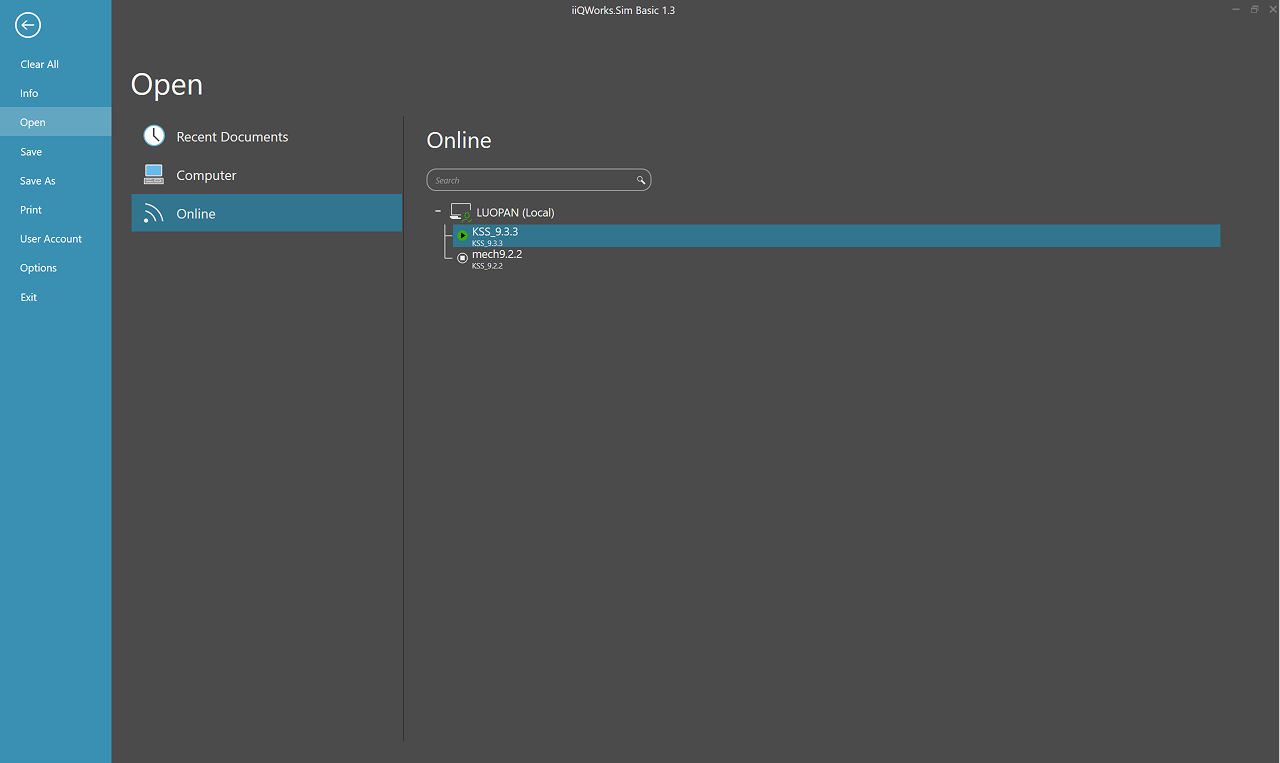
In the iiQWorks.Sim software, select , and then select the corresponding robot controller.
-
In the device list, select , and then click the Load button in the Properties panel on the right.
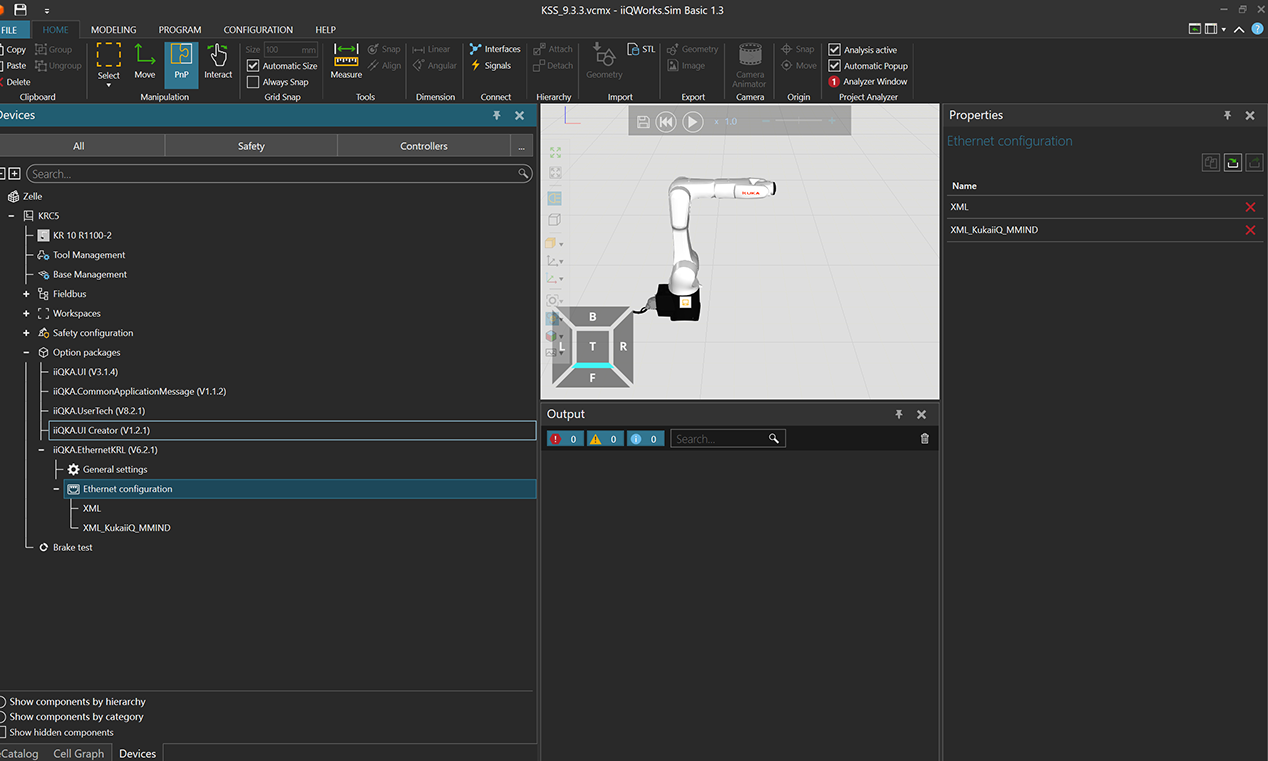
-
In the dialog box that appears, select the XML_KukaiiQ_MMIND.xml file (in the
Communication Component/Robot_Interface/KUKA/KUKA_V9path in the software installation directory), and then click Open. -
Under the Ethernet configuration node, click the XML_KukaiiQ_MMIND.xml file, and then change Server IP and Server port in the Properties panel on the right to the IP address and port number of the IPC.
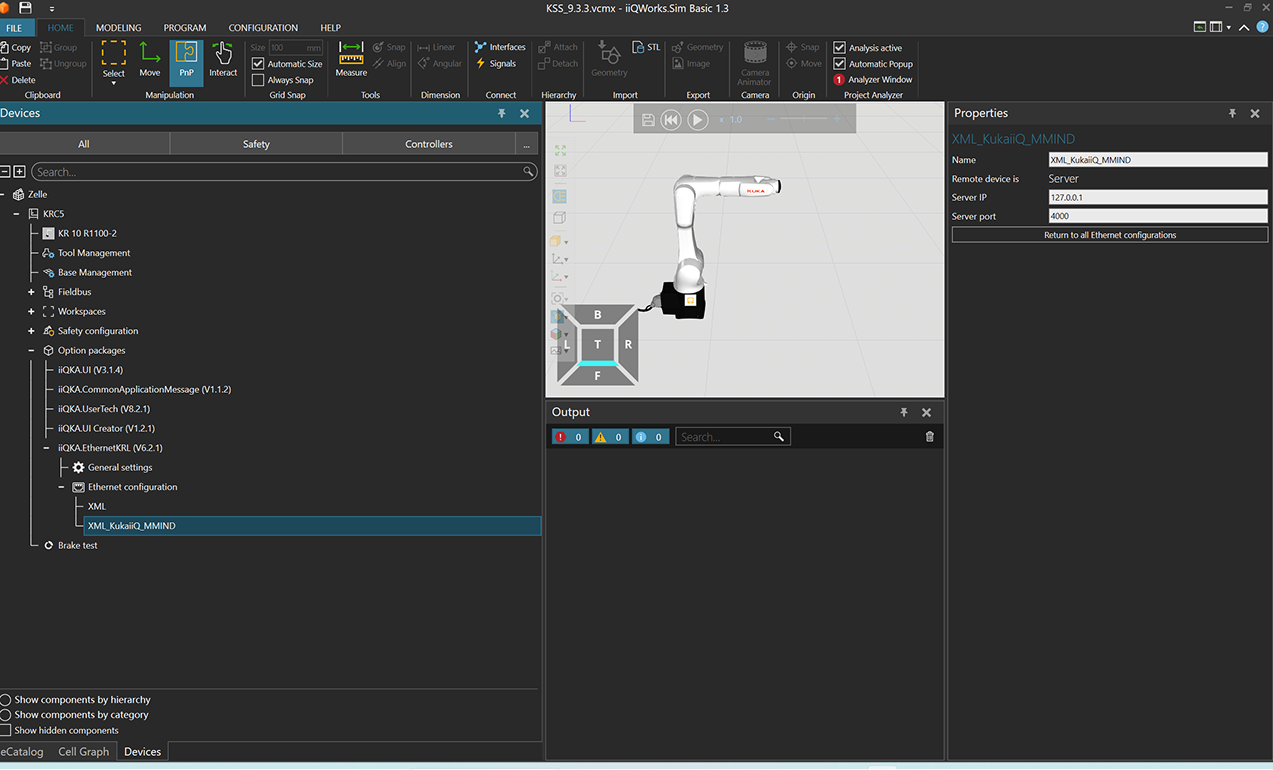
-
In the
Communication Component/Robot_Interface/KUKA/path in the software installation directory, find the “KUKA_V9” folder and copy the folder with Ctrl + C. -
On the menu bar, click the Program menu, and the robot program interface will be displayed. Select Program and paste the “KUKA_V9” folder to the Program directory.
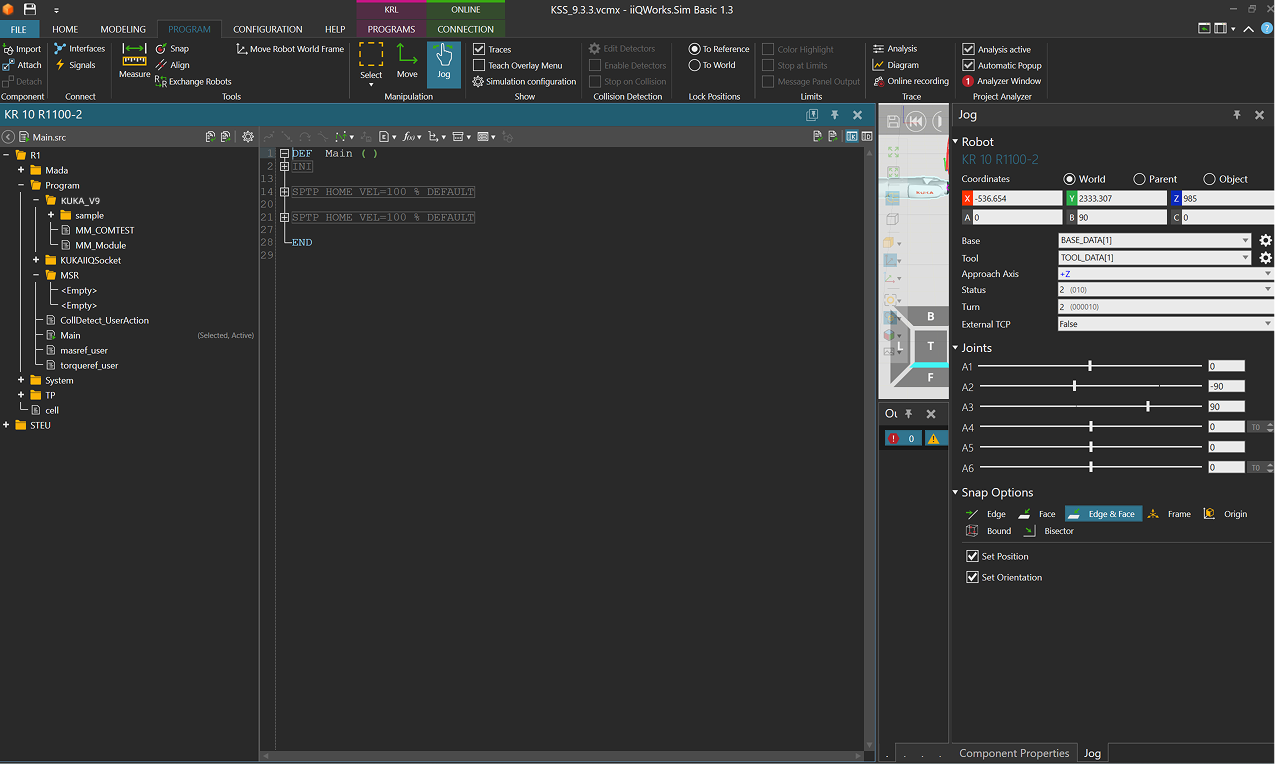
-
On the menu bar, select .
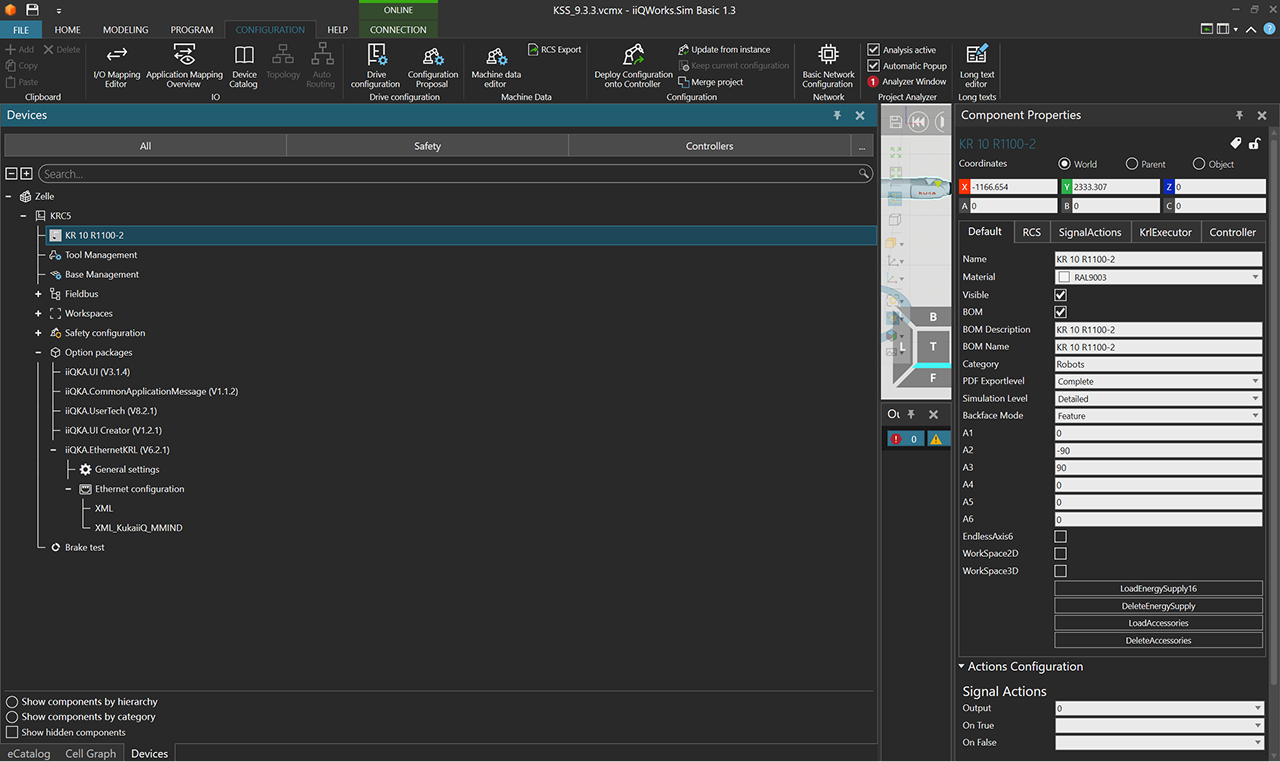
-
In the iiQWorks.Sim Project Deployment dialog box that appears, click Finish.
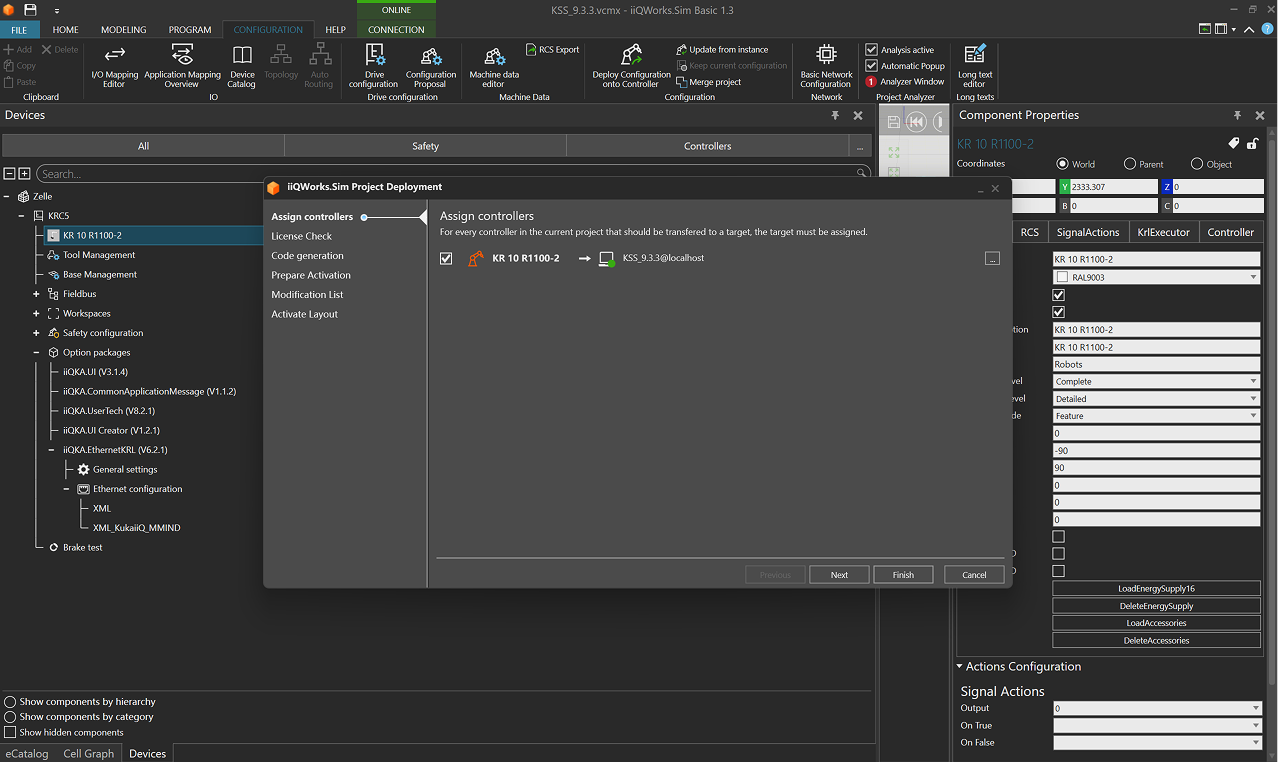
Test Standard Interface Communication
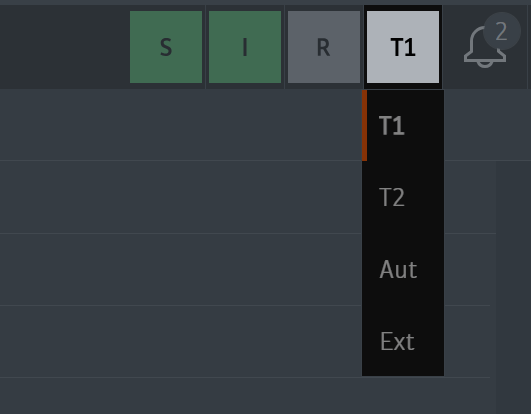
Before you start, please learn how to switch the operating mode as described below. This will not be repeated in the following sections.
Click the mode selection button and select an operating mode from the drop-down list. T1 stands for the Manual Reduced Velocity mode, and Aut stands for the Automatic mode.
-
Following the operations above, switch to the Aut mode.
-
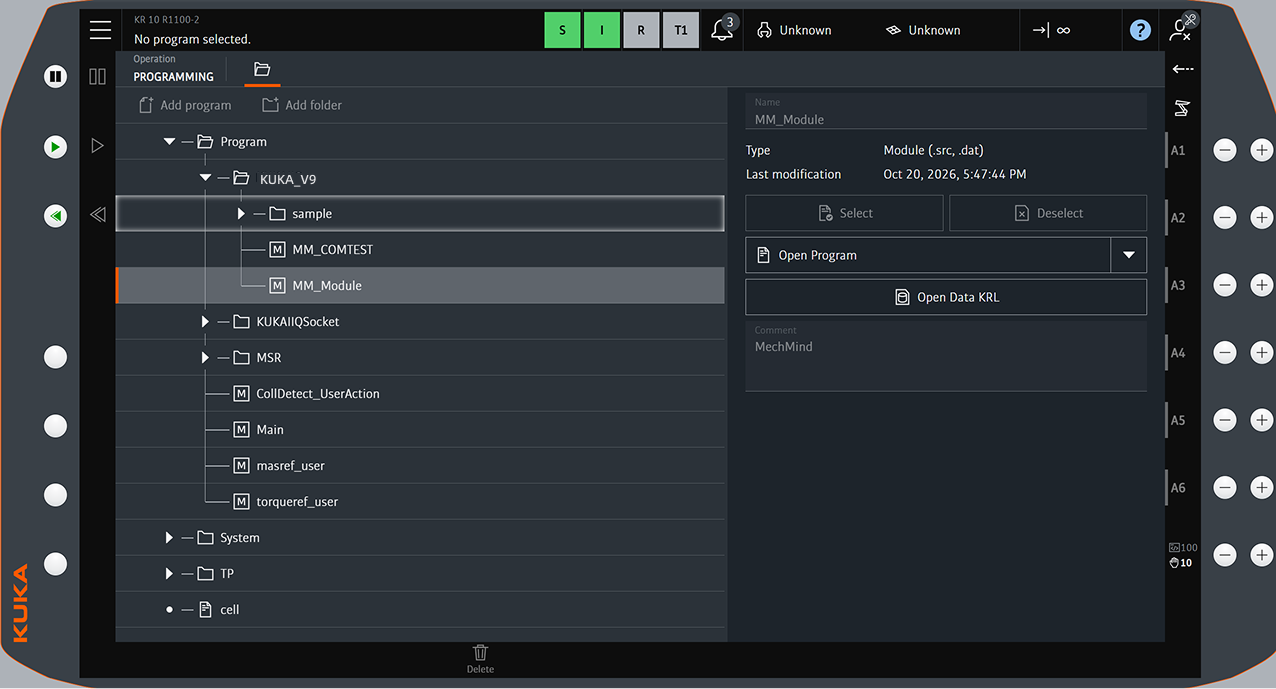
On the teach pendant, select the MM_COMTEST program under Program/KUKA_V9, and then click Open Program.
-
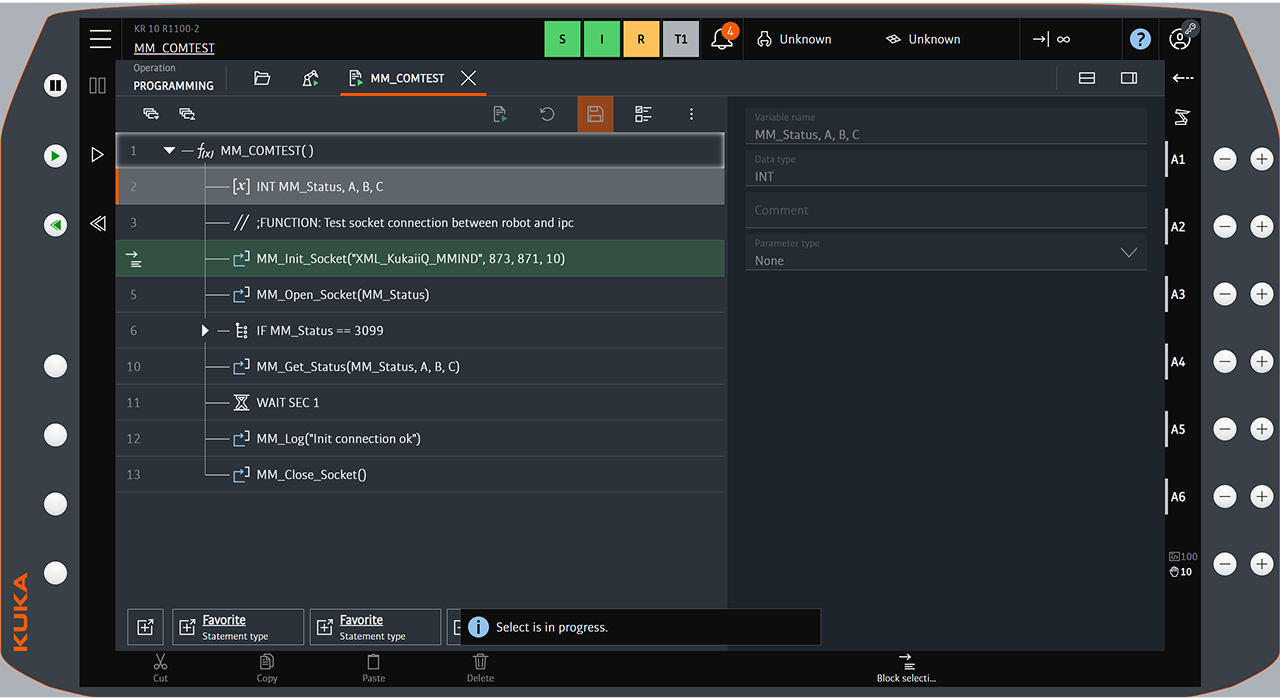
Click the first line of the MM_COMTEST program, and then click Block selection to select the program. Then, press the green play button on the left, and the robot program starts to run.
-
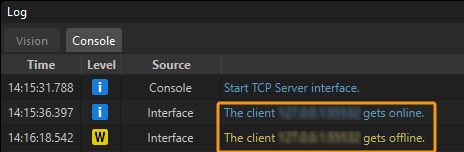
If the communication between the robot and the vision system is successfully established, a related message will be displayed under the Console tab in the log window of Mech-Vision.