Master-Control Communication Setup
This guide shows you how to load the Master-Control program to ROKAE industrial and collaborative robots, and set up the Master-Control communication between the robot and the Mech-Mind Vision System.
| In this section, you will load the robot Master-Control program to the robot system to establish the Master-Control communication between the vision system and the robot. |
Preparation
Check Hardware and Software Versions
|
-
The robot in use is a ROKAE industrial or collaborative robot.
-
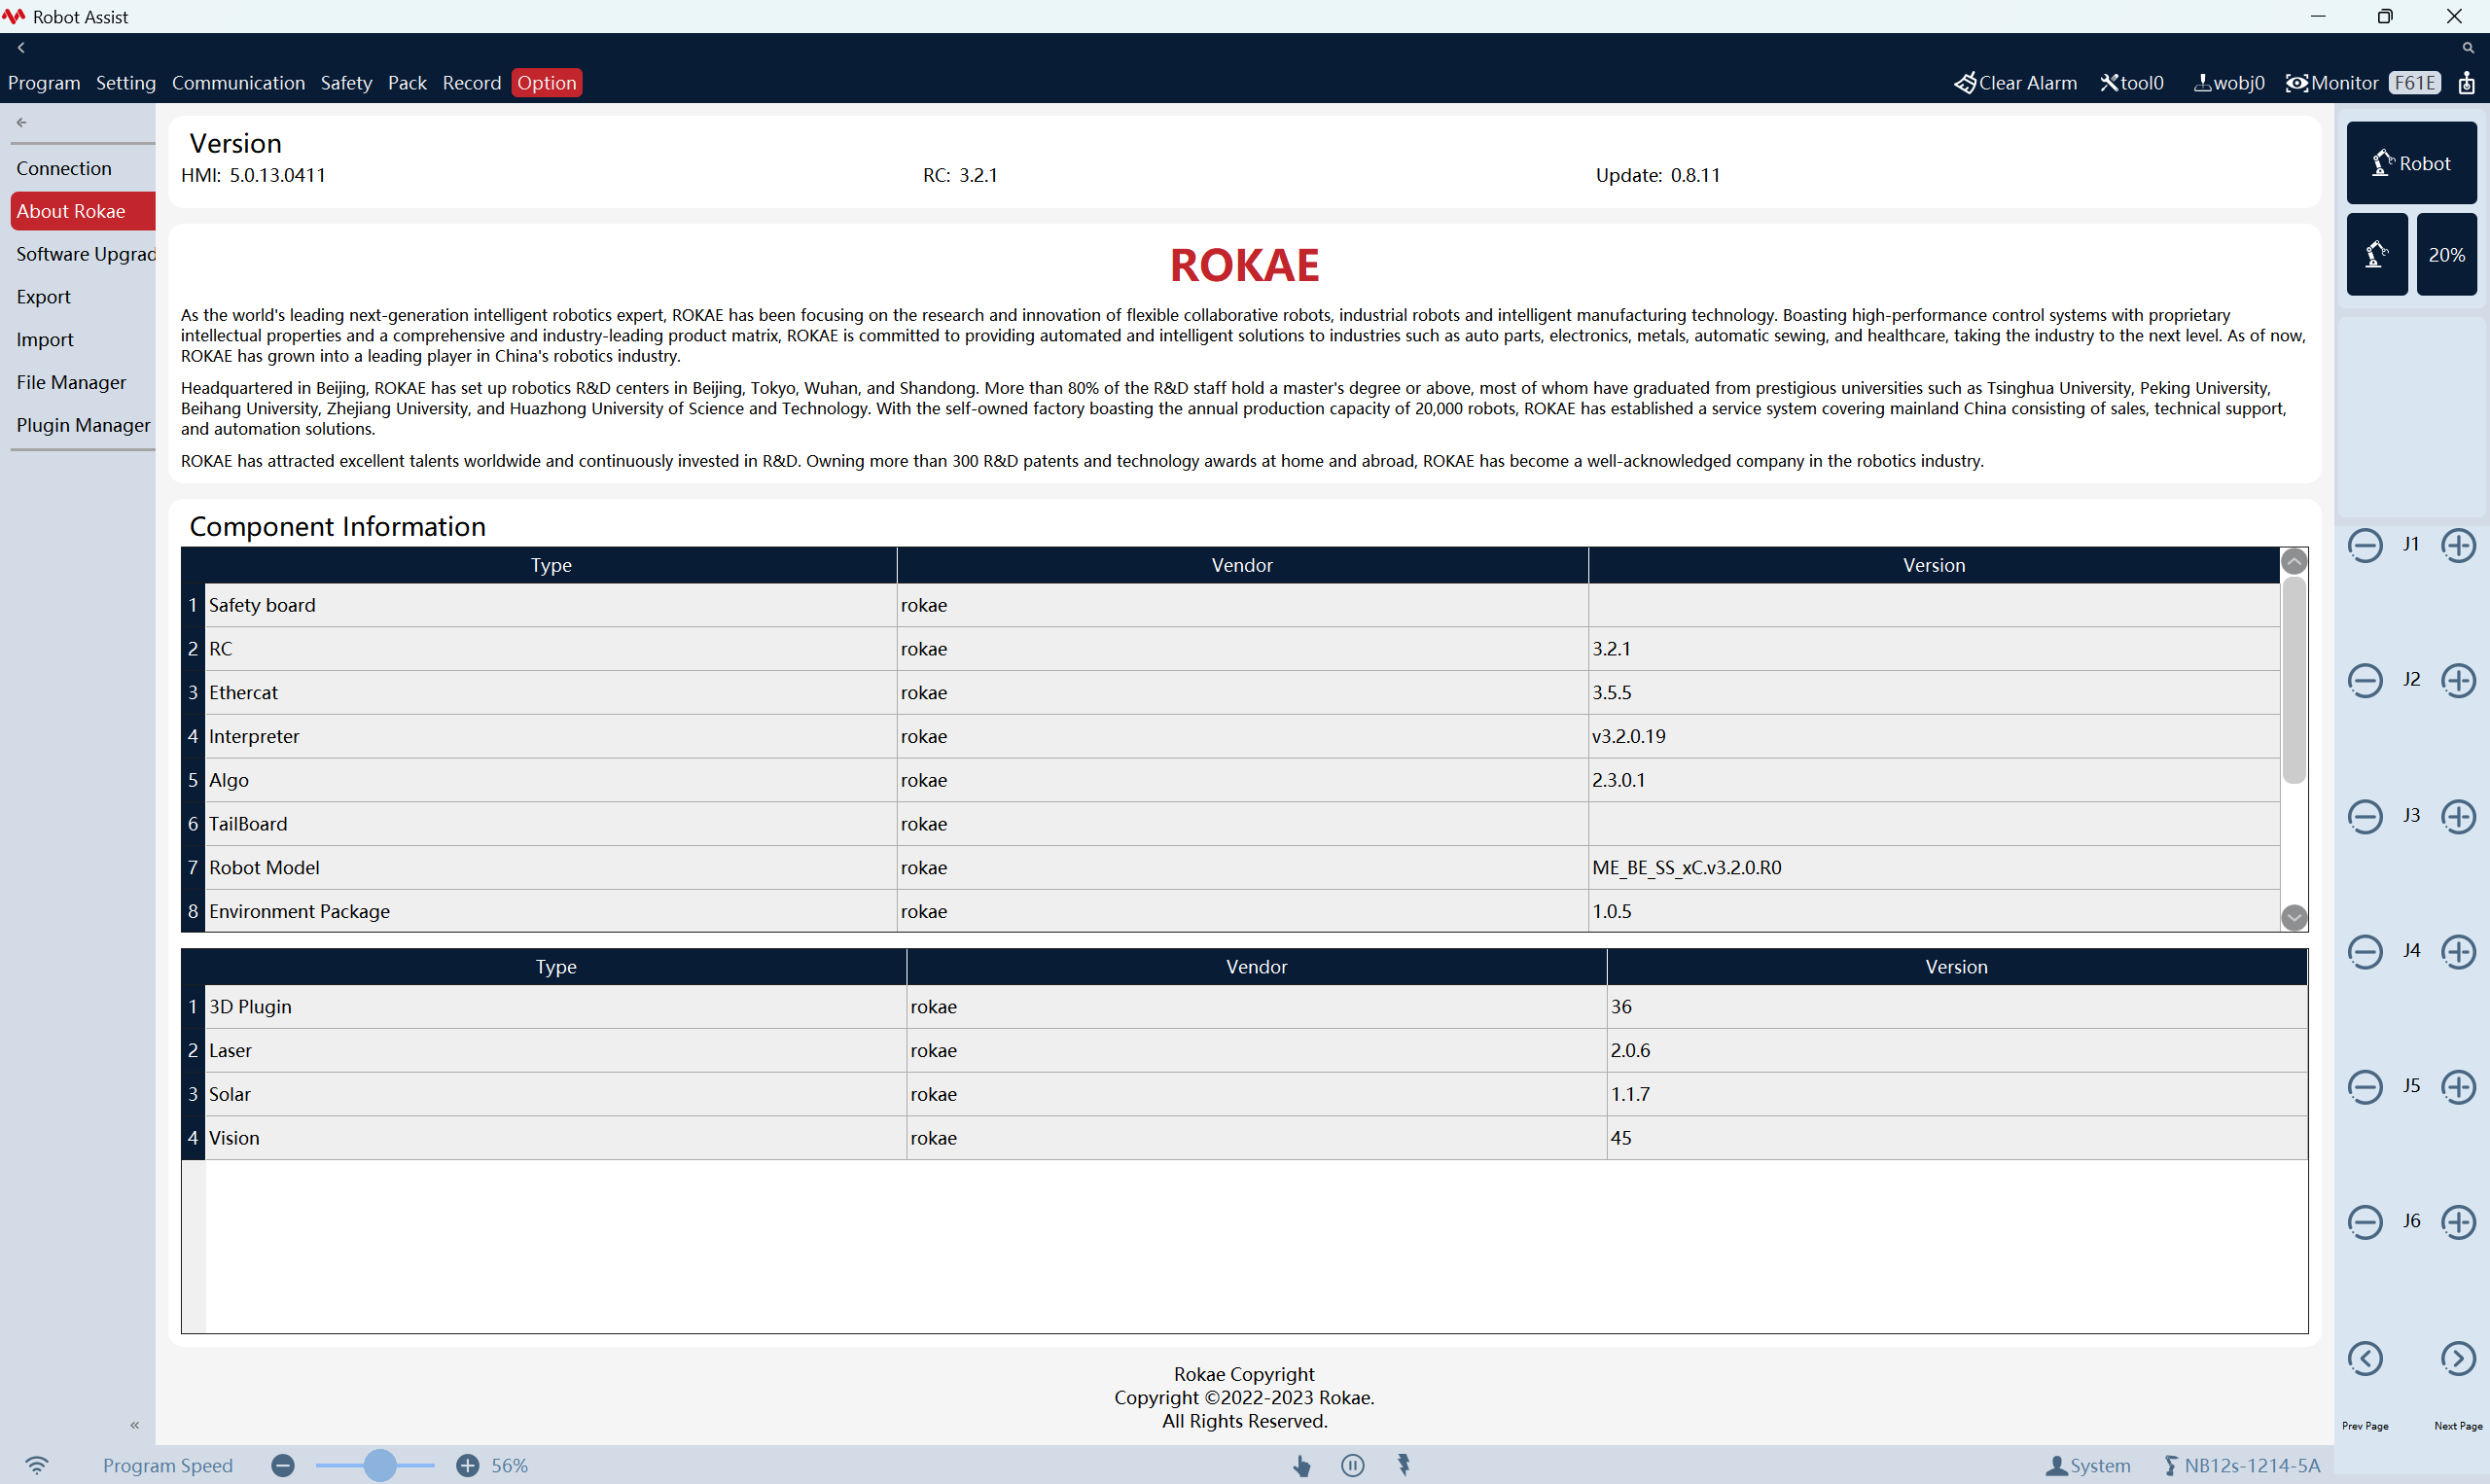
The HMI version is 5.0.13.0411 or above, and the RC version is 3.2 or above.
Click here for instructions
Open the Robot Assist software, and select to view the versions of HMI and RC.
-
The Robot Assist software has been installed on the IPC.
-
Robot Assist is the host computer software for ROKAE robots, which can run on PCs, xPad2, and other devices. To connect the device where Robot Assist is installed and the robot to the same LAN, you can use robot detection, manually enter the controller service address, or other methods to establish a connection with the robot.
-
In this section, the Robot Assist software is installed on the same IPC as the vision system.
-
Set up the Network Connection
ROKAE industrial robots are controlled by controllers, such as the XBC5 series controllers. When setting up the network connection, plug the network cable into the debug Ethernet port of the controller.
Some models of ROKAE collaborative robots adopt a controller-free design (such as ER, ER PRO, CR, and SR), while other models adopt a controller-based design (such as CR-C and SR-C). For collaborative robots with a controller-free design, a debug Ethernet port is provided on the robot base for setting up the network connection; for collaborative robots with a controller-based design, the debug Ethernet port is located on the controller.
The IP address of the default debug Ethernet port on the ROKAE robot base or controller is fixed at 192.168.0.160. This address is the same on all robots and is not recommended to be changed. Therefore, you only need to connect the robot and the IPC with a network cable, and then change the IP address of the IPC. The specific operations are as follows.
-
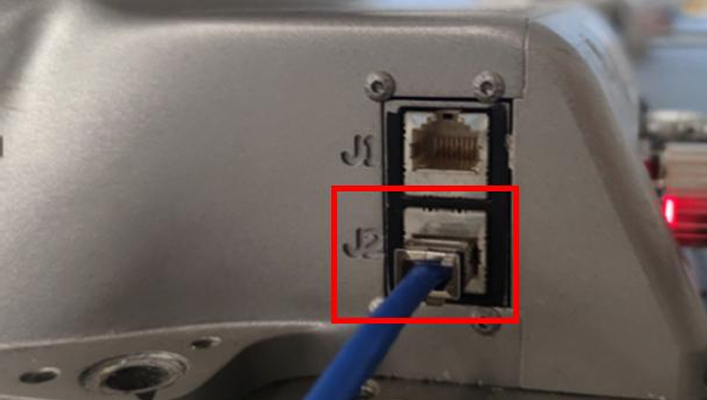
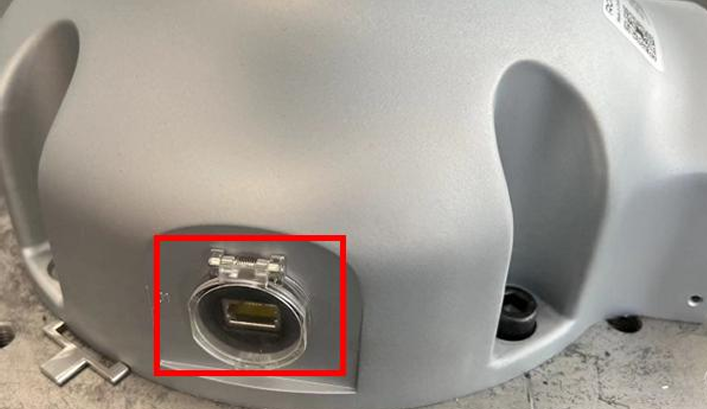
Plug one end of the network cable into the Ethernet port of the IPC, and plug the other end into the debug Ethernet port on the robot base or controller. The debug Ethernet ports of each robot model are listed in the following table.
Robot model Debug Ethernet port (192.168.0.160) Image ER/ER PRO
Port J2
CR
Port J1
CR-C
Controller port
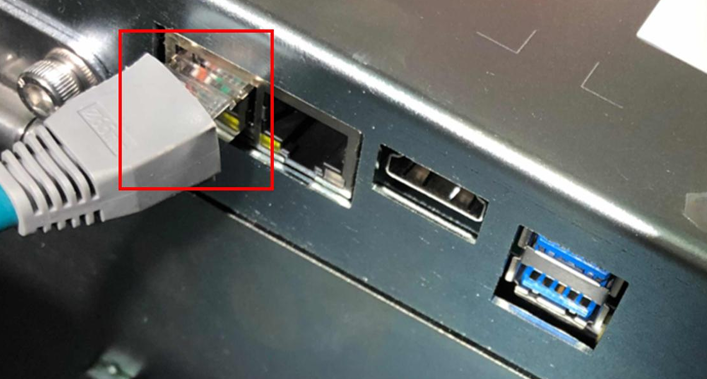
SR
Port J2
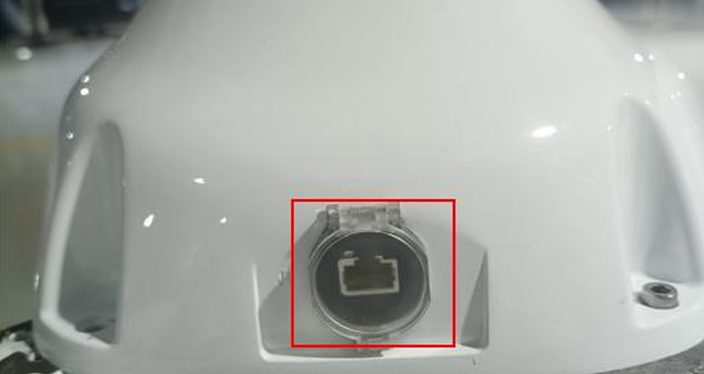
SR-C
Port LAN2
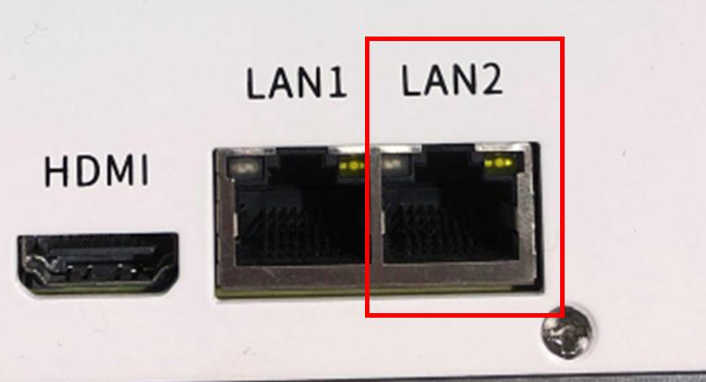
XBC5/XBC5E
Debug Ethernet port
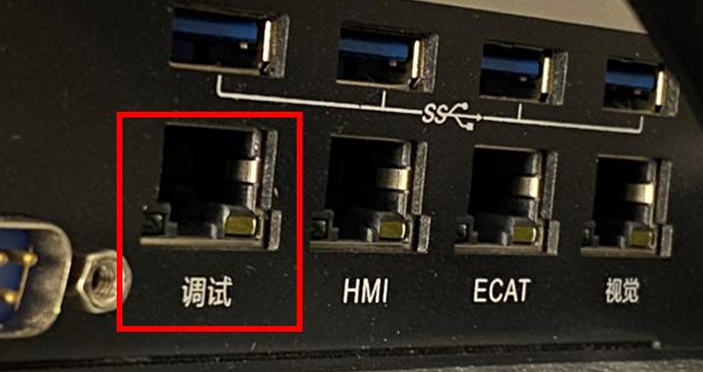
XBC5M
Port LAN2
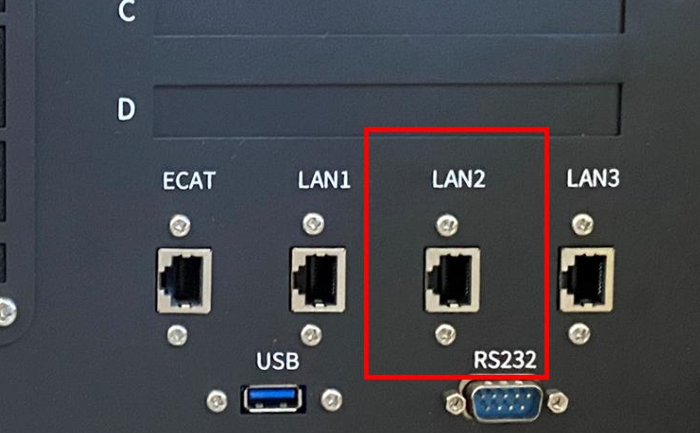
For robot models not listed above, please consult the robot manufacturer or test the IP address of each port to find out the Ethernet port whose IP address is 192.168.0.160. -
In the IPC, set the IP address of the IPC (for example, 192.168.0.222).
-
In the command line window of the IPC, enter the ping 192.168.0.160 command to check whether the robot and the IPC are connected successfully.
If they are not connected successfully, please check the robot Ethernet port and the IP address of the IPC to ensure that both are configured correctly.
Load the Program Files to the Robot
| To prevent the loading operations from affecting the robot system, it is recommended to back up the robot system files before loading the program files. If any problem occurs during the operations, you can restore the robot system with the backup files. For detailed operations, please refer to Back up Robot Files. |
-
Open the Robot Assist software, and click the WiFi icon in the lower-right corner. Enter “192.168.0.160” (the IP address of the robot) in the address bar, and then click Connect.
-
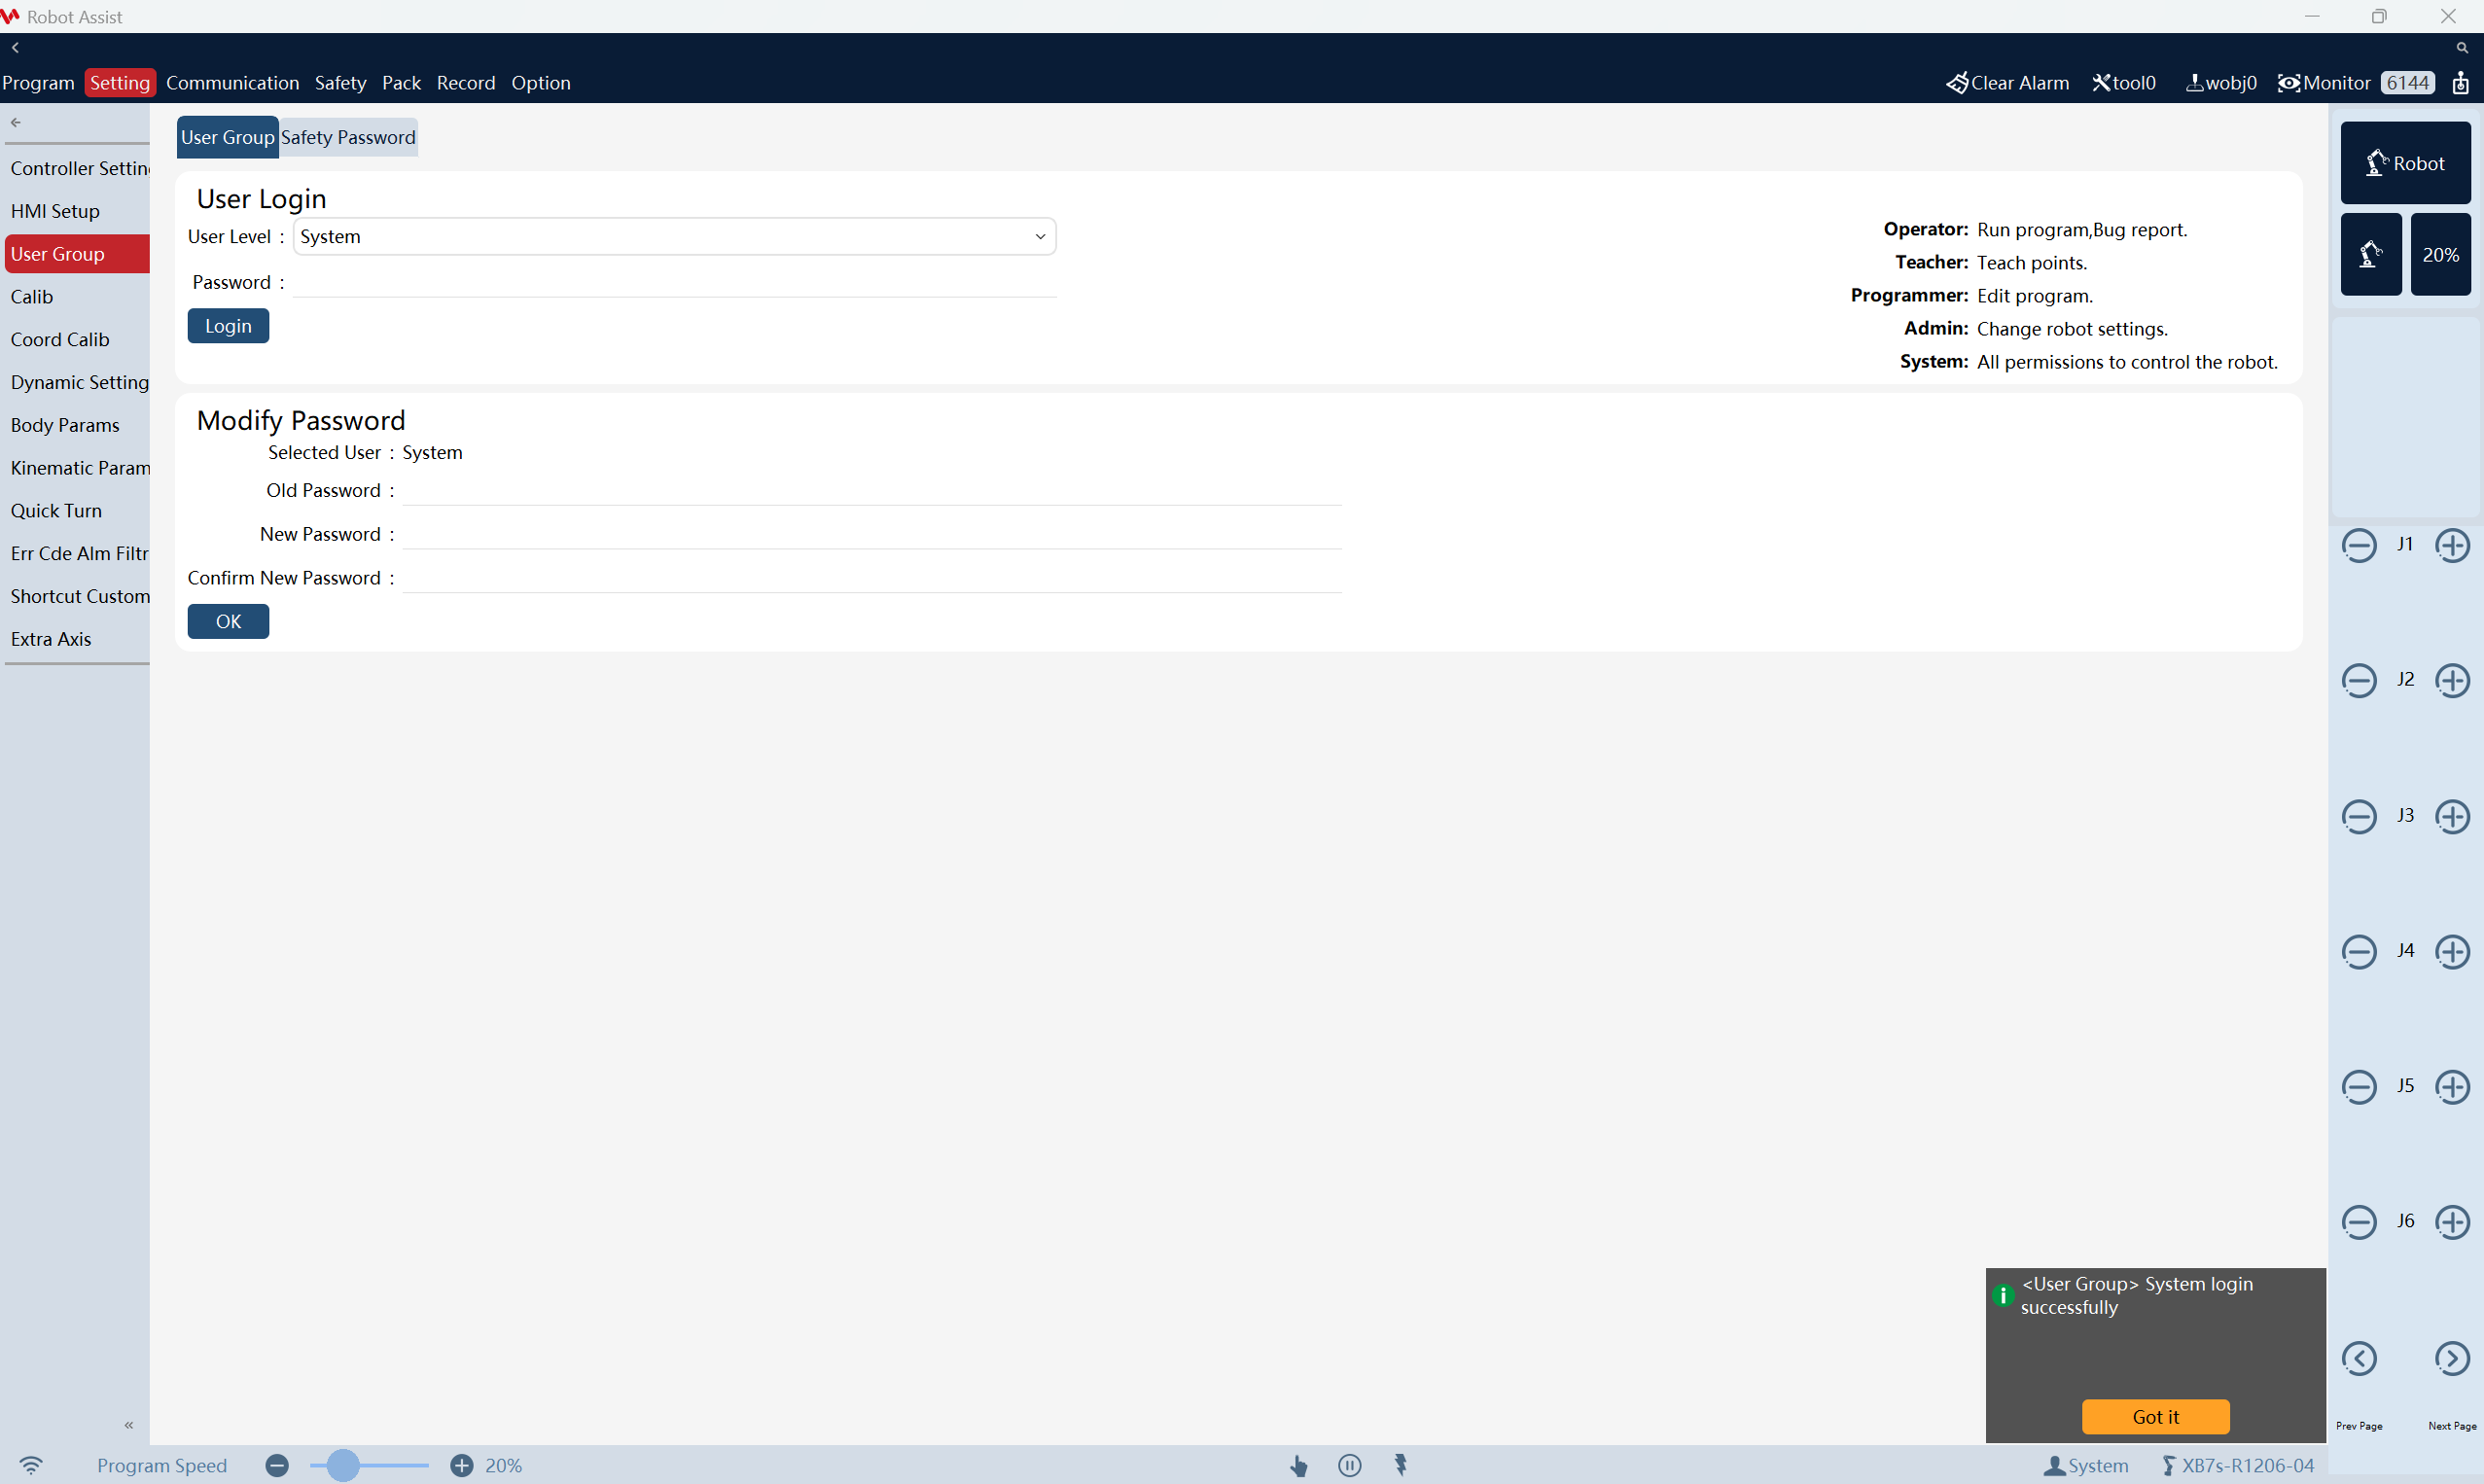
Select , select the “System” user level, enter the password “123456”, and then click Login.
-
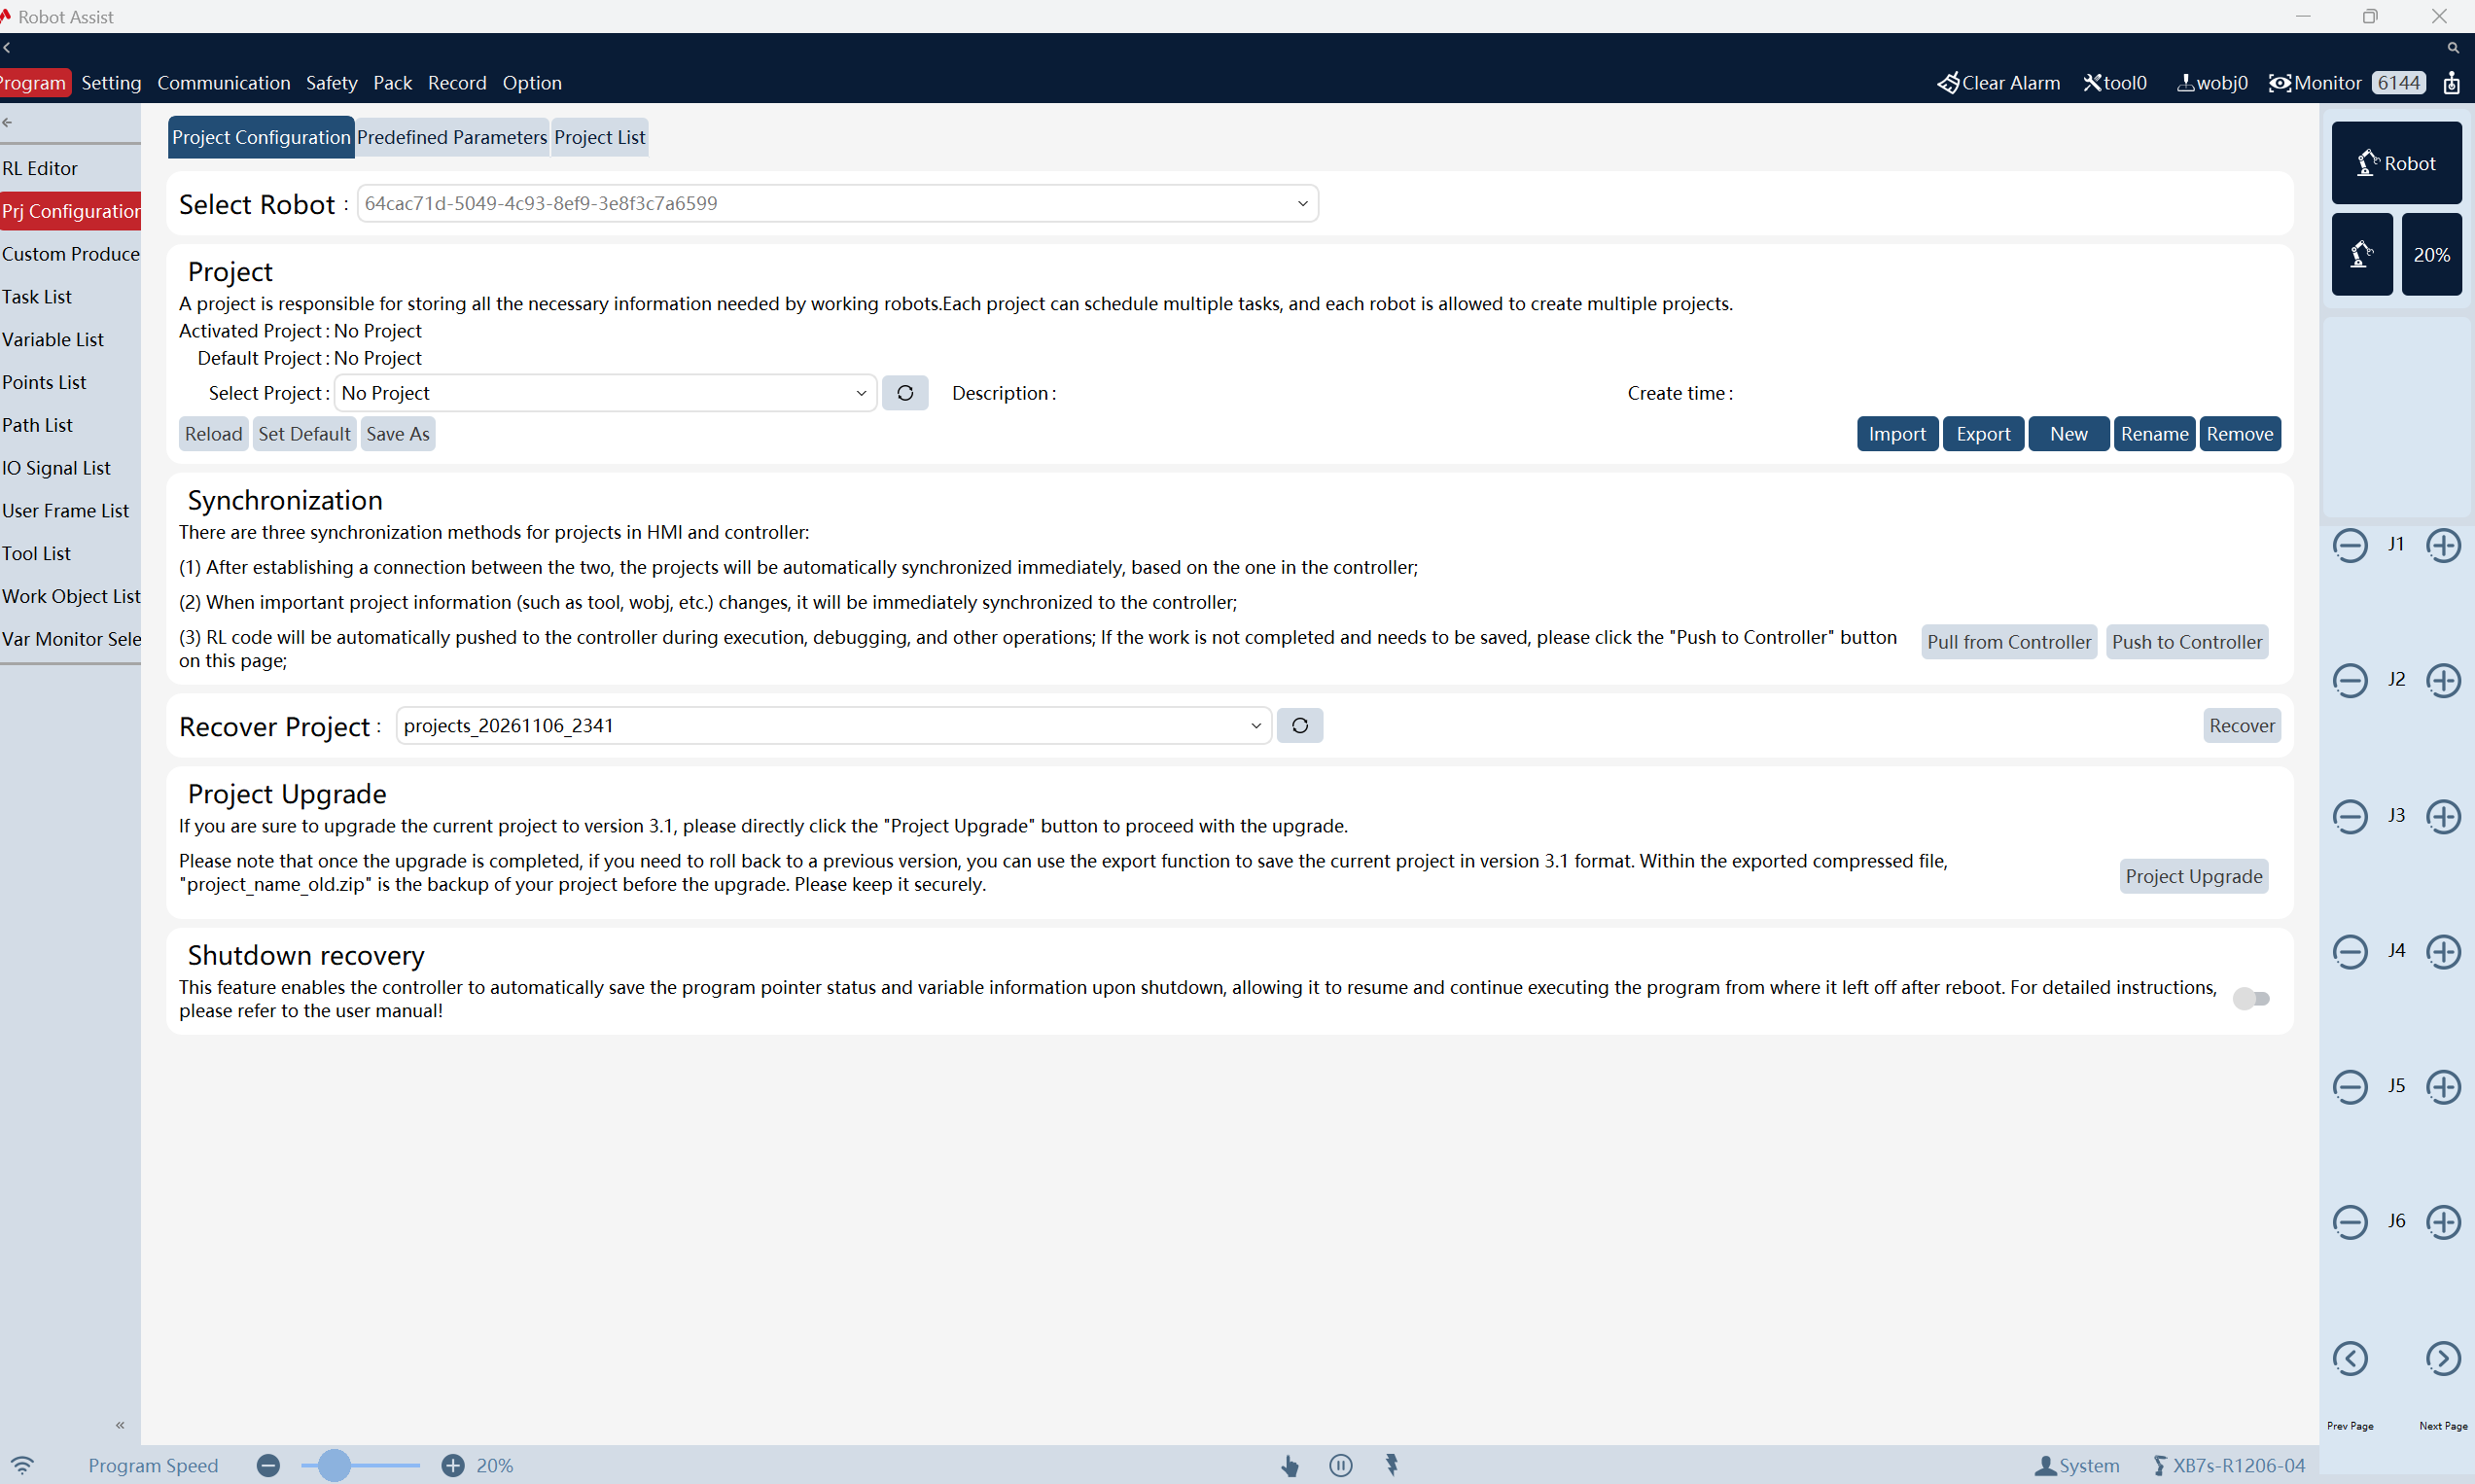
Select .
-
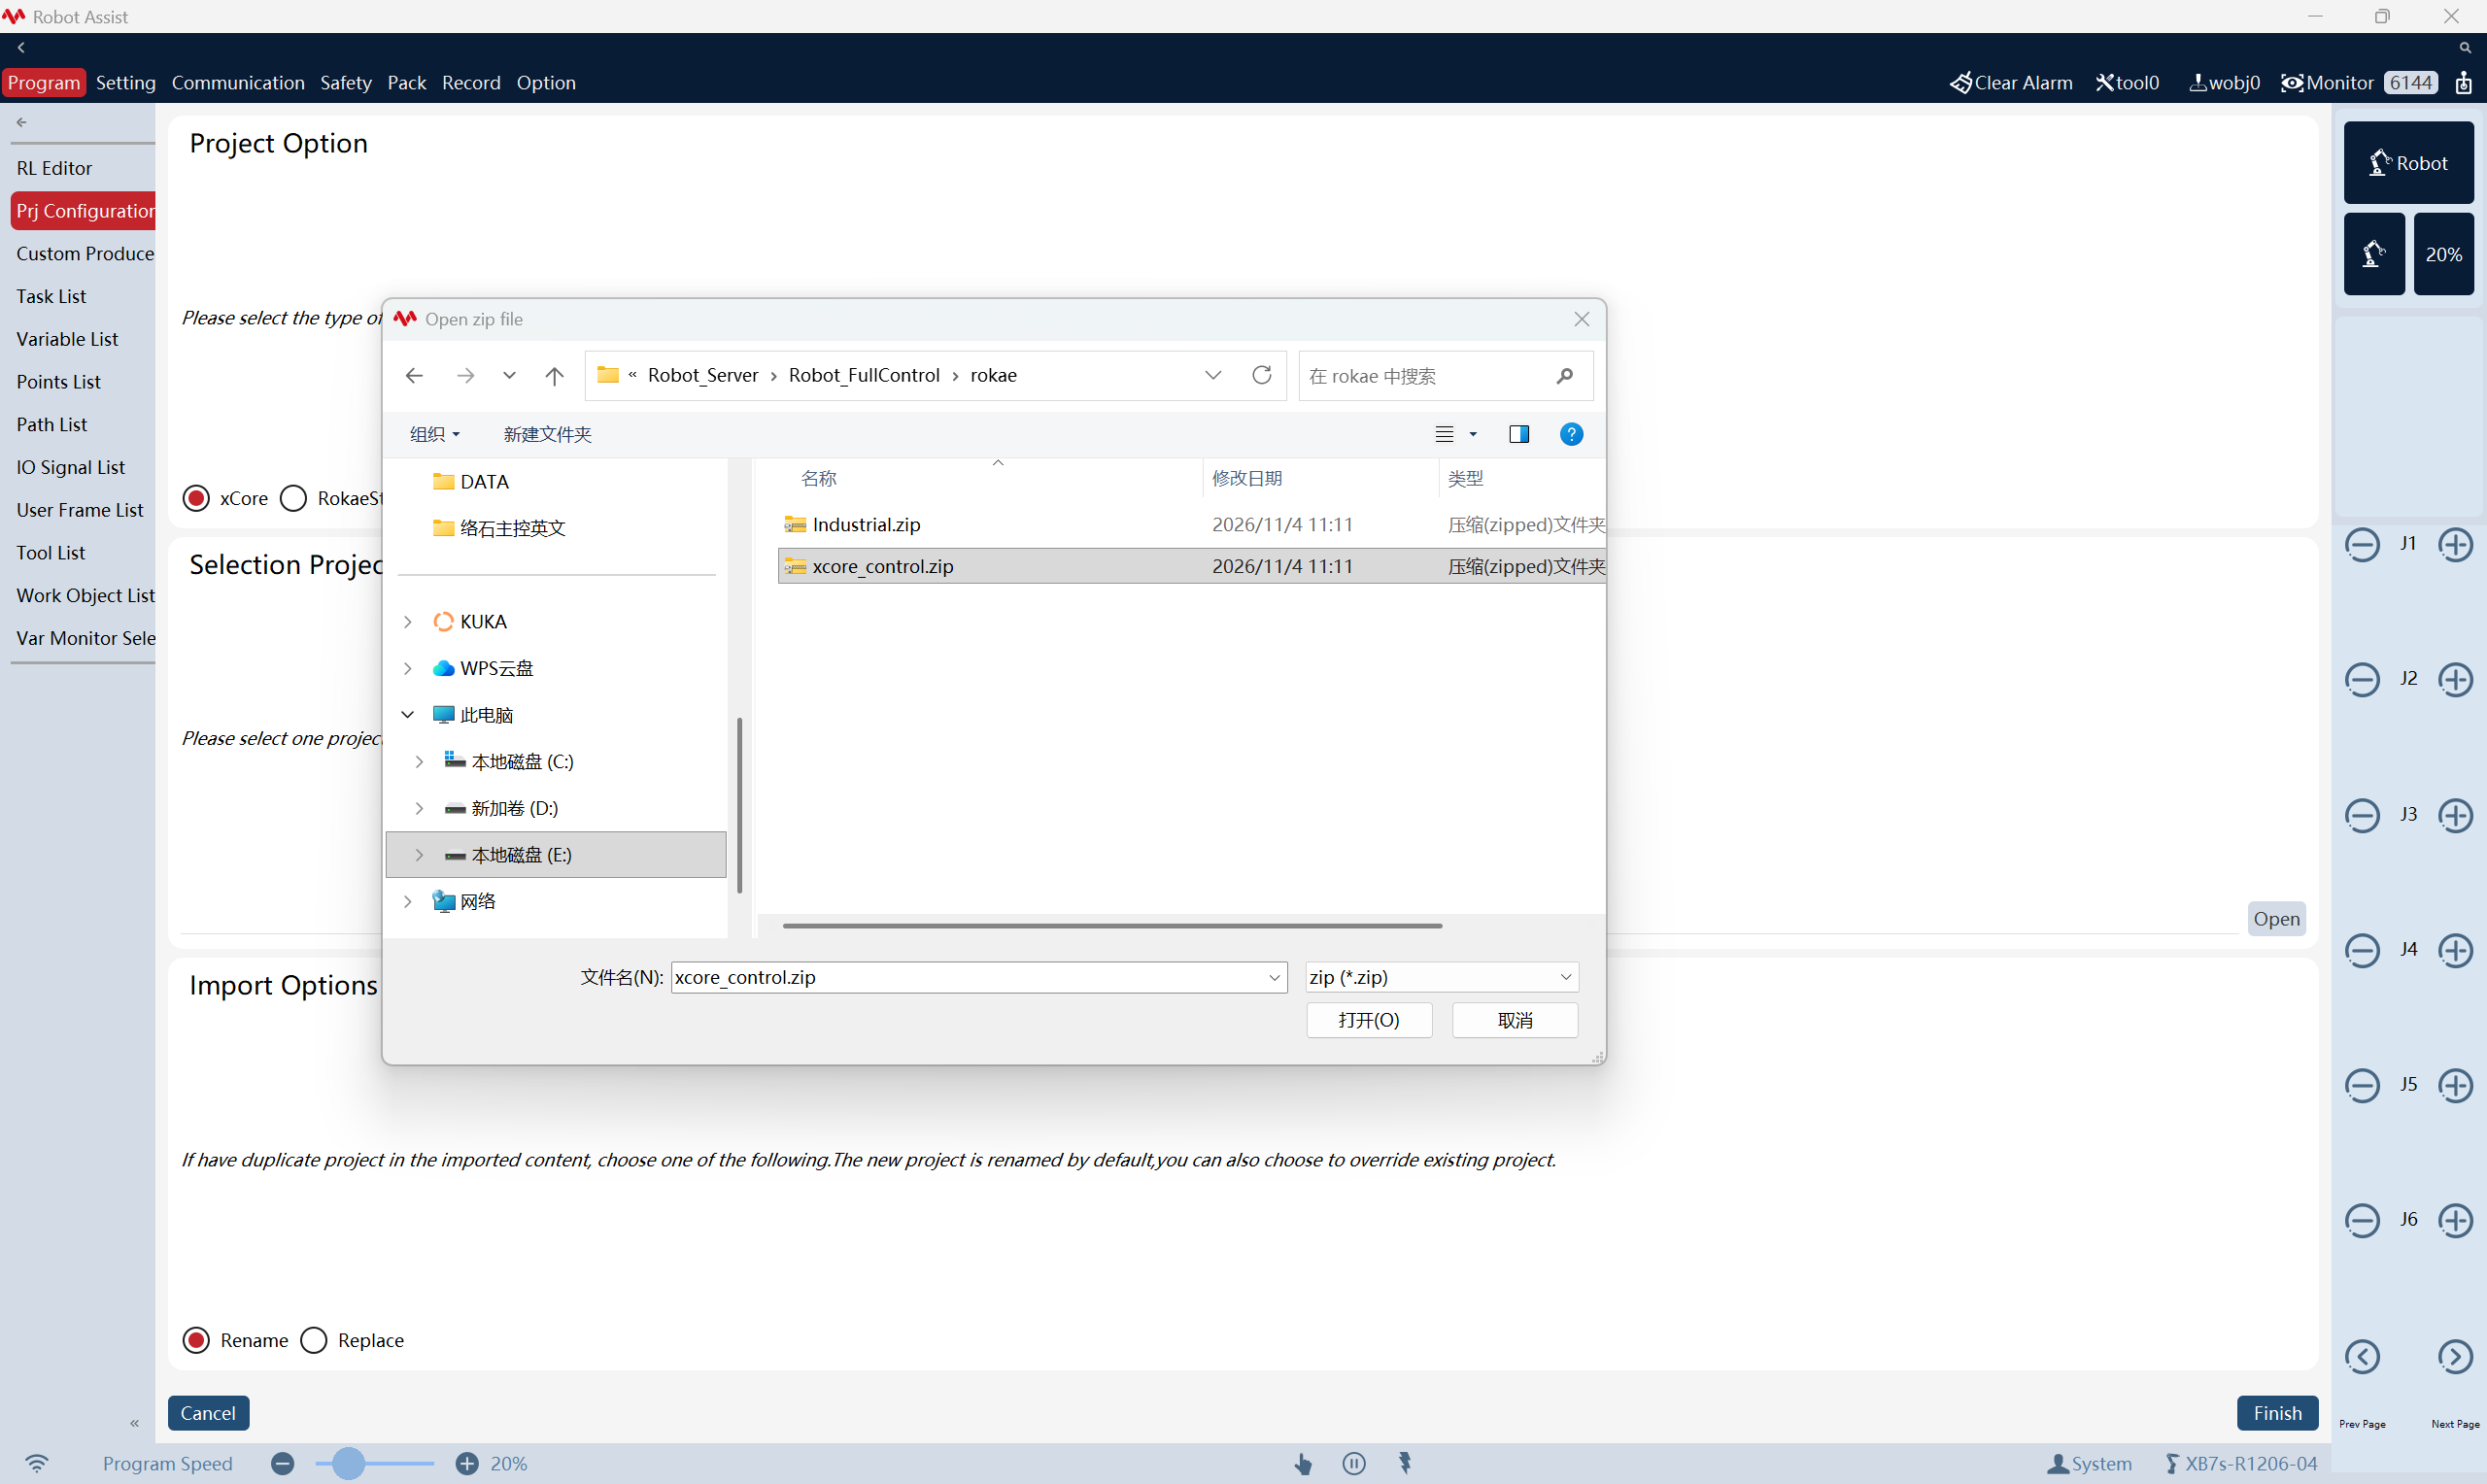
In the Project Options area, select xcore. In the Select Project area, click Open.
-
In the file selection dialog box that appears, select the program file package to be loaded. After confirming that the correct file is selected, click Finish. After a successful import, a notification will appear in the bottom-right corner of the interface.
The program file package to be loaded is located in the Communication Component/Robot_Server/Robot_FullControl/rokaedirectory in the installation path of Mech-Vision and Mech-Viz. The xcore_control.zip file is used for collaborative robots, and Industrial.zip is used for industrial robots.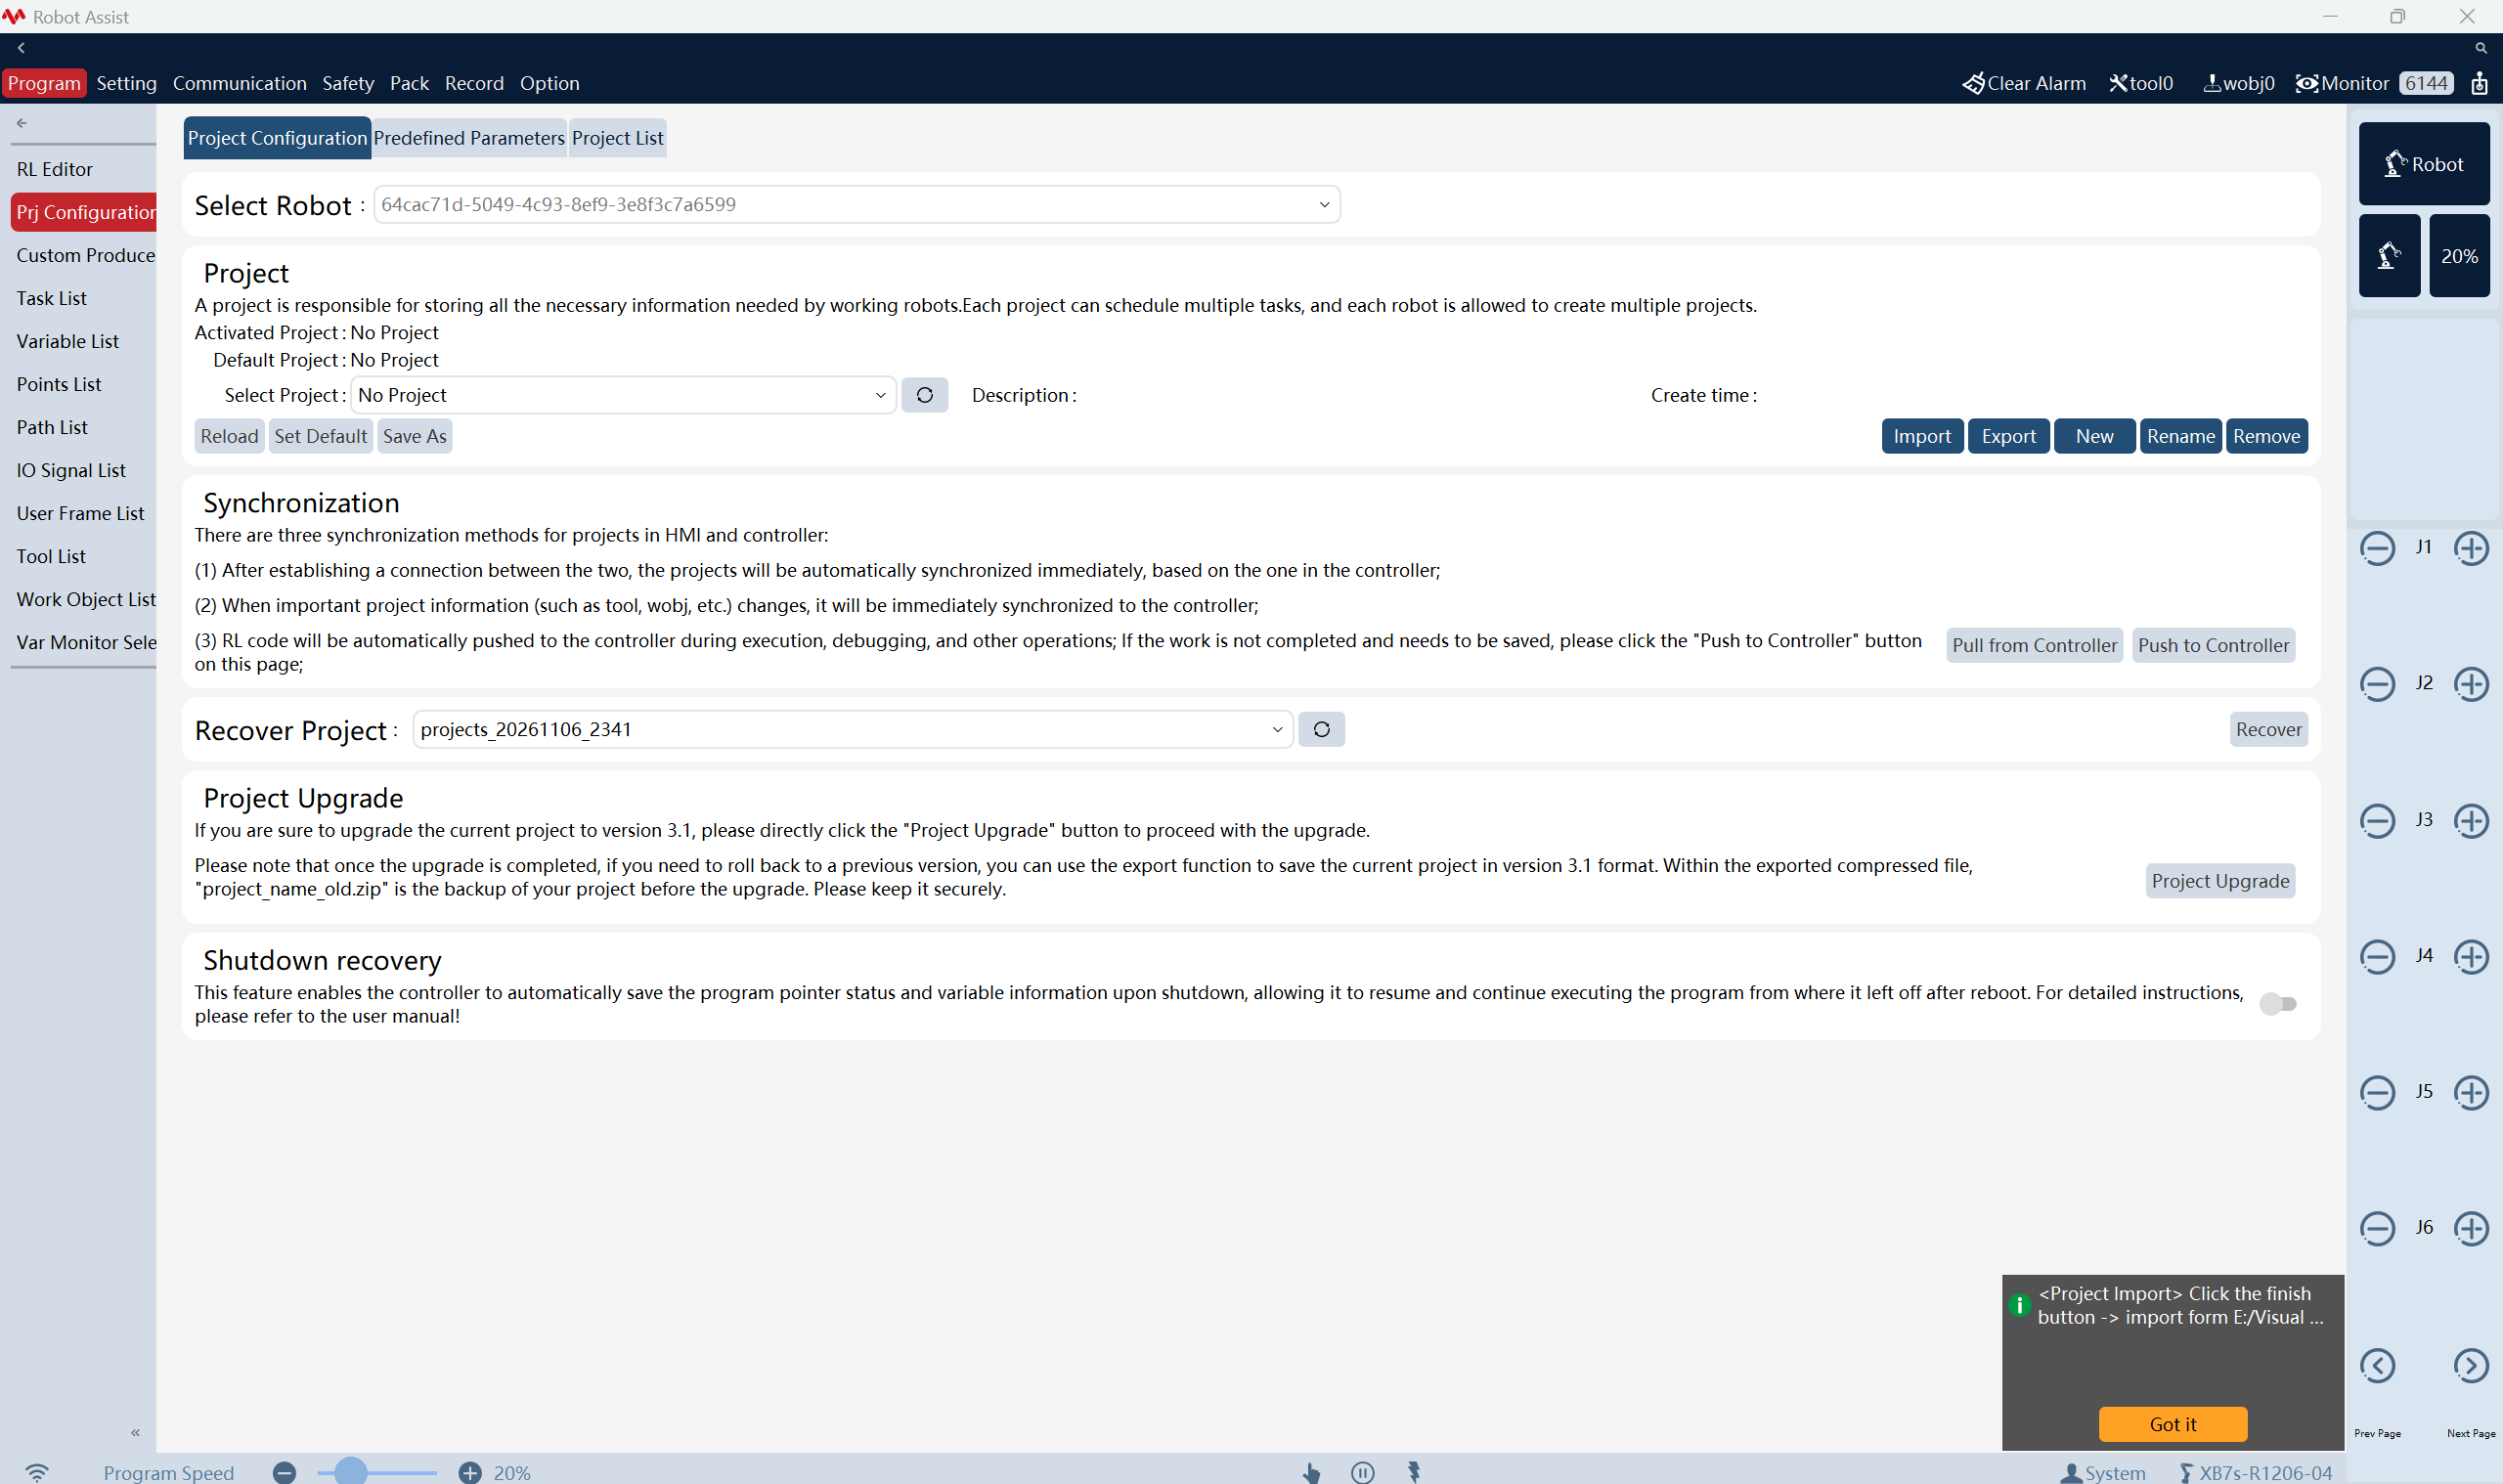
-
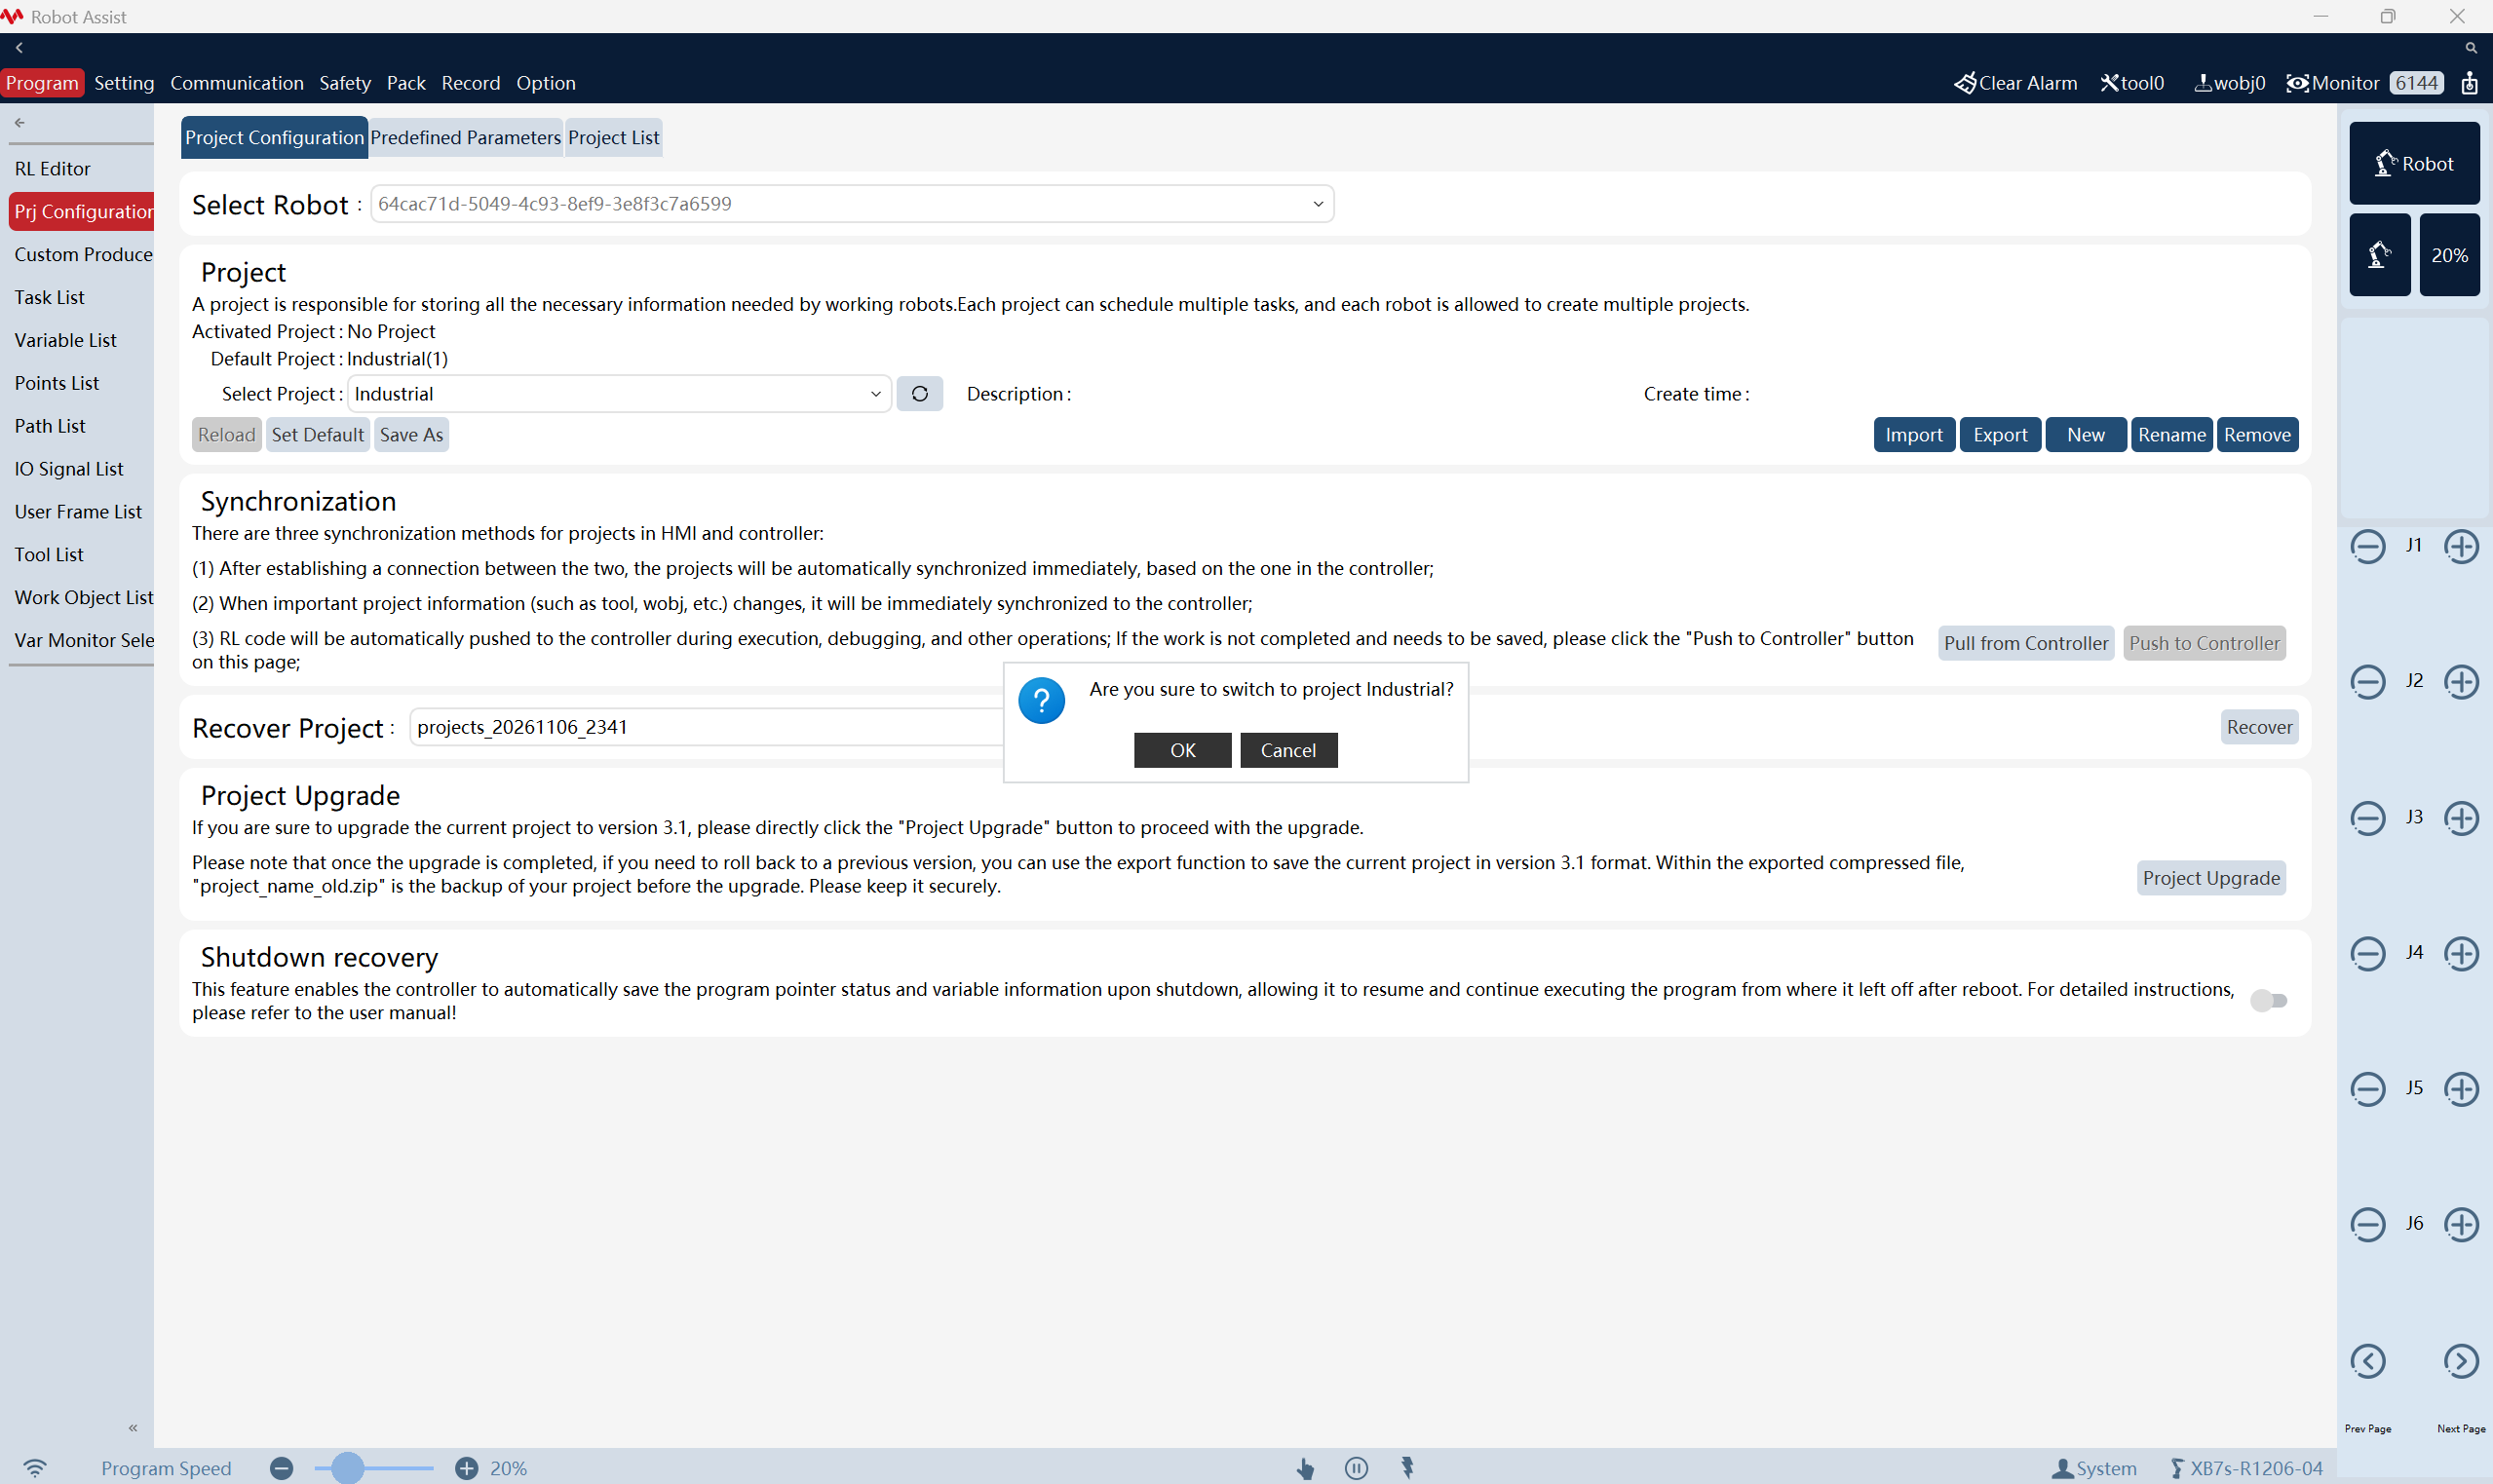
After a successful import, set Select Project to the name of the imported project (xcore_control for collaborative robots, or Industrial for industrial robots), and then click Reload. In the pop-up dialog box, click OK.
Configure External Communication
-
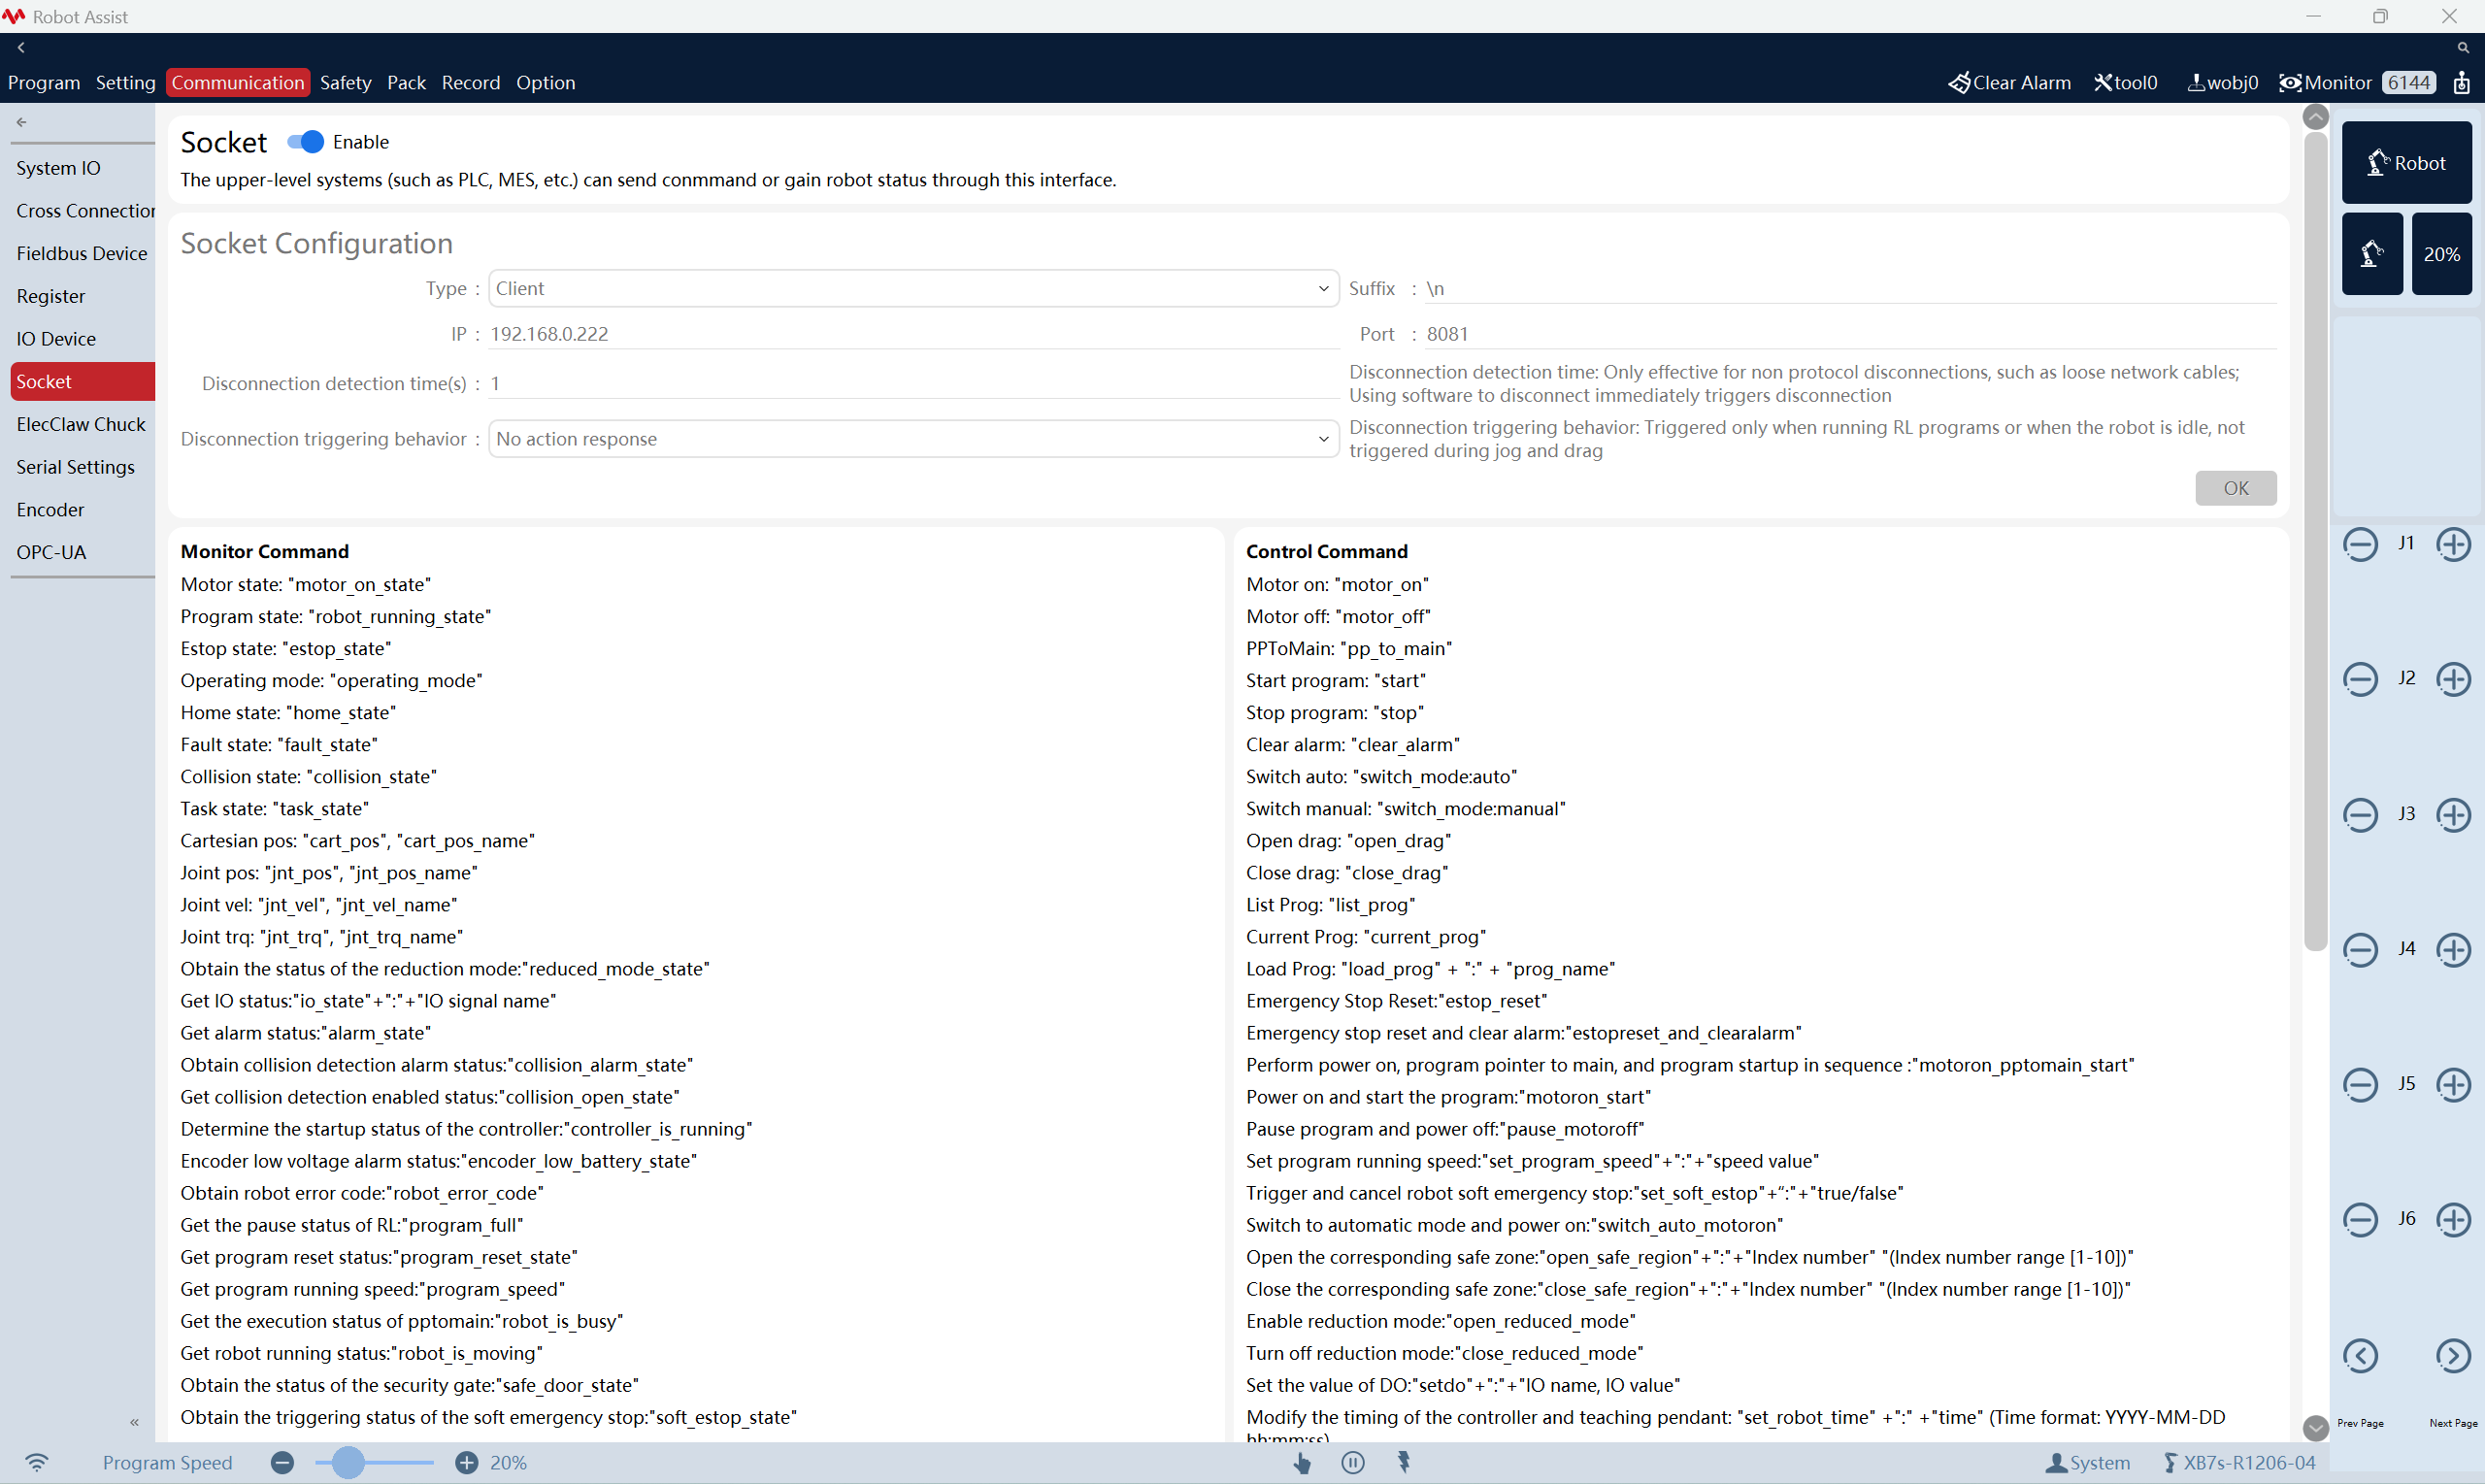
In the Robot Assist interface, select .
-
In the Communication Settings area, set Type to “Client”, set Suffix to “\r”, set IP and Port to the IP address and port (8081 by default) of the IPC, and then click OK.
-
In the top toolbar, set the External Communication switch to Enabled.
You can configure the communication settings only when the External Communication switch is Disabled.
Test Master-Control Communication
Create a Mech-Viz Project
-
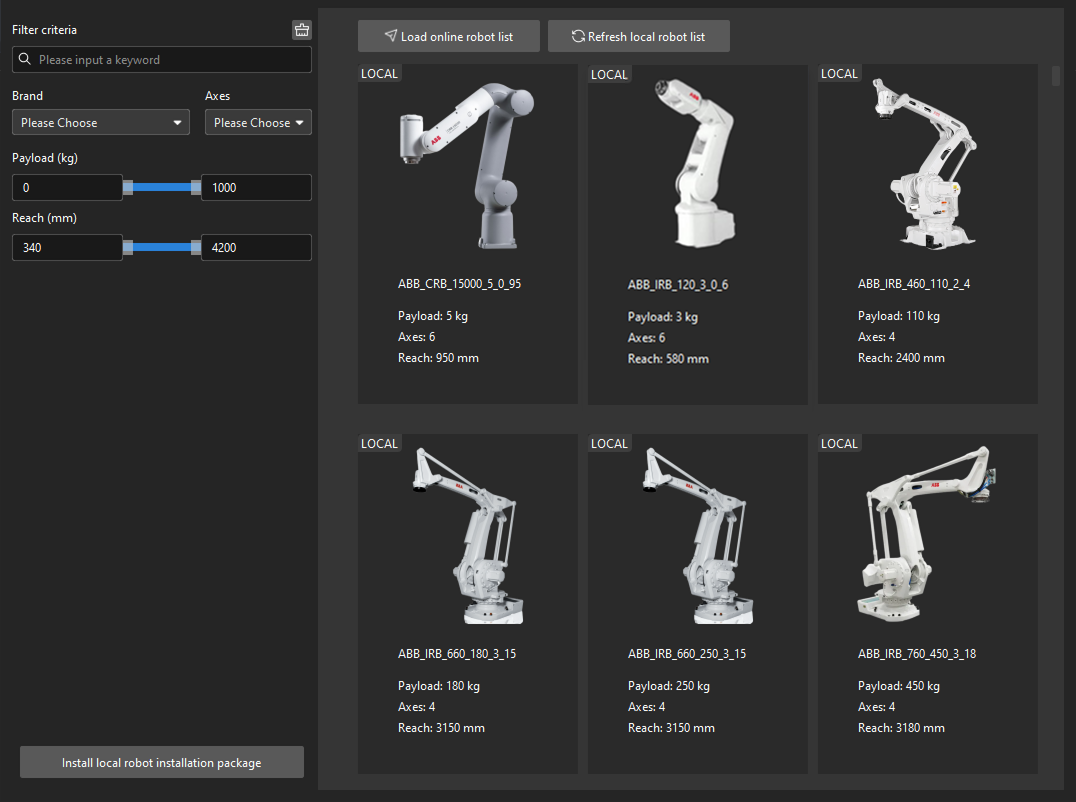
Open Mech-Viz, press Ctrl + N on the keyboard to create a new project. In the following interface, click Load online robot list. Select the robot model corresponding to your real robot brand and model on the interface as shown below.
-
Press Ctrl + S and create or select a folder to save the project.
-
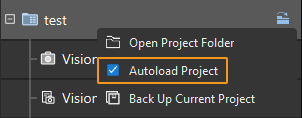
Right-click the project name in the left panel in Mech-Viz and select Autoload Project.
Connect the Robot
-
Select Master-Control Robot on the toolbar of Mech-Viz.
-
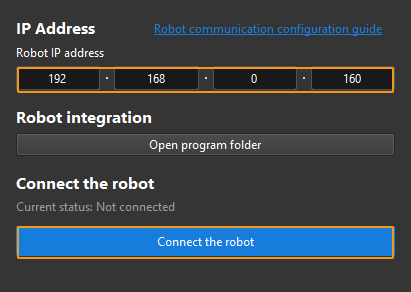
Input 192.168.0.160 in Robot IP address and select Connect the robot.
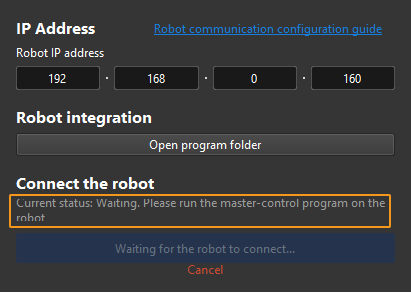
Mech-Viz will wait for the master-control program to run before establishing the connection. By default, the waiting time is 120s.
With the following steps, you can run the master-control program. Note that the operation should be completed in 120 seconds. Otherwise, you’ll need to select Connect the robot in Mech-Viz again. -
In the Robot Assist interface, go to ; the
xcore_control/task0/mainprogram will be displayed. NOTE: For industrial robots, the displayed program isIndustrial/task0/main.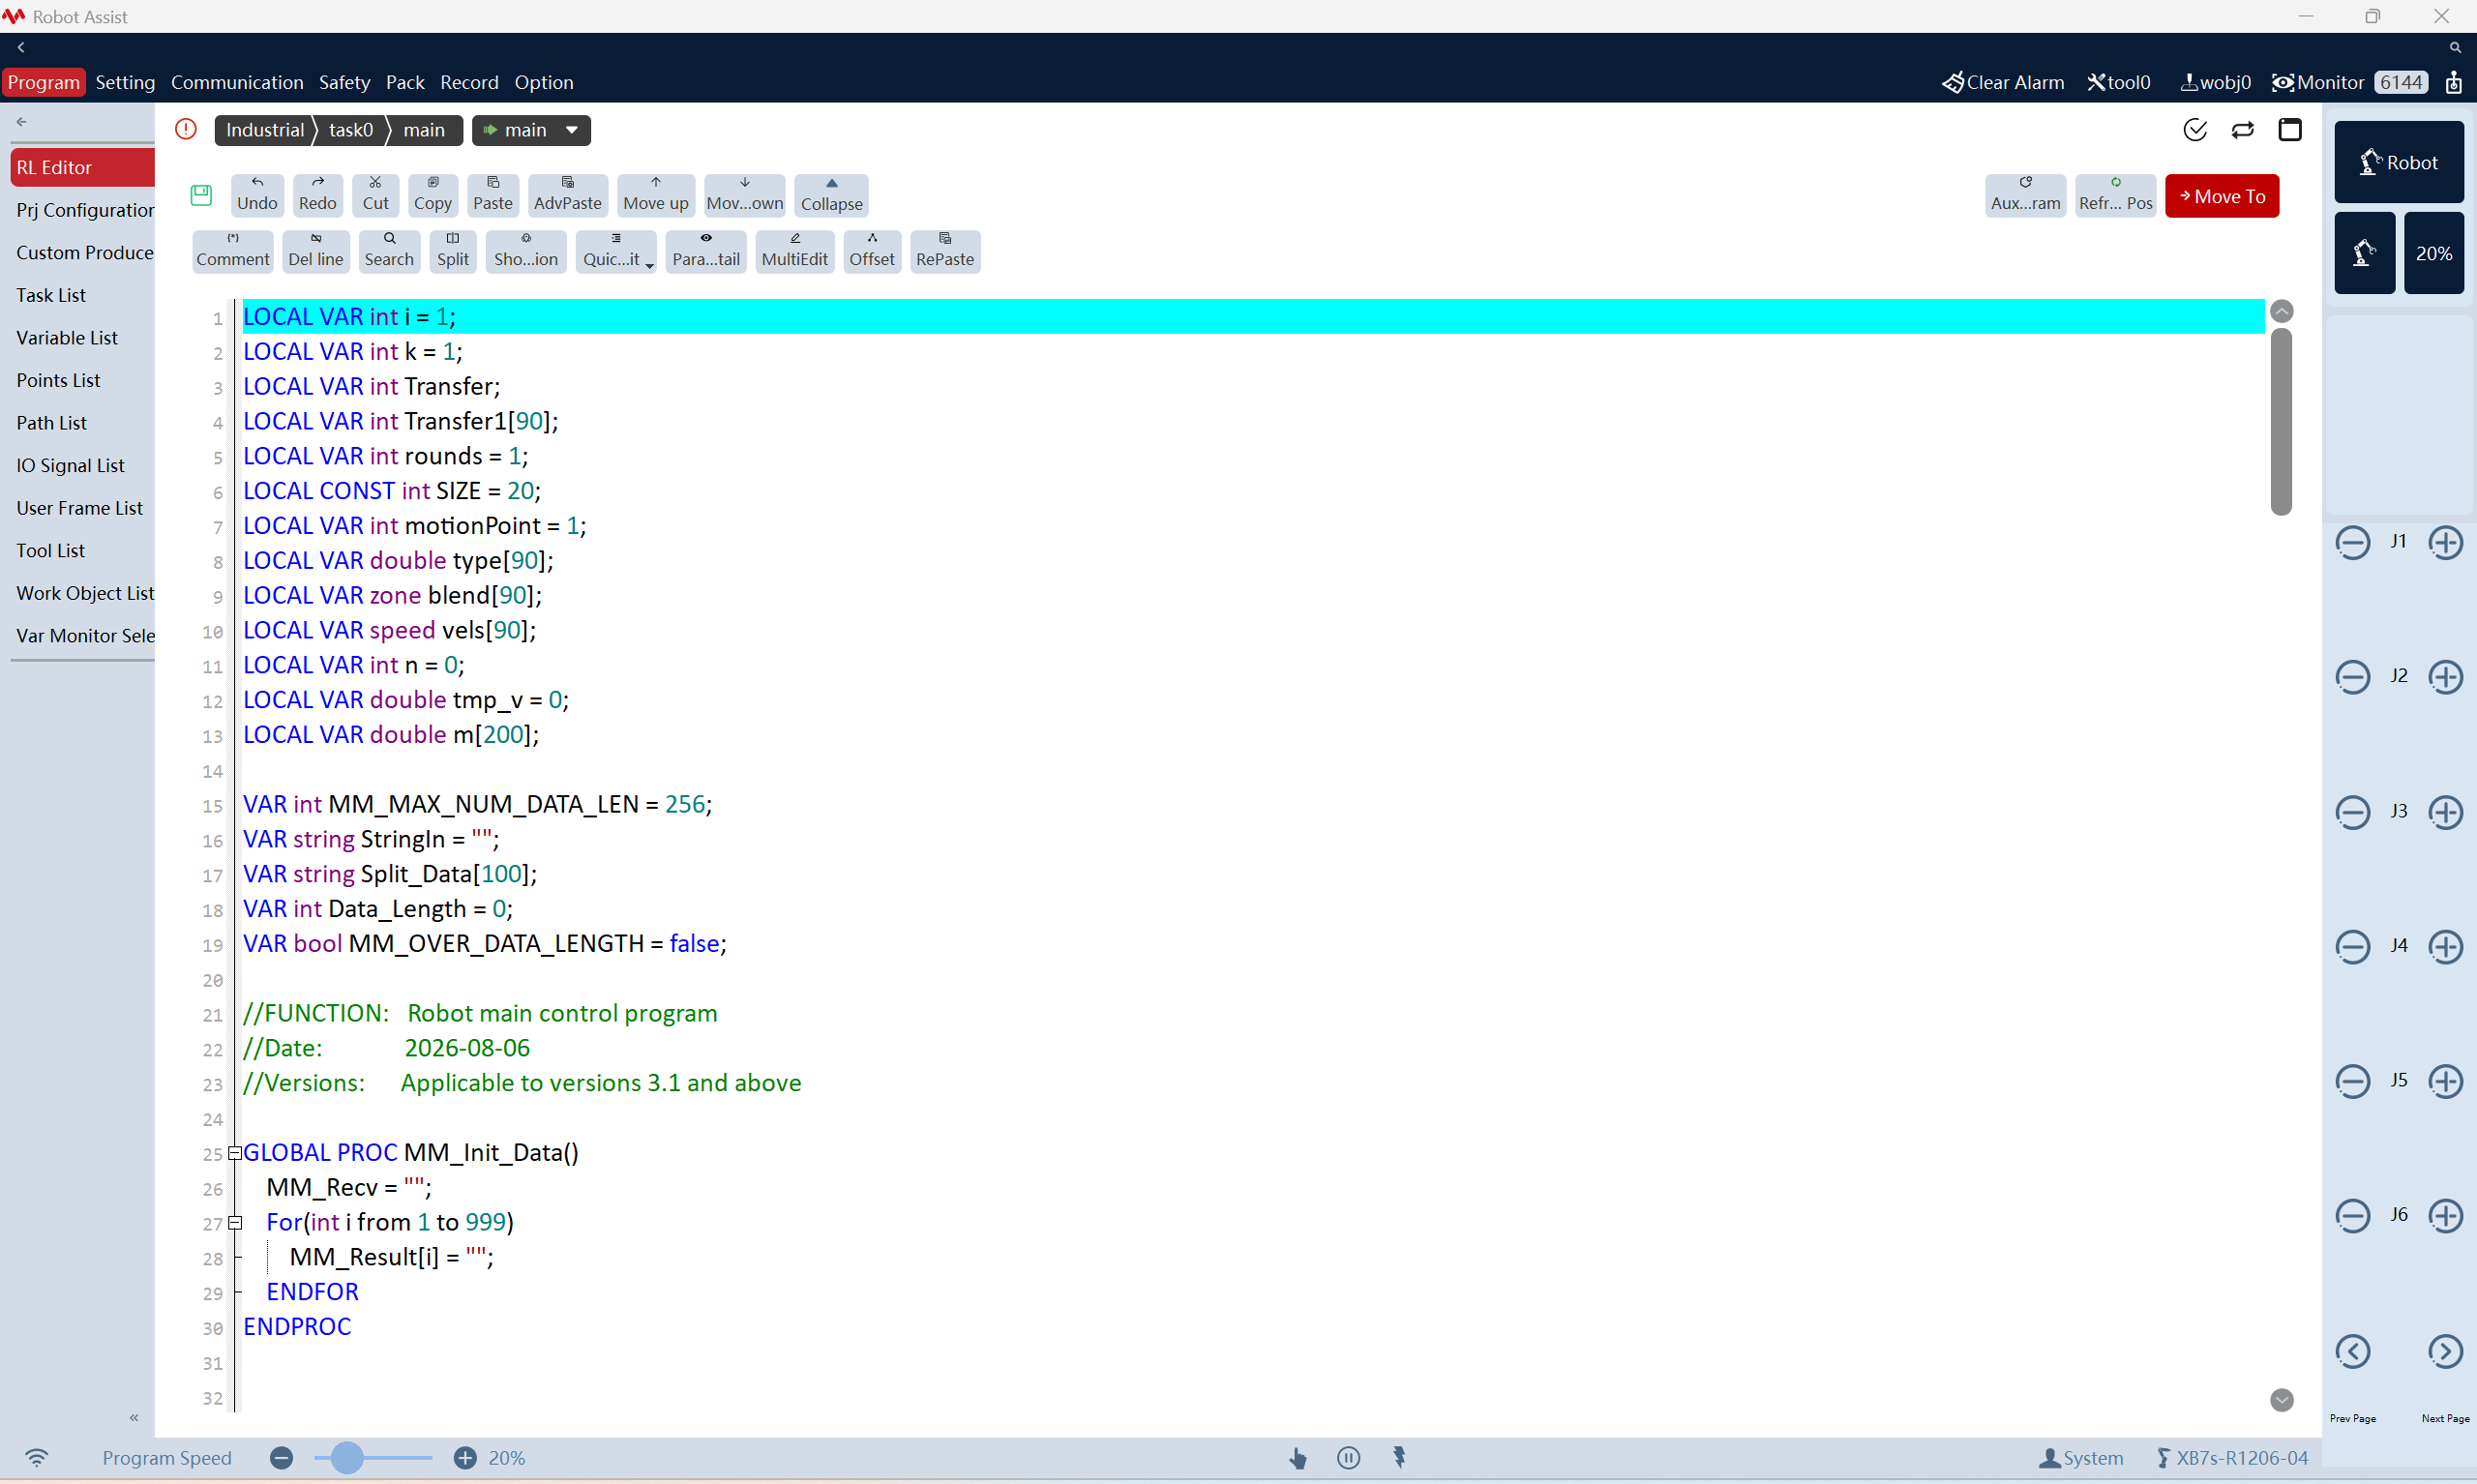
-
In the bottom bar, adjust the program speed as needed, then switch from Manual mode to Automatic mode, and finally power on the robot motors. The final state is as shown below.
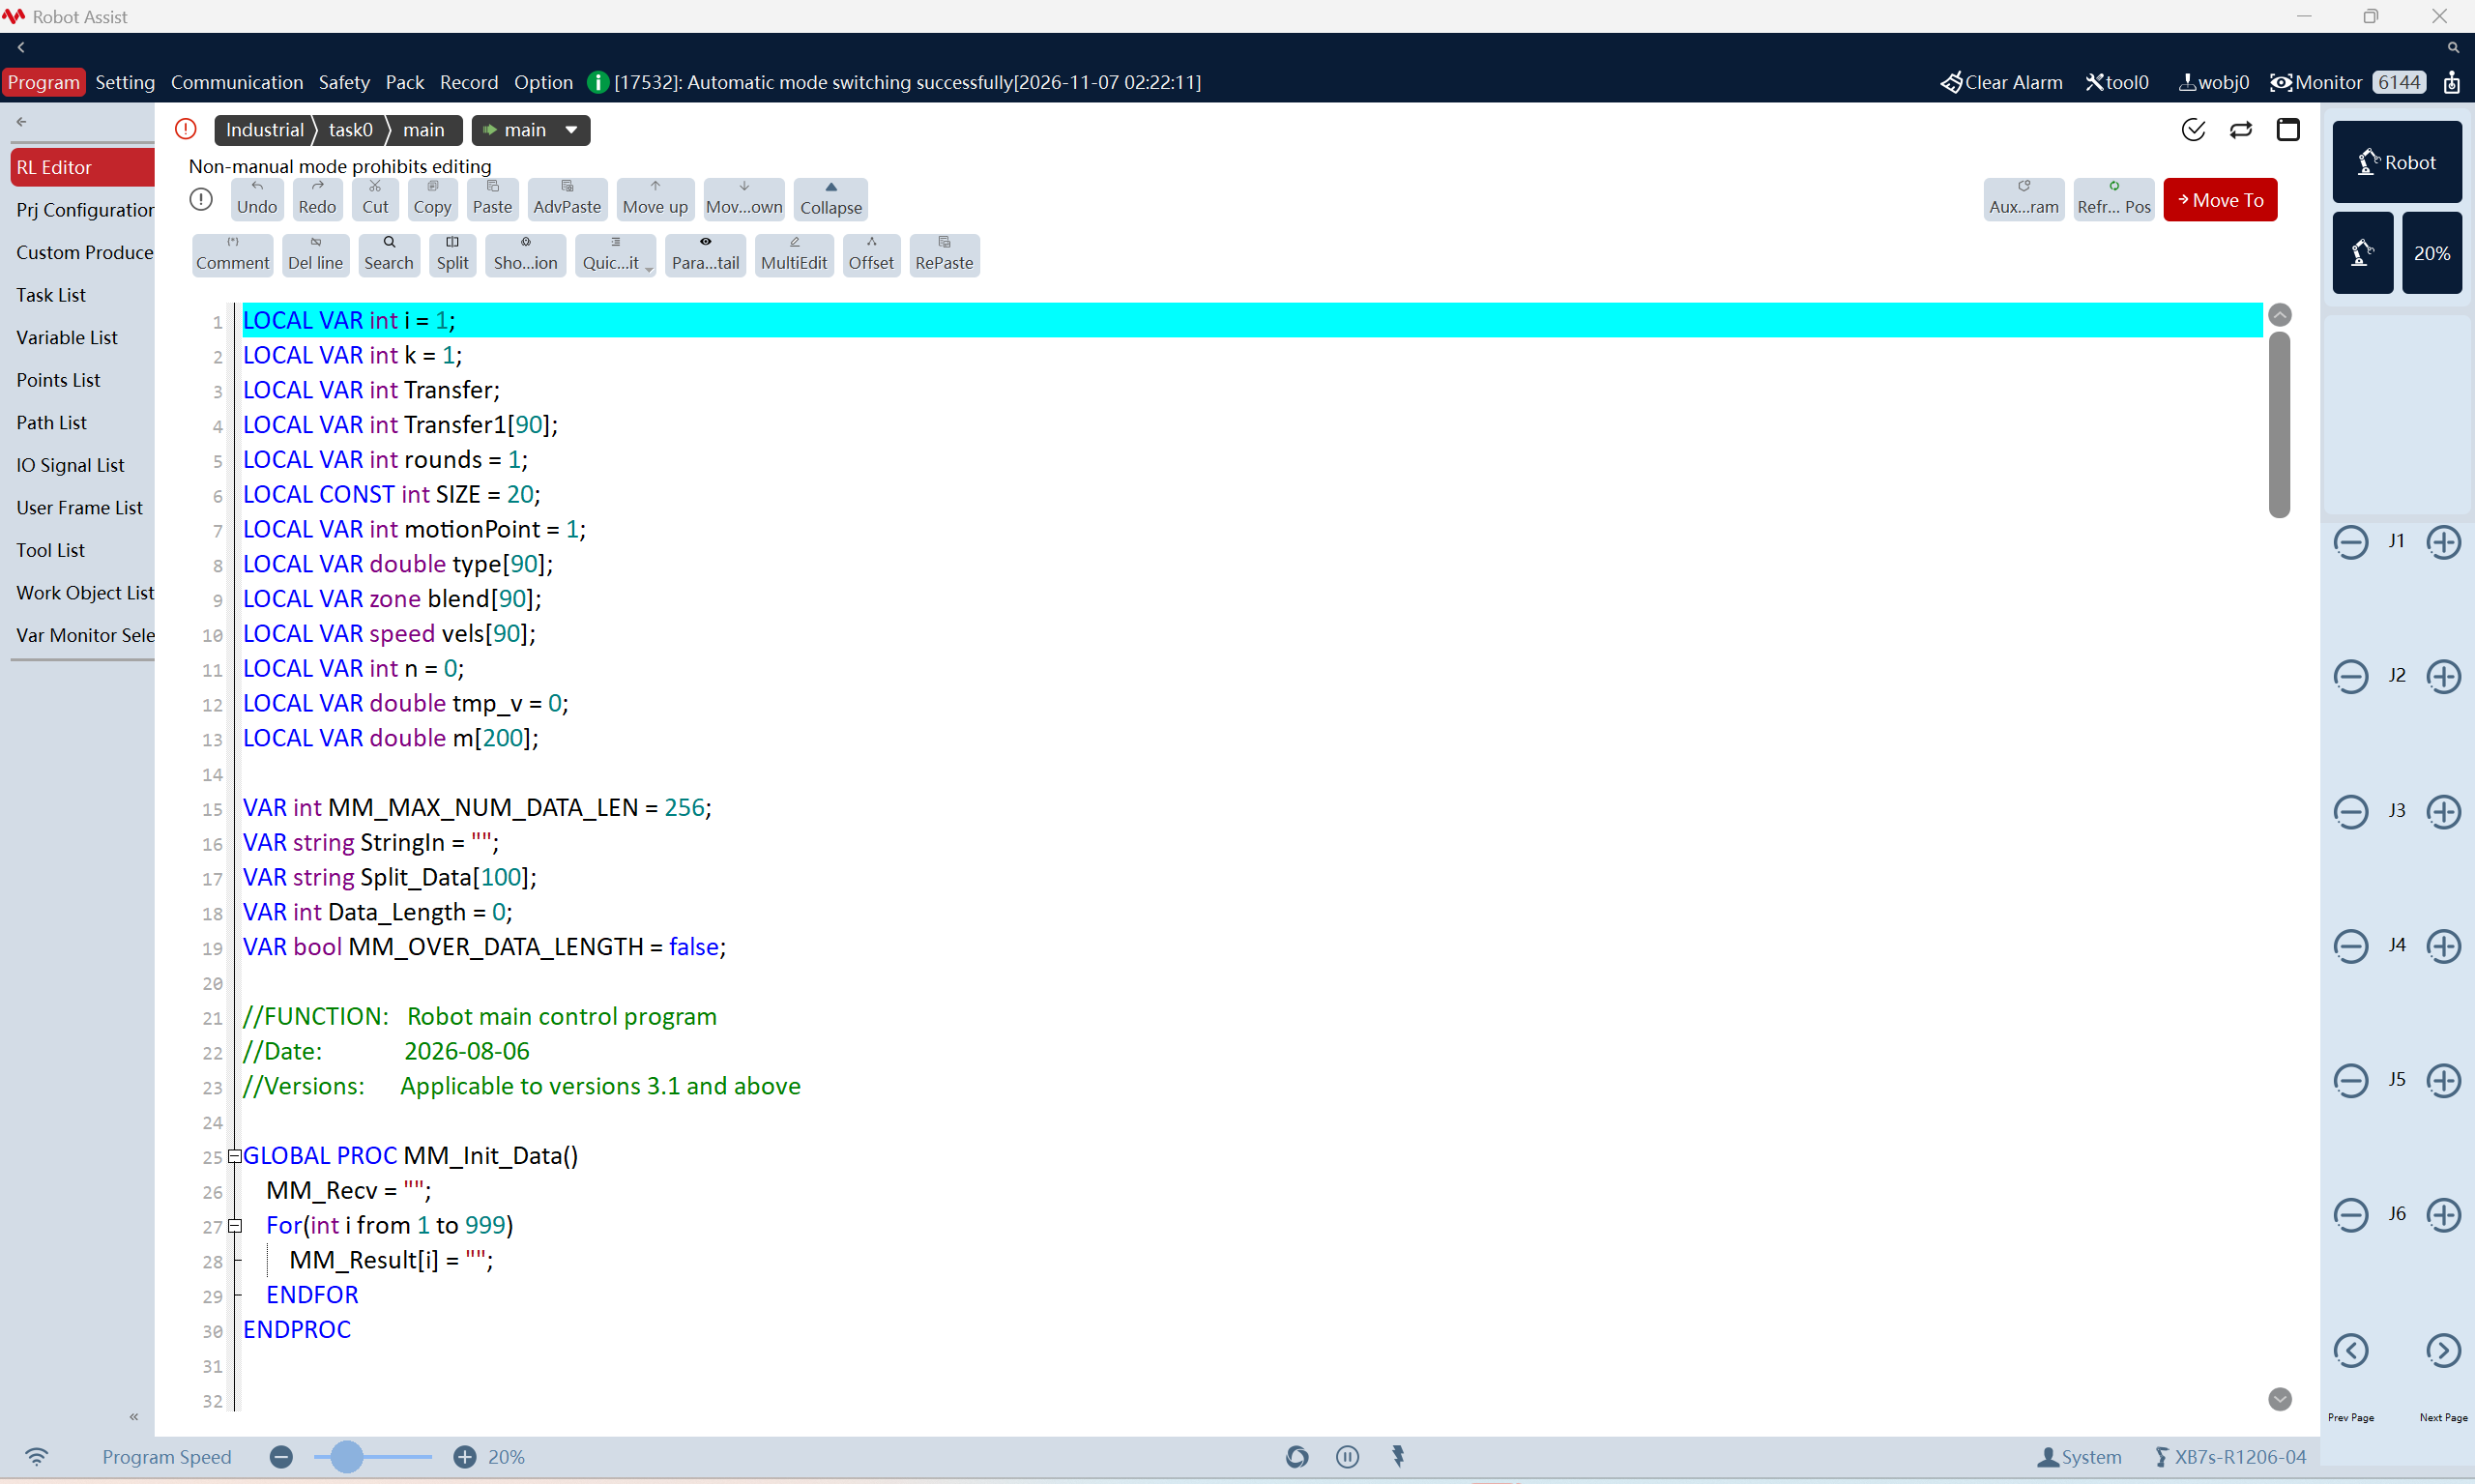
-
Click the green arrow in front of main; the program pointer will point to the main function.
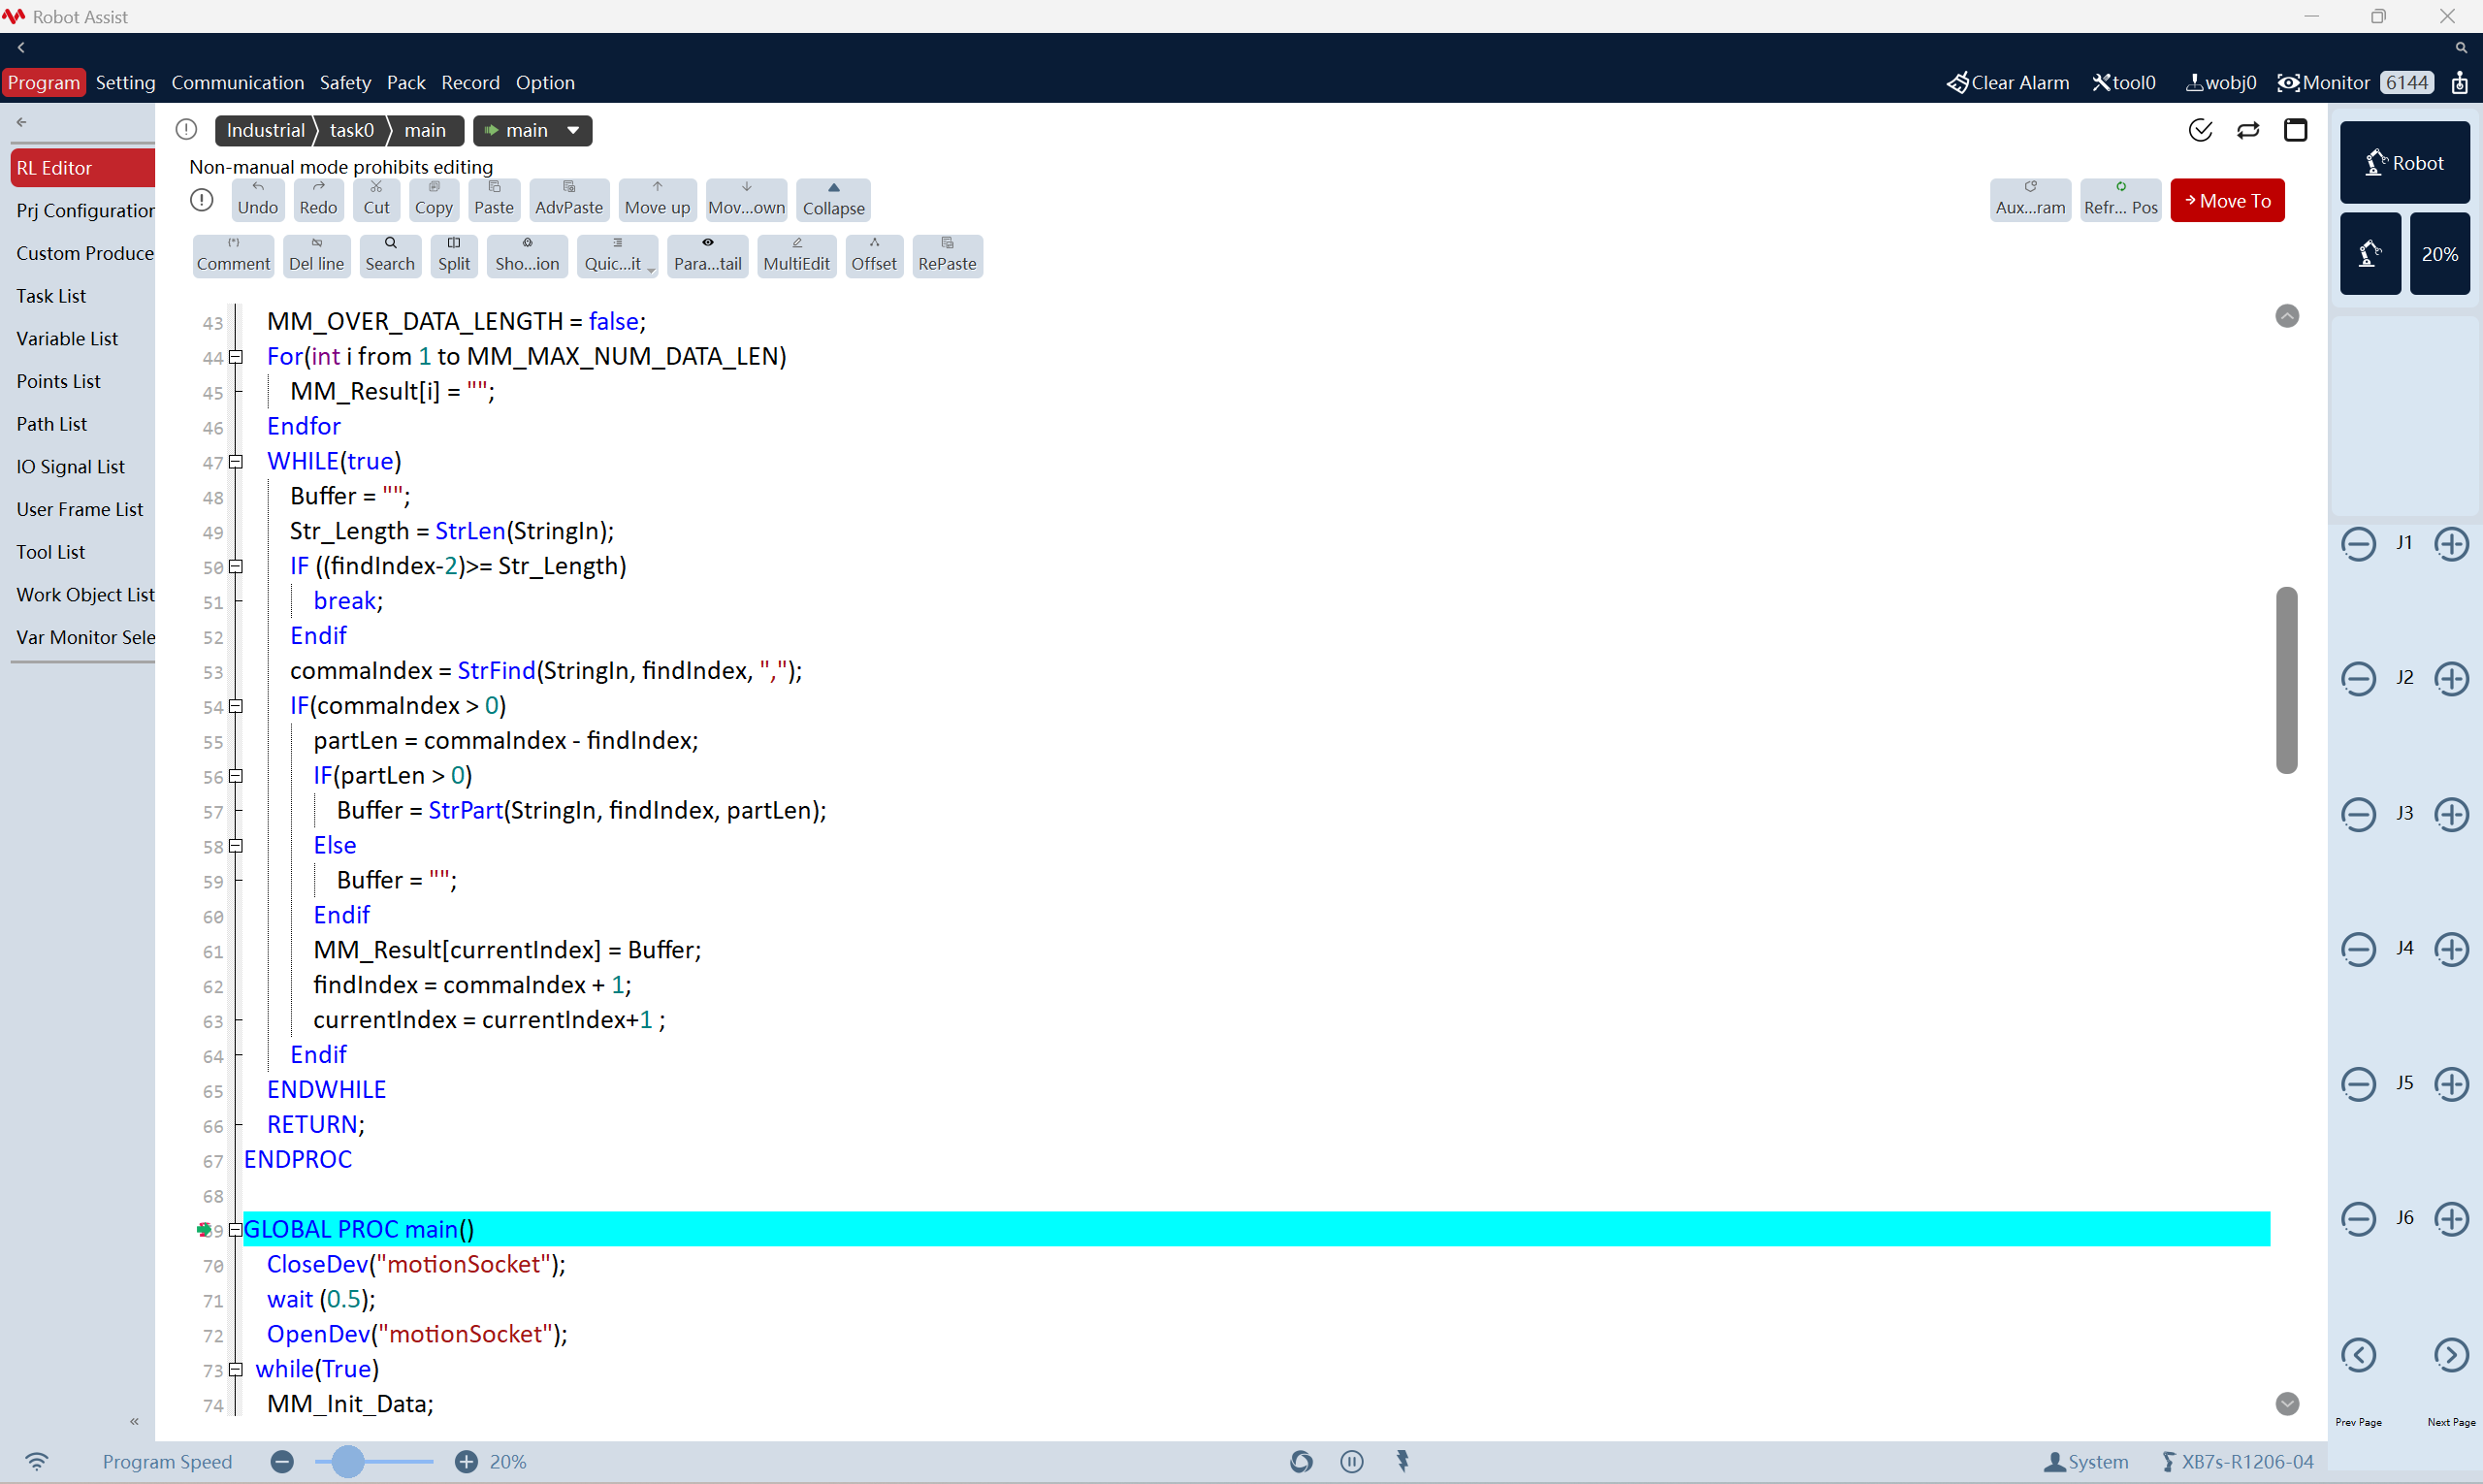
-
In the right sidebar, click the Run button (if there is no Run button, click Next Page).
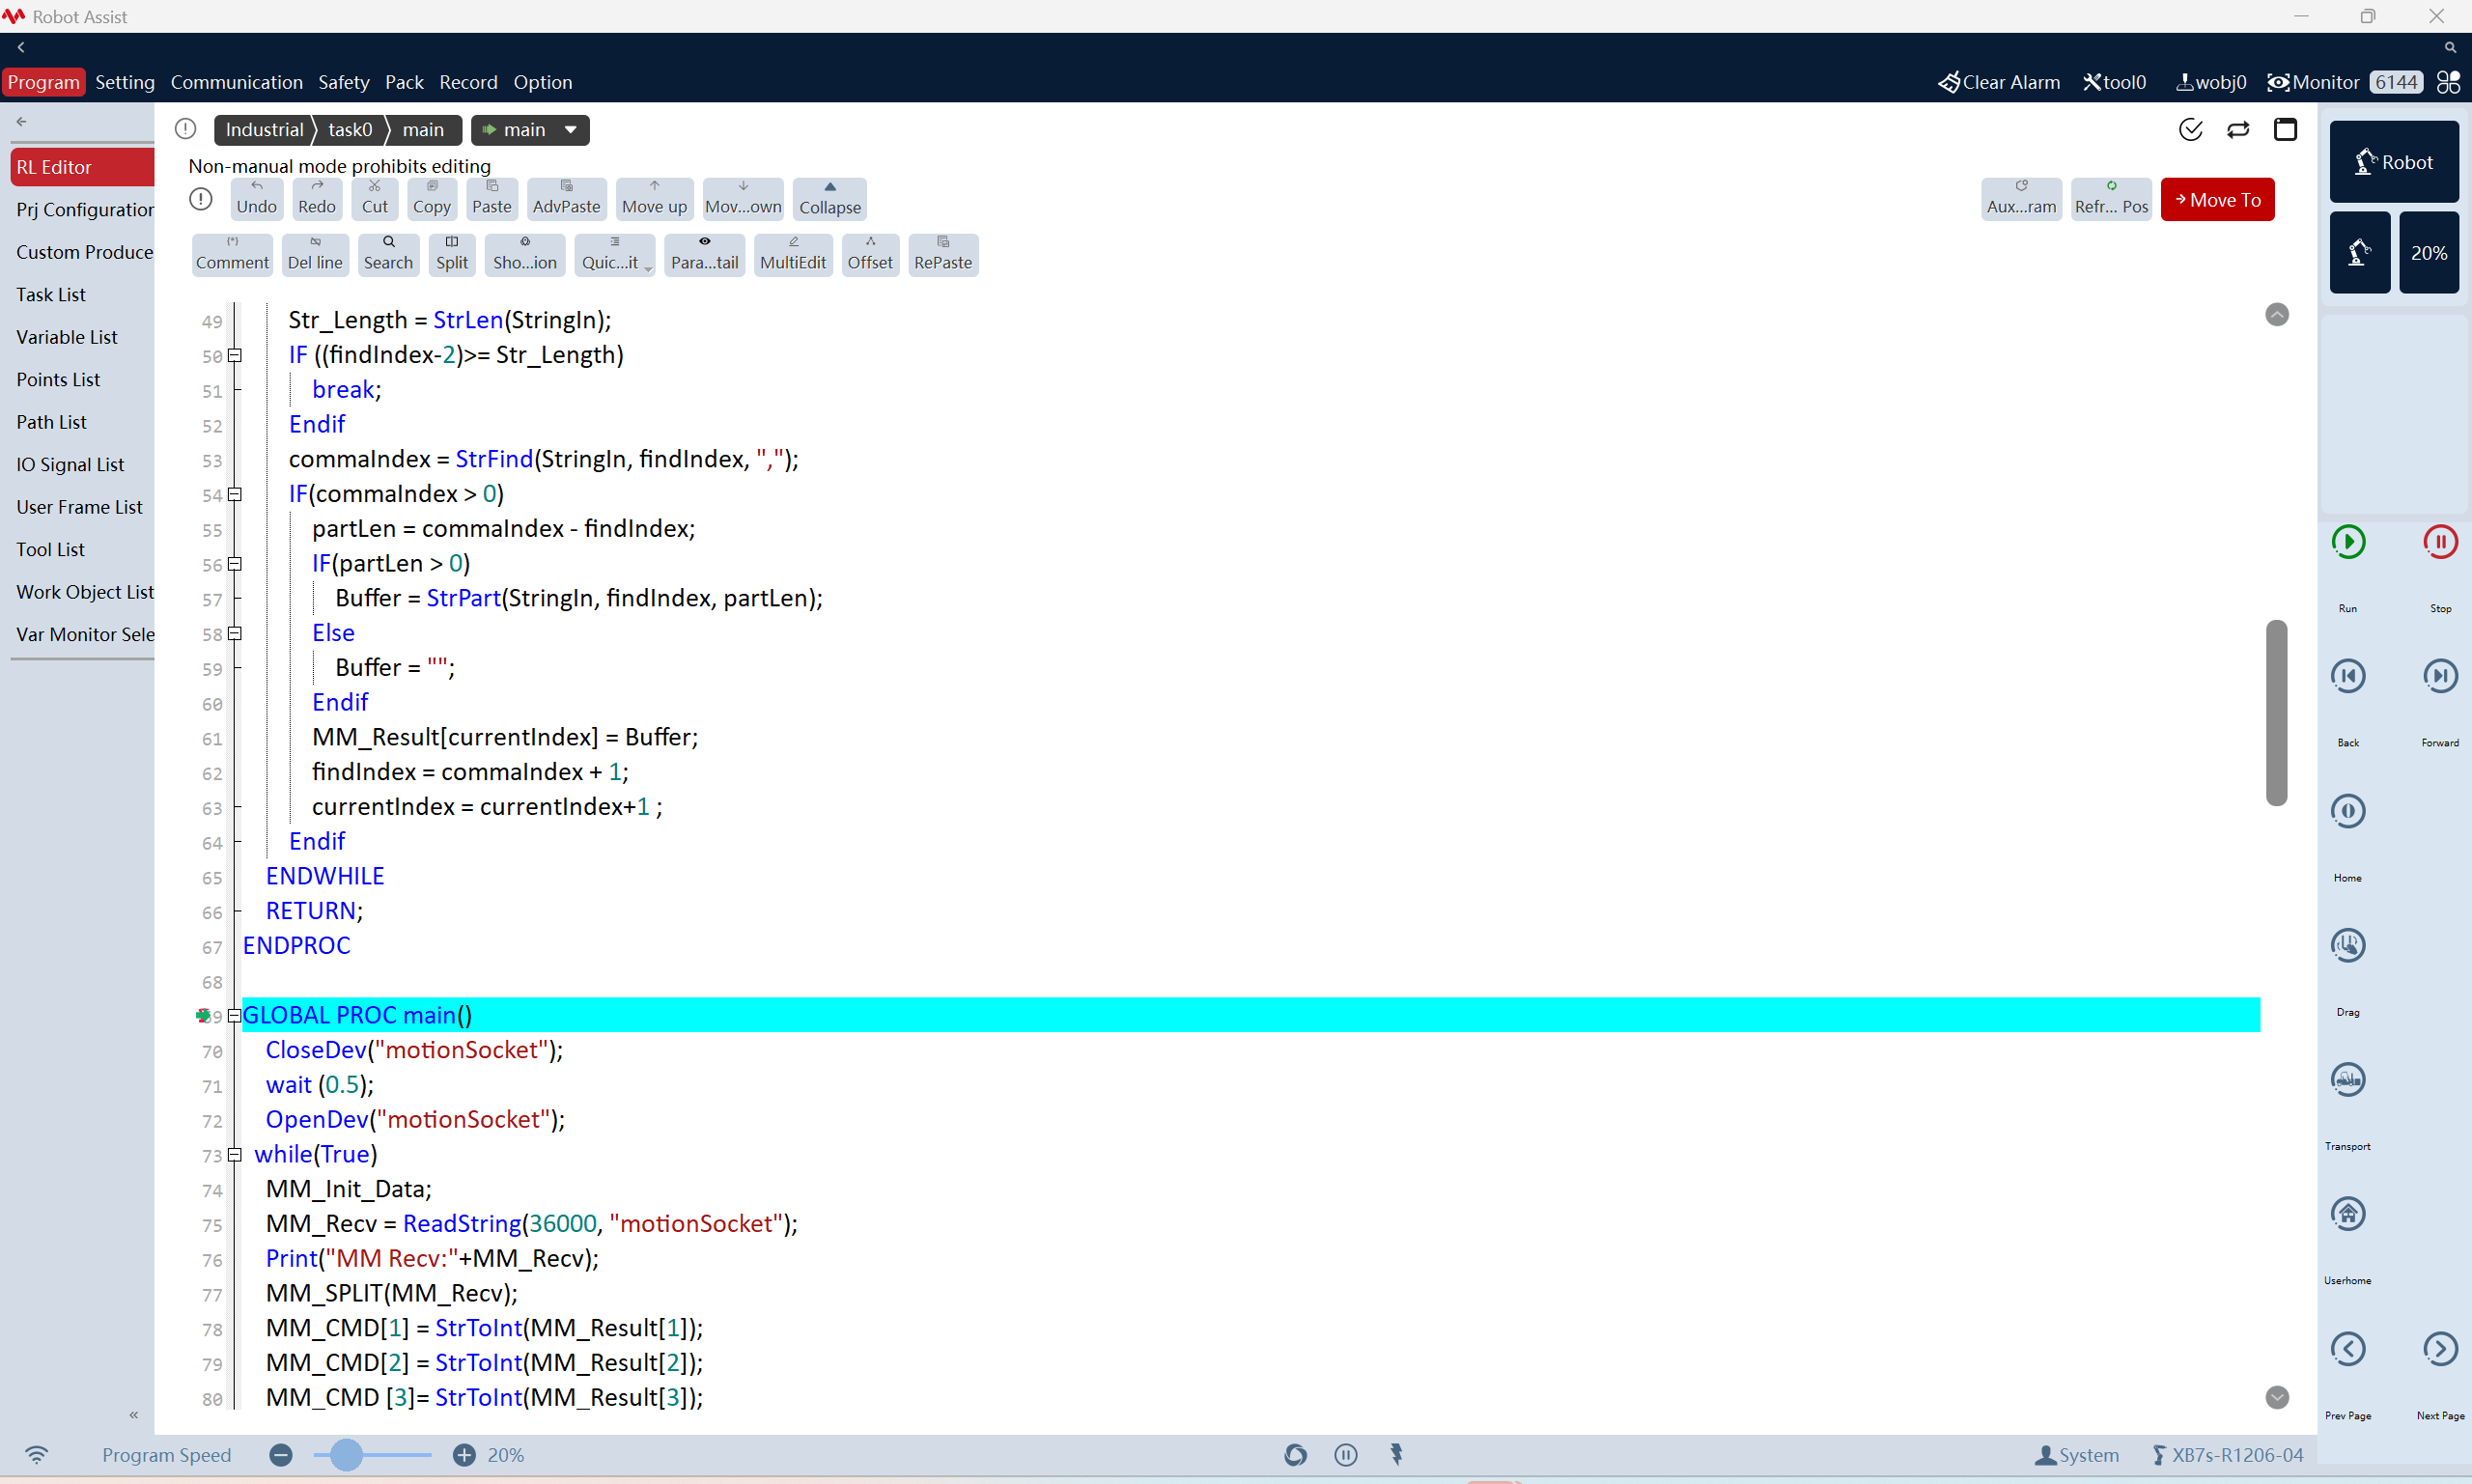
-
If Mech-Viz successfully connects the real robot, the current status will change to Connected. Meanwhile, the icon in the toolbar will turn from blue to green.
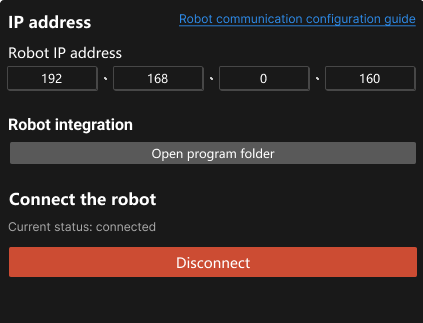
If the connection fails, please double-check the IP addresses set for the robot and the IPC, clear any robot alarms, and rerun the Master-Control program.
Move robot
-
In the toolbar of Mech-Viz, change the “Vel.” (velocity) and “Acc.” (acceleration) parameters to 5%.

-
Click Sync Robot in the toolbar, and you can synchronize the poses of the simulated robot in the 3D simulation space with the poses of the real robot. Then click Sync Robot again to unselect it.

-
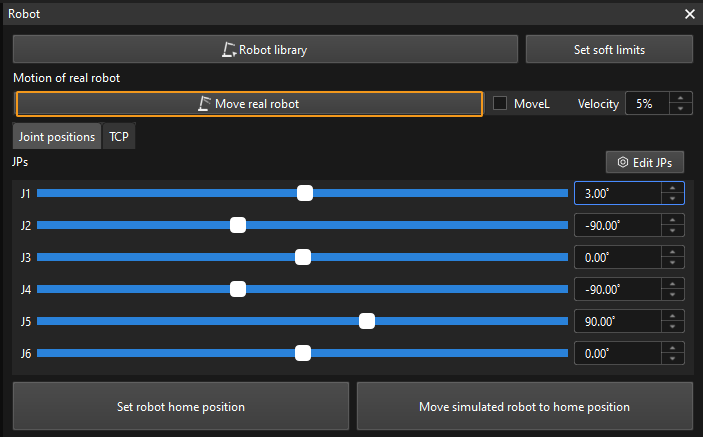
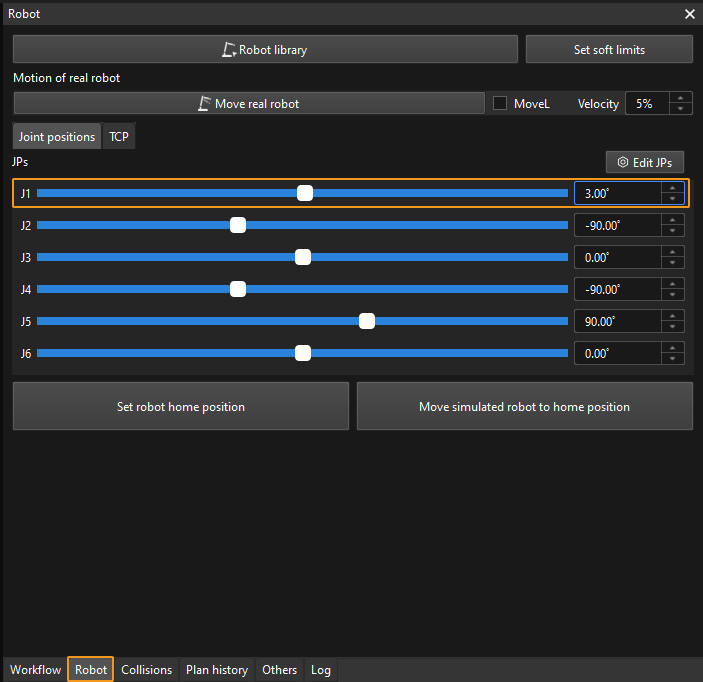
In the Robot tab, slightly adjust the value of “J1”, for example, from 0˚ to 3˚. This operation will move the simulated robot.
-
Click Move real robot and check if the real robot has moved. If the real robot has moved to the pose of the simulated robot, the Master-Control communication is working.
When moving the robot, please ensure the safety of personnel. In the case of an emergency, press the emergency stop button immediately!