KUKA (KSS 9.x) Automatic Calibration
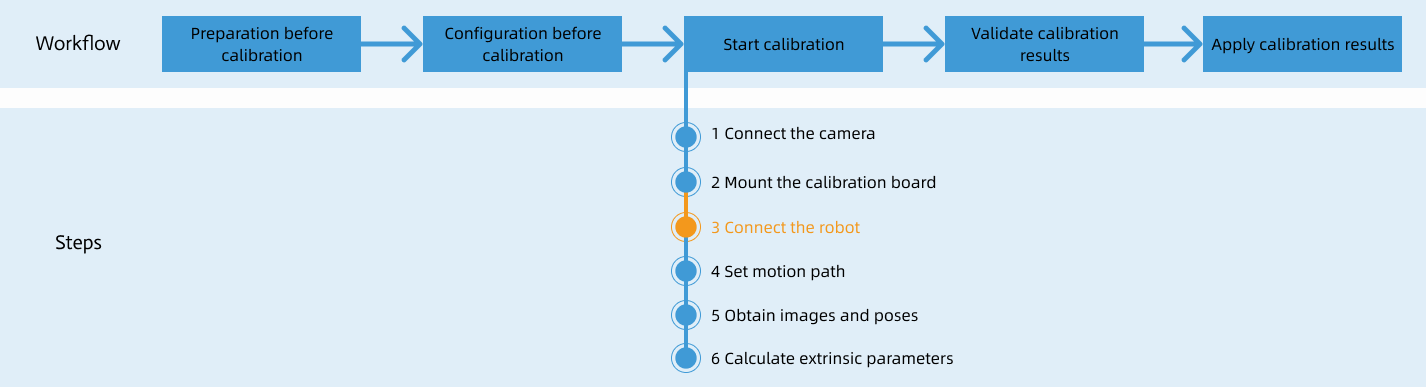
After you set up Standard Interface communication, you can connect the robot to perform automatic calibration. The overall workflow of automatic calibration is shown in the figure below.
Special note
During the calibration procedure, when you reach the Connect the robot step and the Waiting for robot to connect... button appears in Mech-Vision, perform the steps below on the robot side. After you perform the steps, proceed with the remaining steps in Mech-Vision.
|
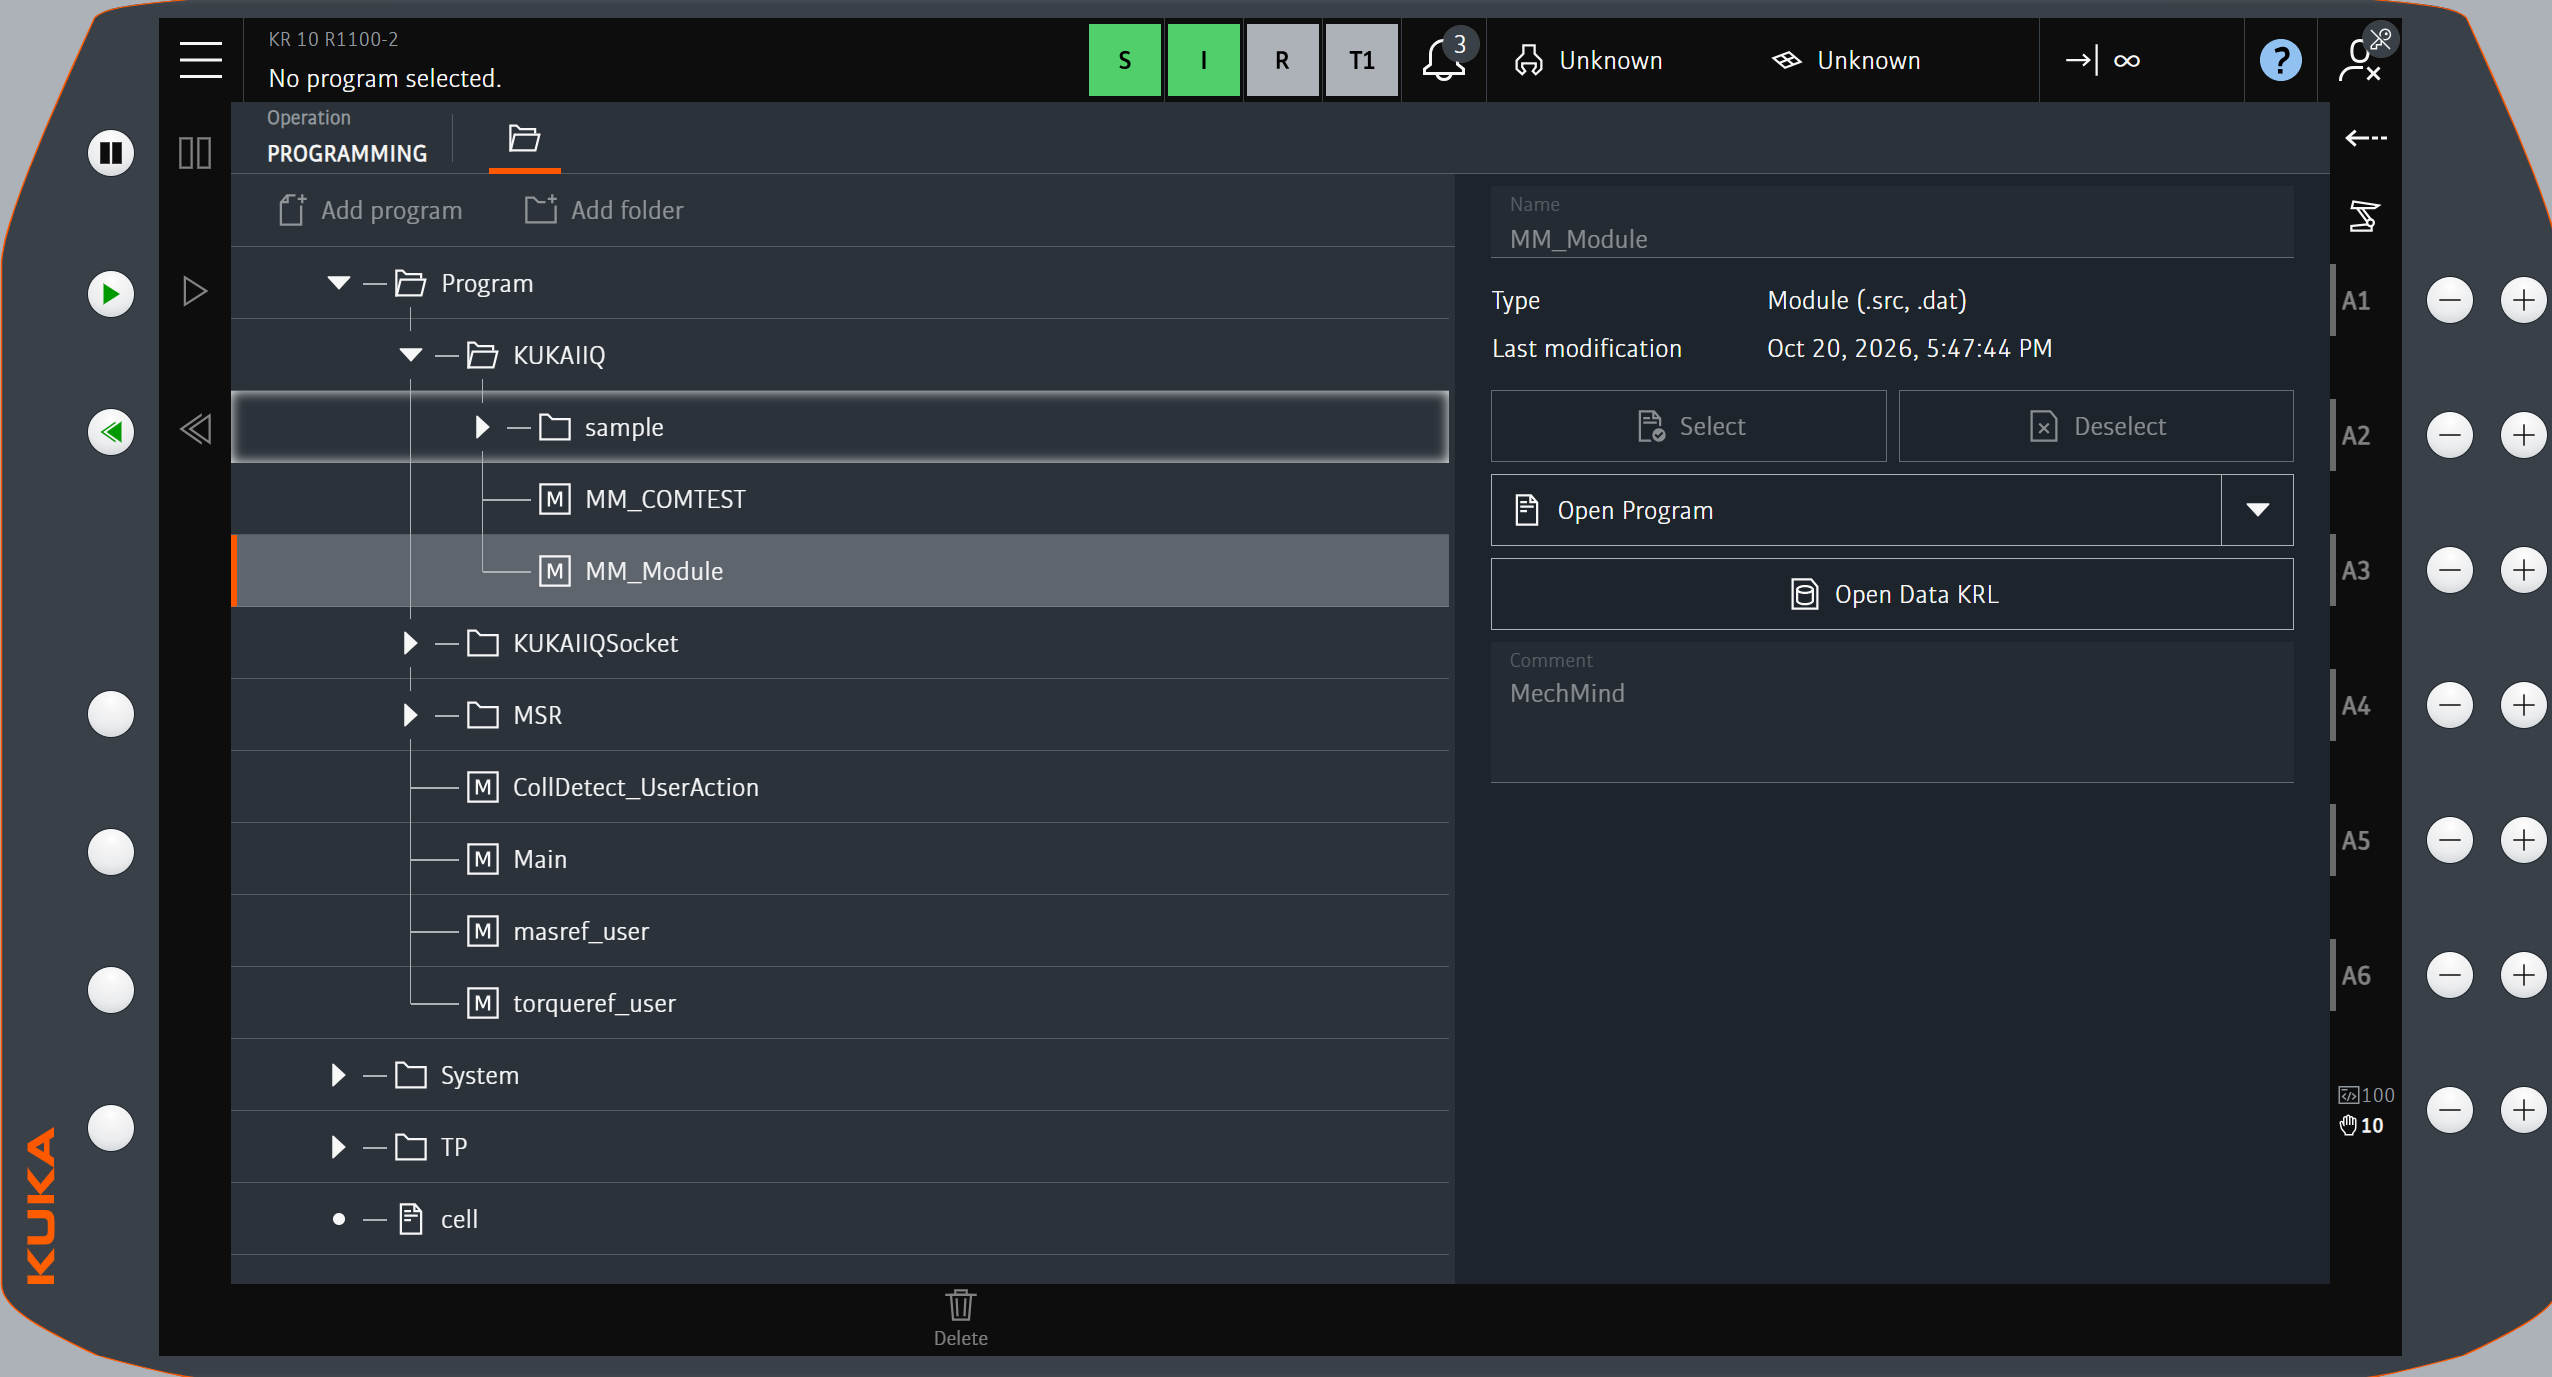
1. Select the Calibration Program
-
Switch to the Administrator user group following the instructions in Switch to the Administrator User Group.
-
On the teach pendant, select the MM_Module program under Program/KUKA_V9, and then click Open Program to complete the program selection.
2. Teach Calibration Start Point
-
Move the robot manually to the start point for calibration.
You can use the position of the robot in the Check the Point Cloud Quality of the Calibration Board step as the calibration start point.
-
Click the “PTP P0 Vel=100 % PDAT0 Tool[1] Base[0]” line to move the cursor to this line. Click Block selection, and a pointer appears in front of the line. Then, click Touch up.
If the Touch up button does not work and an error occurs, try deleting the current motion command and then recreate the motion command. 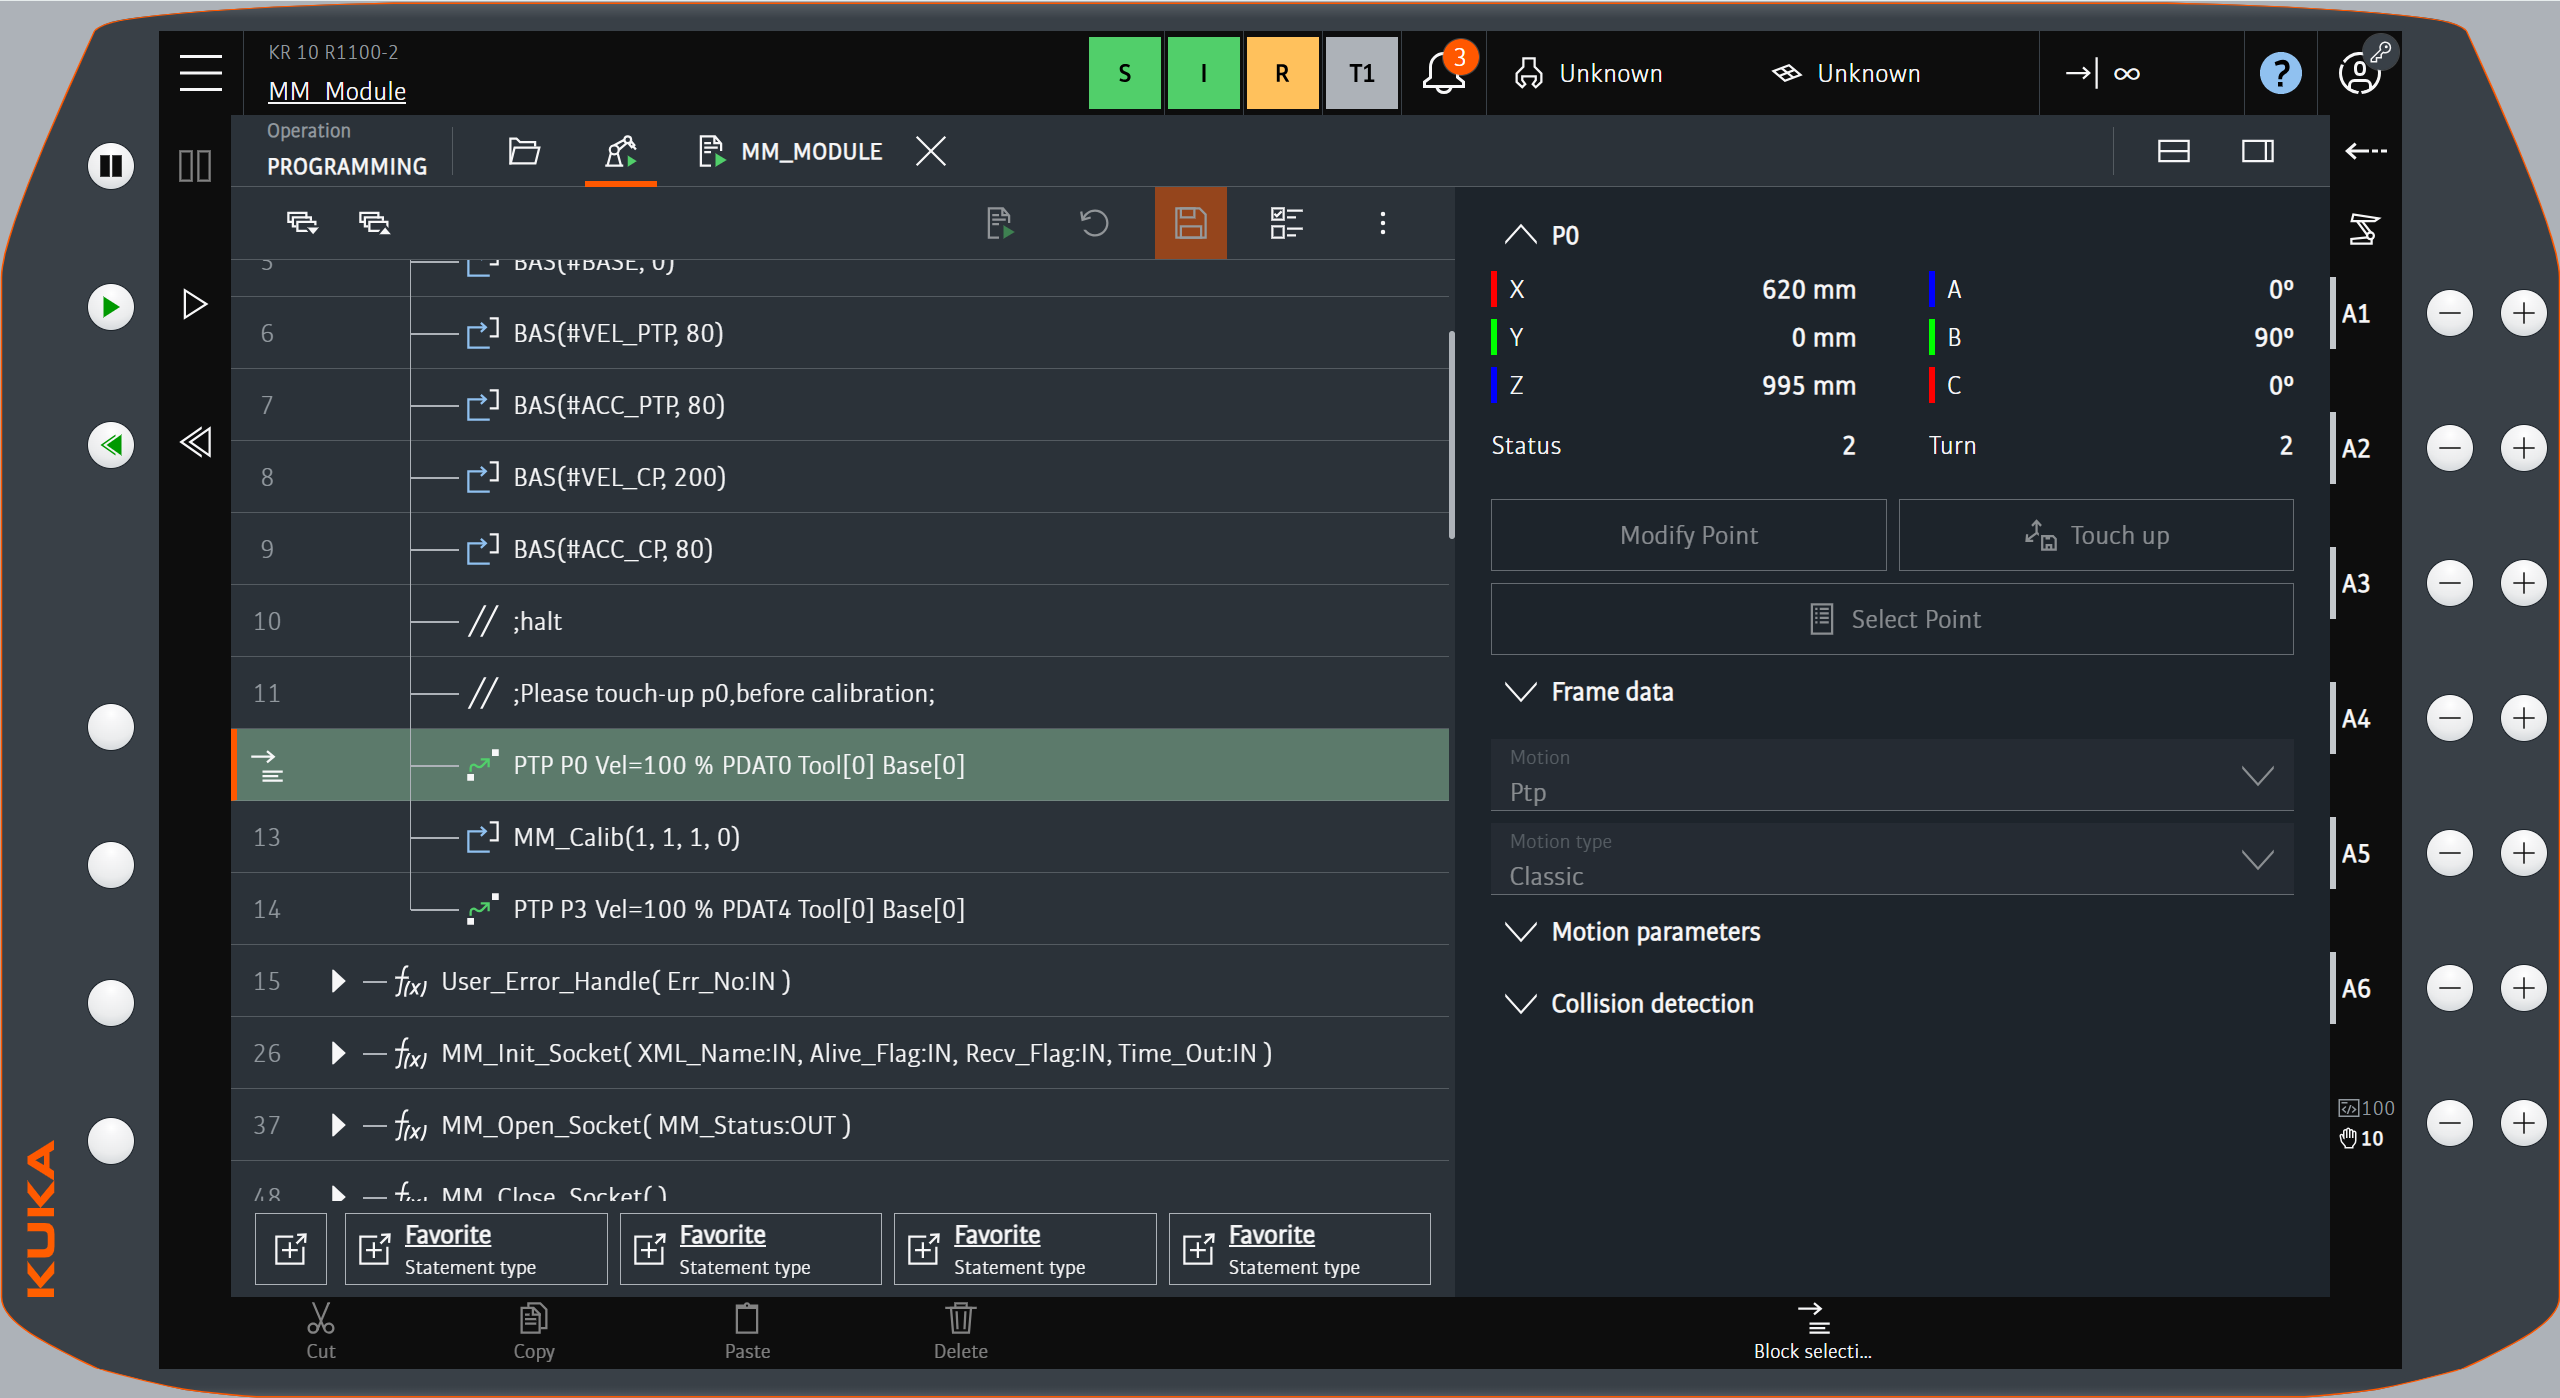
-
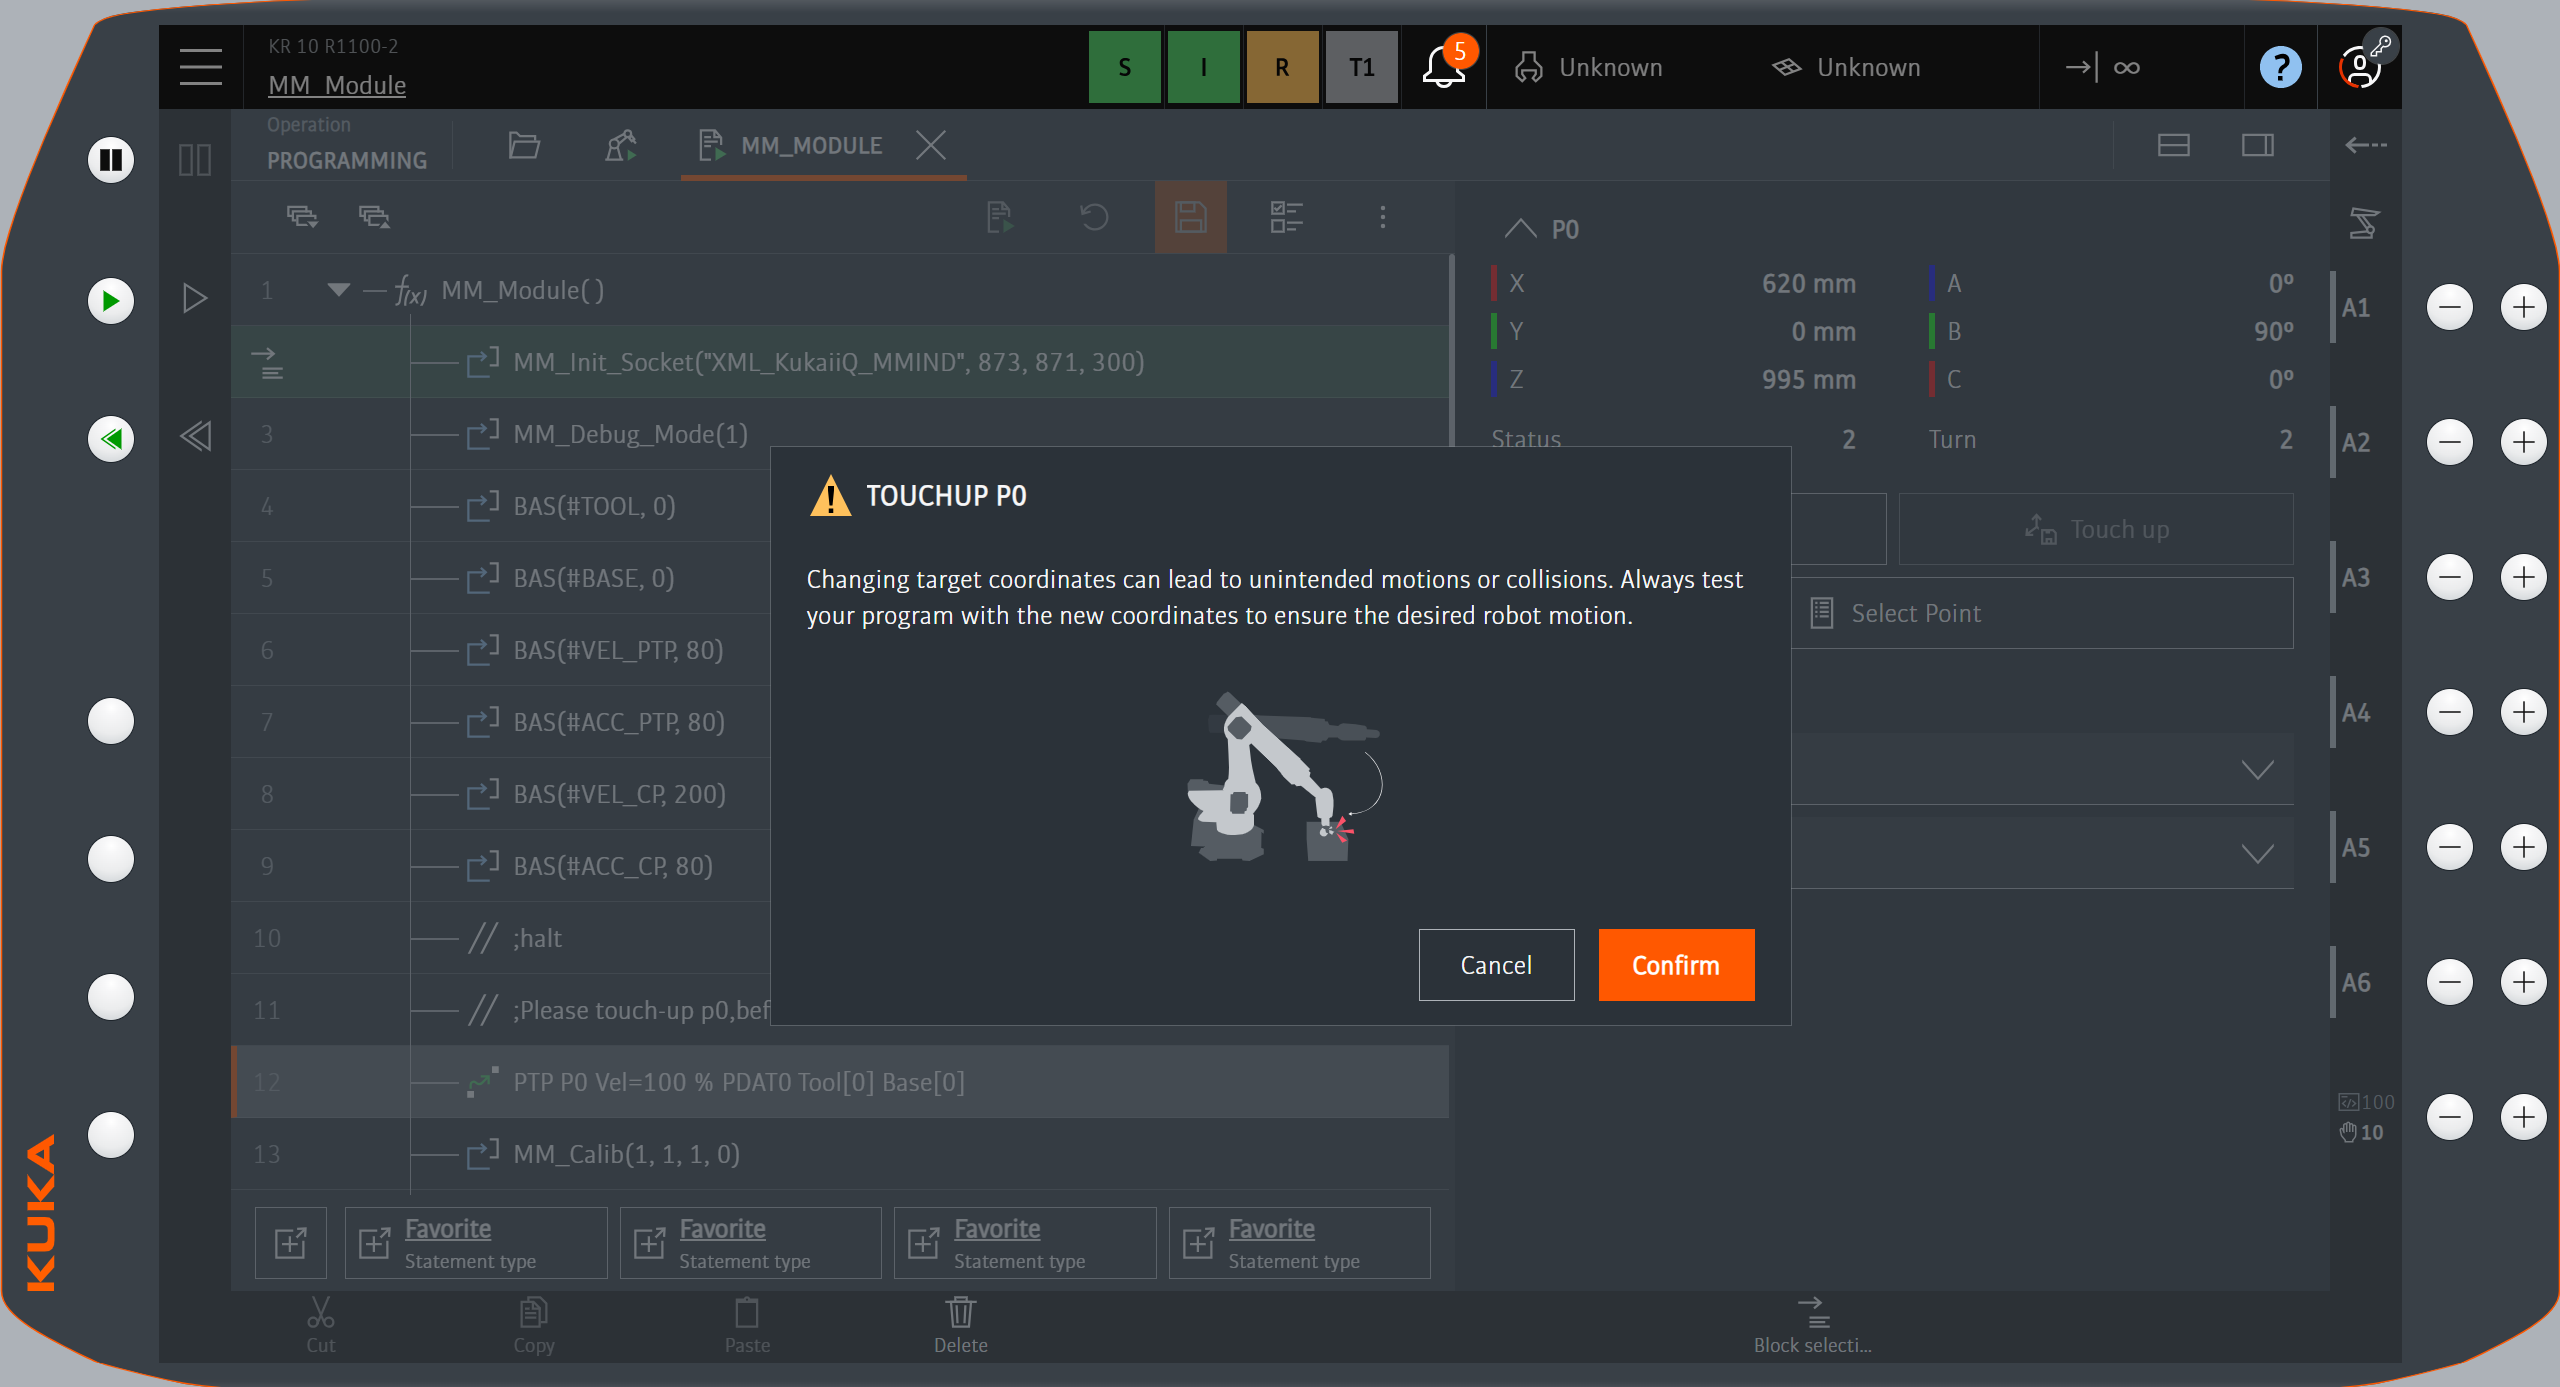
Press OK in the pop-up window to finish teaching the start point for calibration.
3. Run Calibration Program
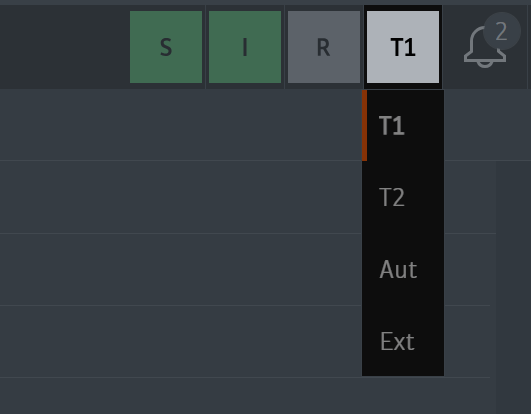
Before you start, please learn how to switch the operating mode as described below. This will not be repeated in the following sections.
Click the mode selection button and select an operating mode from the drop-down list. T1 stands for the Manual Reduced Velocity mode, and Aut stands for the Automatic mode.
-
Following the operations above, switch to the Aut mode.
-
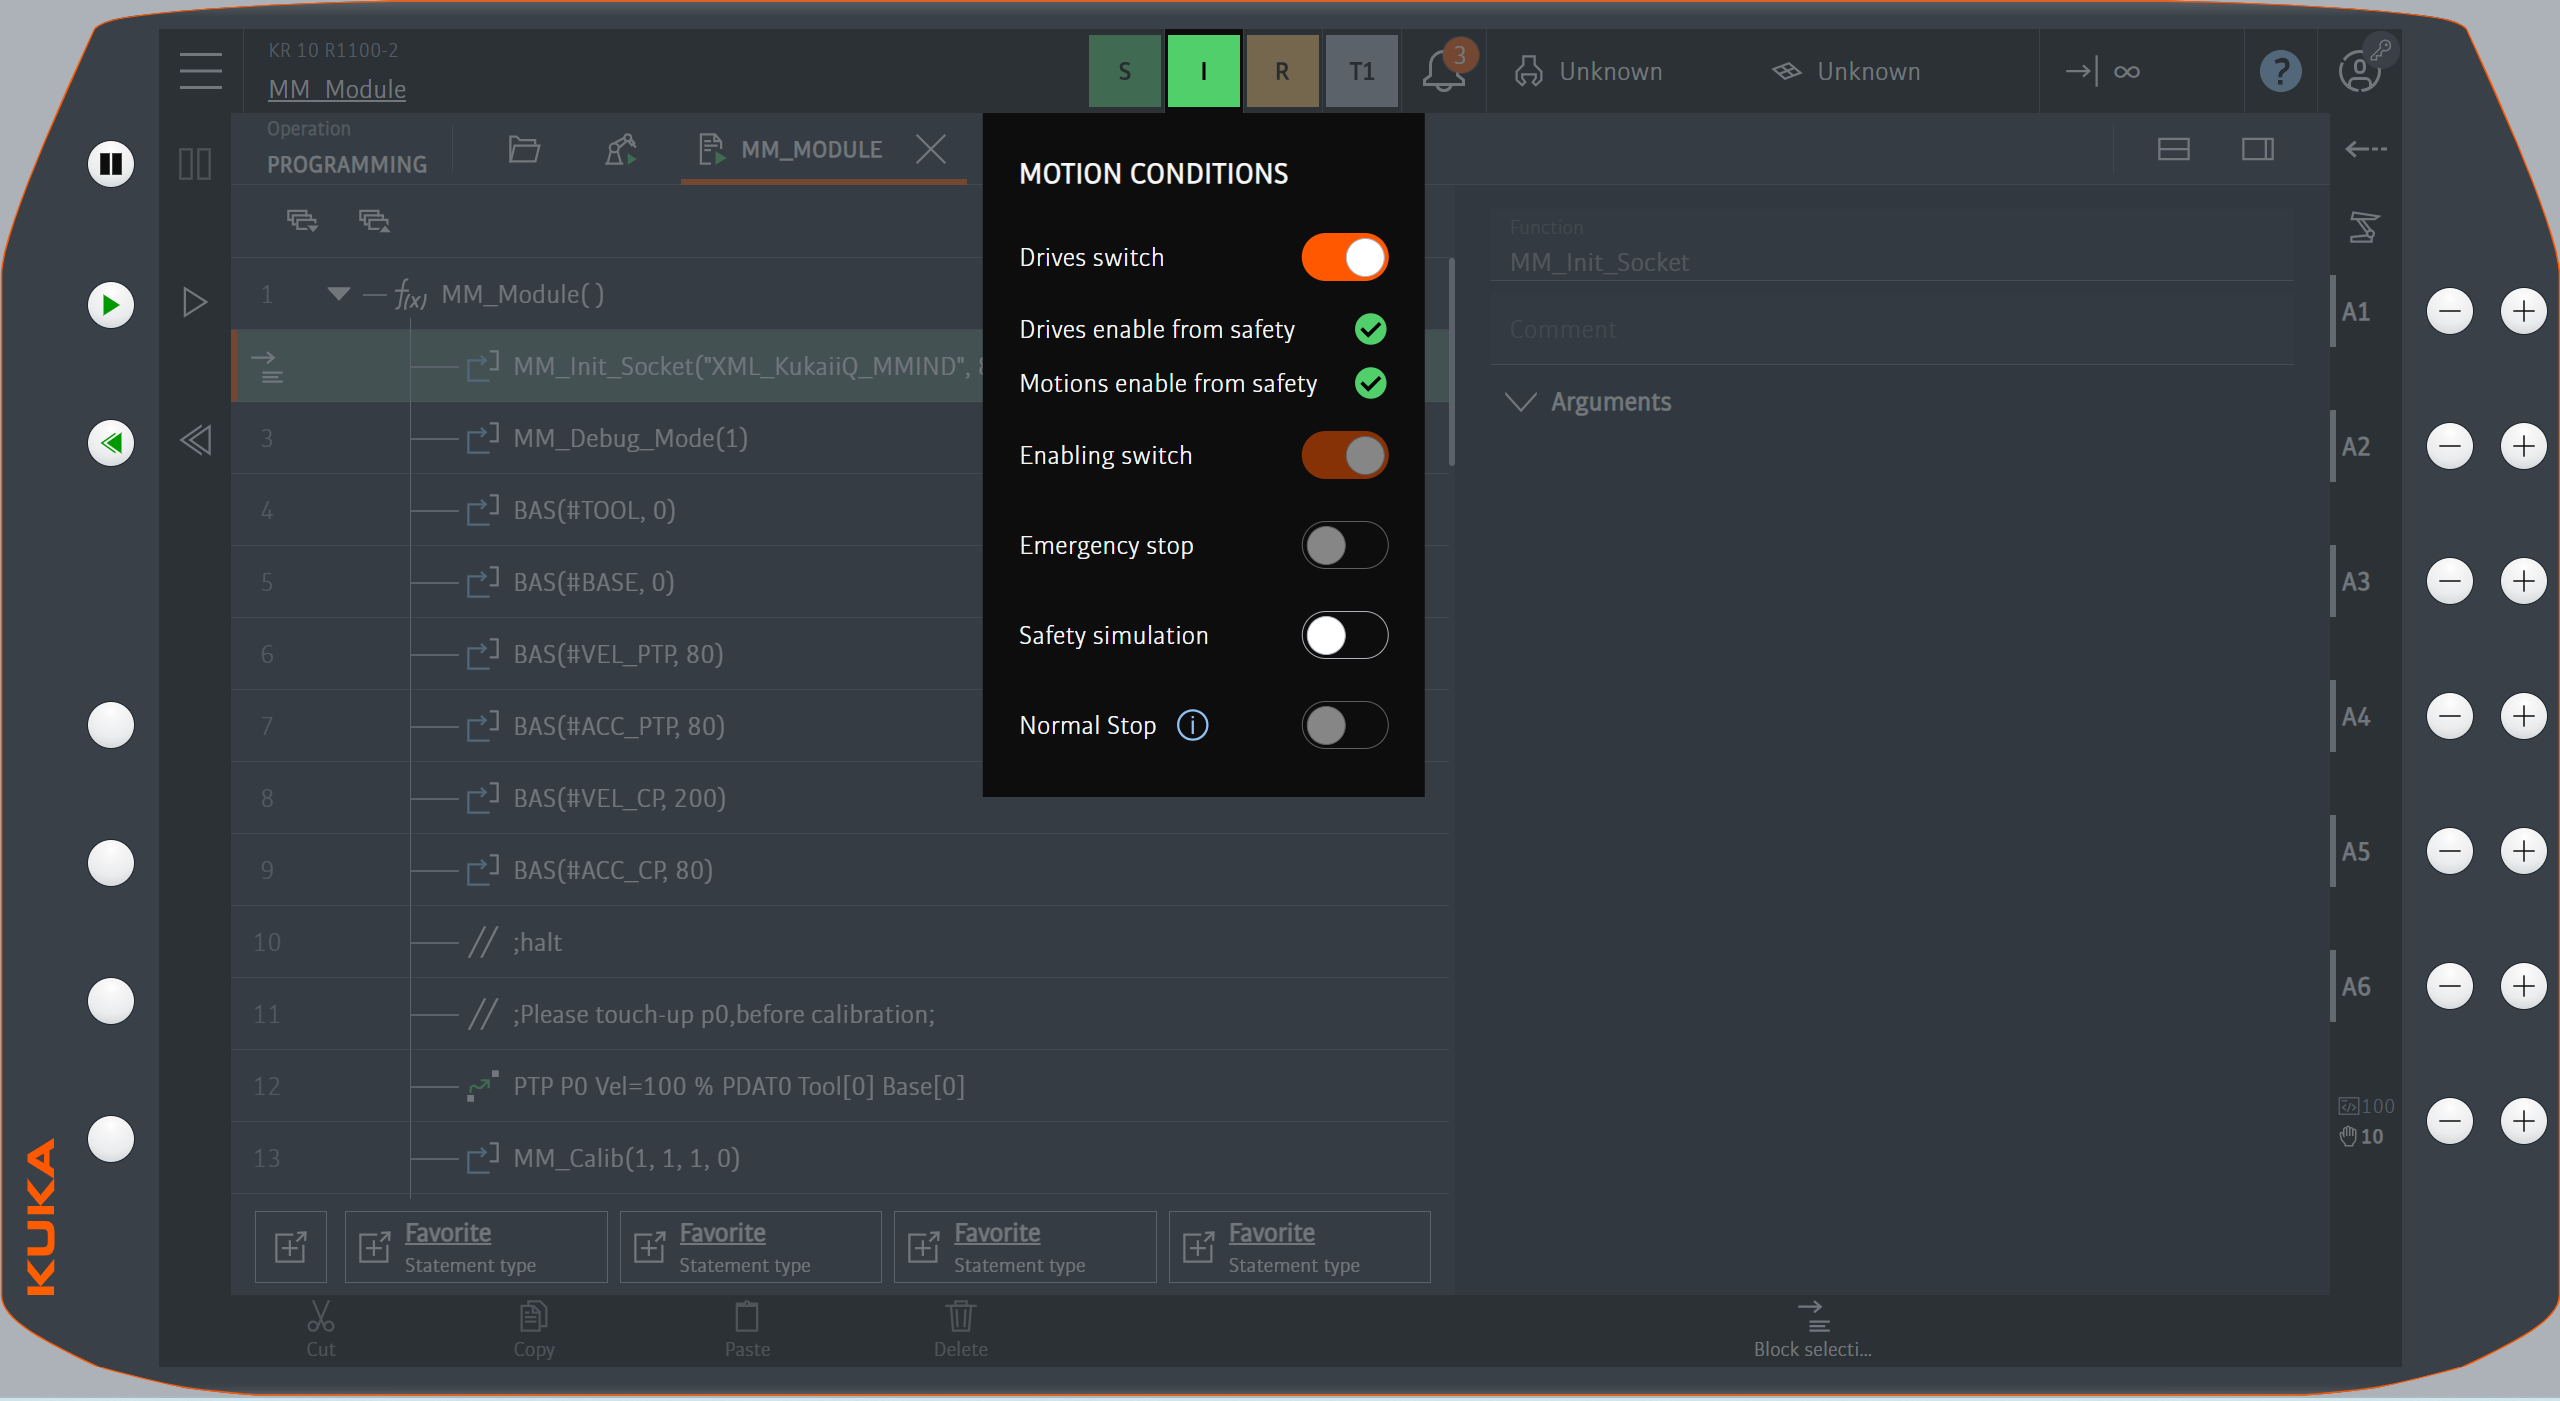
Click O at the top of the teach pendant, and turn on the Drives switch in the pop-up window. Skip this step if the status of Drives is already I.
-
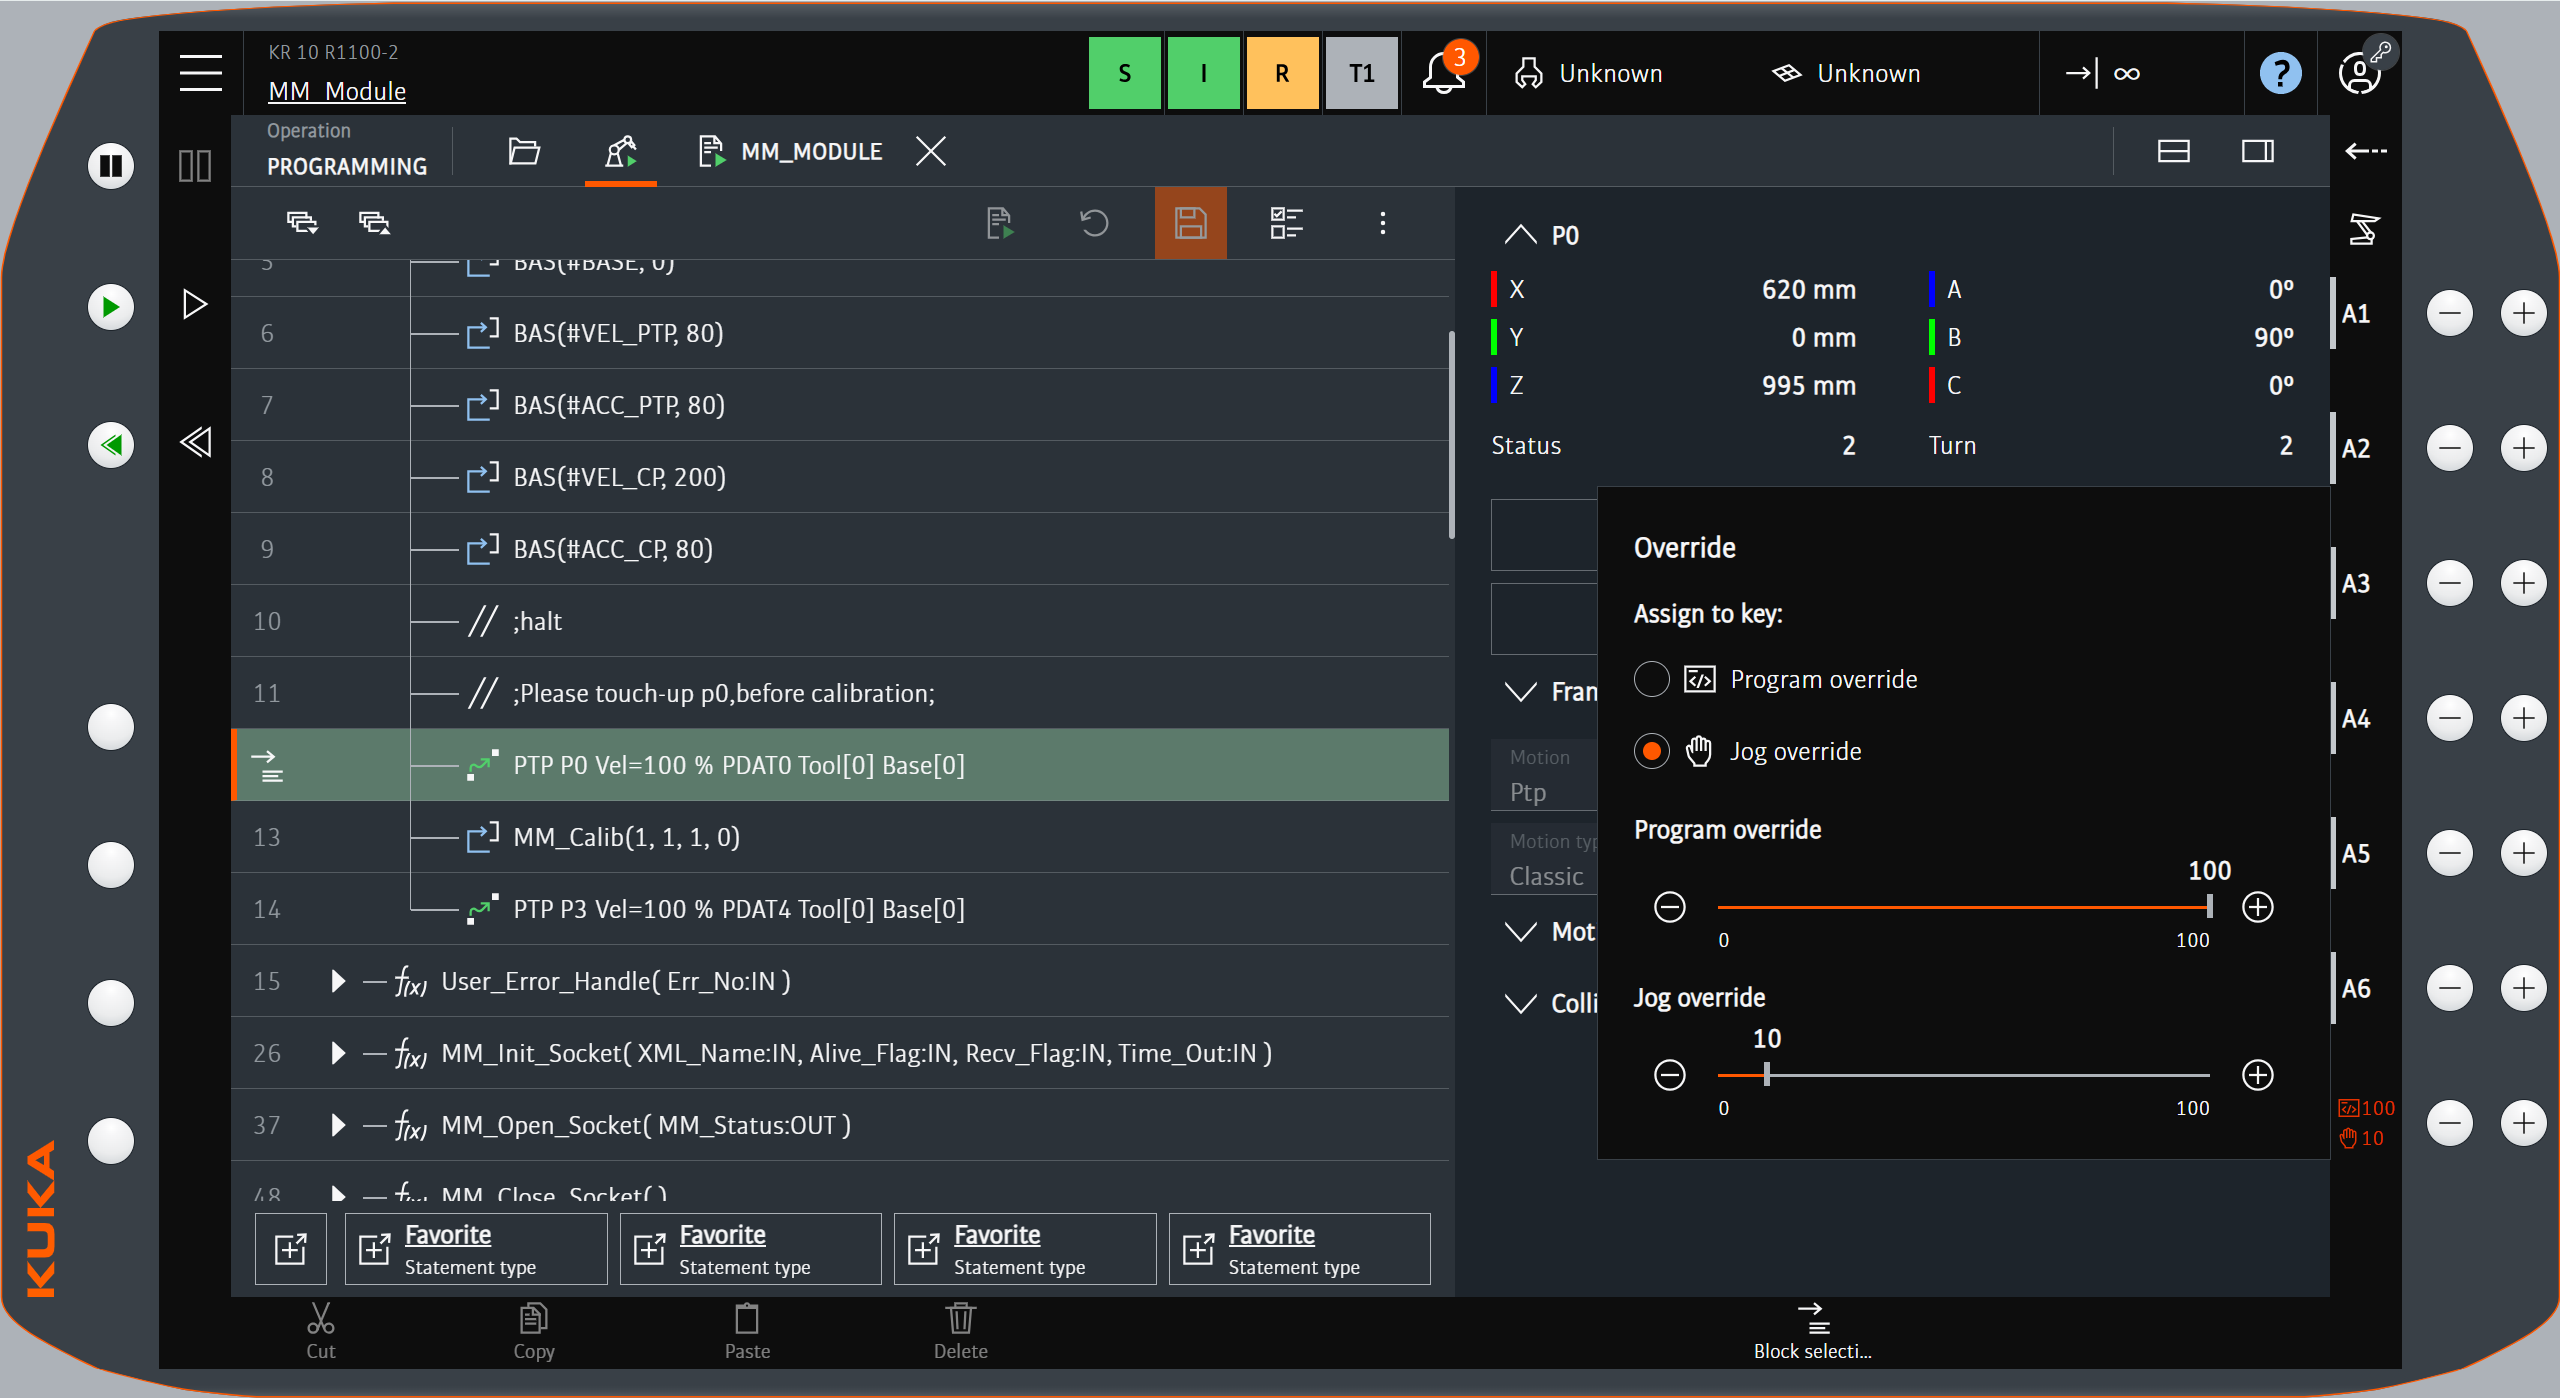
Click the rate icon in the lower-right corner of the teach pendant, and adjust Program override to a proper value to set a proper running speed. Watch the robot’s motion when the program is running.
-
Click the
MM_Init_Socketline to move the cursor to this line, and then click Block selection. After the line is selected, it will turn green.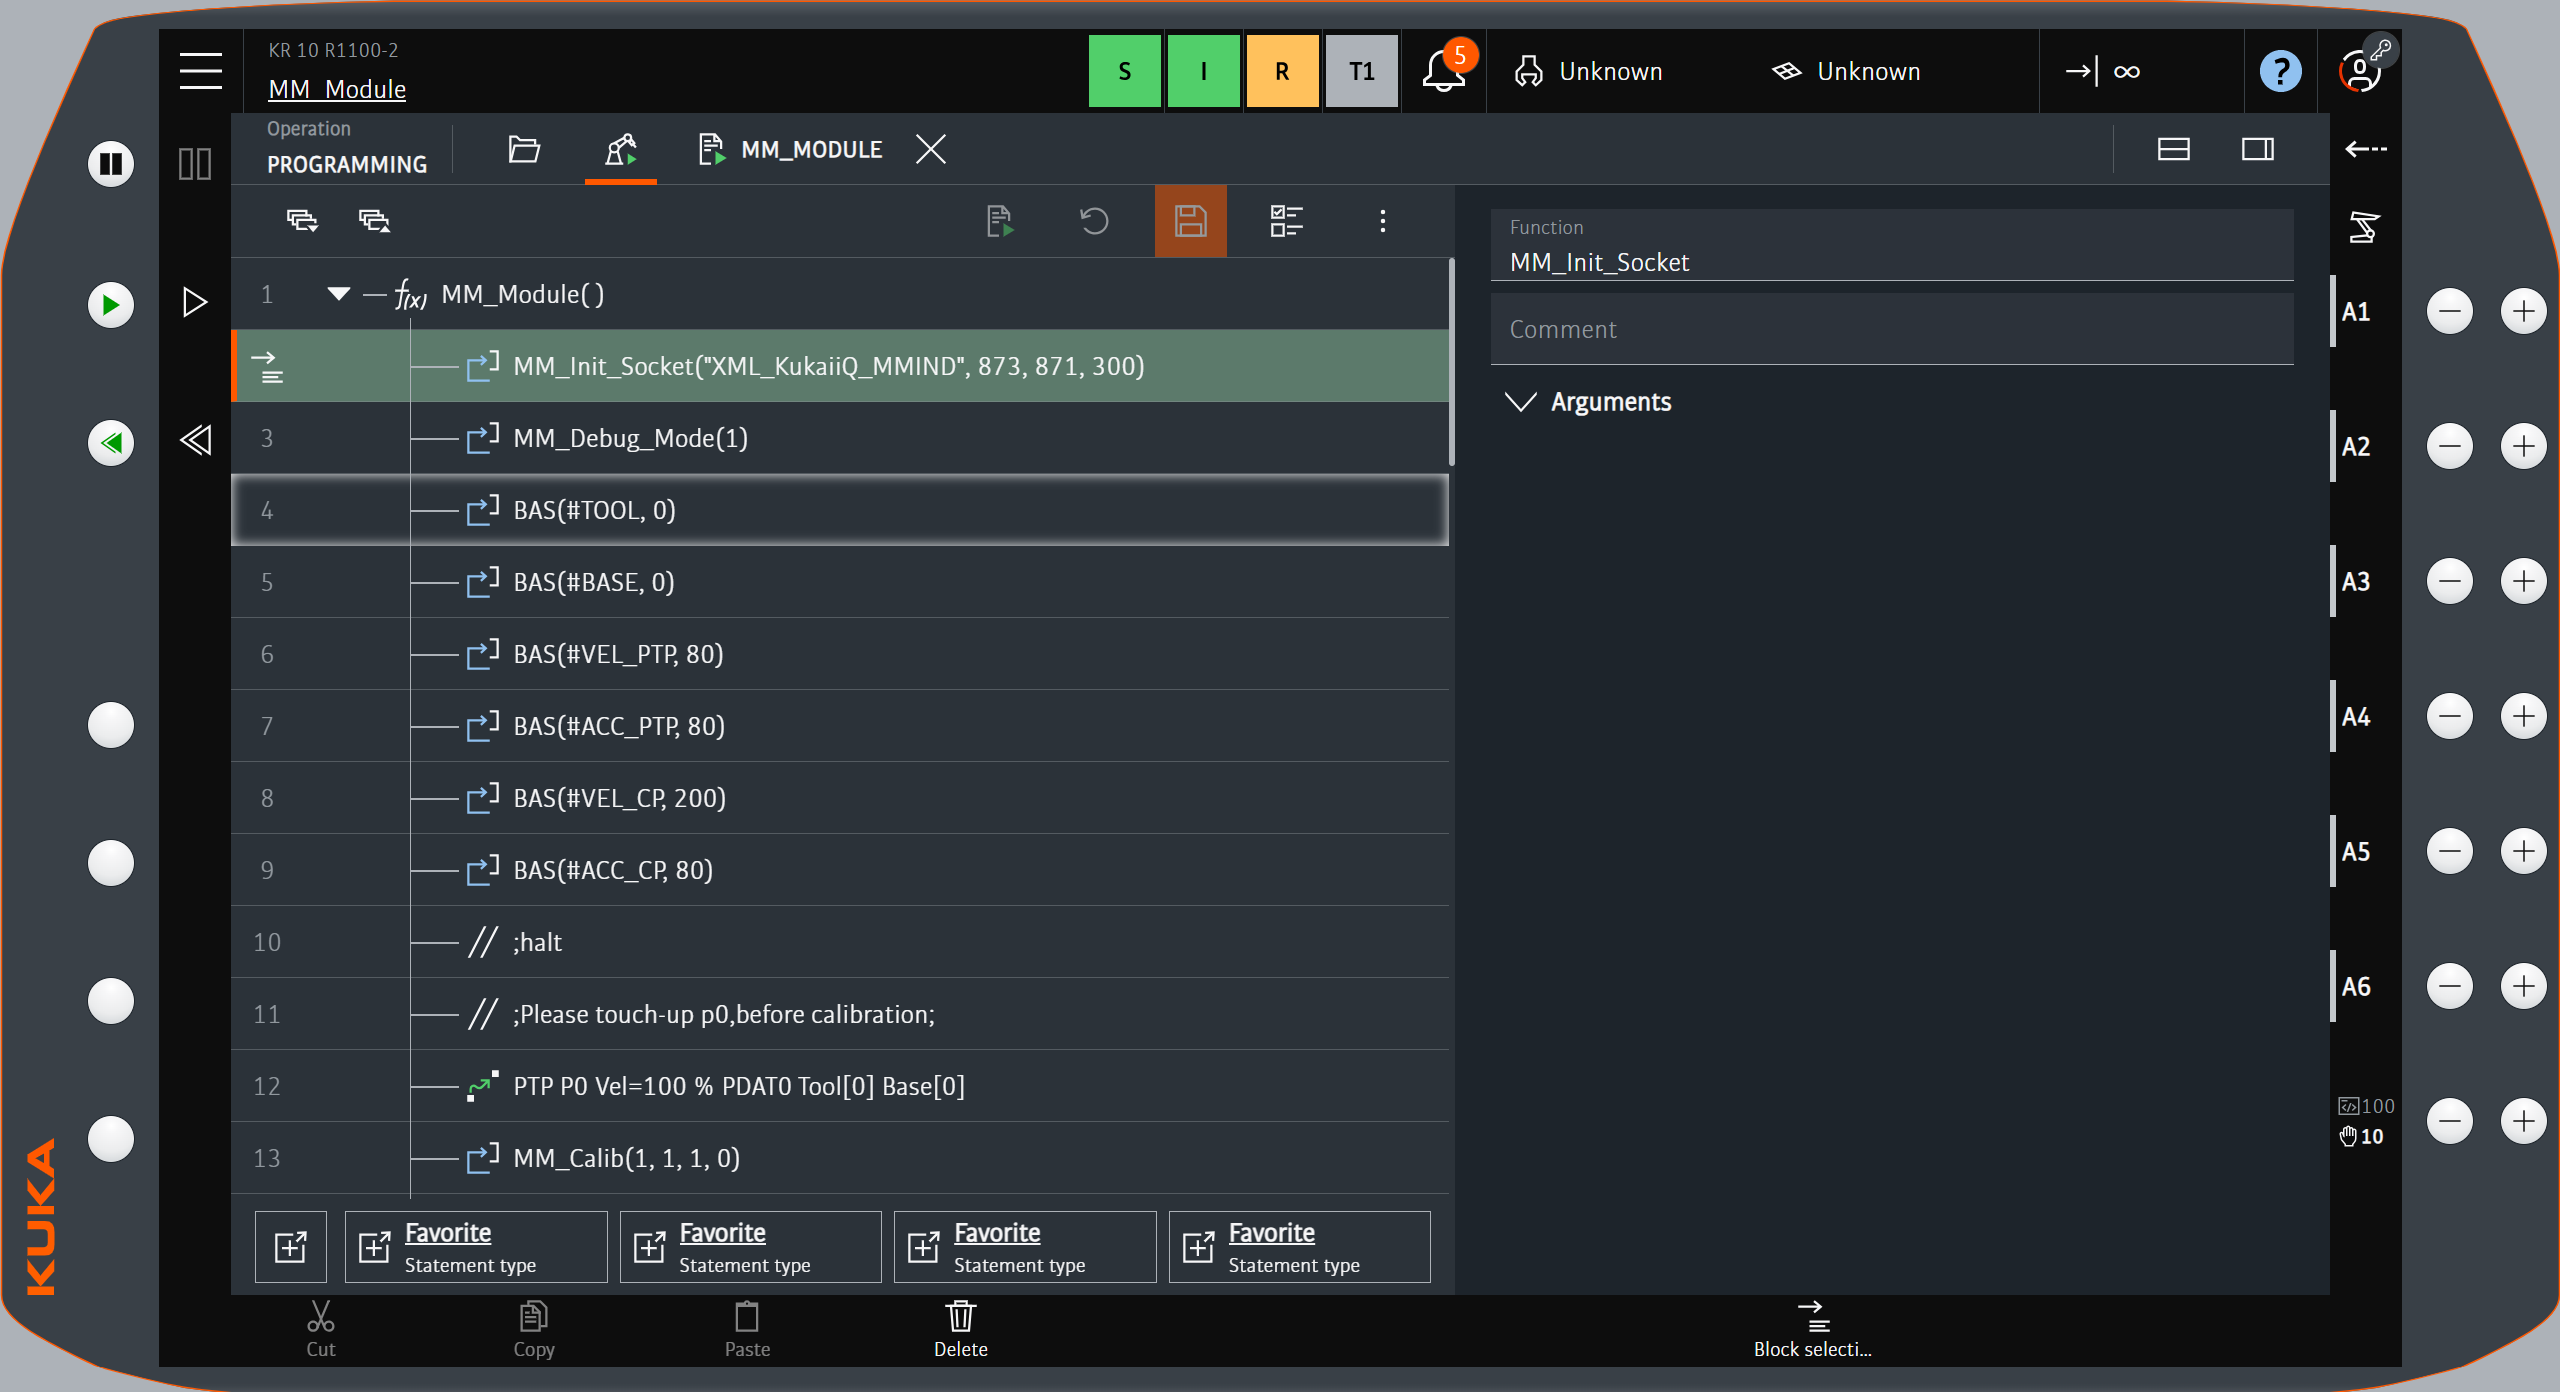
-
Press the green play button on the left of the teach pendant to start running the calibration program.
-
When, in the Calibration window in Mech-Vision, the current status changes to connected and the button Waiting for the robot to connect... changes to Disconnect robot, click Next at the bottom.
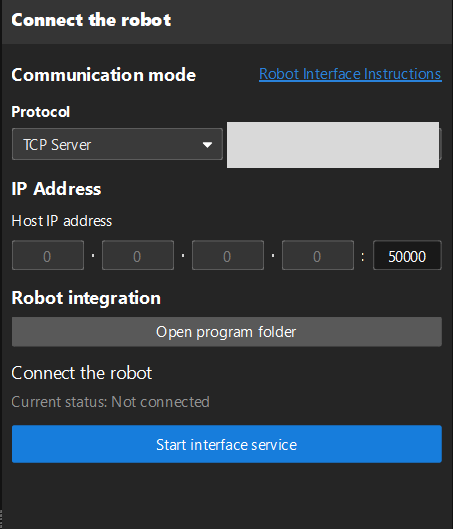
-
Perform Step 4 of Start calibration (which is Set motion path) and the subsequent operations based the following links.
-
If the camera mounting mode is eye to hand, see this document and proceed with the relevant operations.
-
If the camera mounting mode is eye in hand, see this document and proceed with the relevant operations.
-