Adjust Parameters
This topic introduces the actions related to parameters, including the general workflow of adjusting parameters, managing parameter groups, changing parameter visibility, and checking parameter descriptions.
General Workflow of Adjusting Parameters
When adjusting the parameters, you usually need to acquire the data again to check the result of parameter adjustment. The general workflow of adjusting parameters is as follows:
-
At the top of the parameter panel, create a parameter group, or select a parameter group for saving the parameter values.
You can select a built-in parameter group based on your actual scenario to simplify the process of parameter adjustment. For detailed descriptions, please refer to Built-in Parameter Groups. -
Click
 to acquire data and check the data quality.
-
2D image: not too bright or too dark; the surface features of the target object are clearly visible.
Too dark Good Too bright 
-
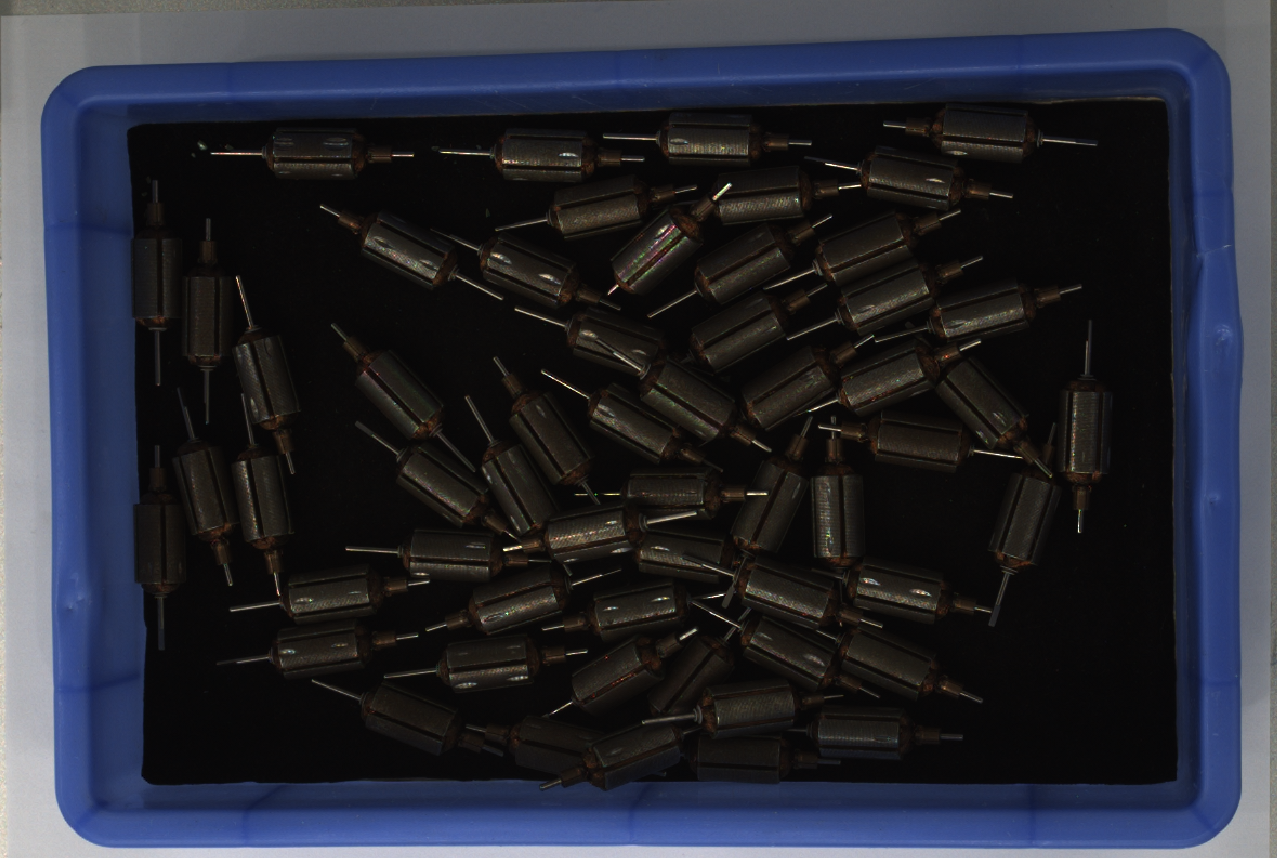
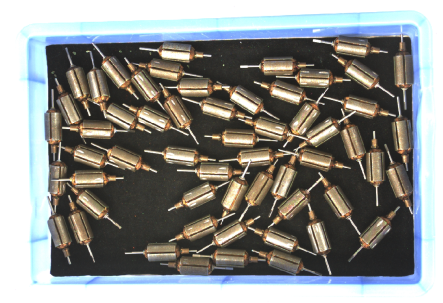
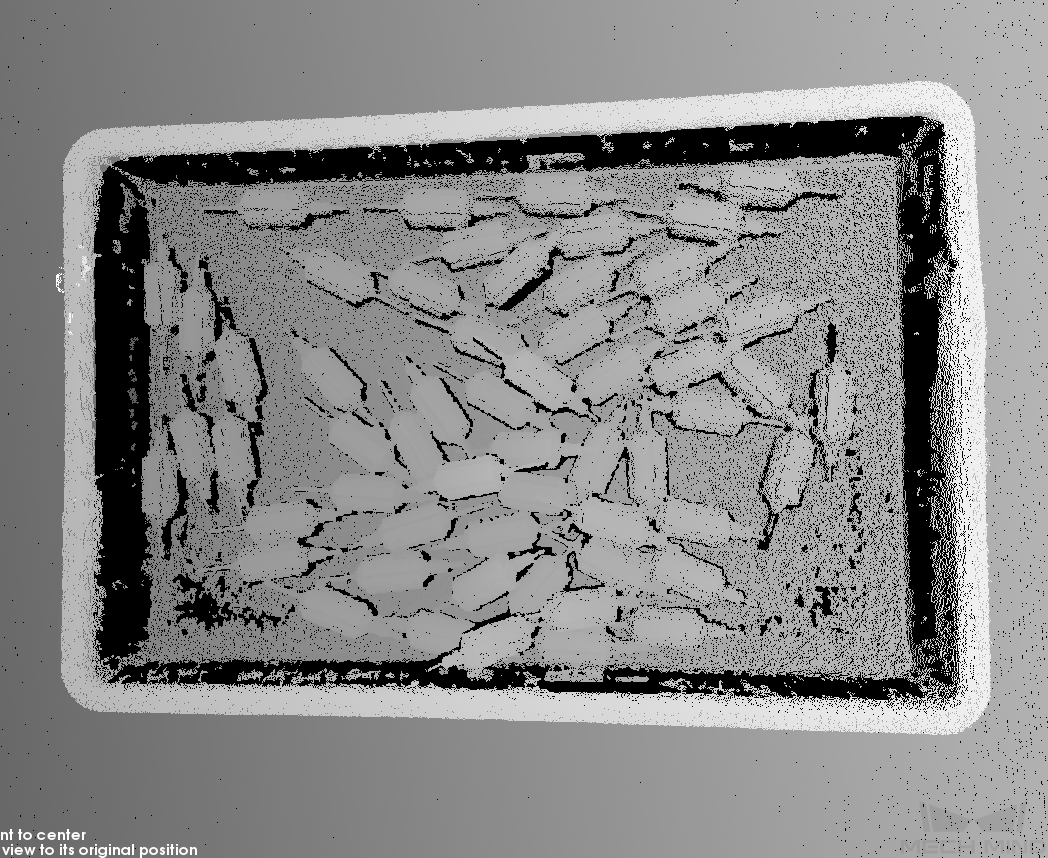
Depth map and point cloud: the needed data is complete. In the following example, the needed data is the rim of the bin and the rotors inside the bin.
Determine which part of the data is needed according to your actual needs. For example, if you need to pick metal bowls with opening facing up by the rim, usually you only need to make sure that the data of the bowl rims is complete.
Needed data incomplete Needed data complete 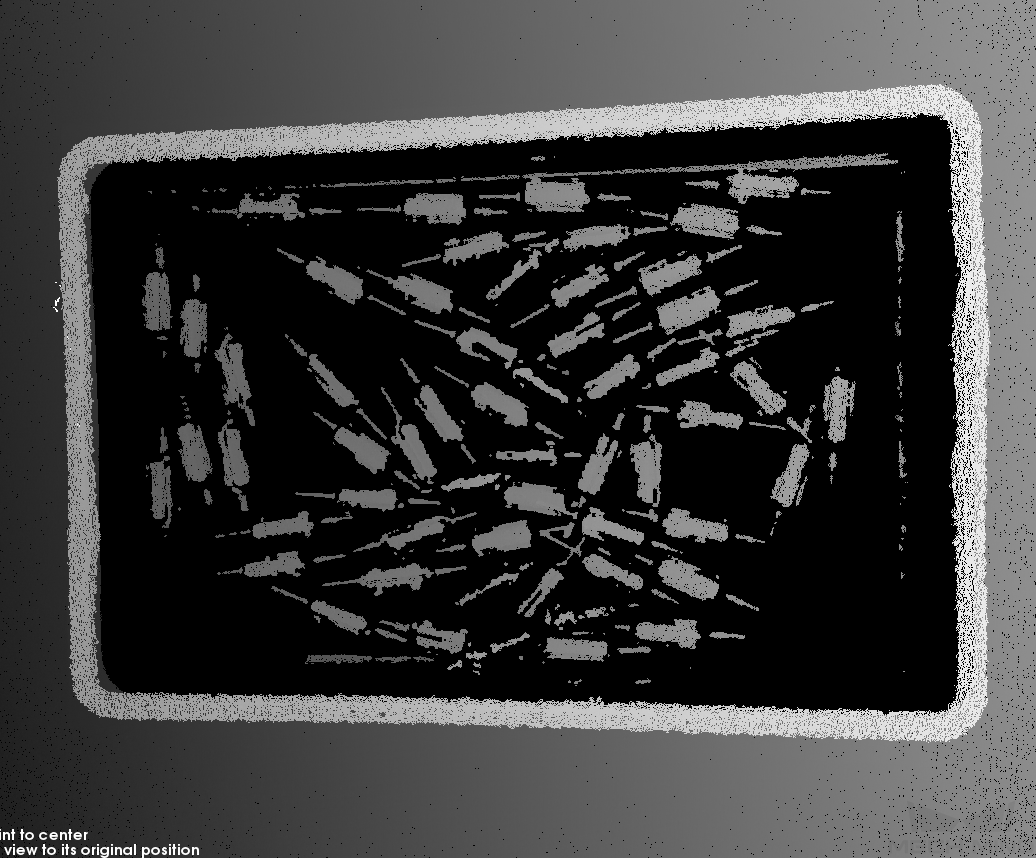
-
-
If the data quality is not good, adjust the corresponding parameters in the parameter panel on the right.
-
If the quality of the 2D image is not good, adjust the parameters in the 2D Parameters category.
-
If the quality of the depth map is not good, adjust the parameters in the 3D Parameters, Depth Range, and ROI categories.
-
If the quality of the point cloud is not good, adjust the parameters in the 3D Parameters, Point Cloud Processing, Depth Range, and ROI categories.
-
When adjusting the parameters, you can refer to the parameter description at the bottom of the parameter panel.
-
For the detailed descriptions of each parameter, please refer to Parameter Reference Guide.
-
-
-
Repeat steps 2 to 3 until the data quality meets the requirements, and then click Save at the top of the parameter panel.
-
Adjustment of the parameters in the Point Cloud Processing, Depth Range, and ROI categories takes effect immediately. You do not need to acquire the data again.
-
If the data quality is still not good, you can change the visibility and adjust the newly displayed parameters.
-
Manage Parameter Groups
Parameter groups are used to save parameter values for different applications, projects, workpieces, and so on. When the application, project, workpiece, etc., changes, switching the parameter group in use can quickly apply the corresponding parameter values.
In Mech-Eye Viewer, you can create a new parameter group, save parameter values to a parameter group, delete a parameter group, rename a parameter group, and import and export parameter groups.
Create a parameter group
Please follow these steps to create a parameter groups using the current parameter settings:
-
On the right of the Parameter Group section, click
 .
. -
In the pop-up window, enter the name for the parameter group, and click Confirm.
The parameter group name cannot be longer than 32 characters. -
After the parameter group is created, it will be displayed in the drop-down menu in the Parameter Group section.
Save Parameters to Parameter Group
Follow these steps to save parameters to a parameter group:
-
Click the drop-down menu in the Parameter Group section, and select the parameter group used for saving parameter values.
-
In the Parameter Group section, click Save or use the shortcut Ctrl + S to save the adjusted parameter values to the currently selected parameter group.
| An asterisk (*) next to a parameter name indicates that the value of this parameter has not been saved to the parameter group. Unsaved changes will be discarded after the camera is disconnected from power. |
Delete a parameter group
To delete a no longer needed parameter group, follow these steps:
-
Click the drop-down menu in the Parameter Group section, and select the parameter group to be deleted.
-
Click
 , and then click Confirm in the pop-up window to delete the parameter group.
| The built-in parameter groups cannot be deleted. |
Rename Parameter Group
Follow these steps to rename a parameter group:
-
Click the drop-down menu in the Parameter Group section, and select the parameter group to be renamed.
-
Click
 , enter the new name in the pop-up window, and then click Confirm.
The parameter group name cannot be longer than 32 characters. -
After the change, the new name will be displayed in the drop-down menu of the Parameter Group section.
| The built-in parameter groups cannot be renamed. |
Export parameter groups
You can export all the parameter groups saved in the current camera to a JSON file. Follow these steps to export parameter groups:
-
In the Parameter Group section, click Export, select the file path, and then click Save.
-
If the parameter groups are successfully exported, the Successfully exported parameter groups window will pop-up. Click Confirm in the window to close this window.
Import Parameter Groups
You can import parameter groups from a JSON file to replace all the parameter groups saved in the current camera. Follow these steps to import parameter groups:
-
In the Parameter Group section, click Import, find the JSON file that stores all the parameter group information, and click Open.
-
If the parameter groups are successfully imported, the Successfully imported parameter groups window will pop-up. Click Confirm in the window to close this window.
Reset Parameter Group
To reset the parameter values saved in a parameter group to default values, follow these steps:
-
Click the drop-down menu in the Parameter Group section, and select the parameter group to be reset.
-
Click Reset, and then click Yes in the pop-up window to reset the parameter values to those stored in the default parameter group.
Change Visibility
The visibility of parameters in Mech-Eye Viewer includes three levels: Beginner, Expert, and Guru. Select from the drop-down menu of Visibility to change the visibility.
-
The Beginner level includes the most frequently used basic parameters.
-
The Expert level includes all parameters in the Beginner level and provides more parameters.
-
The Guru level includes all parameters in the Expert level and provides more parameters.
Usually, adjusting parameters in the Beginner level is enough to meet your needs. If the data quality is still not satisfactory, you can adjust the parameters in the Expert level. In rare cases, the parameters in the Guru level need to be adjusted to meet special needs.
| The Guru level is available in the Administrator account. If needed, please contact Technical Support. |
Check Parameter Description
After you select a parameter in the parameter list, the bottom of the parameter panel displays more information about this parameter, include parameter explanation, API parameter name, value range, default value, visibility and data type. When you adjust parameters, you can use the information here as a reference.
-
If the Parameter Description section blocks the parameter list, click × at the upper right of this section to close it.
-
To display the Parameter Description section again, check the Parameter Description option in the View menu.