Installation Guide
This chapter introduces how to install Mech-DLK and device prerequisites.
Install Mech-DLK
-
Enter Mech-Mind Online Community to download the installation package of Mech-DLK.
-
Double-click the file and install Mech-DLK according to the instructions.
Prerequisites for Using the Software
To make sure Mech-Mind software can function properly, please complete the following actions.
Check Interfaces and Drivers
Check the following in Windows Control Panel:
-
Network and Internet: make sure that the network interfaces used to connect to other devices are functioning properly.
-
Device Manager: under Network adapters and Display adapters, make sure the required drivers for your network interfaces and GPU are installed.
Set up Software License
Mech-Mind uses CodeMeter from Wibu-Systems as the license system for its software. The CodeMeter installer has been included in the software package.
-
Plug the license dongle you received into the IPC.
-
Run the CodeMeter installer to install CodeMeter.
-
Make sure that CodeMeter is running: in the system tray, check if the CodeMeter icon
 is displayed in the Windows tray.
|
Turn off Windows Defender Firewall
The Windows Defender Firewall might block the normal communication between Mech-Mind software and devices connected to the IPC. Therefore, it is necessary to turn off Windows Defender Firewall’s protection for the network interfaces connected to devices that communicate with the software. Follow these steps:
-
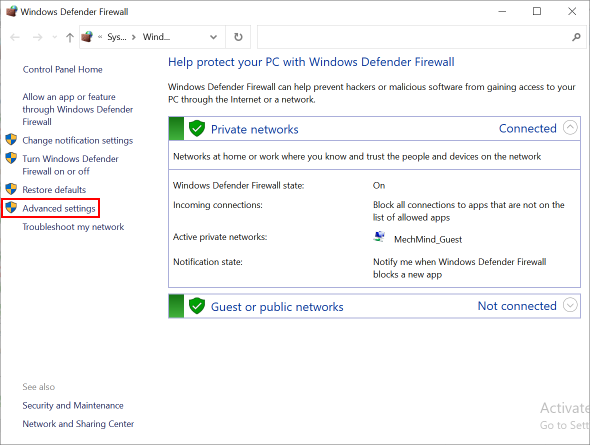
Open the control panel, and click .
-
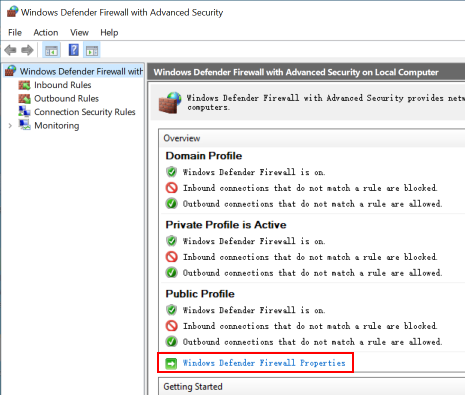
In the pop-up window, click Windows Defender Firewall Properties. .
-
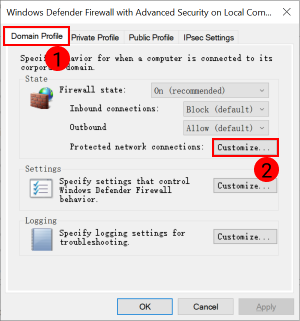
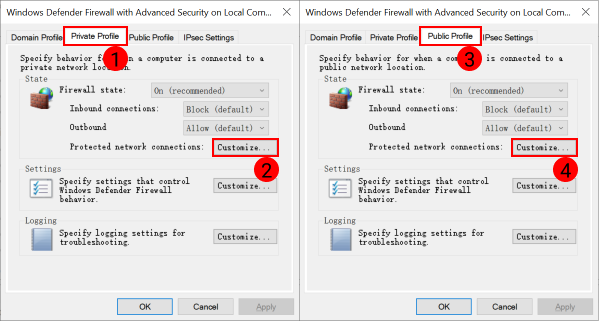
Under the Domain Profile tab, click Customize… next to Protected network connections.
-
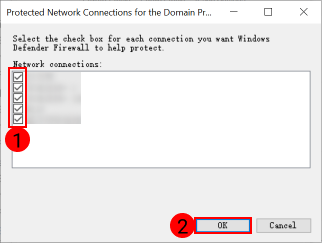
In the pop-up window, uncheck all the network interfaces connected to devices that communicate with the software. Then, click OK.
-
Repeat the above two steps for the Private Profile and Public Profile tabs.
Prevent Windows from Updating (Recommended)
Windows updates might force the IPC to shut down/restart during production in order to complete the updates, which would end the software and thus affect normal production. Therefore, it is highly recommended to prevent Windows from updating to avoid unexpected shutdown.
| If you choose to keep Windows Update enabled, please take measures to ensure that IPC shutdown/restart occurs during planned downtime, such as setting active hours for Windows Update. |
Disable Windows Update
-
Click the magnifying glass icon in the taskbar, and search for Services.
-
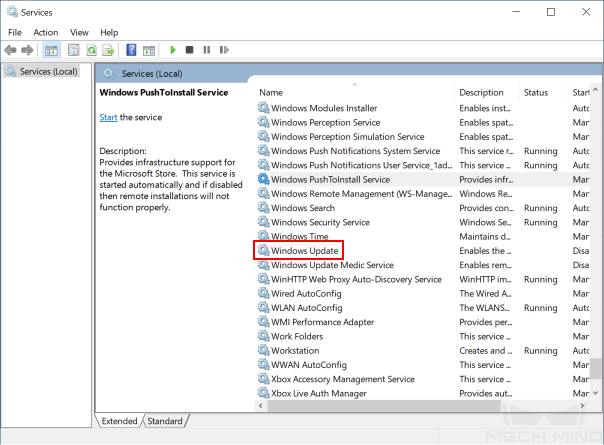
Click Services in the search results to open it, and scroll down to find Windows Update.
-
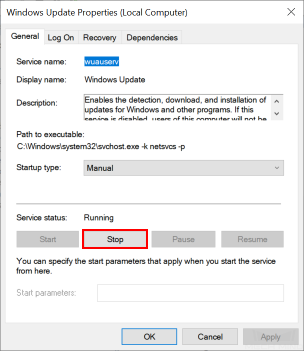
Click OK after clicking the Stop button.
-
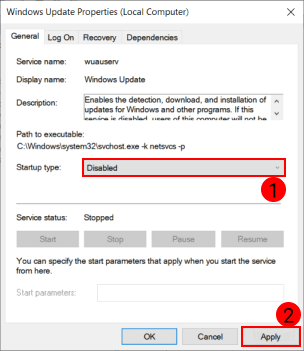
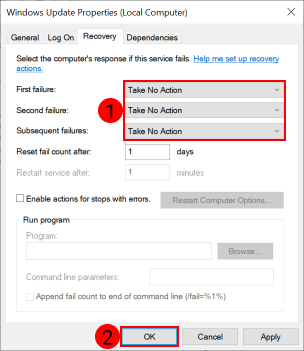
In the drop-down menu of Startup type, select Disabled, and then click Apply.
-
Click the Recovery tab, and change the response for all failures to Take No Action. Then, click OK.
Disable Windows Update Medic Service
Windows Update Medic Service fixes problems in Windows Update and ensures that your computer continues to receive updates. That is, even if you have disabled Windows Update, Windows Update Medic Service will eventually re-enable it. Therefore, it is necessary to disable Windows Update Medic Service as well.
Windows does not allow you to disable Windows Update Medic Service through simple button-clicking. To disable it, you’ll need to go to the Registry Editor as instructed below.
-
Click the magnifying glass icon in the taskbar, and search for “regedit”. Click Registry Editor in the search result to open it.
-
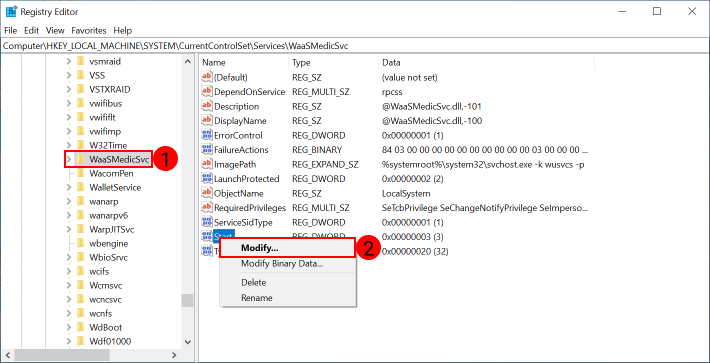
In the left pane, navigate to HKEY_LOCAL_MACHINE\SYSTEM\CurrentControlSet\Services\WaaSMedicSvc. Then in the right pane, right-click Start and select Modify.
-
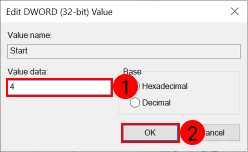
In the pop-up window, change Value data to 4, and then click OK.
-
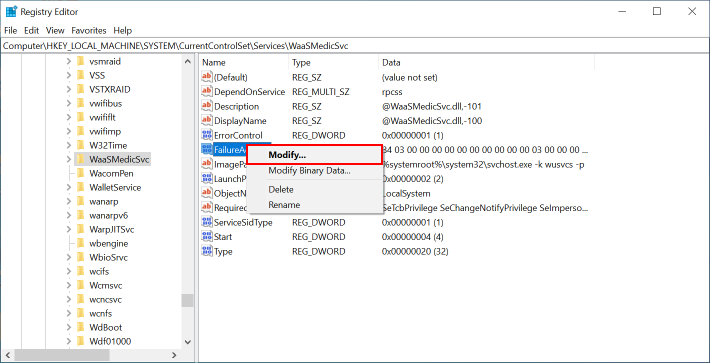
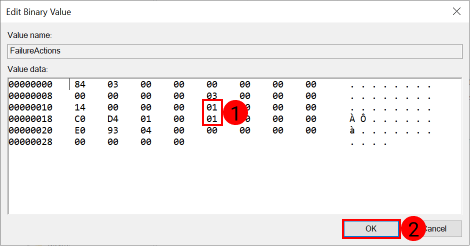
Right-click FailureActions and select Modify.
-
In the pop-up window, change the values (whose positions are shown in the middle box of the following figure) to 01. Then, click OK.
-
Return to Services, find Windows Update Medic Service and double-click to open it.
-
The Startup type in the General tab should be Disabled, and all responses for failures in the Recovery tab should be Take No Action.

Now, you can start to use Mech-DLK.