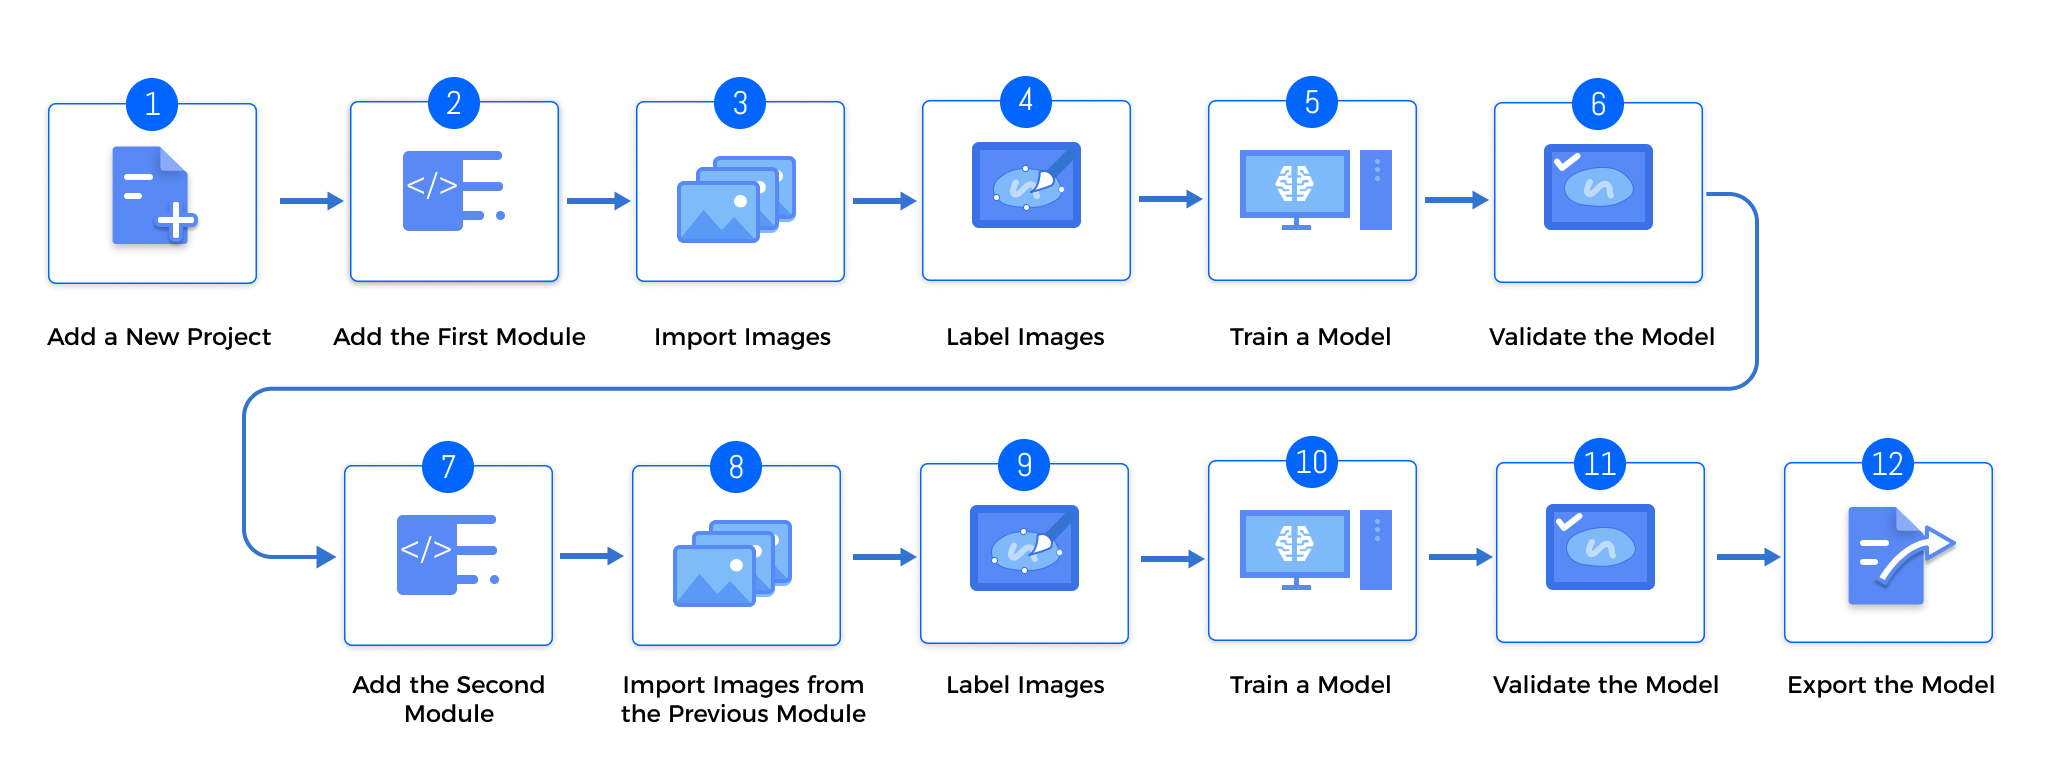
Cascade Modules
Cascading modules can help detect defects in complex scenarios such as changing positions of incoming materials and detection points, as well as the scenarios requiring the classification of defects.
Common Cascading Combinations
The following are the common combinations:
-
Object Detection–Defect Segmentation
-
Feature: Position the to-be-detected objects in an image and then detect defects.
-
Applicable scenarios: There are many objects to be detected in the original image, and the position and number of objects are random. The shapes of defects vary.

-
-
Object Detection–Classification
-
Feature: Position the to-be-detected objects in an image and then determine the orientations and colors of objects.
-
Applicable scenarios: There are multiples objects to be detected in the original image, and the number and positions of objects are random. The objects need to be classified.

-
-
Defect Segmentation–Defect Segmentation
-
Feature: The first Defect Segmentation module segments the region to be detected and the background, and the second Defect Segmentation module performs defect detection on the extracted region.
-
Applicable scenarios: complex background, small or inconspicuous defects. The to-be-detected region should be extracted before fine defect detection.

-
-
Fast Positioning–Defect Segmentation
-
Feature: Single objects, and their positions and angles are relatively random. Thus, they should be rotated to a specified angle and position before defect detection.
-
Applicable scenarios: single objects, random incoming materials, and changing defect shapes.

-
Use Cascaded Modules
First, confirm whether the dongle rights include the module cascading function by clicking the + sign in the upper right corner of the Modules section. If you can click it, the function is enabled. If not, please contact the Mech-Mind Sales to upgrade the authorization version.

-
Train the first module
Train the first module in accordance with the training methods of single modules. After training, check whether the model is applicable.
-
Train the second module
Click + in the upper right corner of the software and add a module according to actual needs.
-
Import the data of the previous module
The results of the previous module will be used as the input of the current module.
-
Click Import and select Import from previous module.
-
Select images.
-
Modify Import Configuration.
-
Image dilation: Dilating N pixels for the selected images can prevent the data loss caused by insufficient accuracy of the previous module. No dilation by default.
-
Keep background: This option determines whether or not to save the pixels other than masks. Only masked images are imported when this option is turned off.
-
-
Click Import.
-
-
Label and train the current module
Complete the labeling and training of the current module.
-
Validate and export the model
After training, validate the model and export it. The exported model can be used in Mech-Vision and Mech-DLK SDK.
| If the previous module is updated, the following module needs to be re-trained. |