Data Processing
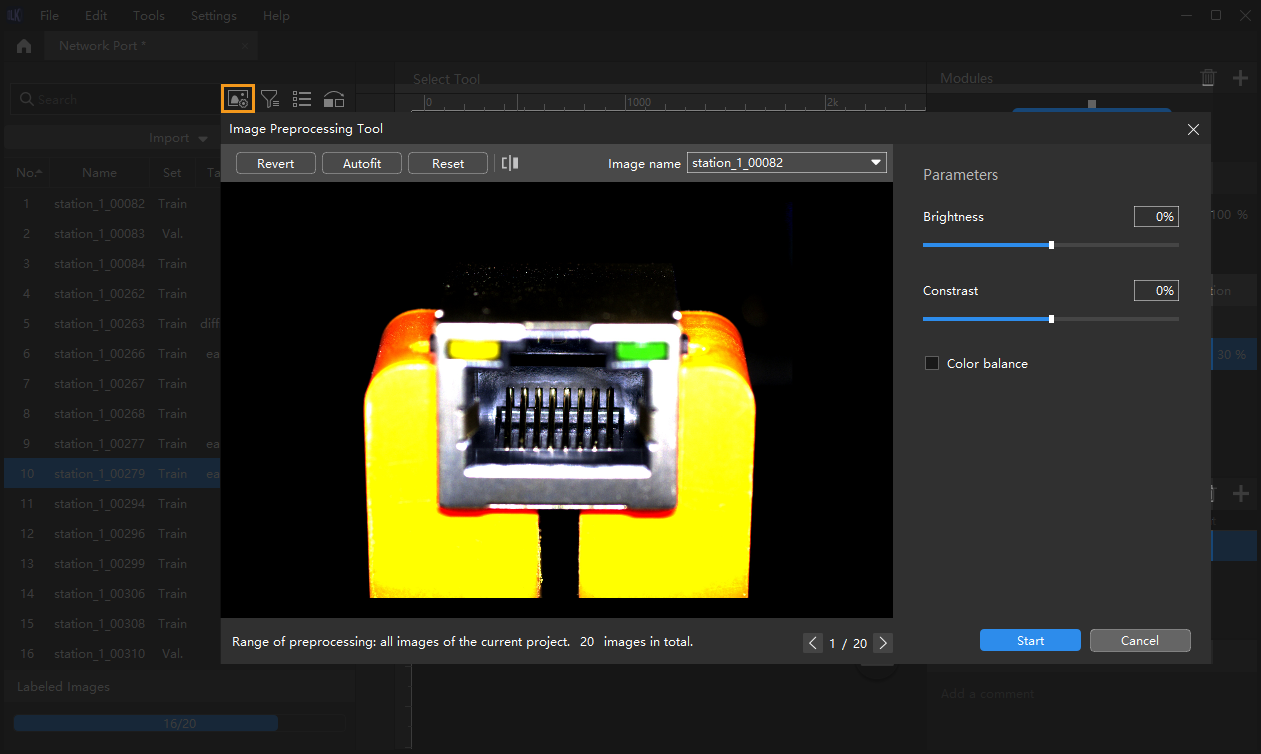
Image Preprocessing
You can adjust the brightness, contrast, and color balance of the images.
Typical Usage Scenarios
The original images captured by the camera have problems such as darkness and unobvious object features due to lighting or other factors.
Steps
-
Click
 to open the Image Preprocessing Tool.
 -
Adjust each parameter to satisfy the requirements.
-
Click Start and wait for the processing to complete.
-
Click OK in the pop-up window.
| Range of preprocessing: all images of the current project. The preprocessed images will replace the original images in the training, testing, and validation sets. |
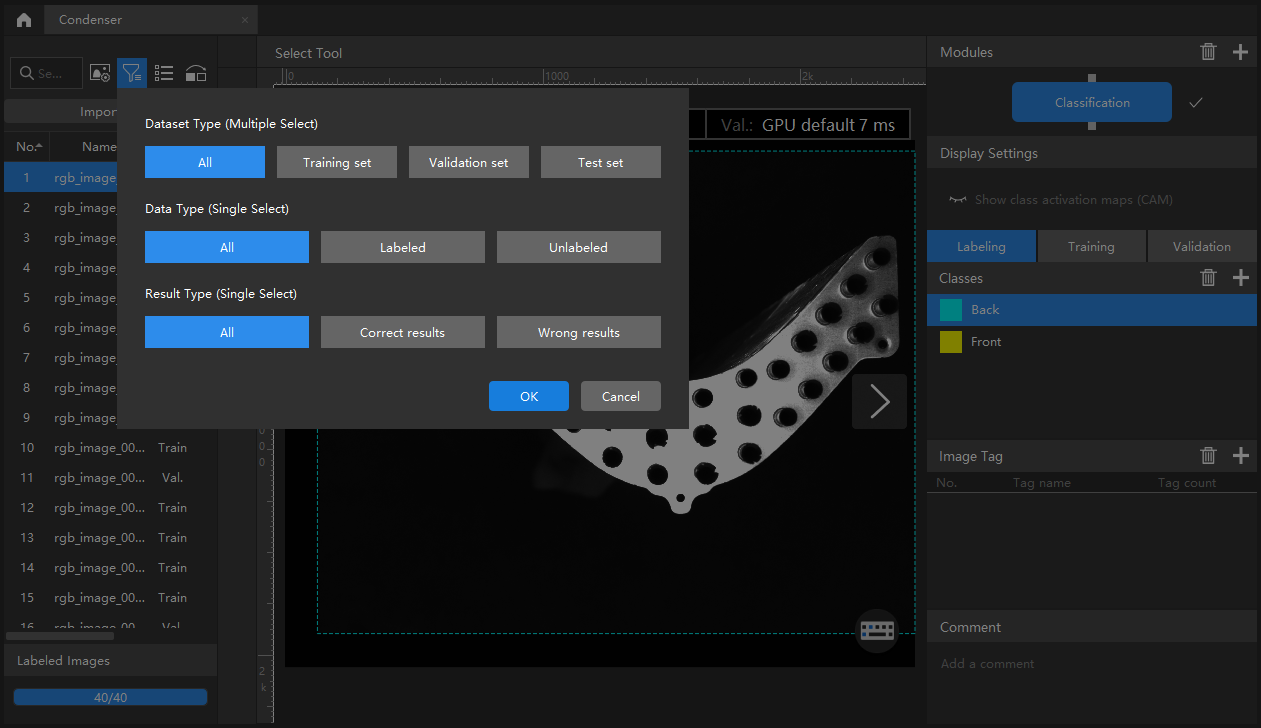
Filter images
You can set the filtering conditions to conveniently select specific images from datasets.
Typical Usage Scenarios
-
View the results of the dataset division. When the dataset division is complete, you can filter images by dataset type to view the content of each dataset and check whether the division results need to be adjusted.
-
Check the data labeling results. During the labeling, you can view the labeling progress and labeling results by filtering by data type.
-
Check the model prediction results. After validation, you can view the validation results by filtering by result type. For instance, when a defect segmentation model made an incorrect prediction, you can select the images with incorrect predictions by selecting False positive and False negative for the result type, which helps you analyze whether the reason for prediction mistakes is incorrect labeling.
Switch to preview mode
The list view mode is the default mode, and you can click ![]() to view icons.
You can drag the slider to change the display size of icons. Click it again to display the list.
to view icons.
You can drag the slider to change the display size of icons. Click it again to display the list.
Partition training and validation sets
By default, 80% of the images in the dataset will be split into the training set, and the rest 20% will be split into the validation set. Please make sure that both the training set and validation set include images in all different classes, which will guarantee that the model can learn all different features and validate the images of different classes properly.
Steps
-
Click
 .
. -
Drag the slider to adjust the proportion of the training set and validation set.
Right-click the image and click Switch to training set, Switch to validation set, or Switch to test set on the pop-up menu to modify the set to which the current image belong.
| The test set is not involved in training and validation. |
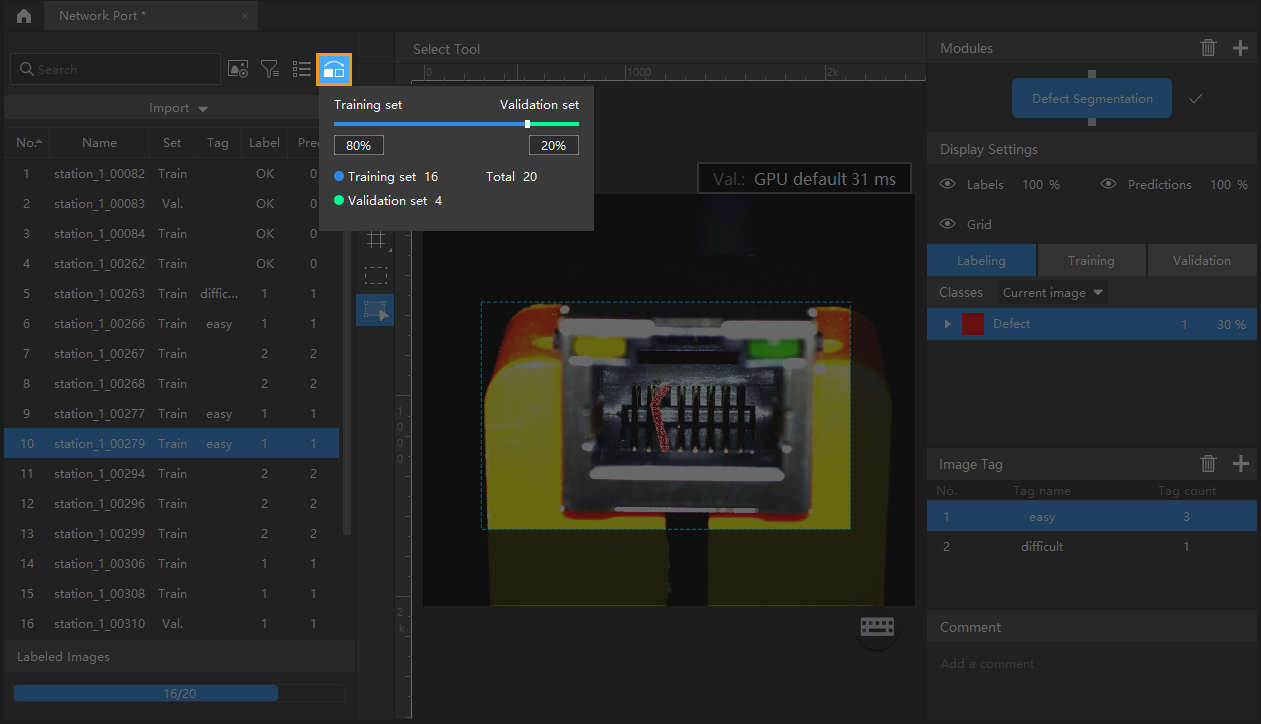
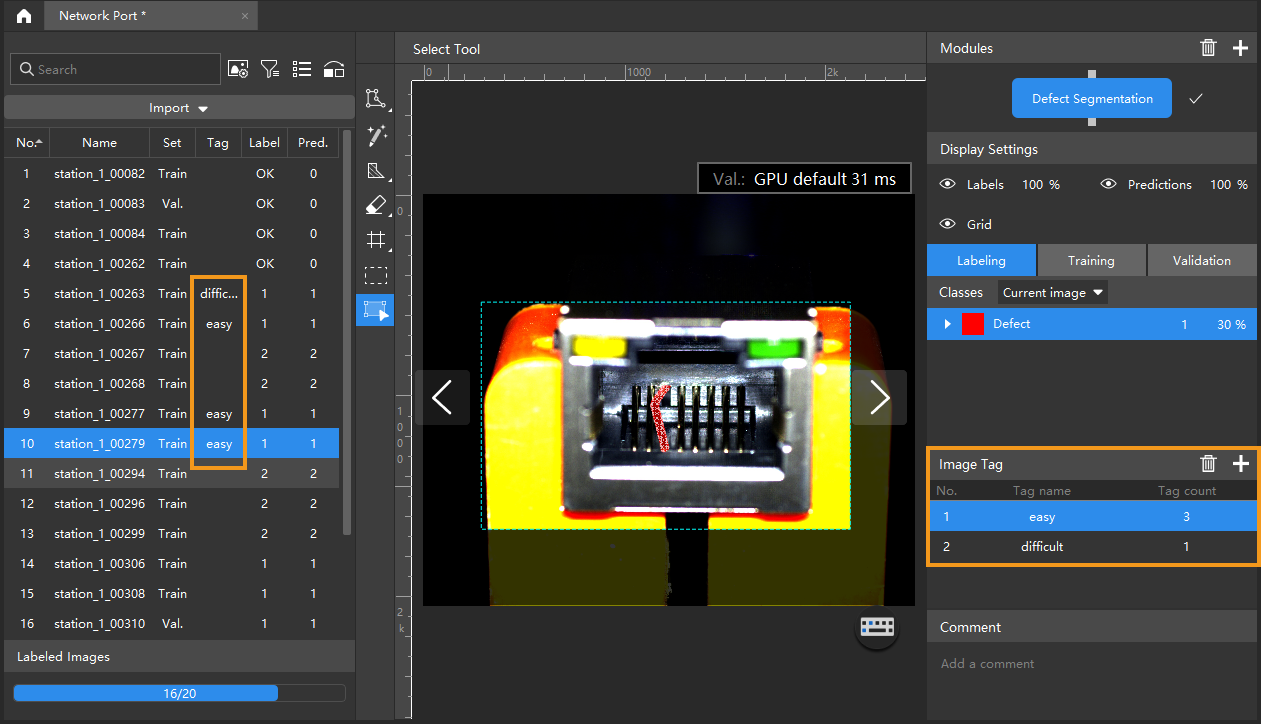
Image Tag
With the image tagging function, you can add tags to images and thereby manage massive image data in a centralized manner according to the usage scenarios of images.
Typical Usage Scenarios
-
For using the Defect Segmentation module:
If the objects in the images have multiple types of defects, the images need to be divided by defect types, and you can divide the images by adding tags.
If it is hard to instantly determine whether the current image contains any defects, you can tag the image first to make a judgment on the image later.
-
After validation, you can tag the images with poor validation results so that you can export the tagged images in groups for optimizing the model.
Steps
-
Create a new tag
-
Click + on the management panel of Image Tag. (The management panel of Image Tag is in the lower right corner of the software interface)
-
By default, the tag name is imageTag1. Double-click it to rename it.
-
Repeat the above steps to create more tags.
-
Select the tag and click
 to delete it. The tag added to the corresponding image(s) will be cleared once deleted.
-
-
-
Add tags to an image
-
Click an image in the list or select multiple images.
-
Click the corresponding tag on the management panel of Image Tag. The tag will be added to the image(s).
-
Press Ctrl or Shift on the keyboard to select multiple images.
-
Right-click the tagged image(s) and click Clear tags to clear the tags of the selected image(s).
-
-