Use the Classification Module
Please click here to download an image dataset of condensers, an example project in Mech-DLK. In this section, we will use the Classification module to train a model that can distinguish between the front and back sides of the condensers.
| You can also use your own data. The usage process is overall the same, but the labeling part is different. |
-
Create a New Project and add the Classification module: Click New Project in the interface, name the project, and select a directory to save the project. Click
 in the upper right corner of the Modules panel and add the Classification module.
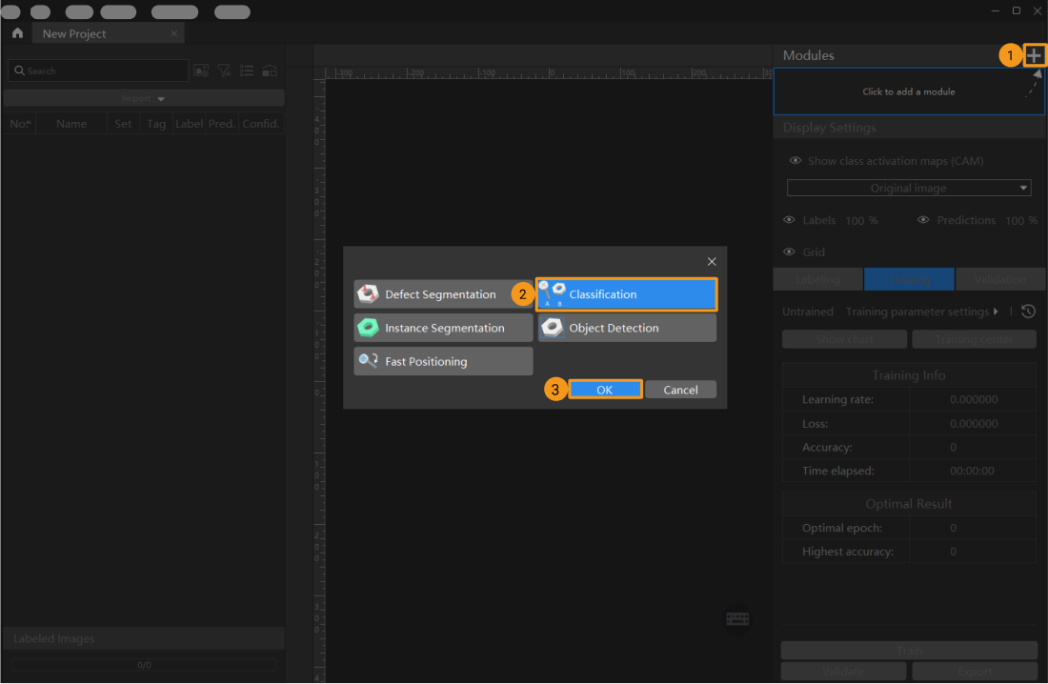
-
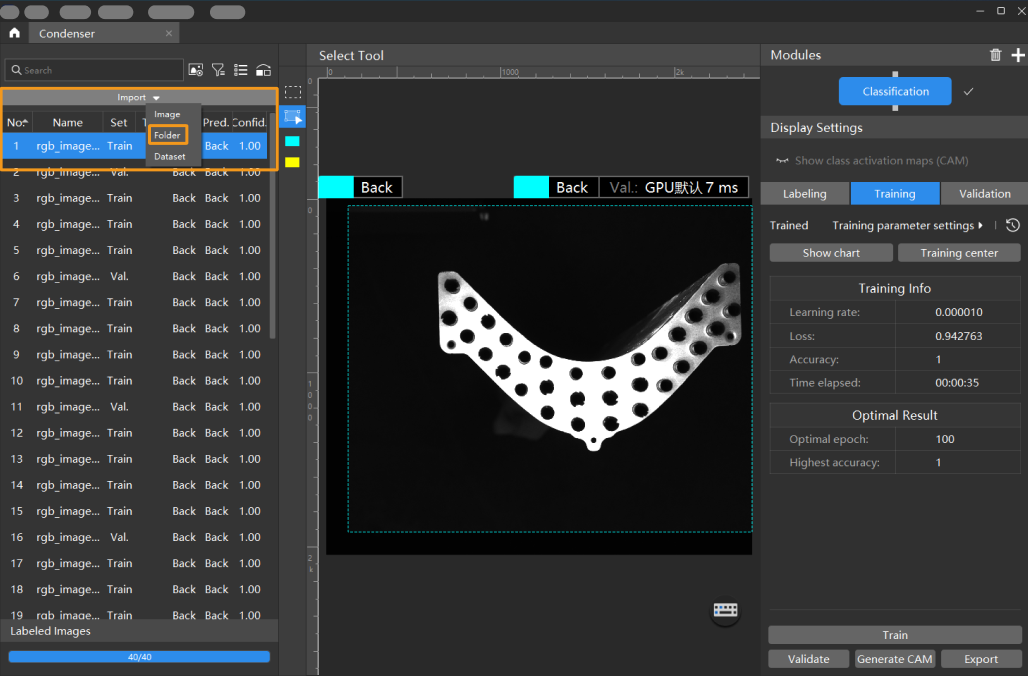
Import the image dataset of condensers: Unzip the downloaded dataset file. Click the Import button in the upper left corner, select Folder, and import the image dataset.
-
Create Labels: Select Labeling and click the + button to create labels based on the type or feature of different objects. In this example, the labels are named front and back to distinguish between the front and back sides of the condenser.
-
Label images: Classify the images with corresponding labels. You can select multiple images and label them together. Please make sure that you have labeled the images accurately.

The Classification module supports selecting multiple images for labeling in batches. -
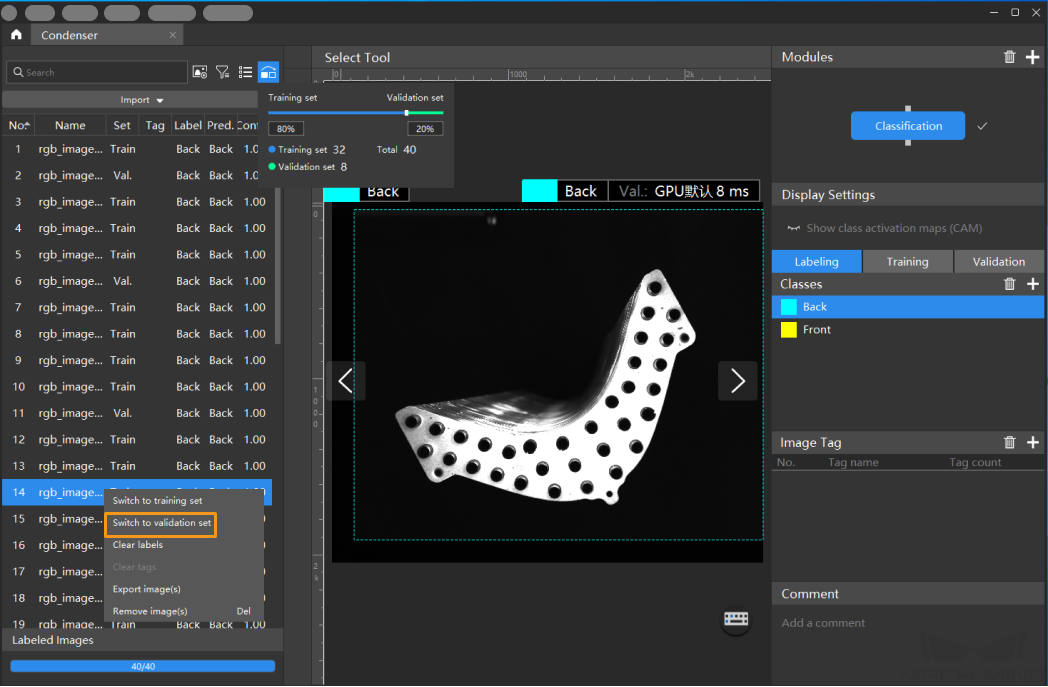
Split the dataset into the training set and validation set: By default, 80% of the images in the dataset will be split into the training set, and the rest 20% will be split into the validation set. Please make sure that both the training set and validation set include images in all different classes, which will guarantee that the model can learn all different features and validate the images of different classes properly. If the default training set and validation set cannot meet this requirement, please right-click the name of the image and then click Switch to training set or Switch to validation set to adjust the set to which the image belong.
-
Train the model: Keep the default training parameter settings and click Train to start training the model. Click here to view the instructions on training parameter configuration.

-
Validate the Model: After the training is completed, click Validate to validate the model and check the results. Click here to view the instructions on validation parameter configuration. You can also click
 > Wrong results > OK to filter the results and check the wrong ones.
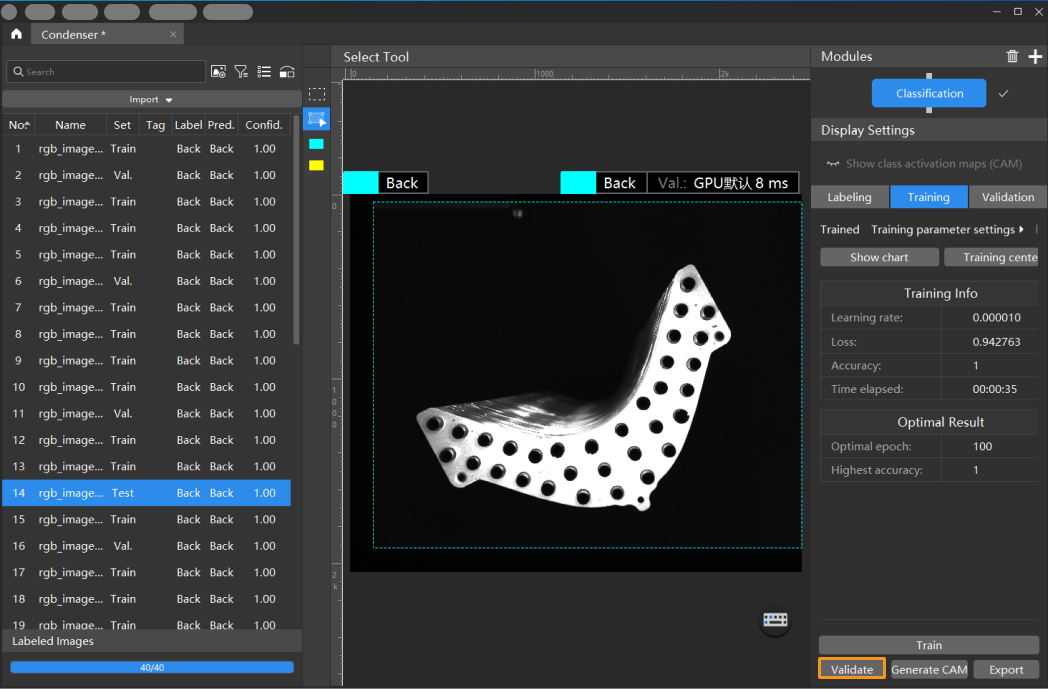
-
Export the model: Click Export, set parameters of the model to be exported in the pop-up window, and then click Export and select a directory to save the exported model.

The exported model can be used in Mech-Vision and Mech-DLK SDK. Click here to view the details.