Train an Unsupervised Segmentation Model
The Unsupervised Segmentation model can identify defective objects by learning the features of defect-free objects. Use OK images to train the model, and the model will judge whether the image of an object contains defects, and locate the areas with defects in the NG images. It is applicable to quality inspection scenarios where object defects vary in shape, position, and size. This topic describes how to train an Unsupervised Segmentation model that can judge whether there are defects on the charging ports and locate the defects.

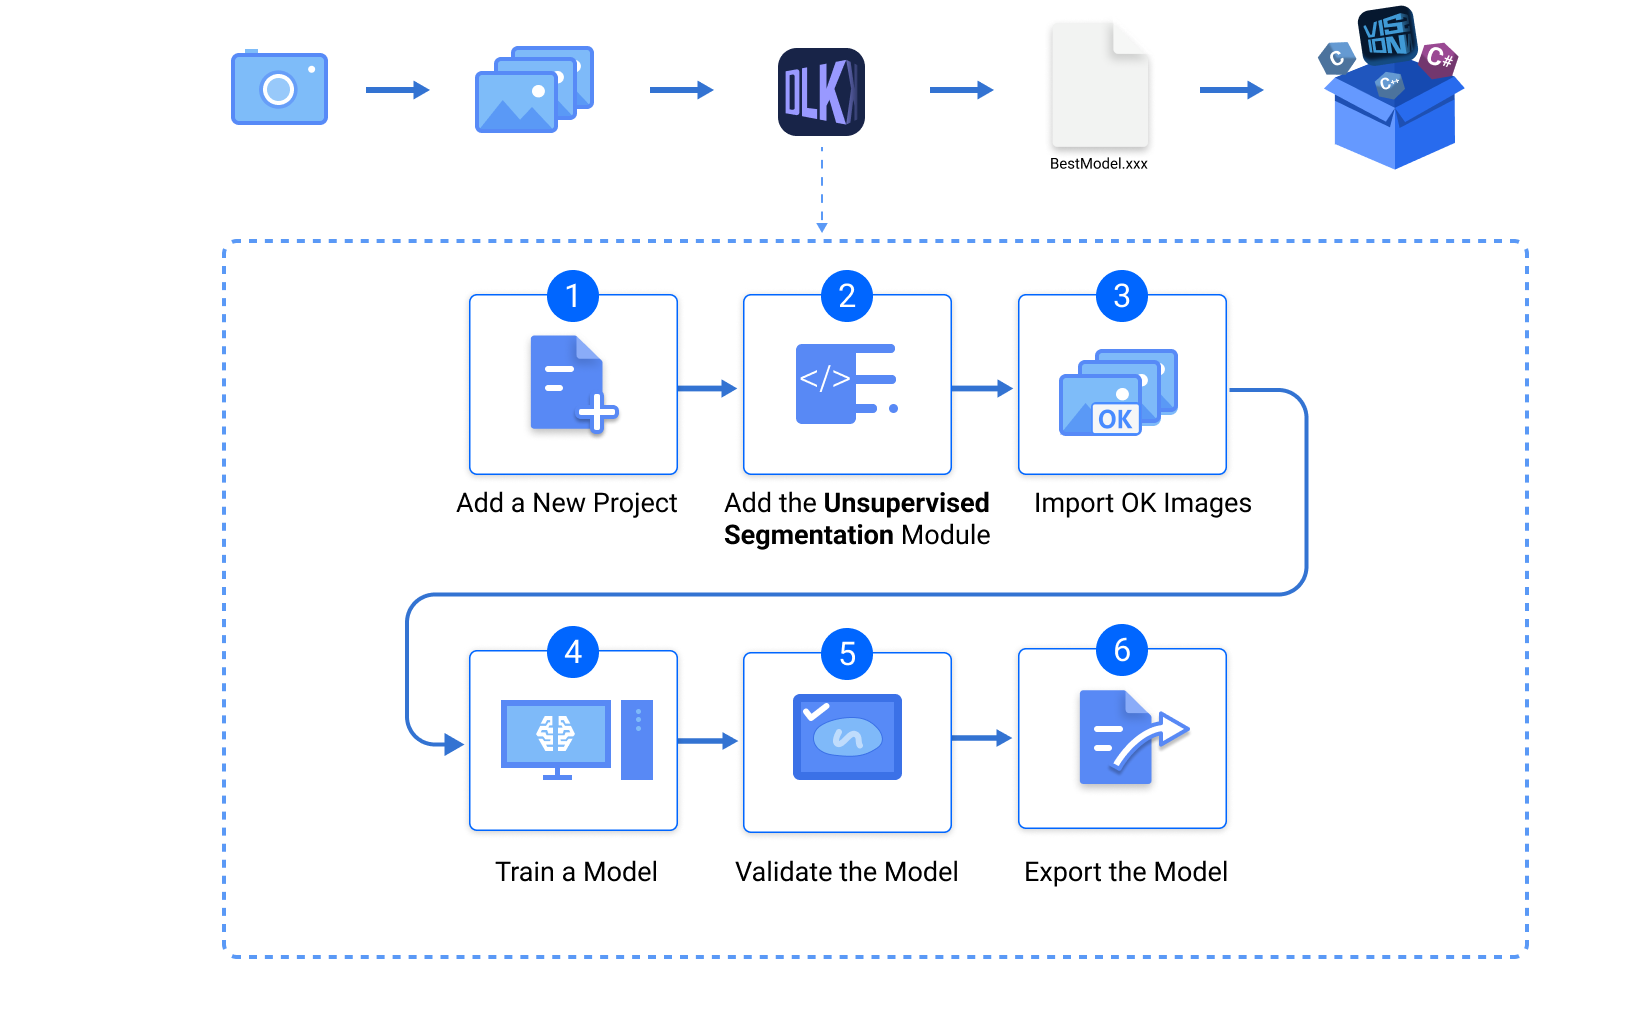
The workflow for training the Unsupervised Segmentation model is as follows:

Preparations
Before you start training, make sure you have acquired and selected the images for training according to the data acquisition standard. In this example, you need to prepare images of charging ports without defects (OK images) and images of charging ports with defects (NG images).
| You do not need NG images to train a model, but it is recommended that you include some NG images in the validation set to improve the results produced by models. |
Create a Project and Add a Module
-
Create a project: Open Mech-DLK. In the upper-left corner of the startup interface, click New Project, name the project, and select a directory to save the project.
-
Add a module: In the upper-right corner of the project interface, click
 in the Modules section, and then select the Unsupervised Segmentation module.
Import and Label the Image Data
-
Import image data: On the upper part of the image list, click , and import the folder of OK images.
-
Select an ROI:
-
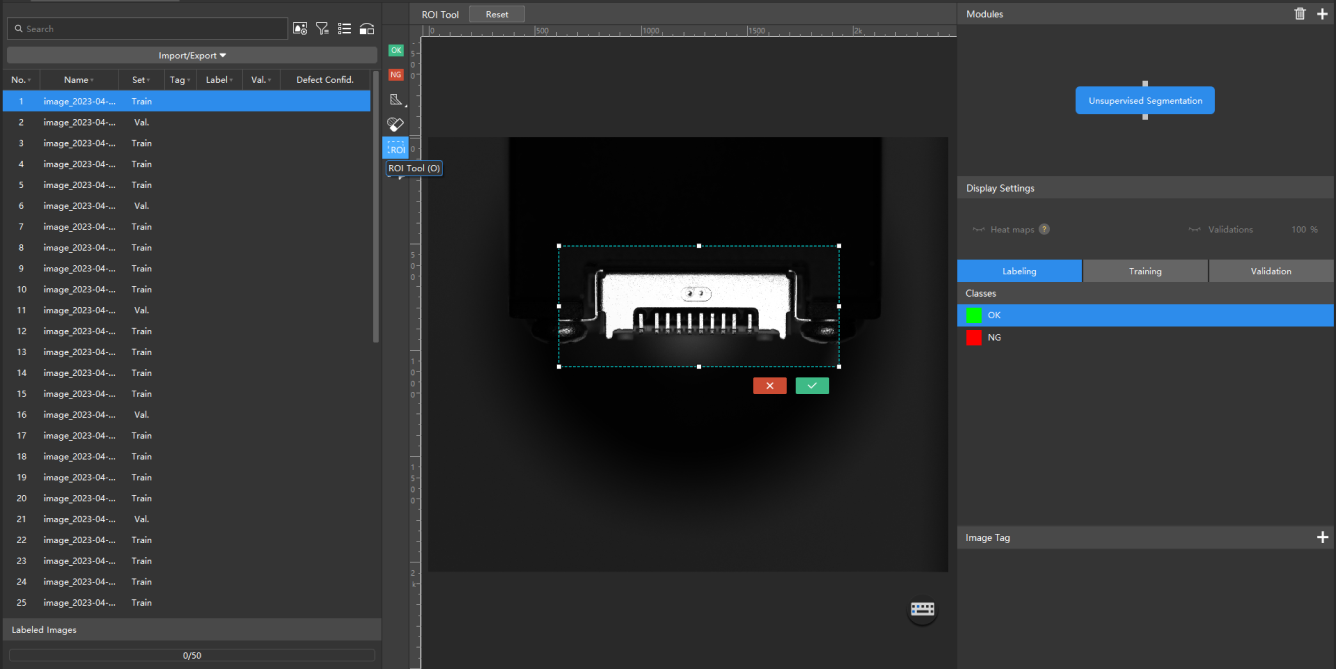
On the labeling toolbar, click the ROI Tool
 , and adjust the frame to select the bin containing rotors in the image. The ROI should exclude irrelevant background and cover the target objects in the image with an appropriate margin.
 -
Click
 in the lower-right corner of the ROI to apply the current ROI. The ROI settings will be applied to all images. Check that all charging ports are consistently within the ROI. Otherwise, adjust the ROI again.
-
-
Label images:
-
On the labeling toolbar, click the OK Label
 to label the images without defects as OK.
 -
Follow the same steps to import the NG images, and click the NG Label
 to label them as NG. NG images will be automatically put into the validation set for validation during model training.
After NG images are imported, make sure to check again that the charging ports in the imported images are consistently within the ROI.
-
Train the Model
After the images are imported and labeled, you can start training the model.
In the Training tab, click the Train button to start training. You can click Training Center to view the training progress, or click Show chart to view training accuracy and defect confidence parameters by epochs.

Validate and Export the Model
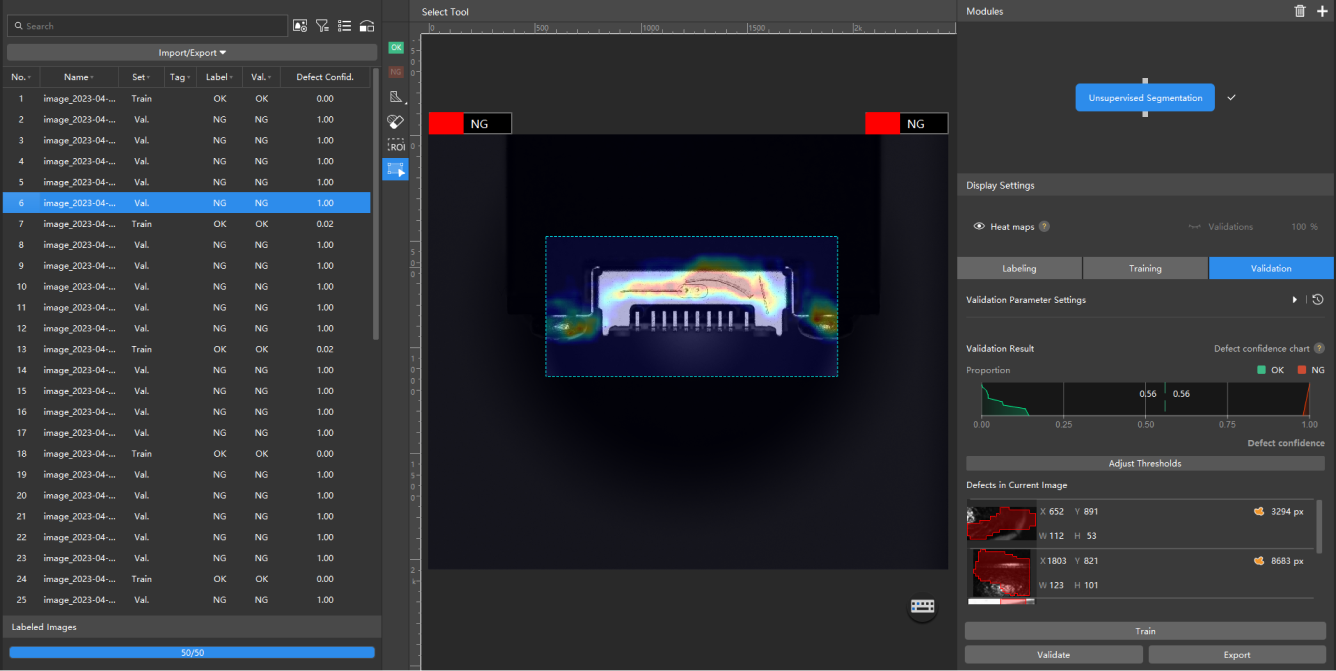
After the model is trained, in the Validation tab, click the Validate button, Mech-DLK will validate the model with the current data.
After the validation is complete, you can view the areas with defects in the heat maps and check the validation results for accuracy. An Unsupervised Segmentation model is successfully trained to detect defects in charging ports.

In the lower-right corner of the Validation tab, click Export, and select a directory to save the exported model. The exported model can be used in Mech-Vision and Mech-DLK SDK. Click here to view the details.