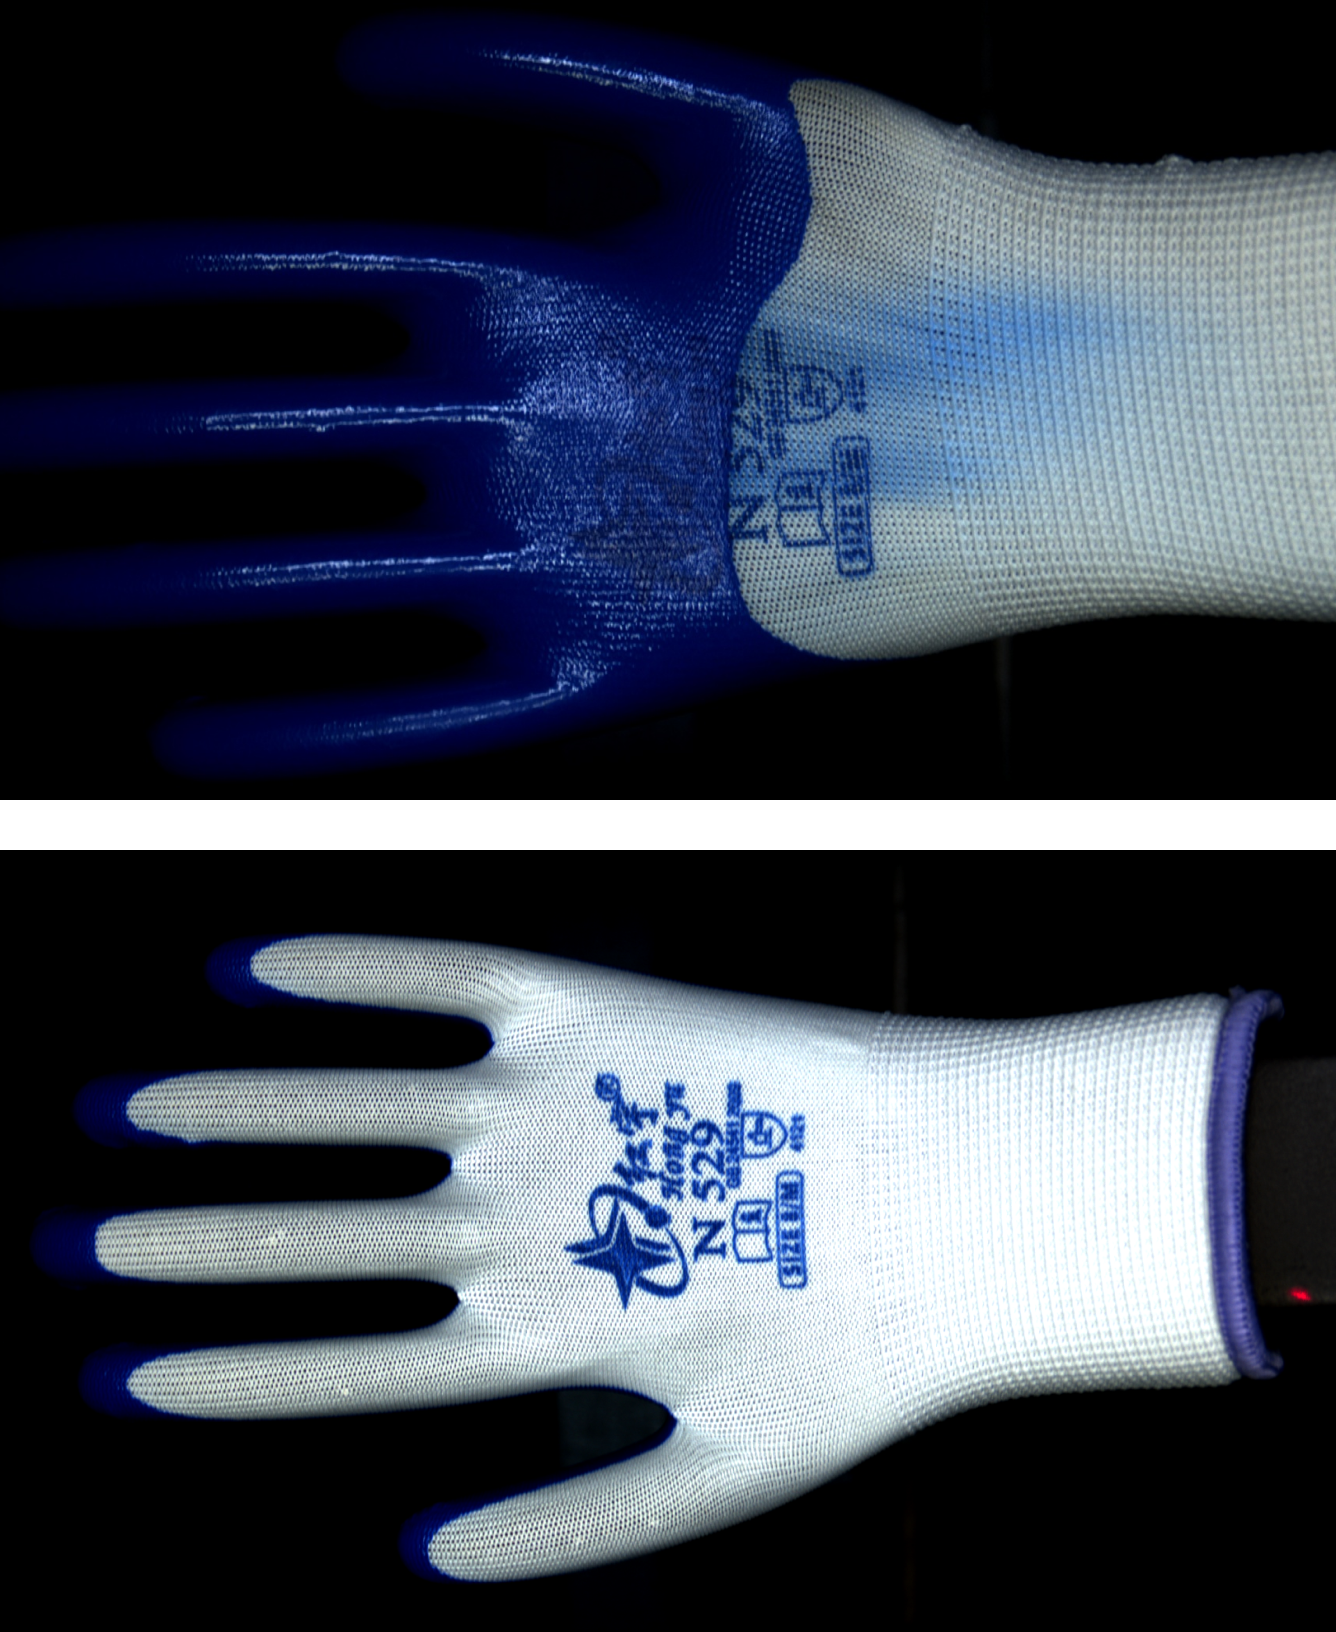
Work Gloves Inspection
The work gloves inspection solution applies deep learning models to locate the areas that require inspection on the gloves and to identify various types of defects based on their features. After images are acquired, use Mech-DLK to train the models, which can enhance the efficiency and accuracy of defect detection.
About the Models
Mech-DLK provides commonly used algorithm models for industrial inspection scenarios. This solution employs the following models for cascading to meet various inspection requirements.
-
Defect Segmentation: This model can accurately detect the location and shape of defects and segment them. It is suitable for small-sized defects. However, accurately labeling all defect areas is required during model training, which incurs high labeling costs. Additionally, it cannot detect defects that cannot be labeled or classify defects.
-
Object Detection: This model can locate, count, and classify defects. Compared to the Defect Segmentation model, this model has a lower labeling cost. However, it cannot provide precise contours of defects and does not perform well when the defects are small. Therefore, this model is commonly used for locating and counting defects in defect detection scenarios, rather than for direct defect detection.
-
Classification: This model can classify different images. It can be used when defect locating is not required and the defect features are distinct. The labeling cost is low, making it suitable for scenarios where defects are difficult to label and require classification. However, this model cannot locate defects and does not perform well when the defects are small.
Basic Information
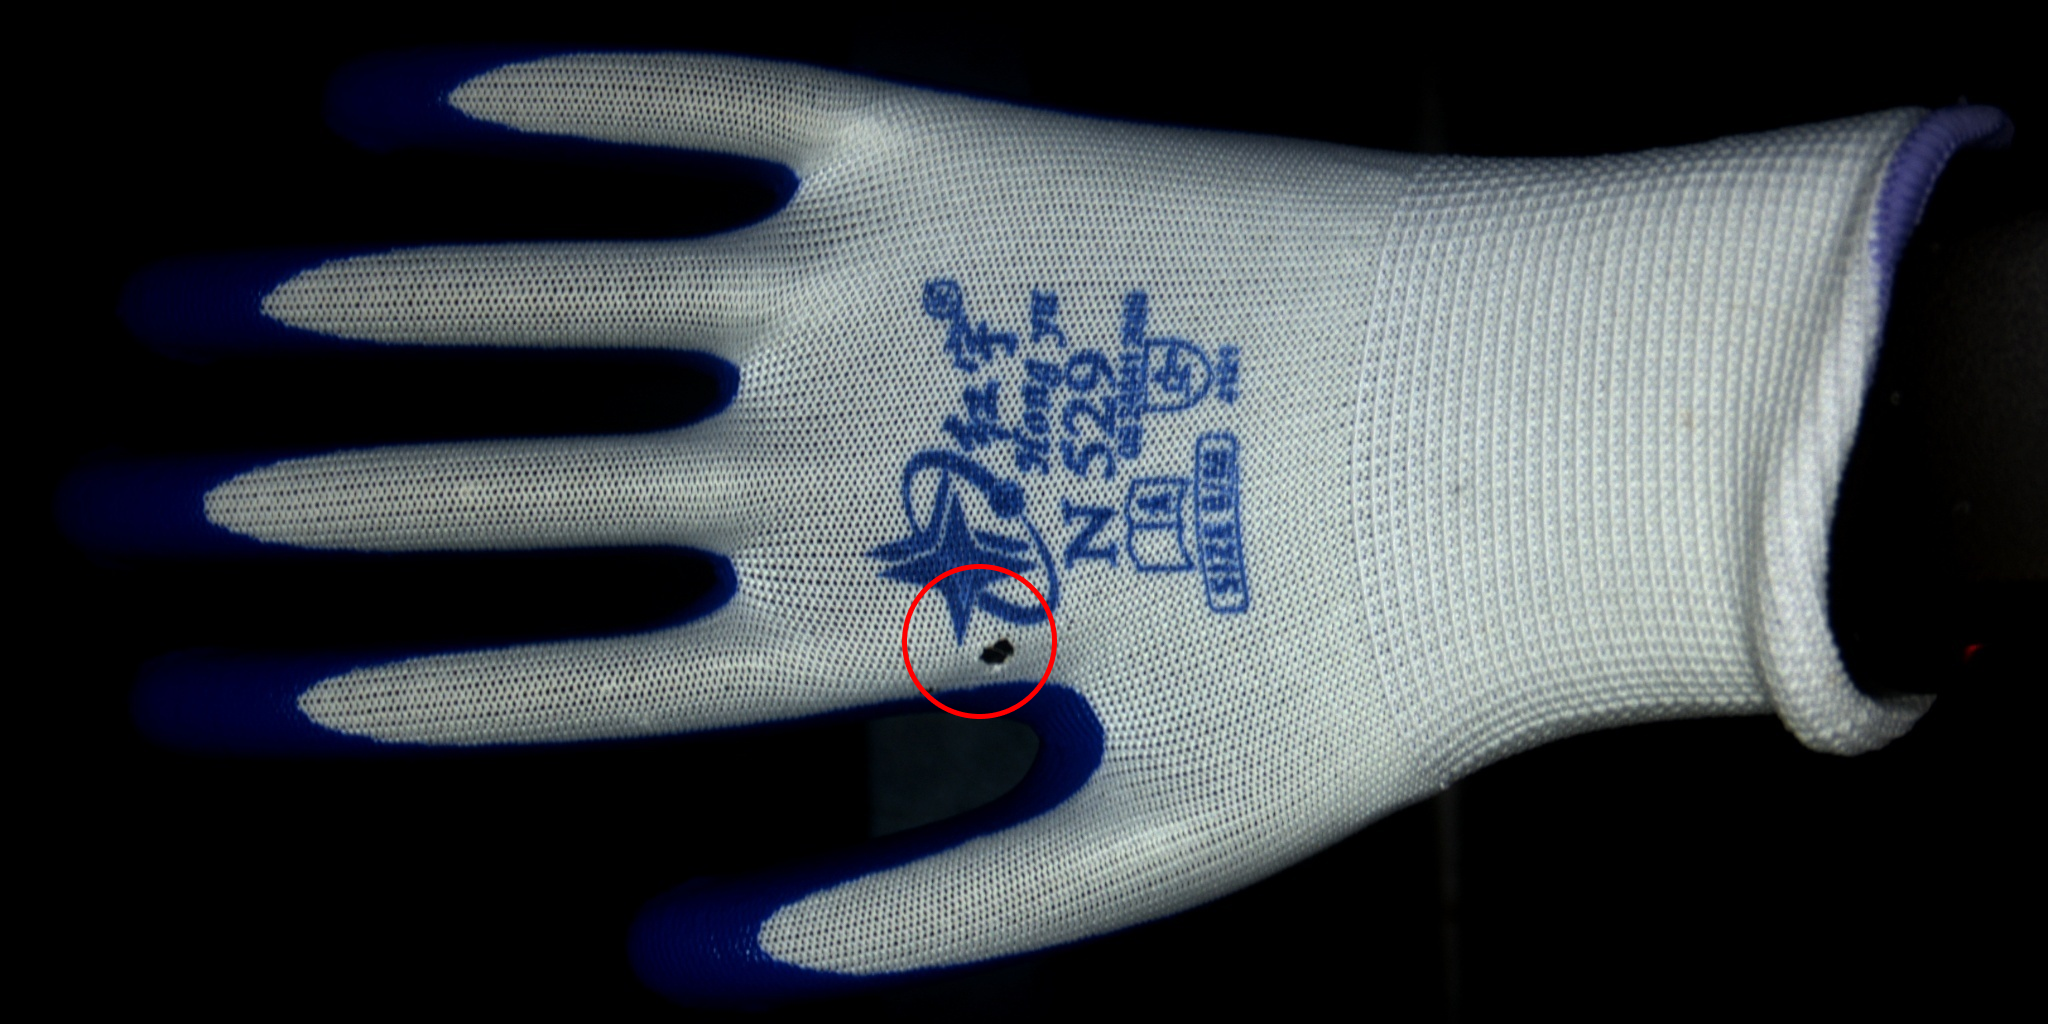
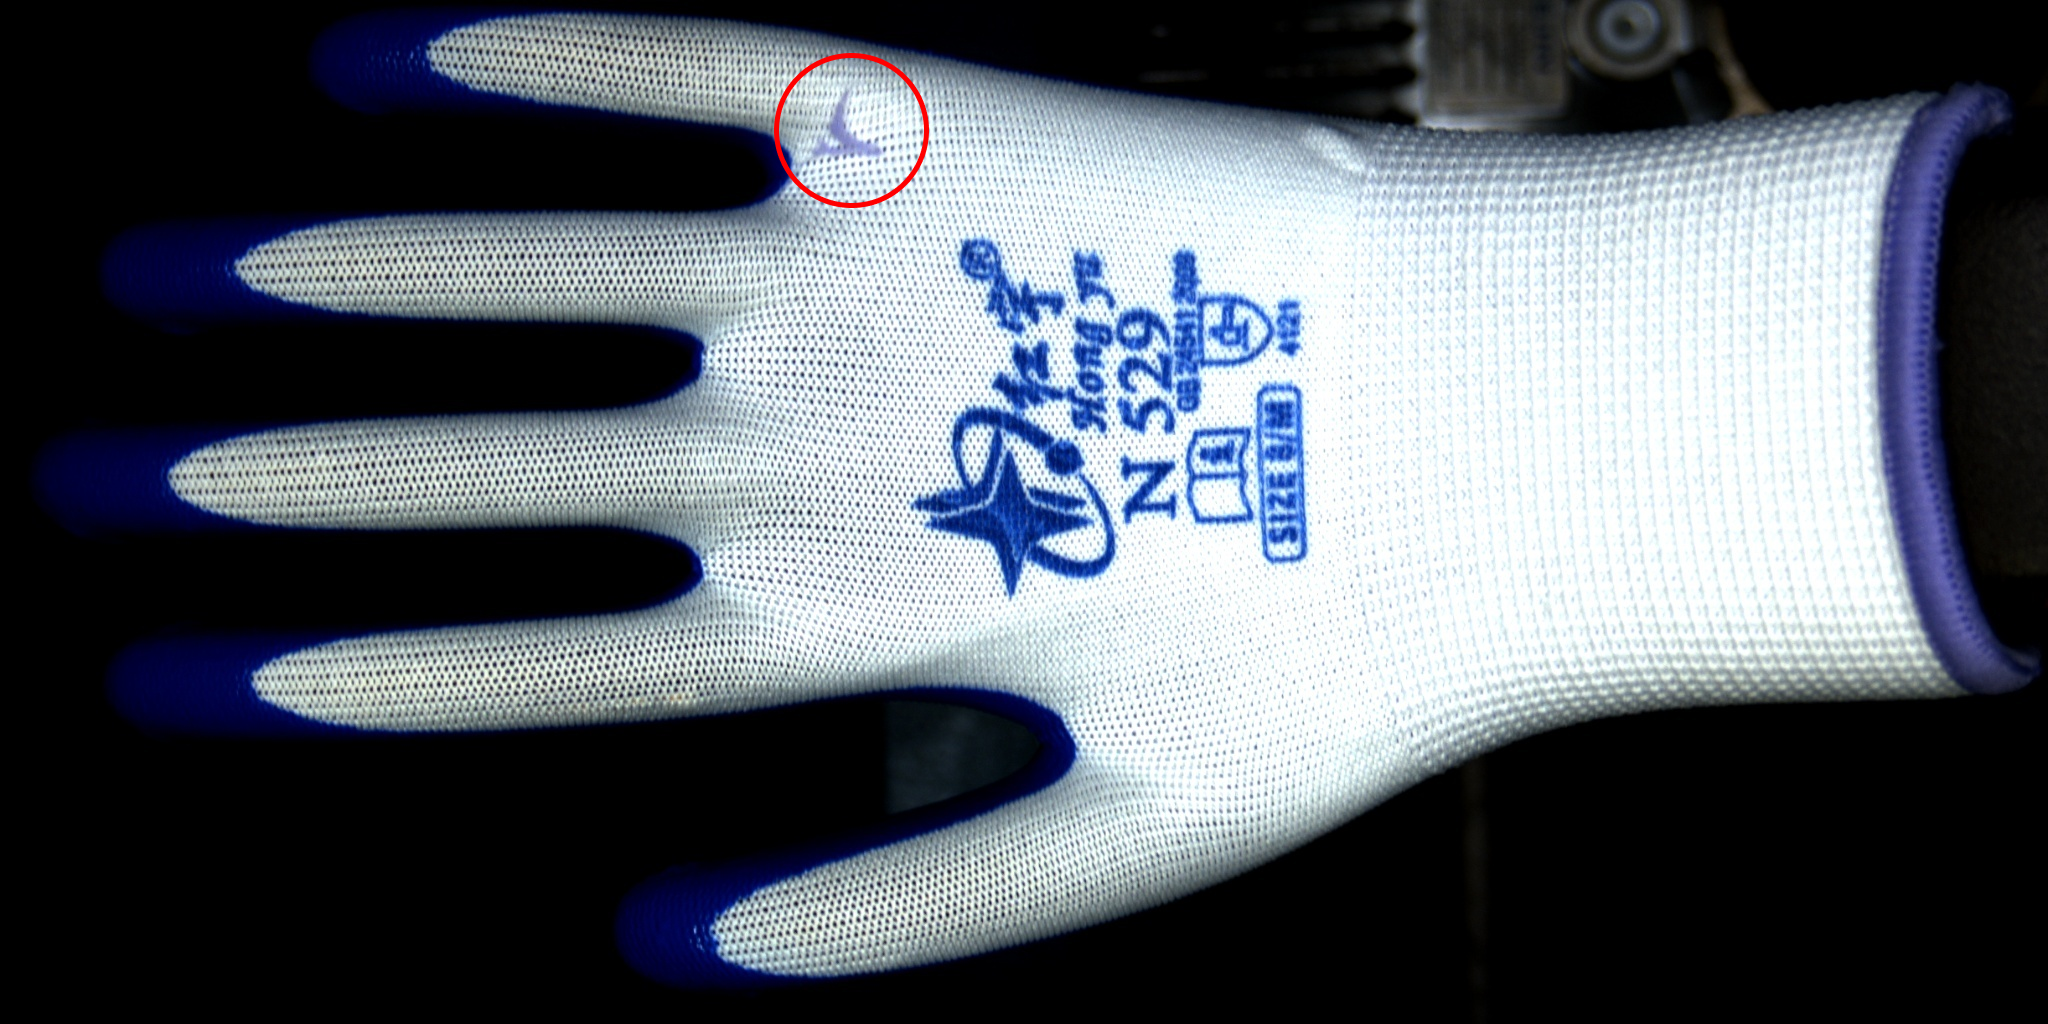
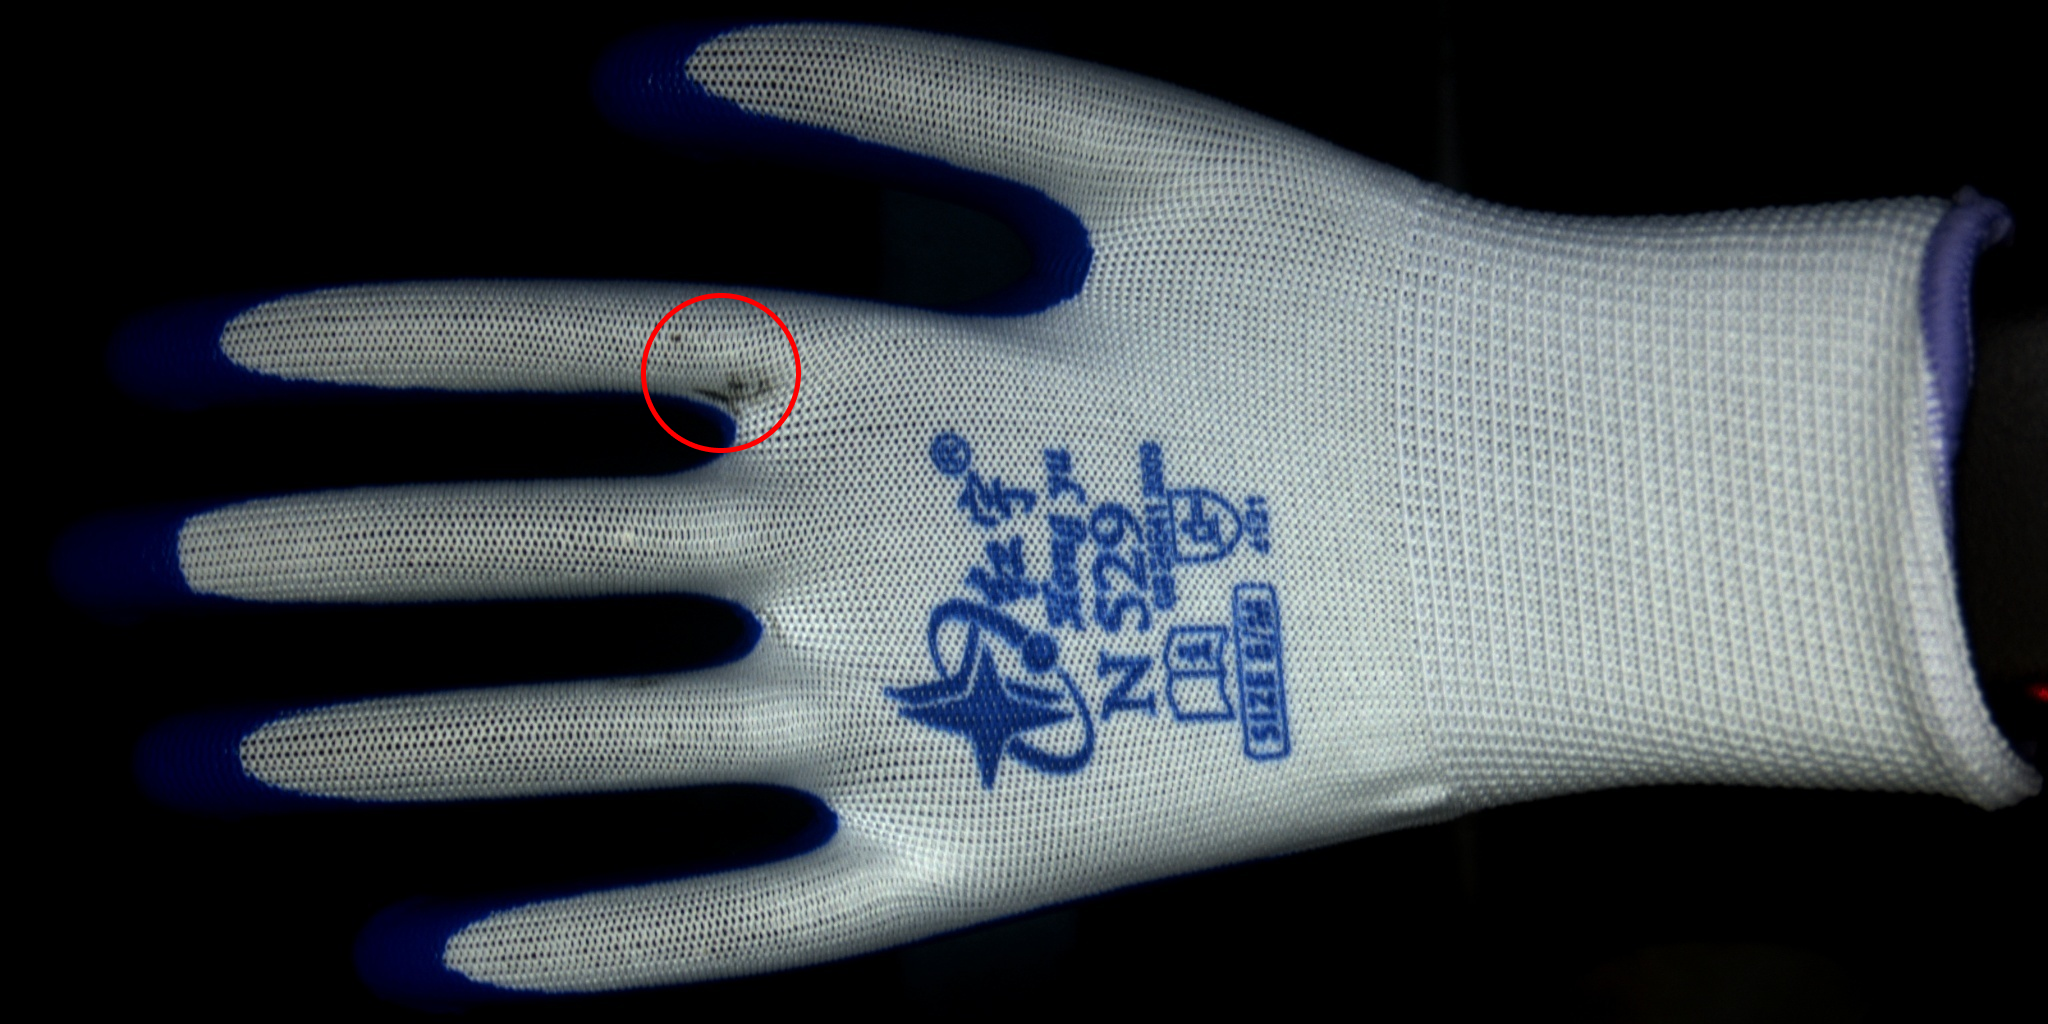
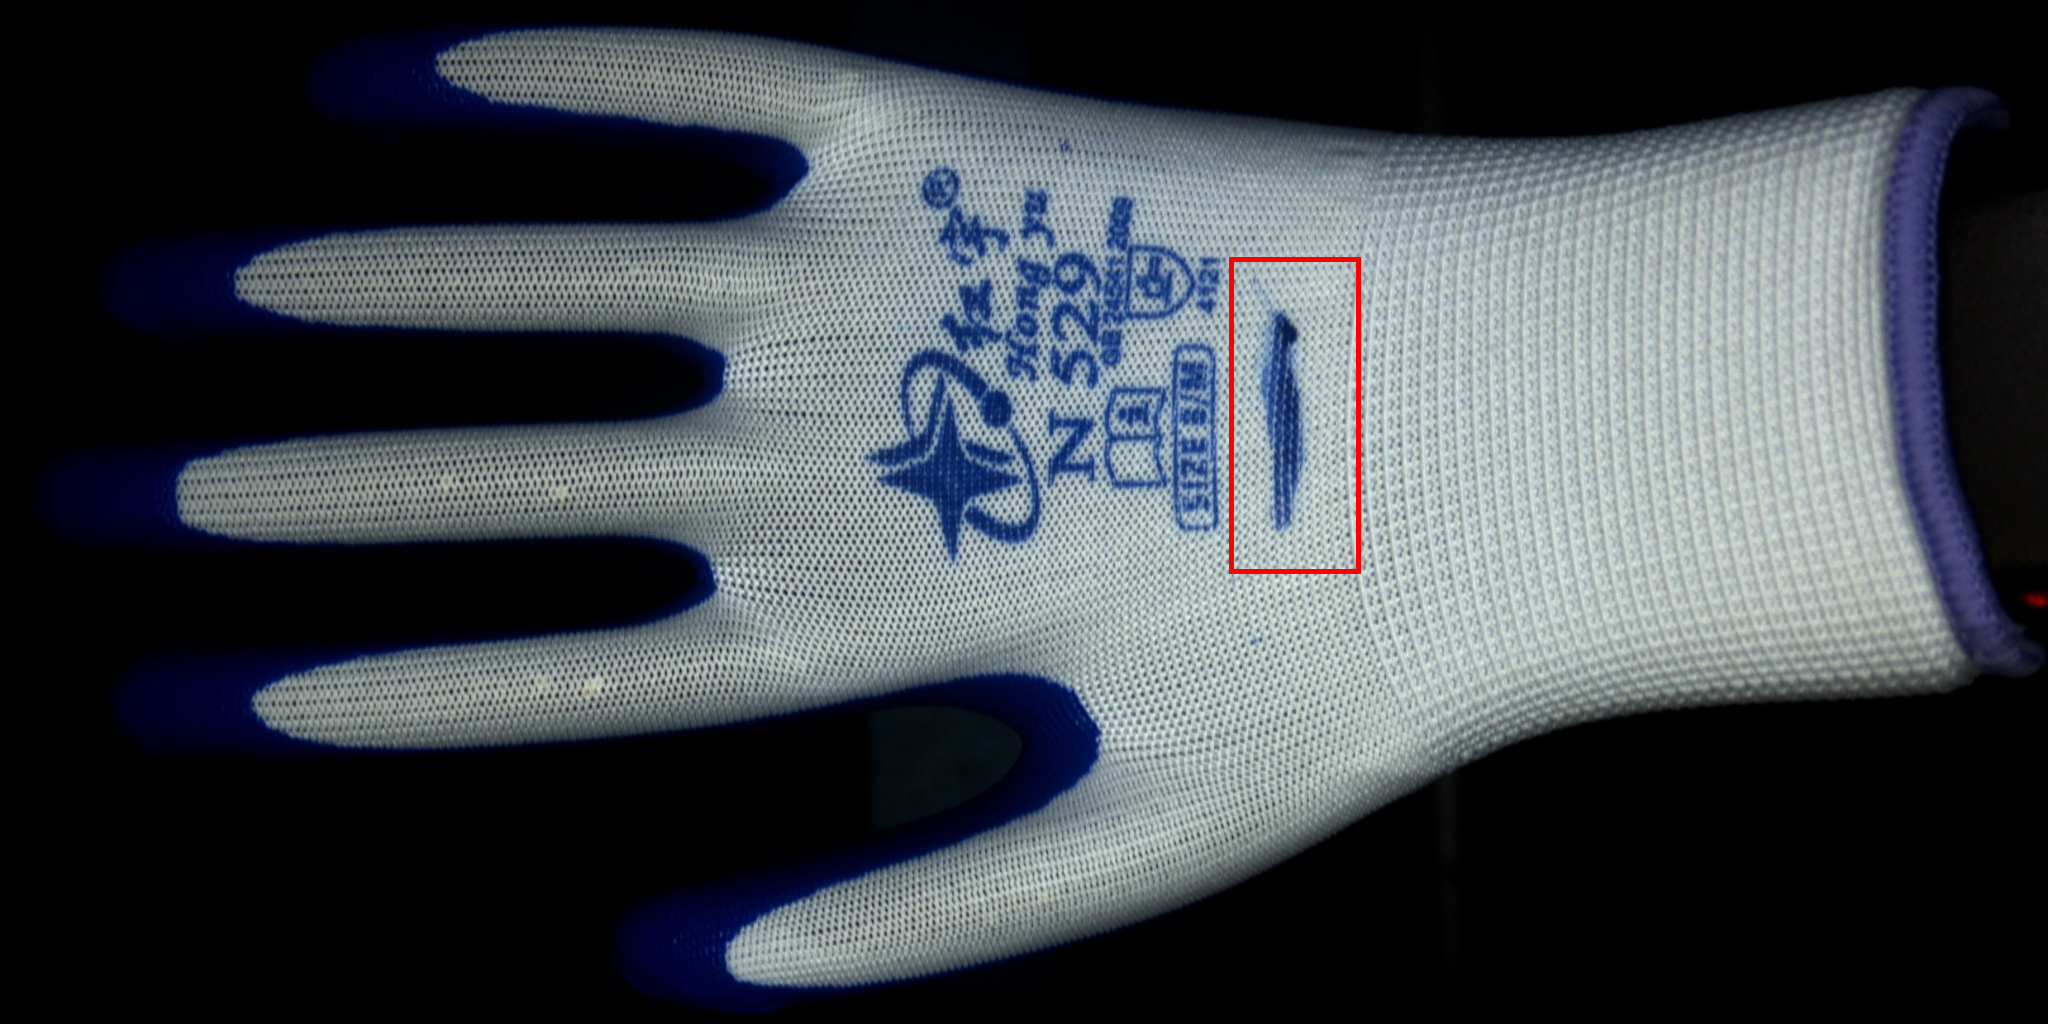
The work gloves inspection solution aims to inspect the following types of defects:
| Imbalanced finger coating | Damage | Anomaly | Stain | NG printing |
|---|---|---|---|---|
|
|
|
|
|
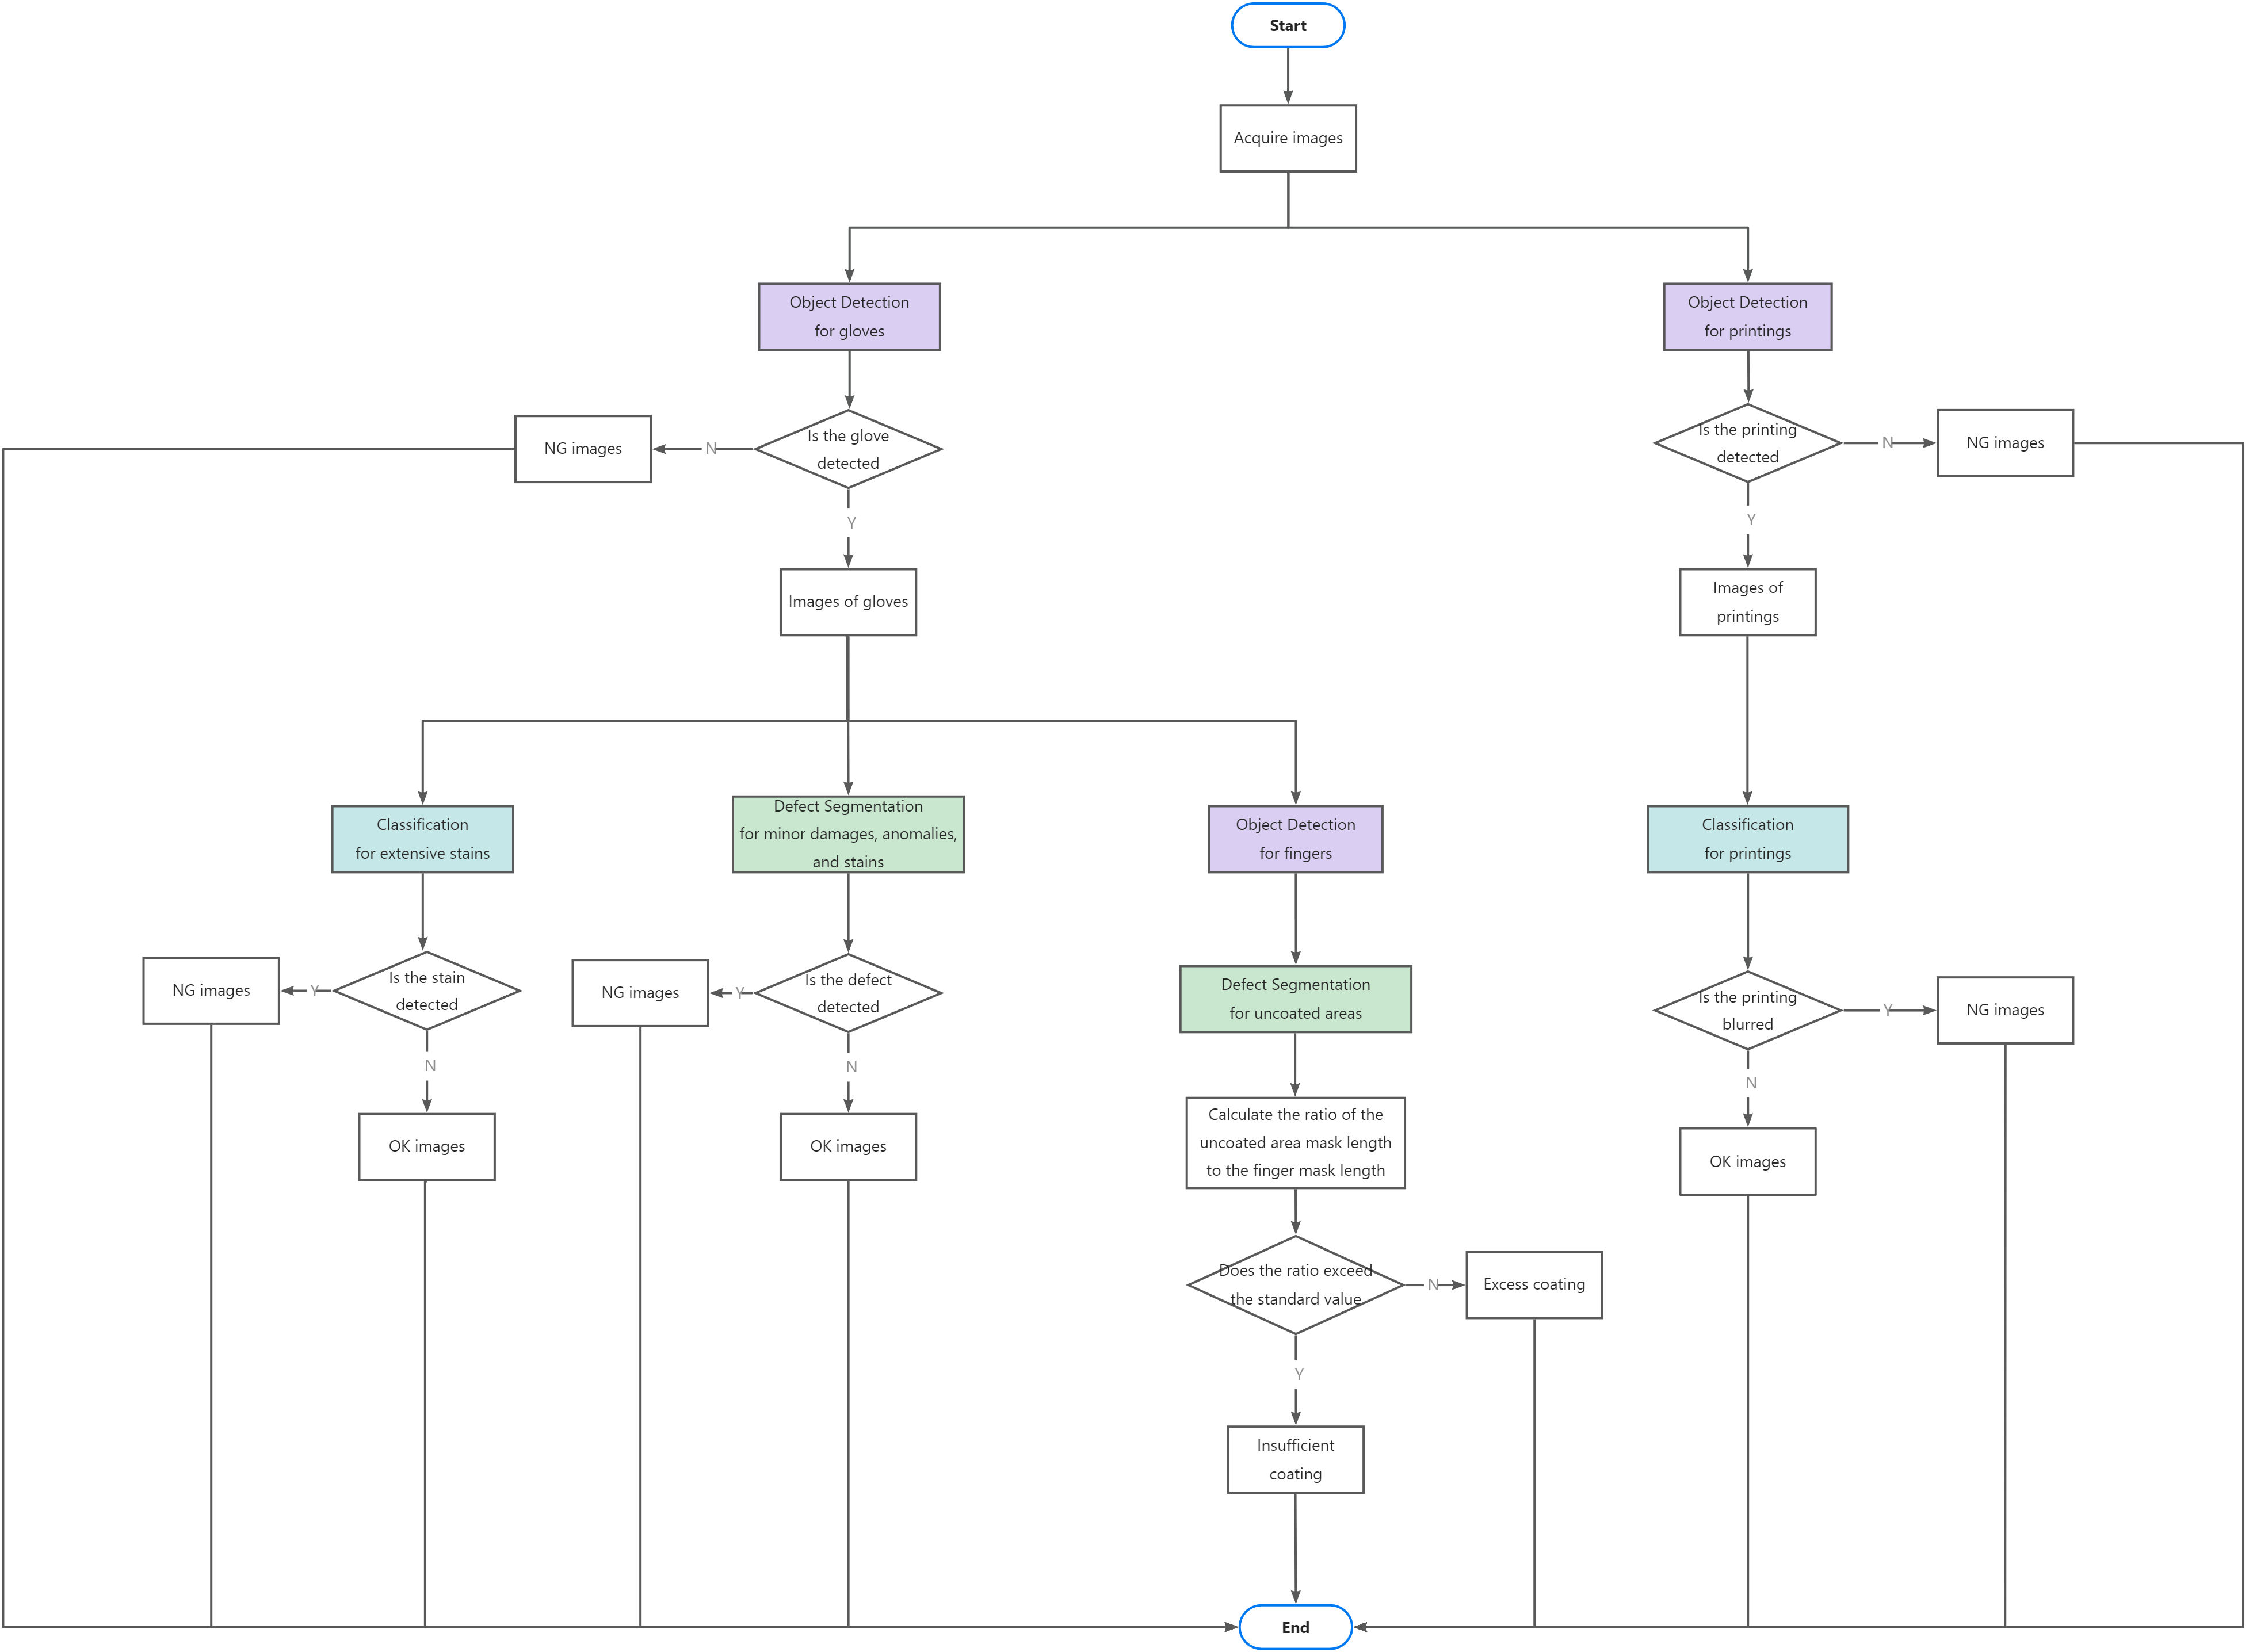
This solution uses the Object Detection model to segment the gloves, printings, and fingers from the images. The Defect Segmentation and Classification models are then applied to process defects in these segmented areas.
The following figure shows the inspection workflow.
Extensive Stains

Defect features: Not required for precise locating of stains. The stains are large and easily identified.
Inspection solution:
-
Use the Object Detection model to segment the gloves from the images.
-
Use the Classification model to classify the gloves as NG (stained) or OK (unstained).
Minor Damages, Anomalies, and Stains

Defect features: The defects are small and can be labeled.
Inspection solution:
-
Use the Object Detection model to segment the gloves from the images.
-
Use the Defect Segmentation model to segment the damages, stains, and anomalies.
Imbalanced Finger Coatings

Defect features: The area and shape of finger coatings are variable, making it difficult to directly label the defects during model training.
Inspection solution:
-
Use the Object Detection model to segment the gloves from the images.
-
Use the Object Detection model to segment the fingers from the gloves.
-
Use the Defect segmentation model to segment the white areas (uncoated) on the fingers. Then, calculate the ratio of the length of this area to the length of the finger to determine whether the coating is excess or insufficient.
NG Printings
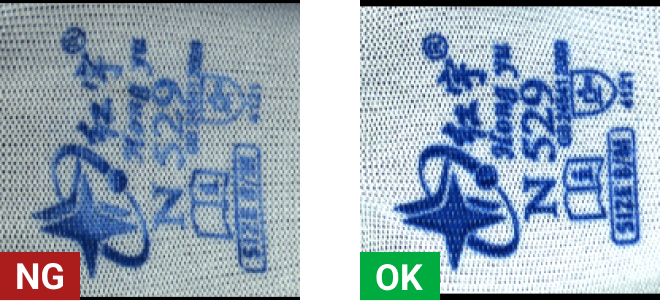
Defect features: The printings are distinct in features. Not required for defect locating, only the classification of blurred and clear printings is needed.
Inspection solution:
-
Use the Object Detection model to segment the printings from the images.
-
Use the Classification model to classify the printings as NG (blurred) or OK (clear).
Solution Deployment
Train Models
Object Detection for Gloves and Printings
This model is used to segment the gloves and printings from the original images, allowing for precise defect processing in these areas.
-
Create a project and add the Object Detection module.
Click New Project in the interface, name the project, and select a directory to save the project. Click + in the upper right corner of the Modules section and add the Object Detection module.
-
Import image data.
In the upper-left corner of the interface, click Import/Export to import the acquired glove images.
-
Create a label.
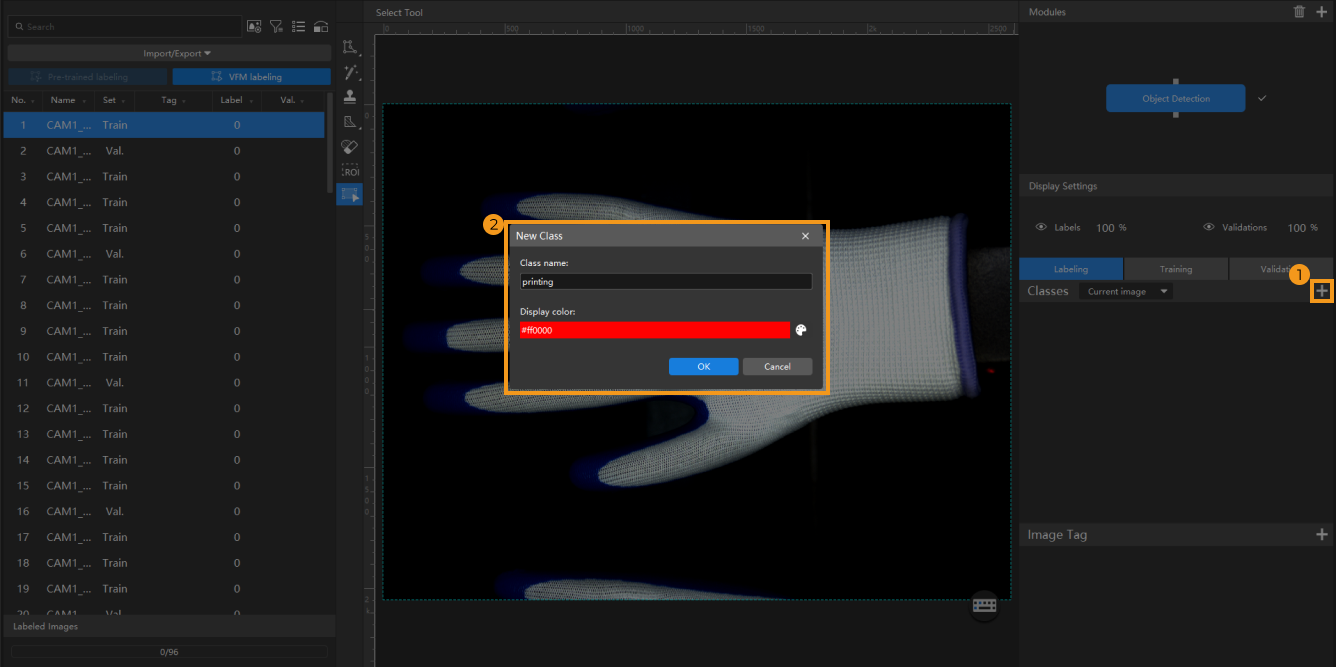
In the Labeling tab, click + and create a label based on the object type.
-
For the glove model, create a glove label.
-
For the printing model, create a printing label.
-
-
Label images.
On the labeling toolbar, right-click
 and then click
  (or press R on the keyboard). Long press the left mouse button in the selection region, move it in any direction, and then release the left mouse button to finish the rectangular selection.
-
For the glove model, label the gloves in the images.
-
For the printing model, label the printings in the images.
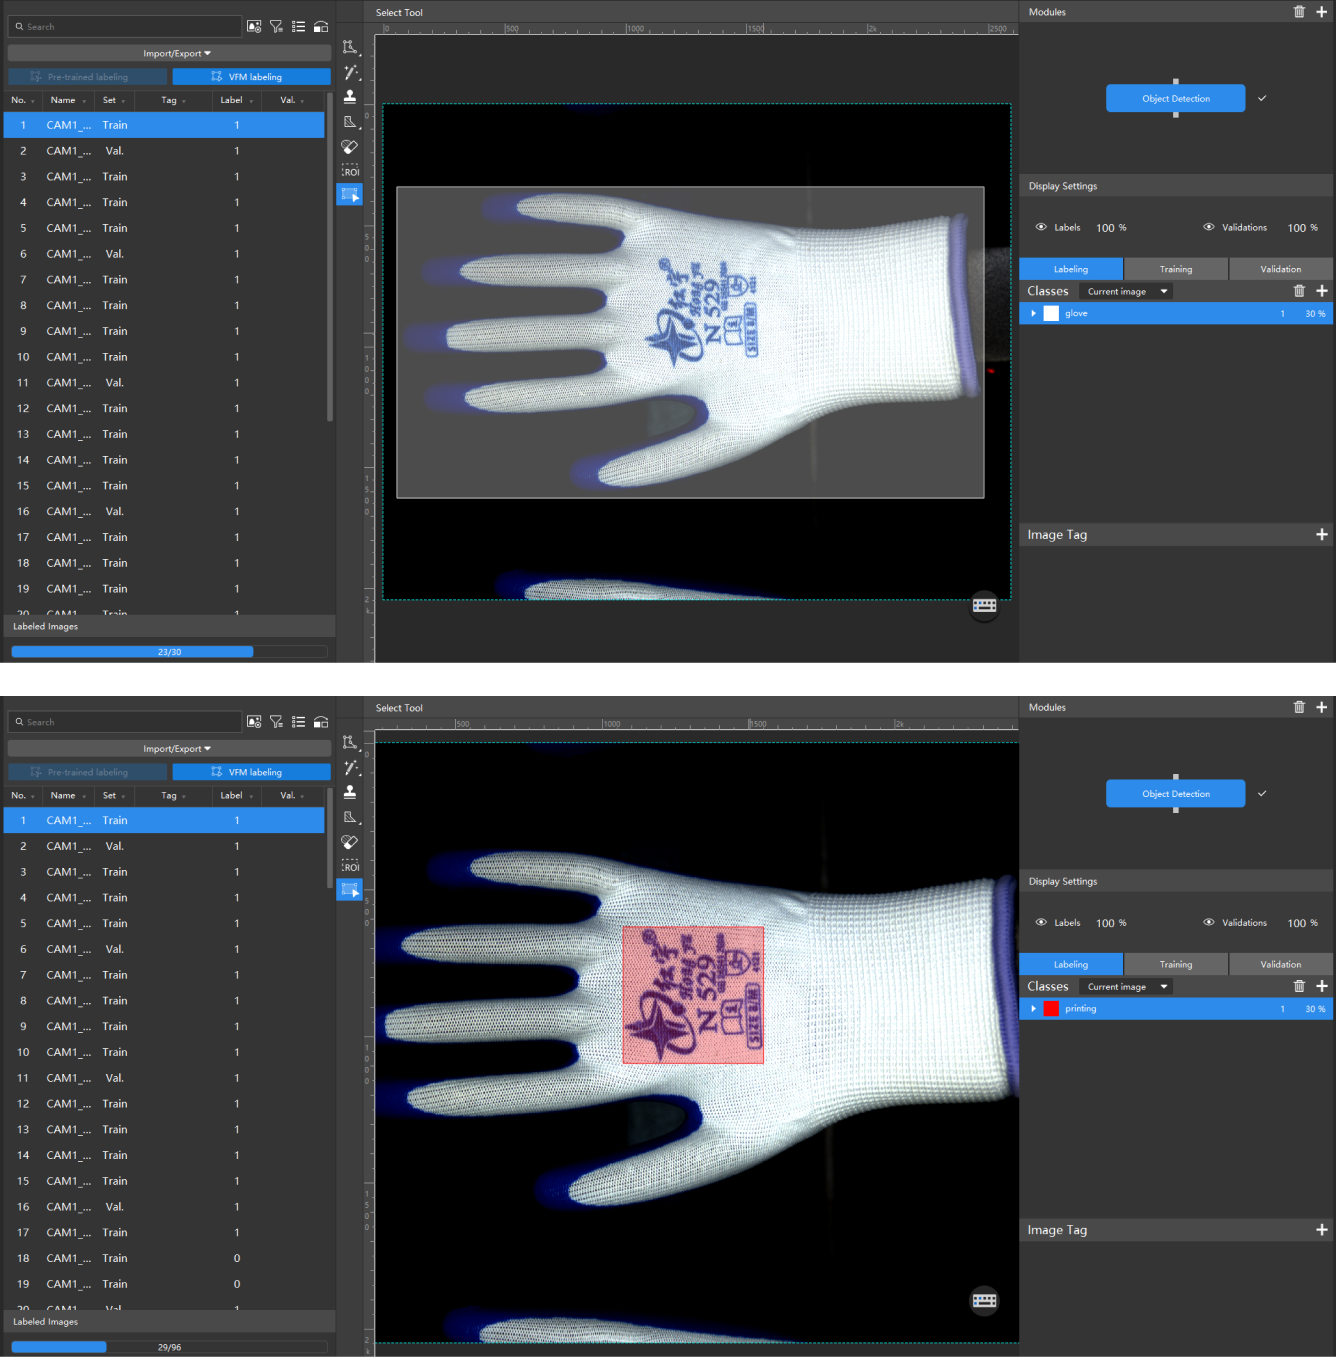
When labeling, ensure that the rectangular selection tightly encloses the target object, and avoid including irrelevant regions. -
-
Train the model.
In the Training tab, keep the default training parameter settings and click Train to start training the model.
-
Validate the model.
After the training is completed, click Validate in the Validation tab to validate the model and check the results.
Object Detection for Fingers
After training the glove model, cascade a new Object Detection module to segment fingers.
-
Cascade an Object Detection module.
In the project interface of the Object Detection module for gloves, click the + button in the Modules section in the upper-right corner, and select Object Detection.
-
Import image data.
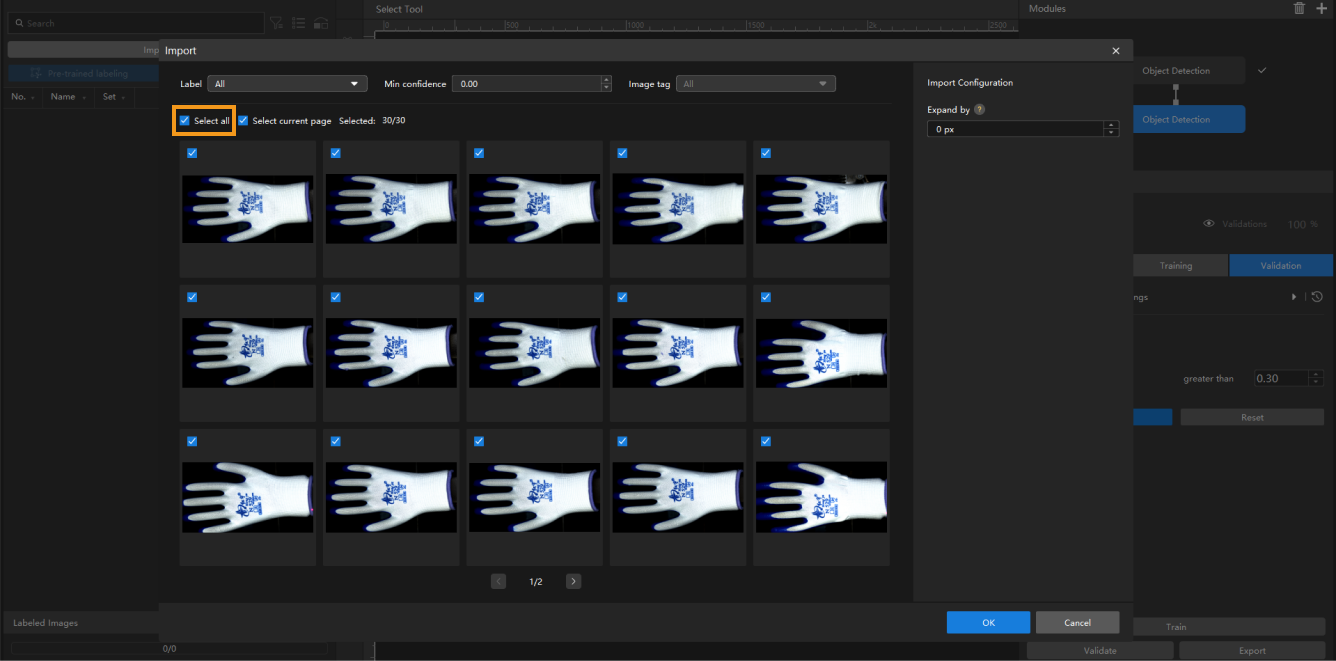
In the upper-left corner of the interface, click , select all validation results from the previous module, and click OK.
-
Create a label.
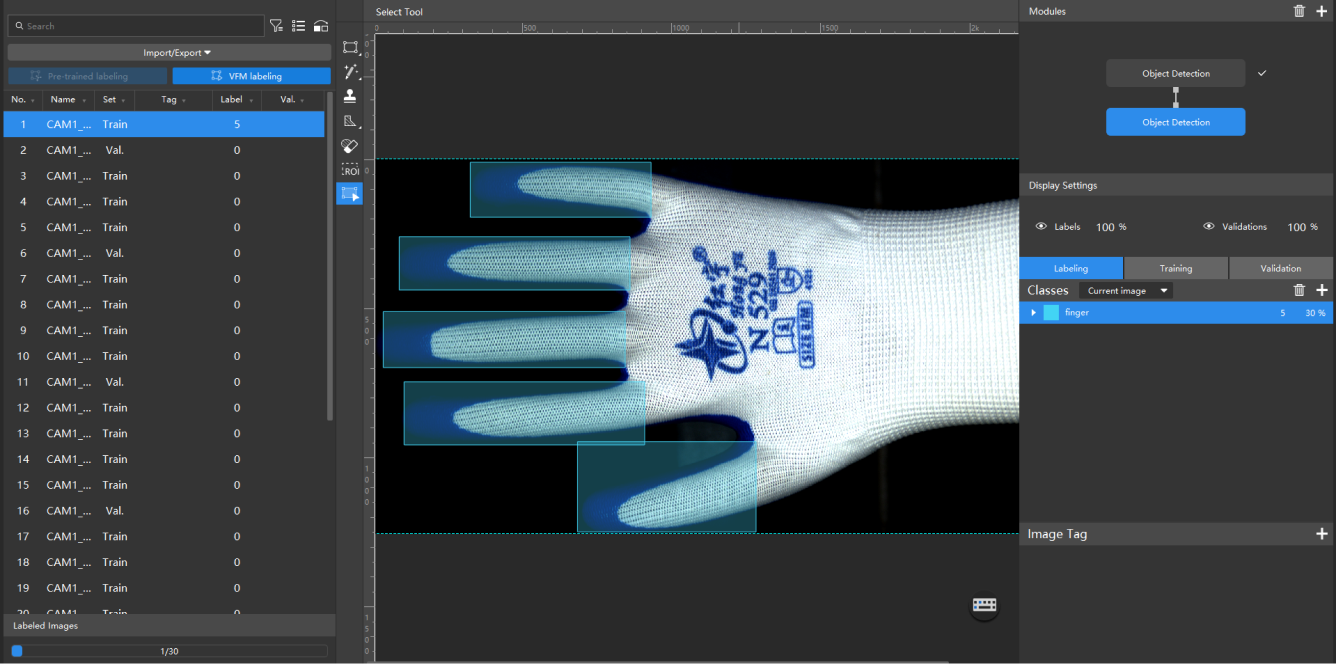
In the Labeling tab, click + and create a finger label.
-
Label images.
On the labeling toolbar, right-click
 and then click
  (or press R on the keyboard) to label each finger in the images.
-
Train the model.
In the Training tab, keep the default training parameter settings and click Train to start training the model.
-
Validate the model.
After the training is completed, click Validate in the Validation tab to validate the model and check the results.
Classification for Extensive Stains
This model is used to classify the gloves as NG (stained) or OK (unstained), so that the stained gloves can be identified.
-
Cascade the Classification module.
In the project interface of the Object Detection module for gloves, click the + button in the Modules section in the upper-right corner, and select Classification.
-
Import image data.
In the upper-left corner of the interface, click , select all validation results from the previous module, and click OK.
-
Create labels.
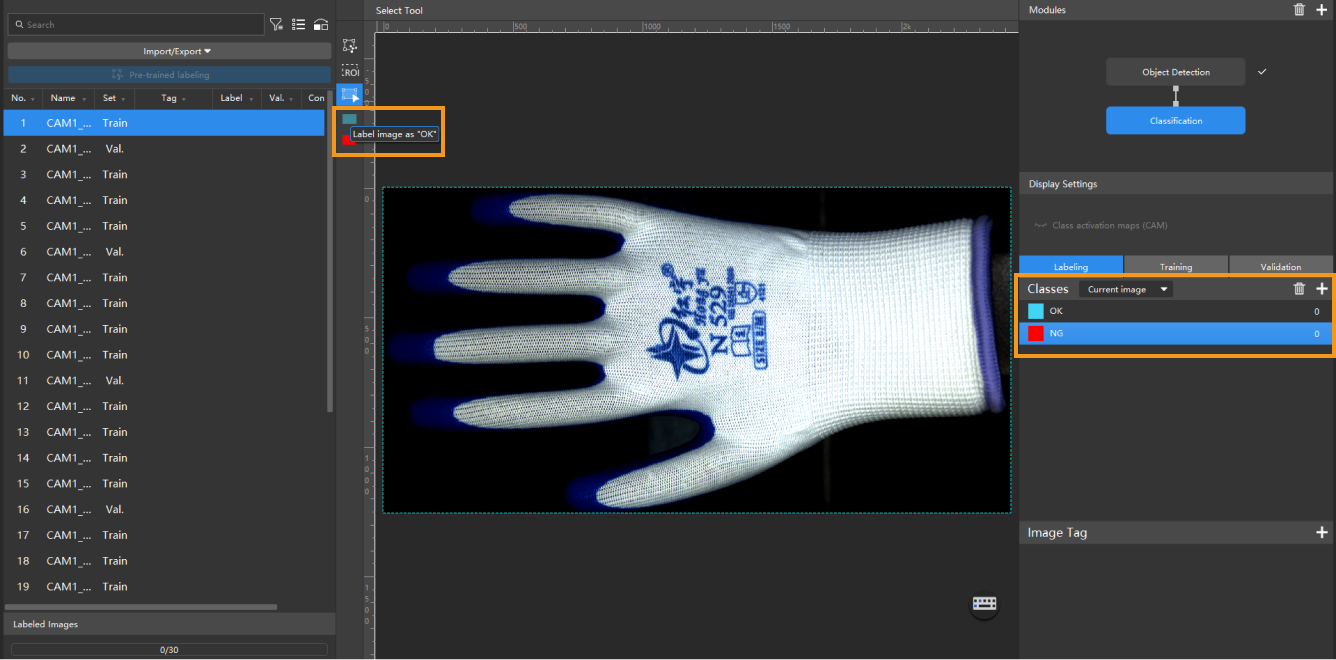
In the Labeling tab, click + and create labels based on the object feature. In this module, create NG and OK labels.
-
Label images.
On the left-side labeling toolbar, select the labels to label the stained gloves as NG and the unstained gloves as OK. You can select multiple images and label them simultaneously.
-
Train the model.
In the Training tab, keep the default training parameter settings and click Train to start training the model.
-
Validate the model.
After the training is completed, click Validate in the Validation tab to validate the model and check the results.
Classification for NG Printings
This model is used to classify the printings segmented from the Object Detection model as NG (blurred) or OK (clear), so that the gloves with NG printings can be identified.
-
Cascade the Classification module.
In the project interface of the Object Detection module for printings, click the + button in the Modules section in the upper-right corner, and select Classification.
-
Import image data.
In the upper-left corner of the interface, click , select all validation results from the previous module, and click OK.
-
Create labels.
In the Labeling tab, click + and create labels based on the object feature. In this module, create NG and OK labels.
-
Label images.
On the left-side labeling toolbar, select the labels to label the blurred printings as NG and the clear printings as OK. You can select multiple images and label them simultaneously.
-
Train the model.
In the Training tab, keep the default training parameter settings and click Train to start training the model.
-
Validate the model.
After the training is completed, click Validate in the Validation tab to validate the model and check the results.
Defect Segmentation for Minor Defects
This model is used to label minor damages, anomalies, and stains on gloves.
-
Cascade the Defect Segmentation module.
In the project interface of the Object Detection module for gloves, click the + button in the Modules section in the upper-right corner, and select Defect Segmentation.
-
Import image data.
In the upper-left corner of the interface, click , select all validation results from the previous module, and click OK.
-
Label images.
You need to label OK and NG images.
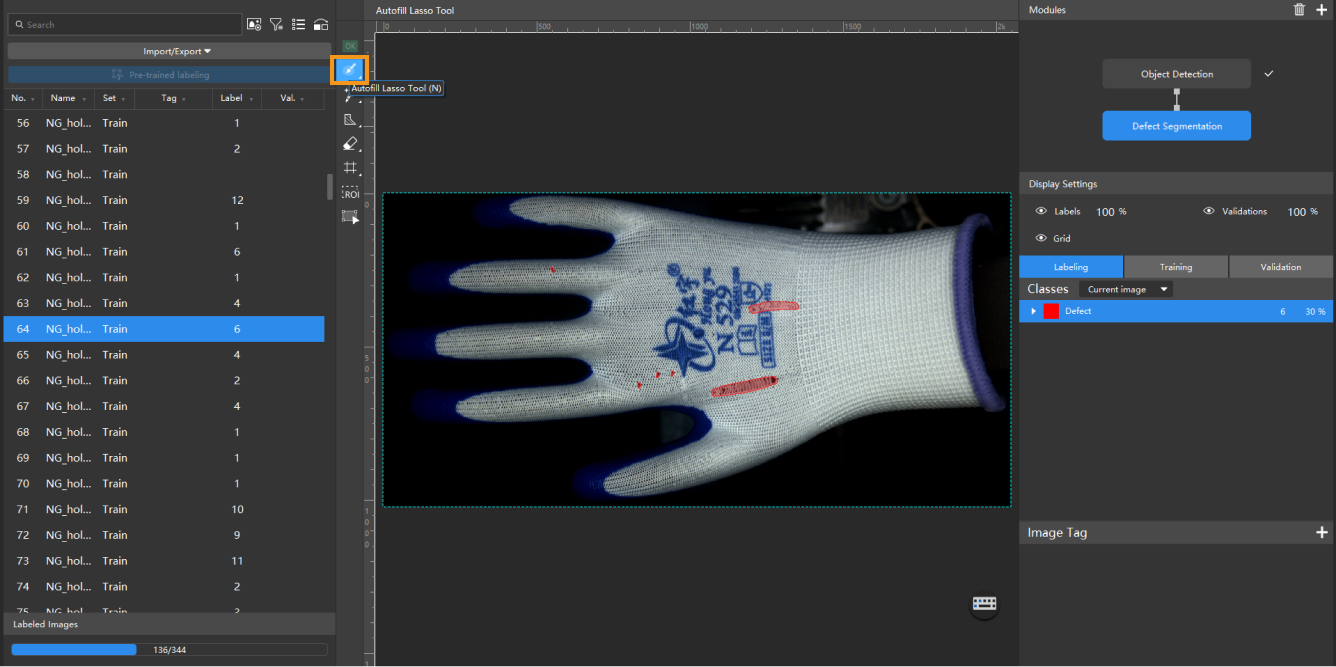
-
For NG images, right-click the Polygon Tool and select a suitable tool to select the defect regions. During labeling, select the defects as precisely as possible with the tools to avoid including excessive non-defective areas.
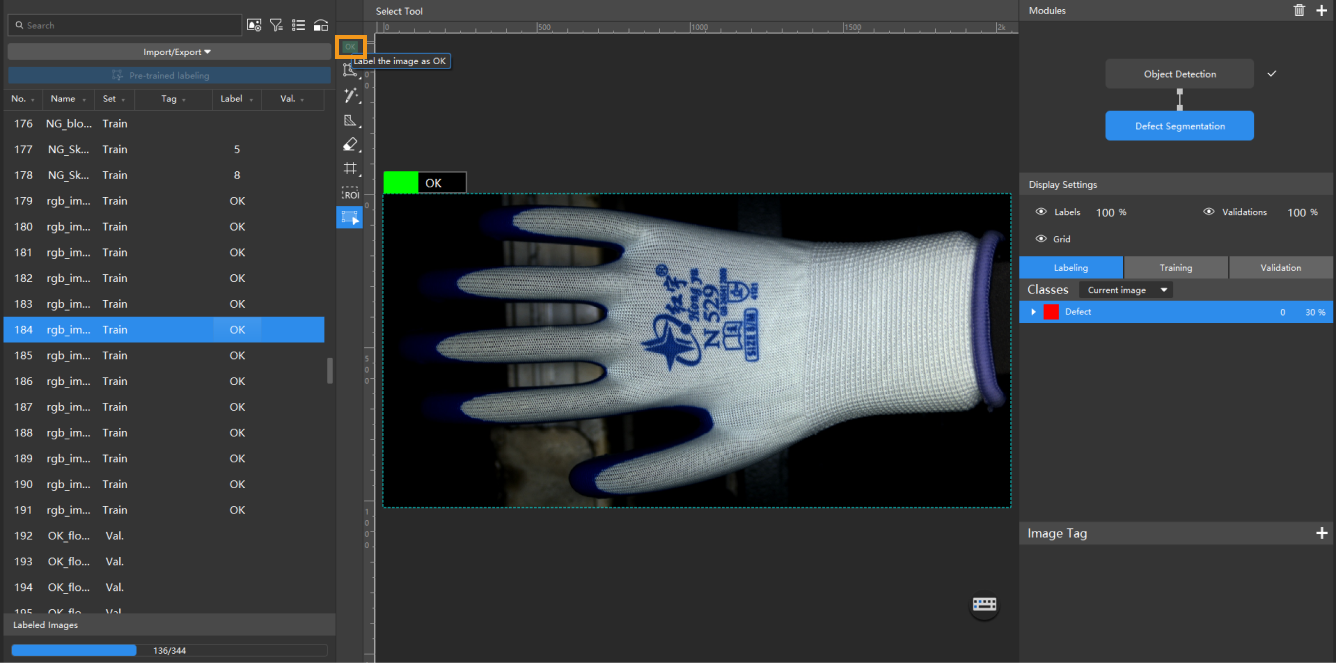
-
For OK images, select an image and click the OK Label on the labeling toolbar. The image will be labeled as OK.
-
-
Train the model.
In the Training tab, keep the default training parameter settings and click Train to start training the model.
-
Validate the model.
After the training is completed, click Validate in the Validation tab to validate the model and check the results.
Defect Segmentation for Imbalanced Finger Coatings
This model is used to segment the uncoated areas on the fingers to calculate the ratio of the coated areas, thus determining whether the coating is excess or insufficient.
-
Cascade the Defect Segmentation module.
In the project interface of the Object Detection module for fingers, click the + button in the Modules section in the upper-right corner, and select Defect Segmentation.
-
Import image data.
In the upper-left corner of the interface, click , select all validation results from the previous module, and click OK.
-
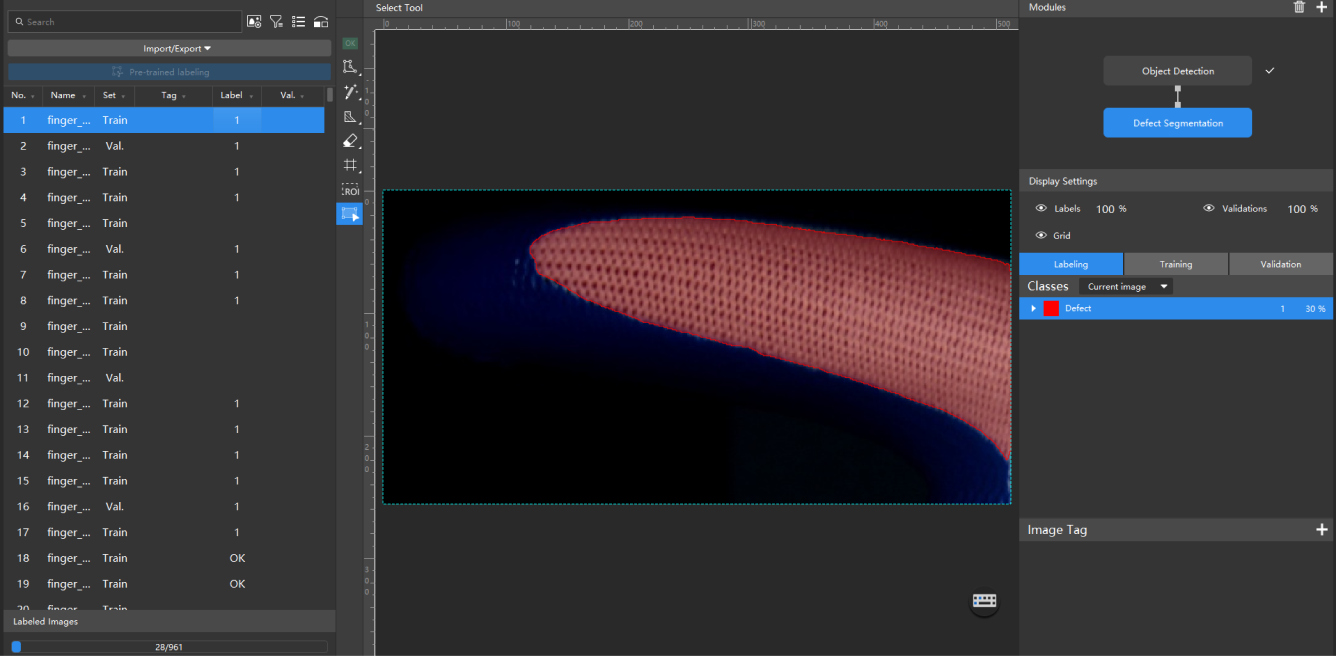
Label images.
You need to label the white areas on the fingers.
-
Train the model.
In the Training tab, keep the default training parameter settings and click Train to start training the model.
-
Validate the model.
After the training is completed, click Validate in the Validation tab to validate the model and check the results.
Deploy Models
You can use Mech-DLK SDK for secondary development to integrate deep learning inference functions into the quality control system (software) of the production line. Then, use the exported model packages for inference to obtain the inference results.
| You can also use the Deep Learning Model Package Inference Step in Mech-Vision for model inference and to obtain inference results. To use Mech-Vision, a corresponding software license must be purchased. |
