Train a Classification Model
The Classification model can be used to classify different images based on their features. This topic describes how to train a Classification model to distinguish between the front and back sides of the condensers.

The workflow for training the Classification model is as follows:
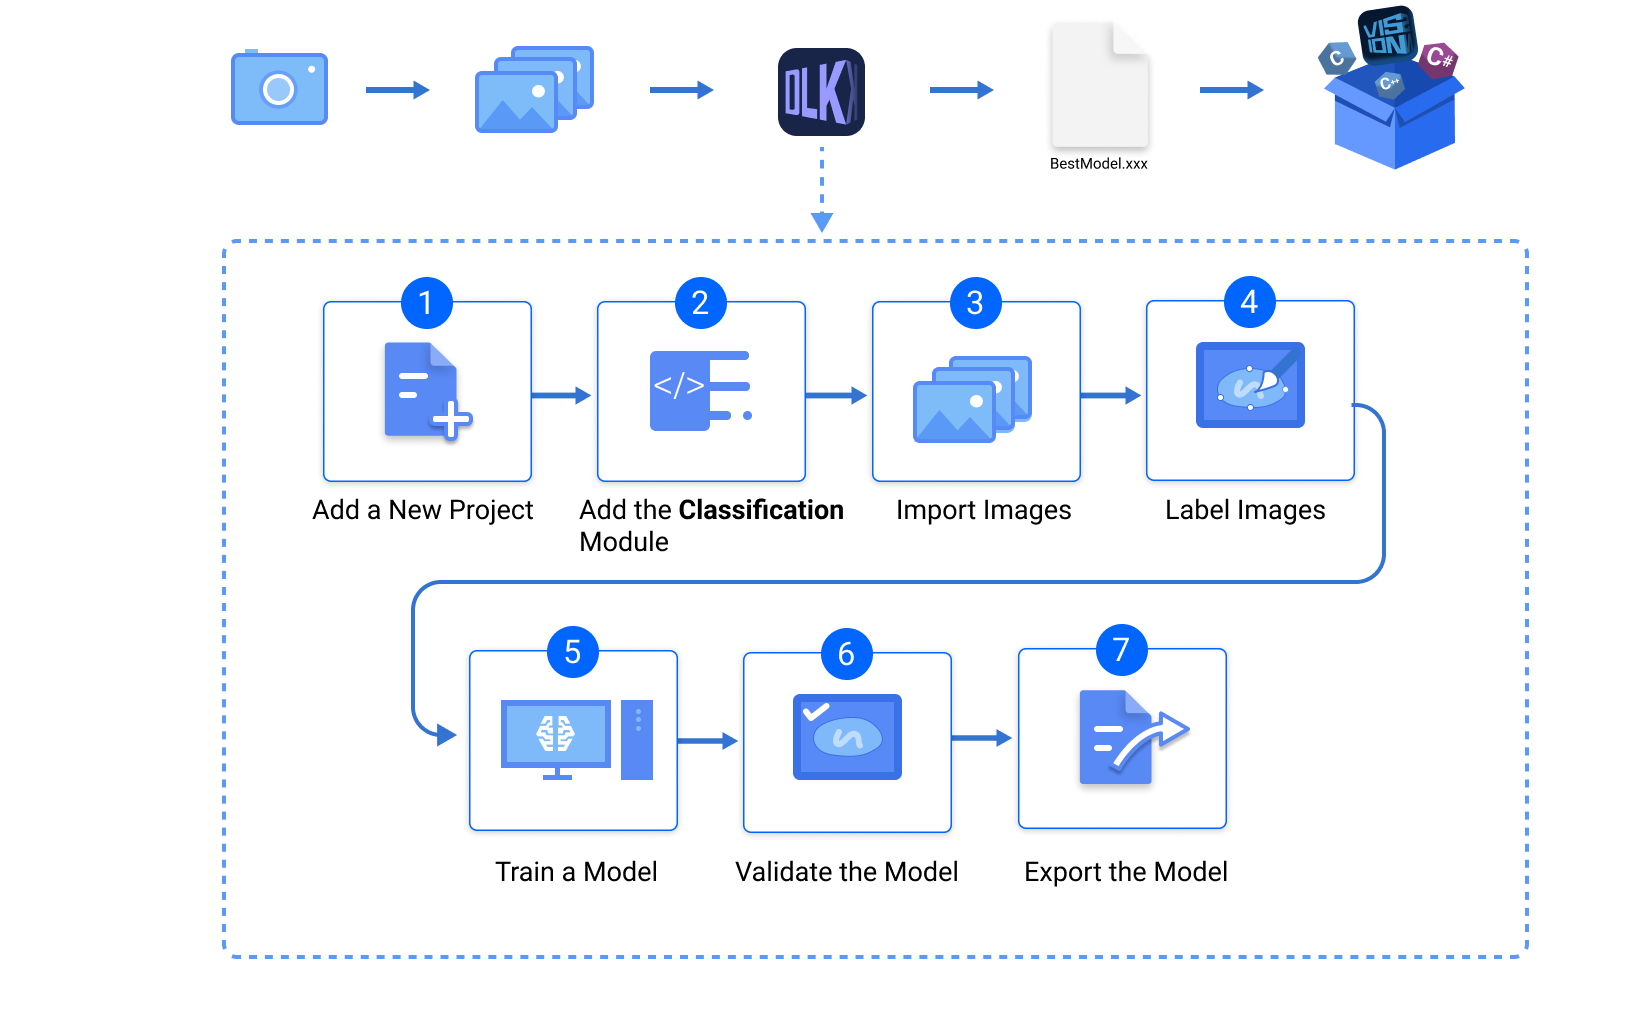
Preparations
Before you start training, make sure you have acquired and selected the images for training according to the data acquisition standard. In this example, you need to prepare the front and back images of the condensers.
Create a Project and Add a Module
-
Create a project: Open Mech-DLK. In the upper-left corner of the startup interface, click New Project, name the project, and select a directory to save the project.
-
Add a module: In the upper-right corner of the project interface, click
 in the Modules section, and then select the Classification module.
Import and Label the Image Data
-
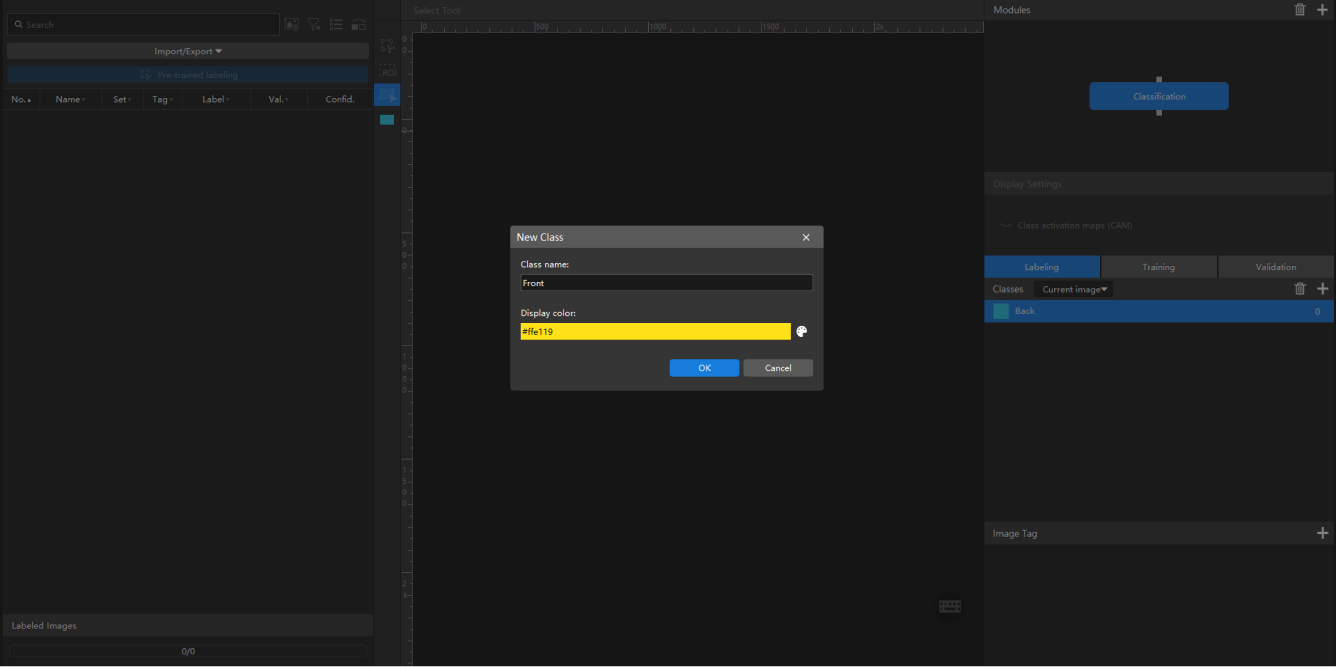
Create labels: In the Labeling tab, click
 in the Classes section to create labels. In this example, you need to create the Front and Back labels to classify the front and back sides of the condensers.
-
Import image data:
-
On the upper part of the image list, click , and import the folder of the front side images.
-
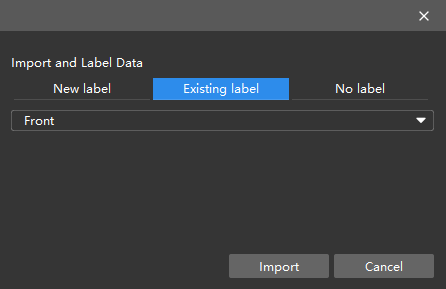
In the pop-up Import and Label Data window, click Existing label, select the label Front, and click Import. All images in the folder will be imported into the project and labeled as Front.
-
Follow the same steps to import the folder of the back side images and label them as Back.
-
If you need a new label for the imported folder, you can click New label in the Import and Label Data window, create a new class, and then click Import.
-
If you do not want to label the images during import, you can click No label in the Import and Label Data window. The images will be imported without labels. You can import all the images and manually label them afterwards.
-
-
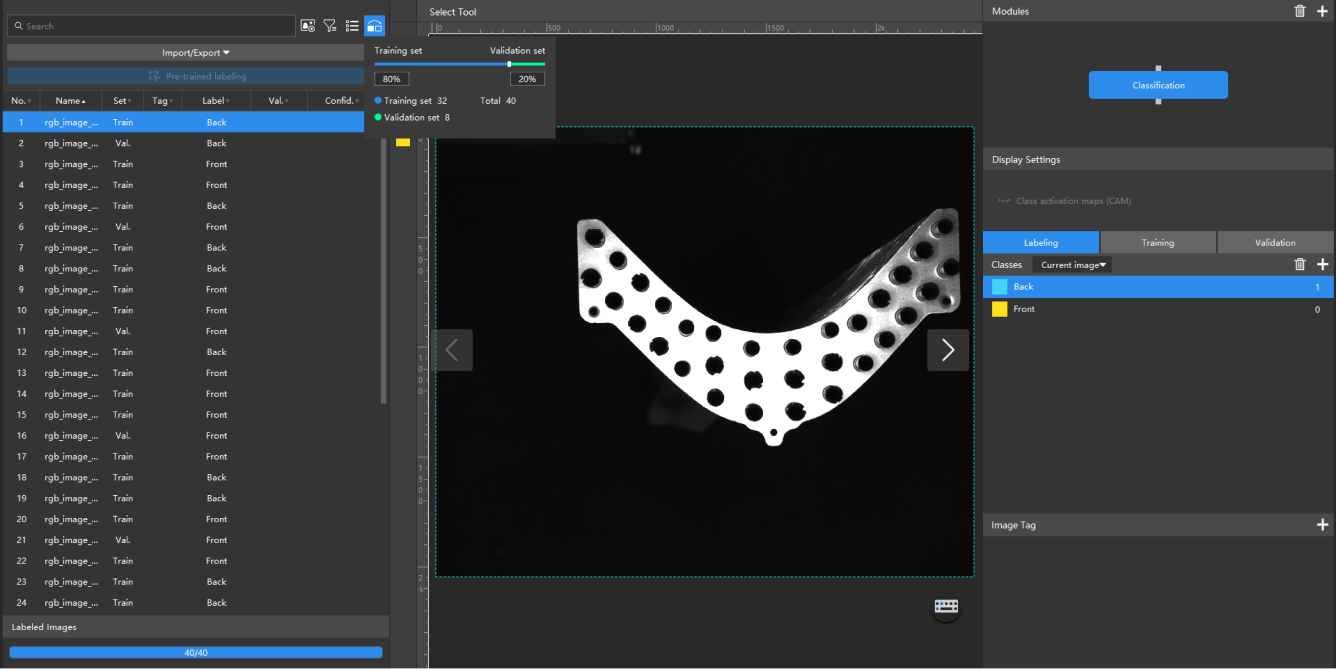
Split the dataset: After all images are imported and labeled, click
 and drag the slider to split 80% of the images in the dataset into the training set, and the rest 20% into the validation set.
Train the Model
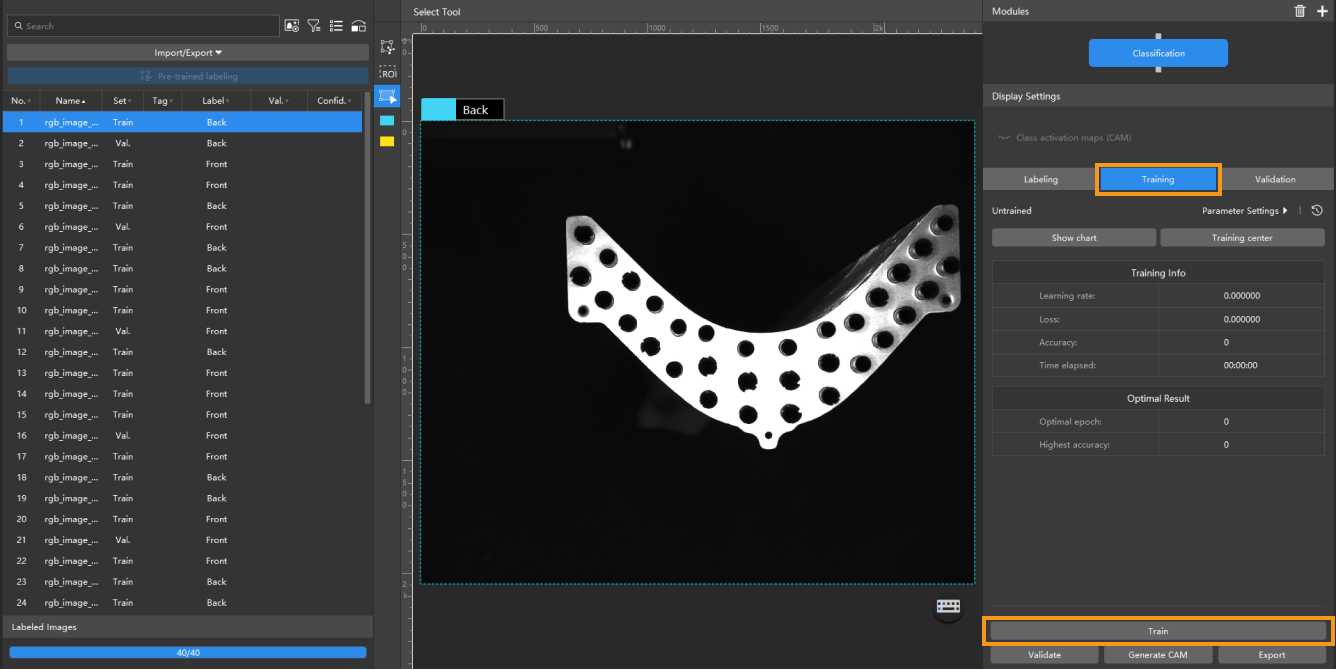
After the images are imported and labeled, you can start training the model.
In the Training tab, click the Train button to start training. You can click Training Center to view the training progress, or click Show chart to view training accuracy and loss parameters by epochs.
Validate and Export the Model
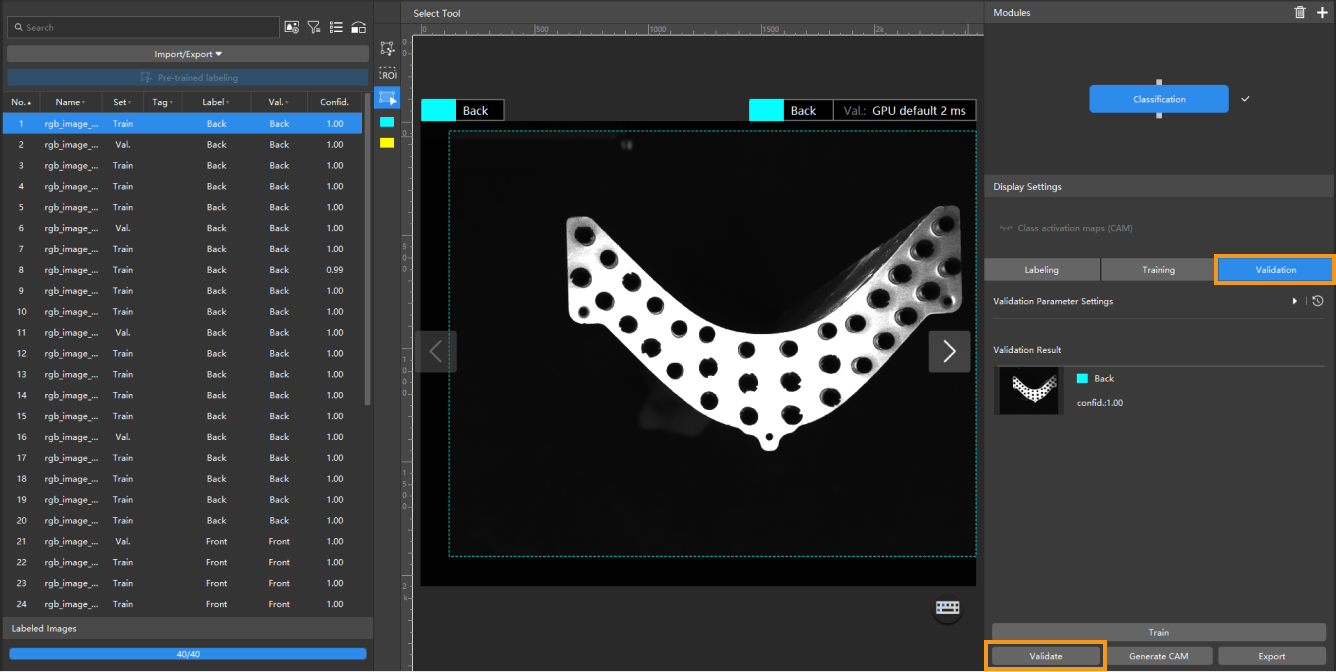
After the model is trained, in the Validation tab, click the Validate button, Mech-DLK will validate the model with the current data.
After the validation is complete, check the validation results for accuracy. A Classification model is successfully trained to distinguish between the front and back sides of the condensers.
In the lower-right corner of the Validation tab, click Export, and select a directory to save the exported model. The exported model can be used in Mech-Vision and Mech-DLK SDK. Click here to view the details.