Train a Defect Segmentation Model
The Defect Segmentation model can be used to judge whether there are defects on the objects and pinpoint the defects. This topic describes how to train a Defect Segmentation model to judge whether the network ports have defects and pinpoint the defects.

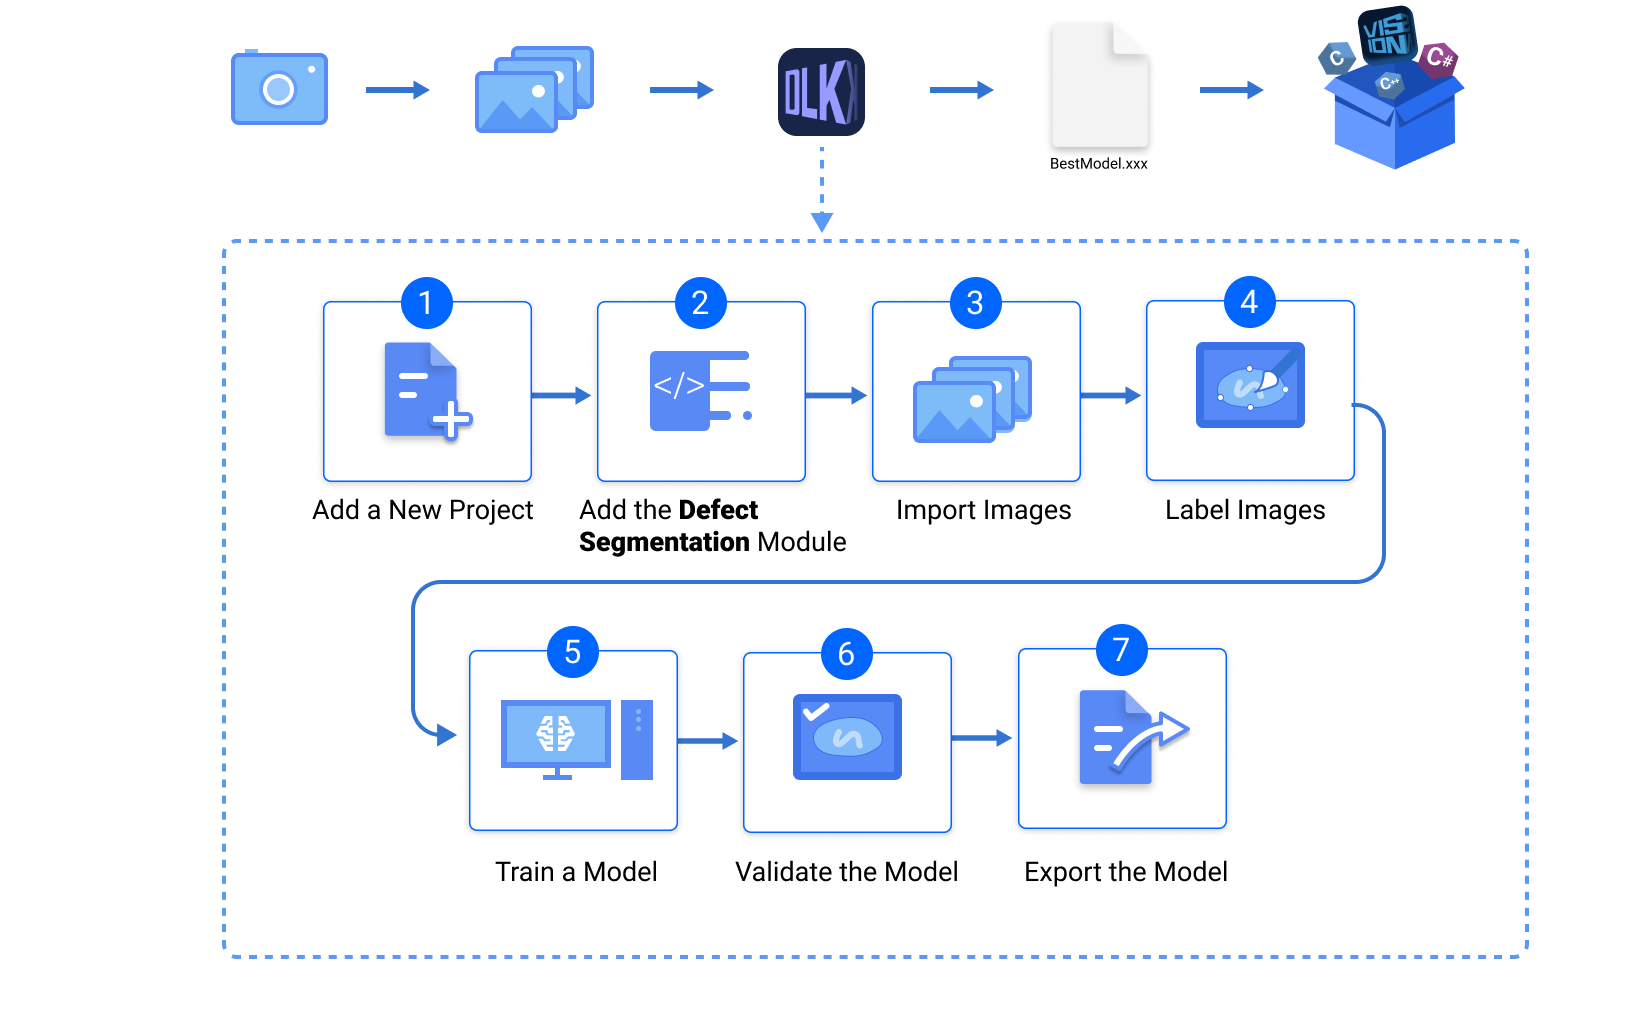
The workflow for training the Defect Segmentation model is as follows:
Preparations
Before you start training, make sure you have acquired and selected the images for training according to the data acquisition standard. In this example, you need to prepare images of network ports without defects (OK images) and images of network ports with defects (NG images).
Create a Project and Add a Module
-
Create a project: Open Mech-DLK. In the upper-left corner of the startup interface, click New Project, name the project, and select a directory to save the project.
-
Add a module: In the upper-right corner of the project interface, click
 in the Modules section, and then select the Defect Segmentation module.
Import and Label the Image Data
-
Import image data: On the upper part of the image list, click , and import the image folder.
-
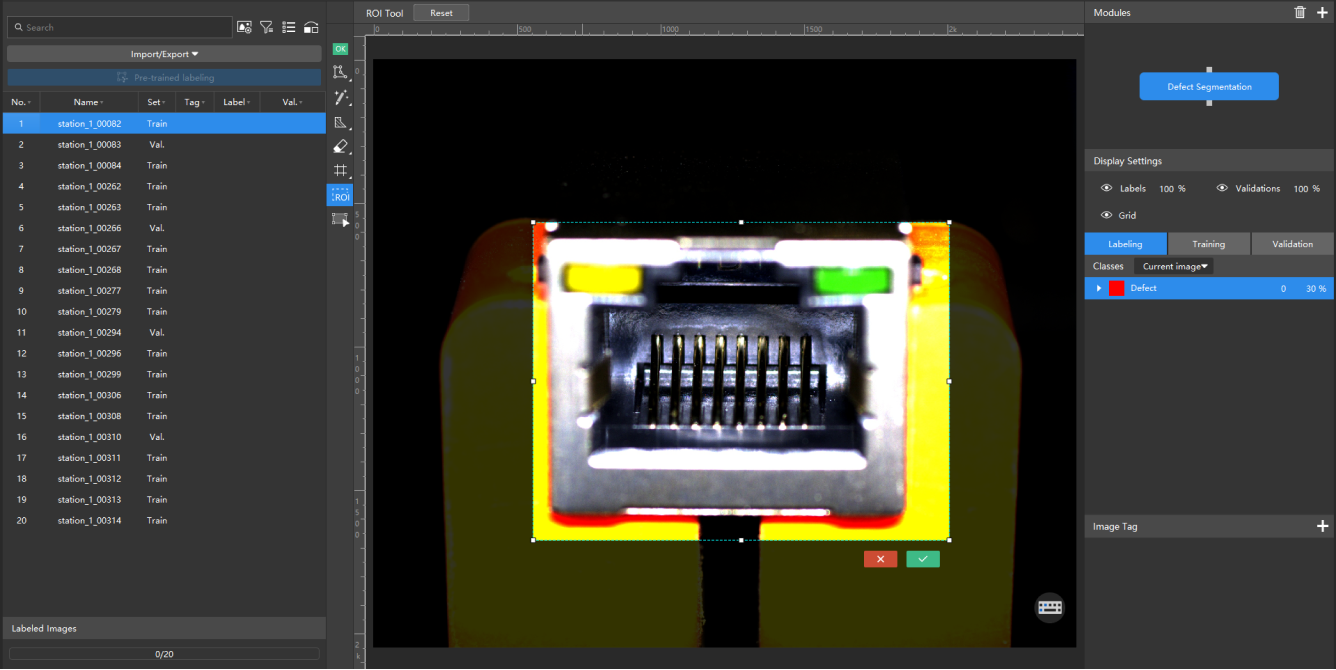
Select an ROI:
-
On the labeling toolbar, click the ROI Tool
 , and adjust the frame to select the bin containing rotors in the image. The ROI should exclude irrelevant background and cover the target objects in the image with an appropriate margin.
 -
Click
 in the lower-right corner of the ROI to apply the current ROI. The ROI settings will be applied to all images. Check that all network ports are consistently within the ROI. Otherwise, adjust the ROI again.
-
-
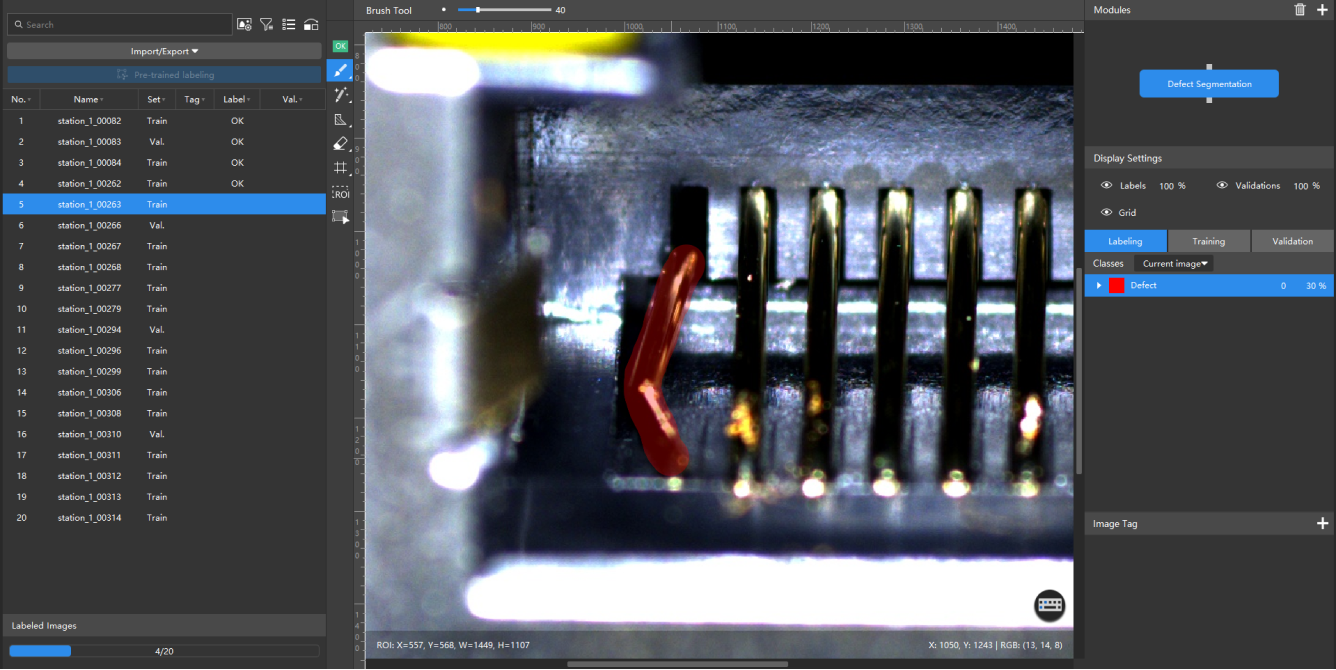
Label images:
-
For OK images, select an image and click the OK Label
 on the labeling toolbar. The image will be labeled as OK.
 -
For NG images, right-click
 , then click the Brush Tool
  to label the defects. During labeling, the brush should be close to the edge of the defects to avoid including excessive non-defective areas. You can also use the mask tools, eraser tools, and grid tools for different labeling scenarios. Click here to view how to use labeling tools.
-
-
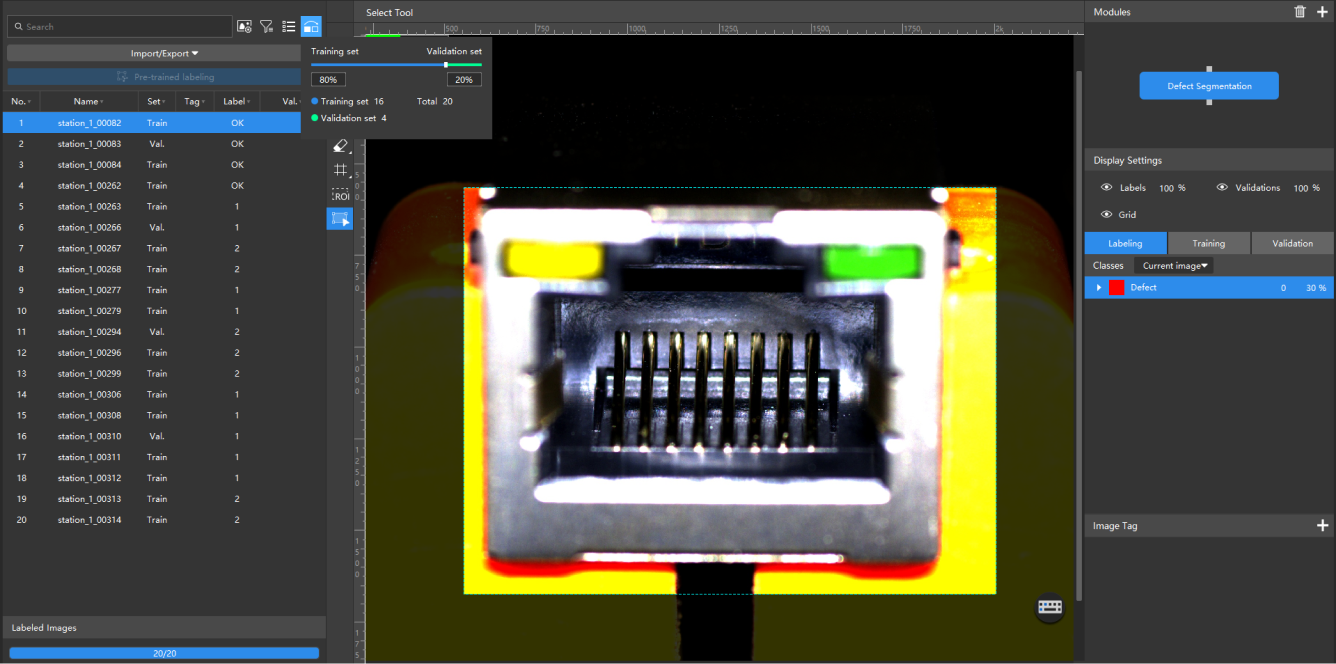
Split the dataset: After all images are imported and labeled, click
 and drag the slider to split 80% of the images in the dataset into the training set, and the rest 20% into the validation set.
Train the Model
After the images are imported and labeled, you can start training the model.
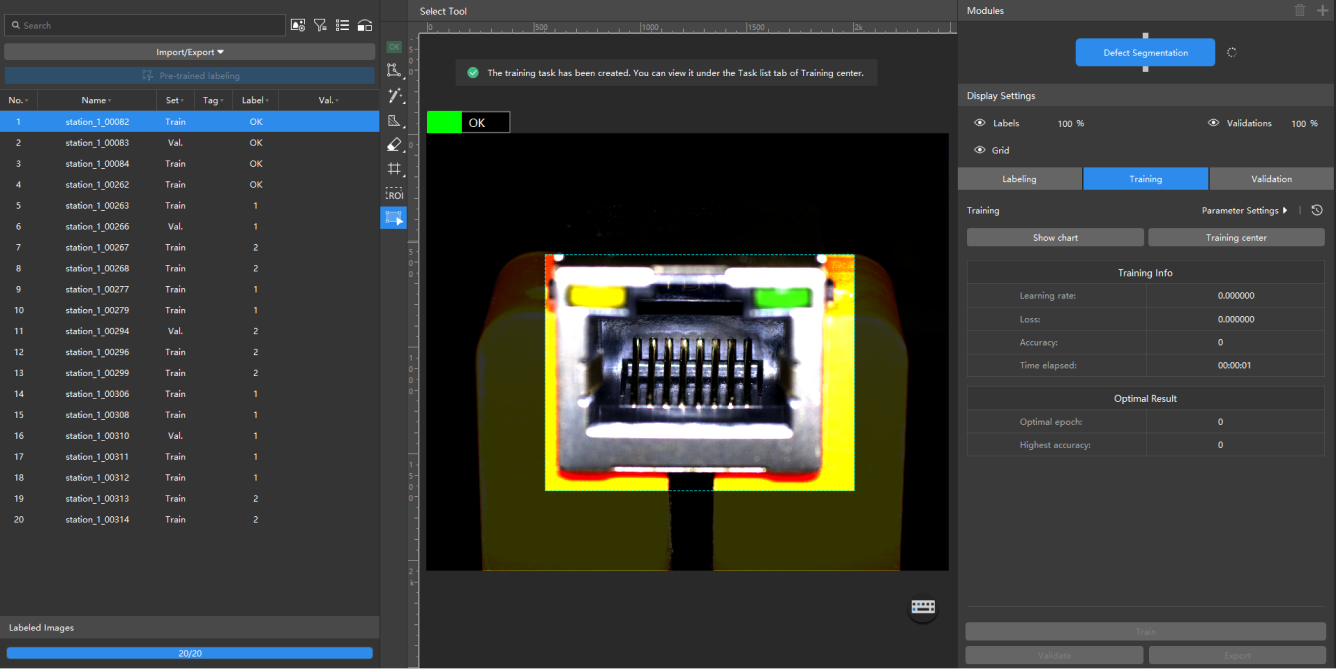
In the Training tab, click the Train button to start training. You can click Training Center to view the training progress, or click Show chart to view training accuracy and loss parameters by epochs.
Validate and Export the Model
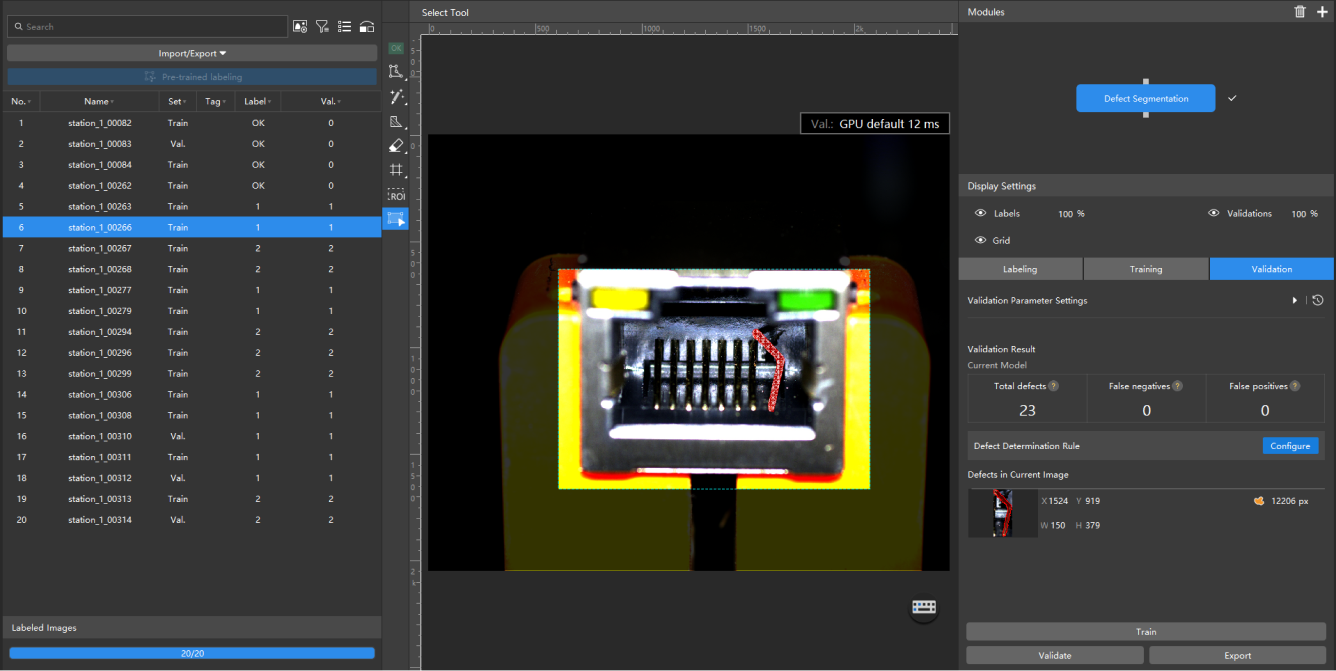
After the model is trained, in the Validation tab, click the Validate button, Mech-DLK will validate the model with the current data.
After the validation is complete, check the validation results for accuracy. A Defect Segmentation model is successfully trained to detect defects in network ports.
In the lower-right corner of the Validation tab, click Export, and select a directory to save the exported model. The exported model can be used in Mech-Vision and Mech-DLK SDK. Click here to view the details.