C++ (Windows)
This topic introduces how to use the C++ samples of Mech-DLK SDK on Windows. For sample descriptions, refer to Sample Usage Guide.
Installation Package Contents
The following describes the C++ sample files in the Mech-DLK SDK installation package:
| Contents | Description |
|---|---|
cpp/bin |
Dependent third-party libraries ( |
cpp/docs |
C++ interface documentation |
cpp/examples |
C++ example programs |
cpp/include |
C++ header files |
cpp/lib |
C++ library files |
cpp/Licenses |
Dependency library license file |
cpp/resources |
Files needed to run samples such as model packages and test images |
|
Prerequisites
To use the C++ samples in Mech-DLK SDK, the following software must be installed:
Install Mech-DLK SDK
Obtain the latest version of Mech-DLK SDK from Installation Guide and complete installation.
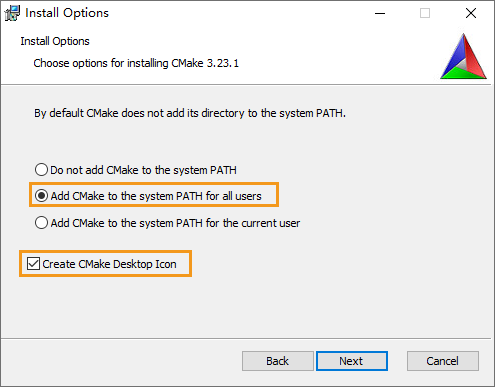
Install CMake
-
Download CMake Installation Package: Select the installation package that corresponds to Windows x64 Installer.
-
During installation, it is recommended to select Add CMake to environment variables.
|
Before you compile C++ samples, ensure that CMake 3.10 or above is installed. |
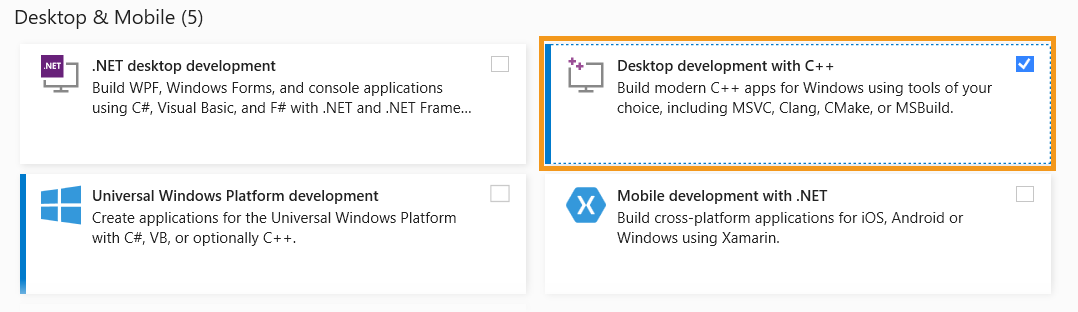
Download Visual Studio
-
Download the Visual Studio installation package.
-
During installation, select Desktop development with C++ in the Desktop & Mobile category. Then, click Install in the lower-right corner.
|
Install OpenCV (Optional)
If you need to compile and run the OpenCV samples, download and install OpenCV.
| This sample uses OpenCV 4.12.0 as an example. If you are using other versions, adjust the configuration according to the actual situation. |
Sample Adjustment Instructions
Before compiling and running various C++ samples, you can adjust the input images, model packages, and related resource files according to your actual business needs. The following content provides examples of common adjustment items.
-
Input image: Replace the image to be detected, or modify the image reading path according to actual requirements.
-
Model package: A defect segmentation model package is provided by default in the installation package. You can replace it with the one you need according to your actual business needs.
-
Output: Adjust how detection results are output based on project requirements, including modifying the save path, file name, or output location of result images.
-
Resource files: You can add or replace images, model packages, and related resource files required by the business in the cpp/resources directory.
Compile and Run Samples
After completing relevant adjustments, you can follow these steps to build and run the sample.
Basic Sample
Compile the Sample
-
Open CMake, select the directory containing the build script in the Source directory, i.e., cpp/examples, and select or enter the directory used to generate the project in the build directory, such as cpp/build.
Where is the source code
xxx\cpp\examples
Where to build the binaries
xxx\cpp\build
-
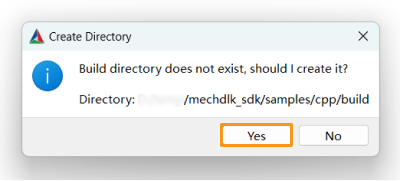
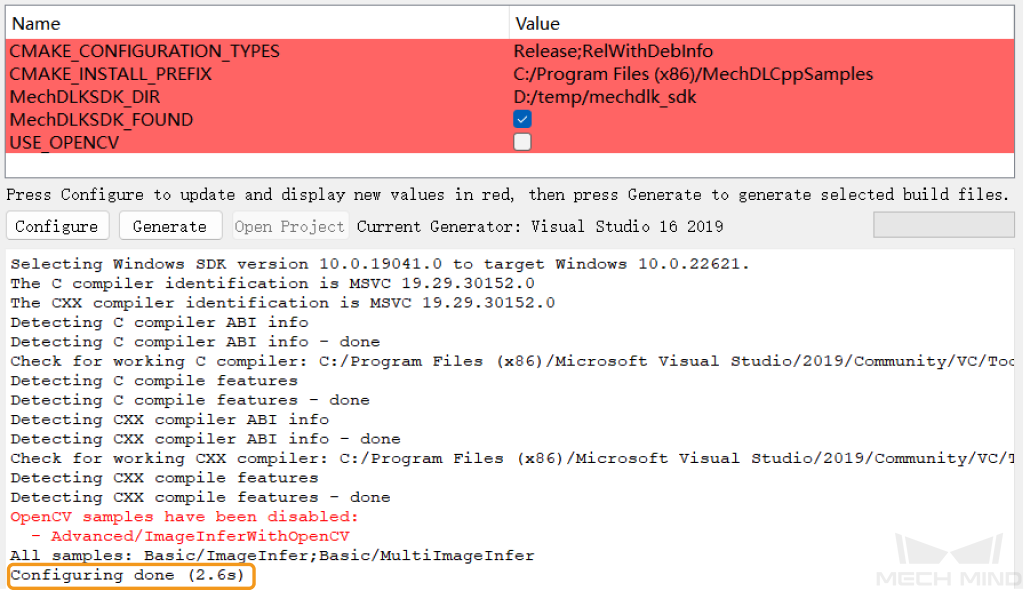
Click Configure. If the build directory does not exist when you configure it for the first time, please click Yes in the pop-up dialog box to create a directory.
On the configuration page, select the installed version of Visual Studio, set the platform to x64, and then click Finish.
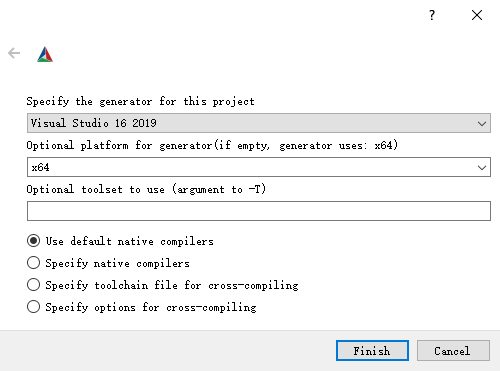
When the configuration completes, the statement Configuring done will appear in the last line of the log.
-
In the CMake configuration item, confirm that the SDK path is configured correctly:
-
DL_SDK_INCLUDE_PATH points to the cpp/include directory (used to locate header files).
-
DL_SDK_LIB_PATH points to the cpp/lib directory (used to the link library files).
If the path is not configured correctly, the compilation may fail. Click Configure again to confirm the modification and then proceed to the next step.
-
-
Click Generate. When the generation completes, the statement Generating done will appear in the last line of the log. Then, click Open Project to open the solutions in Visual Studio.

-
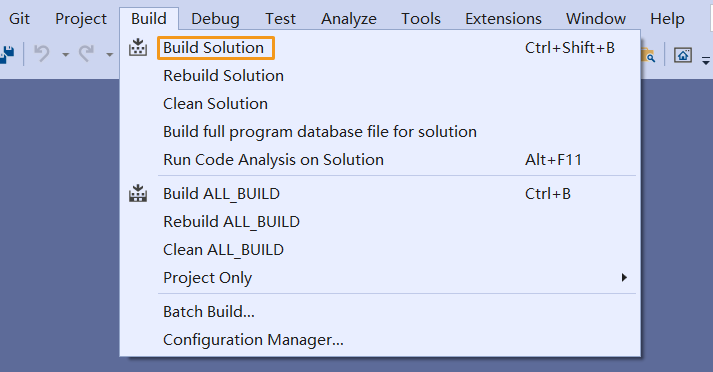
On the toolbar of Visual Studio, set Solution Configuration to Release, and set Solution Platform to x64. In the Visual Studio menu bar, select .
-
After the compilation, you can see the generated
example_basic.exefile in the build directory (i.e., cpp/build/Release).
Run the Sample
-
Copy the
hasp_rt.exefile and all.dllfiles in the cpp/bin directory to the directory whereexample_basic.exeis stored. -
Copy the
resourcesfolder in the cpp/resources folder to the same directory asexample_basic.exe.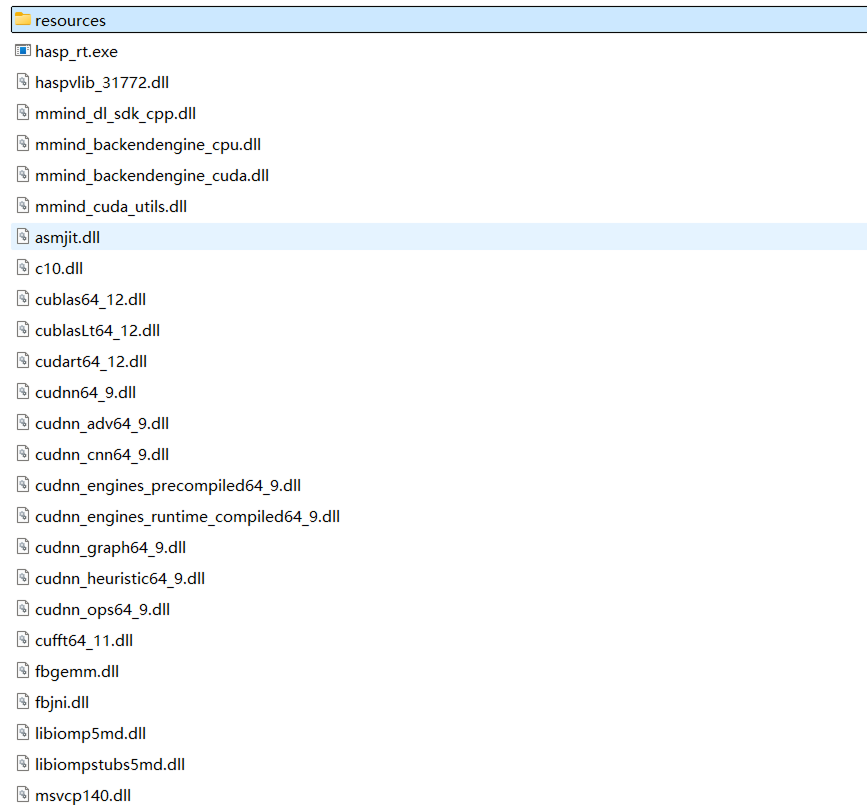
-
Double-click the generated
example_basic.exefile in the cpp/build/Release directory to run the sample. If you want to run the sample in Visual Studio, set theexample_basicproject as a startup project, and then click Local Windows Debugger to run the sample.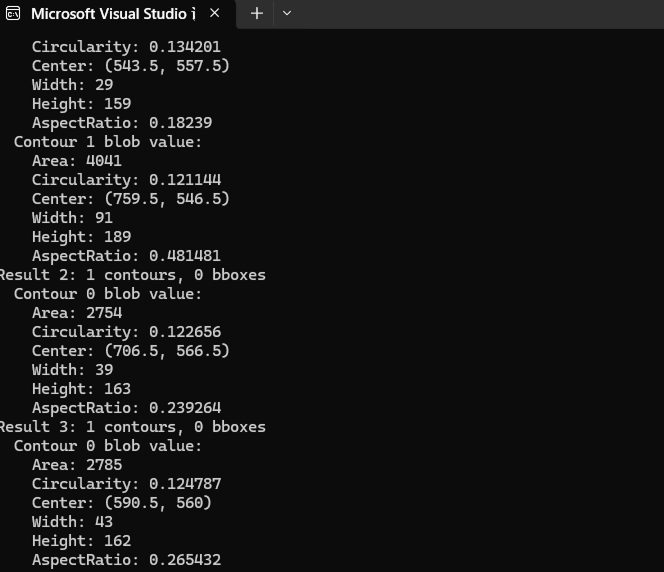
|
The cpp/resources directory contains the model and resource files needed for the sample to run. Ensure that they are in a location that is properly accessible to the program. |
Advanced Sample (Multi-Thread Inference)
Compile the Sample
The compilation of the multi-thread inference sample is consistent with that of the Basic sample. After finishing compiling the Basic samples, you can find the example_advanced_multi_thread_infer.exe file in the cpp/build/Release directory.
Run the Sample
-
Copy the
hasp_rt.exefile and all.dllfiles in the cpp/bin directory to the directory whereexample_advanced_multi_thread_infer.exeis stored. -
Copy the
resourcesfolder in the cpp/resources folder to the same directory asexample_advanced_multi_thread_infer.exe. -
In the cpp/build/Release directory, double-click the generated
example_advanced_multi_thread_infer.exefile to run the sample. If you want to run the sample in Visual Studio, set theexample_advanced_multi_thread_inferproject to be a startup project, and then click Local Windows Debugger to run the sample.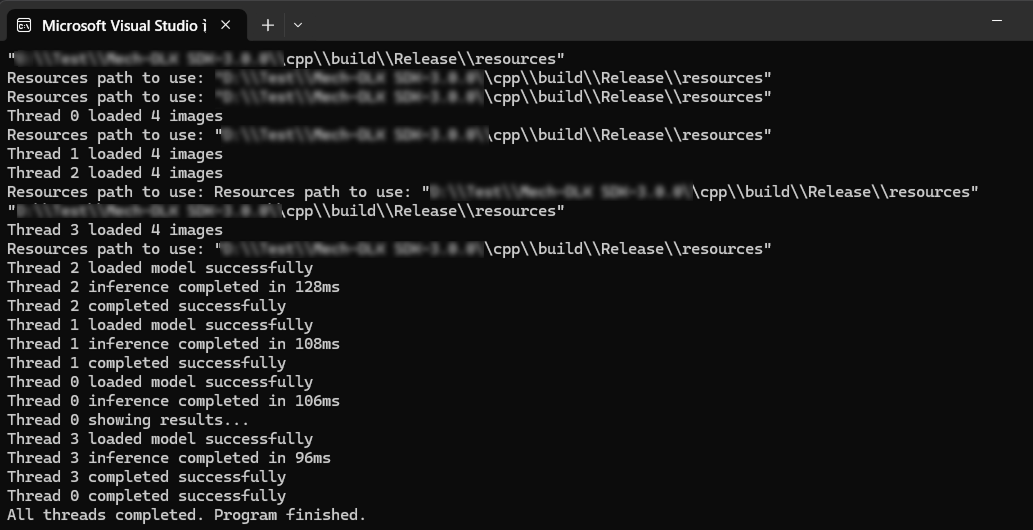
| By default, the multi-thread inference sample uses an inference engine that is independent of each thread. If multiple threads share the same inference engine, ensure the safety of concurrent use of multiple threads. |
Advanced Sample (OpenCV)
Compile the Sample
-
Follow Compile Basic Samples steps to complete the initial configuration.
-
Enable
USE_OPENCVon the CMake configuration page, and enterOpenCV_INCLUDE_DIRandOpenCV_LIB_DIRpaths.
-
After completing the configuration, click Configure again. After confirming that there is no new configuration item in red, click Generate.
-
When the generation completes, the statement Generating done will appear in the last line of the log. Then, click Open Project to open the solutions in Visual Studio.
-
On the toolbar of Visual Studio, set Solution Configuration to Release, and set Solution Platform to x64. In the Visual Studio menu bar, select .
-
After the compilation, you can see the generated
example_advanced_infer_with_opencv.exefile in the cpp/build/Release directory.
Run the Sample
-
Copy the
hasp_rt.exefile and all.dllfiles in the cpp/bin directory and paste them to the directory whereexample_advanced_infer_with_opencv.exeis stored. -
Copy the
resourcesfolder in the cpp/resources folder to the same directory asexample_advanced_infer_with_opencv.exe. -
Copy and paste the dependency libraries related to the OpenCV runtime to the same directory as
example_advanced_infer_with_opencv.exe. -
Double-click the generated
example_advanced_infer_with_opencv.exefile in cpp/build/Release to run the sample. If you want to run the sample in Visual Studio, set theexample_advanced_infer_with_opencvproject as a startup project, and then click Local Windows Debugger to run the sample.
Advanced Sample (HALCON)
Compile the Sample
-
Follow Compile Basic Samples steps to complete the initial configuration.
-
Enable
USE_HALCONon the CMake configuration page, and enterHALCON_INCLUDE_DIRandHALCON_LIB_DIRpaths.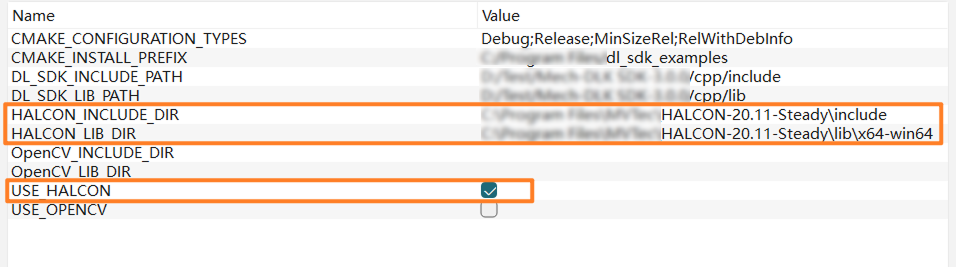
-
After completing the configuration, click Configure again. After confirming that there is no new configuration item in red, click Generate.
-
When the generation completes, the statement Generating done will appear in the last line of the log. Then, click Open Project to open the solutions in Visual Studio.
-
On the toolbar of Visual Studio, set Solution Configuration to Release, and set Solution Platform to x64. In the Visual Studio menu bar, select .
-
After the compilation, you can see the generated
example_advanced_infer_with_halcon.exefile in the cpp/build/Release directory.
Run the Sample
-
Copy the
hasp_rt.exefile and all.dllfiles in the cpp/bin directory and paste them to the directory whereexample_advanced_infer_with_halcon.exeis stored. -
Copy the
resourcesfolder in the cpp/resources folder to the same directory asexample_advanced_infer_with_halcon.exe. -
In the cpp/build/Release directory, double-click the generated
example_advanced_infer_with_halcon.exefile to run the sample. If you want to run the sample in Visual Studio, set theexample_advanced_infer_with_halconproject as a startup project, and then click Local Windows Debugger to run the sample.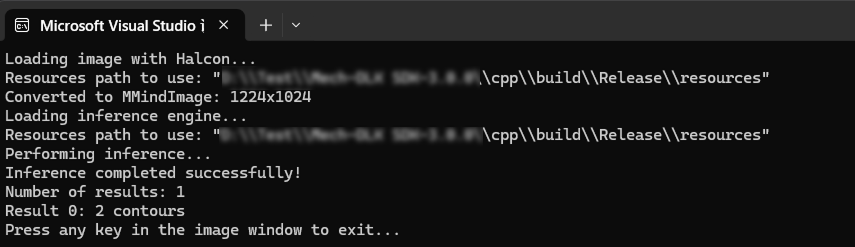
FAQs
Compilation Issues
Could Not Find Header Files or Library Files for OpenCV or HALCON
-
Problem: When compiling OpenCV or HALCON samples, an error message saying that no header files or library files related to third-party libraries were found.
-
Solution: Make sure that
USE_OPENCVorUSE_HALCONis enabled properly during the configuration phase of CMake, and that the corresponding header and library files are filled in correctly.
Could Not Open SDK Header File
-
Problem: An error occurred during compilation, indicating that the SDK header file could not be opened.
-
Solution: Check and fix
DL_SDK_INCLUDE_PATHandDL_SDK_LIB_PATHin the CMake configuration entries to ensure that they point to cpp/include and cpp/lib respectively, and then click Configure again to generate a solution.
Operation Issues
Missing .dll Errors
-
Problem: The program failed to run, indicating that a
.dllfile is missing. -
Solution: Confirm that the
hasp_rt.exefile and all.dllfiles in the cpp/bin directory are copied to the directory where the generated executable file is stored. If it is an OpenCV or HALCON sample, also ensure that the.dllfiles that the corresponding third-party libraries depend on can be found by the system normally.
Missing .dll File in OpenCV Sample
-
Problem: When running the OpenCV sample, an error message saying that no OpenCV-related
.dllfile could be found. -
Solution: Copy the dependency libraries related to the OpenCV runtime and paste them to the directory where
example_advanced_infer_with_opencv.exeis stored.
Missing Resources or Model Error
-
Problem: A resource or model was missing when the program was running.
-
Solution: Confirm that the
resourcesfolder in the cpp/resources directory has been copied to the peer directory of the generated executable file and that it contains the model and resource files needed to run the sample.