Check Intrinsic Parameters
This section describes how to check camera intrinsic parameters and quickly correct the intrinsic parameters.
Check Preparations
Before checking the intrinsic parameters, please prepare the calibration board in the project according to the following requirements:
-
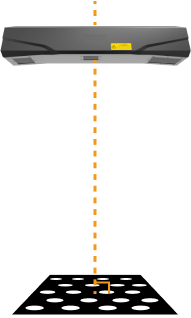
Place the calibration board within the camera’s FOV and ensure that it is within the recommended working distance of the camera and perpendicular to the camera’s central axis:
-
Obtain the 2D image and depth map of the calibration board. Please ensure that the obtained 2D images and depth maps meet the following standards:
-
The region containing the circles on the calibration board is completely captured.
-
The 2D image is not too bright or too dark, and the circles on the calibration board are clear and complete.
-
The circles on the calibration board in the depth map are complete.
-
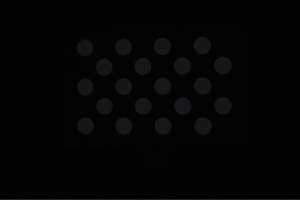
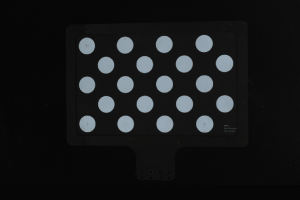
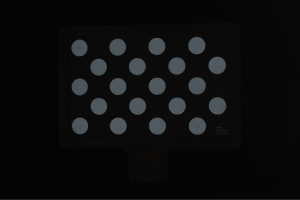
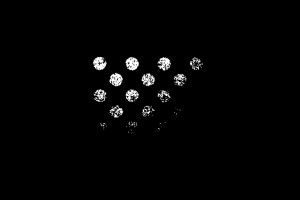
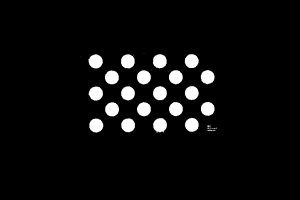
Examples of 2D images of the calibration board:
| Image too dark, the circles on the calibration board cannot be easily discerned. | Circles on the calibration board are complete, and circle boundaries are clearly visible. | Image too bright, the circles on the calibration board cannot be easily discerned. | |
|---|---|---|---|
|
|
|
|
If the obtained 2D image does not satisfy the requirements, please adjust the parameters for the 2D image.
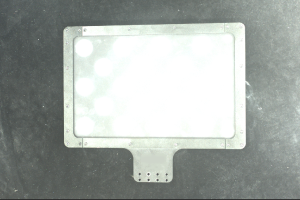
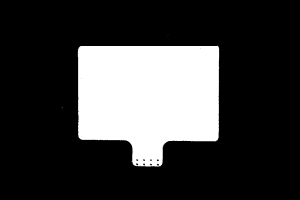
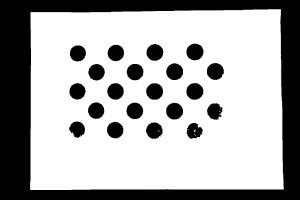
Examples of depth maps of the calibration board:
| Exposure time too short, the circles on the calibration board are incomplete. | Circles on the calibration board / the entire calibration board are complete. | Exposure time too long, some or all the circles on the calibration board are lost. | |
|---|---|---|---|
|
|
|
|
If the obtained depth map does not satisfy the requirements, please adjust the parameters for the depth map.
In addition, please preheat the camera before checking the camera’s intrinsic parameters. The camera cannot effectively guarantee the accuracy of point cloud reconstruction until thermal balance is reached. Please use one of the following methods to warm up the camera:
-
Connect to the camera through the Mech-Eye Viewer software or Mech-Eye API and then continuously capture images for more than 30 minutes;
-
Power on the camera and keep it in standby for more than 40 minutes.
Check Method
-
Open the Mech-Eye Viewer software, click the Tool menu in the menu bar, and select Intrinsic Parameter Tool to open the Intrinsic Parameter Tool window.
-
In 1. Place calibration board and check image quality, click Acquire images to obtain the 2D image and depth map of the calibration board. Check if the images satisfy the requirements.
-
In 2. Select model of placed calibration board, set the specifications of the calibration board. Click the triangle on the right to select the calibration board model.
-
In 3. In Check intrinsic parameters, click Check intrinsic parameters to start checking the intrinsic parameters. When the check is completed, a window of the check results will pop up.
-
In the Intrinsic Parameter Check Results dialog box, view the value (percentage) of Scalar difference.
|
Intrinsic Parameter Check Criteria
For 3D vision–guided applications, the intrinsic parameter qualification criteria for V4 cameras are shown in the table below.
| Model | Object focal distance (mm) | Distance from the calibration board to the camera (mm) | Model of used calibration board | Qualification standard |
|---|---|---|---|---|
UHP-140 |
300 |
300 |
OCB-5 |
Scalar difference < 0.4% |
NANO |
350 |
350 |
CGB-20 |
Scalar difference < 0.4% |
550 |
550 |
CGB-20 |
Scalar difference < 0.6% |
|
PRO S |
500 |
500 |
CGB-20 |
Scalar difference < 0.6% |
700 |
700 |
CGB-20 |
Scalar difference < 0.8% |
|
1000 |
1000 |
CGB-35 |
Scalar difference< 1.0% |
|
PRO M |
1200 |
1200 |
CGB-35 |
Scalar difference < 1.2% |
2000 |
2000 |
CGB-50 |
Scalar difference < 2.0% |
|
LSR S |
800 |
800 |
CGB-35 |
Scalar difference < 0.8% |
1400 |
1400 |
CGB-50 |
Scalar difference < 1.4% |
|
LSR L |
1500 |
1500 |
CGB-50 |
Scalar difference < 1.6% |
3000 |
2800 |
CGB-50 |
Scalar difference < 2.8% |
|
DEEP |
3000 |
2800 |
CGB-50 |
Scalar difference < 2.8% |
For 3D vision–guided applications, the intrinsic parameter qualification criteria for V3 cameras are shown in the table below.
| Model | Object focal distance (mm) | Distance from the calibration board to the camera (mm) | Model of used calibration board | Qualification standard |
|---|---|---|---|---|
Nano |
350 |
350 |
CGB-20 |
Scalar difference < 0.4% |
550 |
550 |
CGB-20 |
Scalar difference < 0.6% |
|
Log S |
700 |
700 |
CGB-20/BDB-5 |
Scalar difference < 0.8% |
1000 |
1000 |
CGB-35/BDB-6 |
Scalar difference< 1.0% |
|
Log M |
1200 |
1200 |
CGB-35/BDB-6 |
Scalar difference < 1.2% |
2000 |
2000 |
CGB-50/BDB-7 |
Scalar difference < 2.0% |
|
Pro S Enhanced |
500 |
550 |
CGB-20 |
Scalar difference < 0.6% |
700 |
700 |
CGB-20 |
Scalar difference < 0.8% |
|
1000 |
1000 |
CGB-35 |
Scalar difference< 1.0% |
|
Pro M Enhanced |
1200 |
1200 |
CGB-35 |
Scalar difference < 1.2% |
2000 |
2000 |
CGB-50 |
Scalar difference < 2.0% |
|
Pro XS |
350 |
350 |
CGB-20 |
Scalar difference < 0.4% |
550 |
550 |
CGB-20 |
Scalar difference < 0.6% |
|
Deep |
3000 |
2800 |
CGB-50 |
Scalar difference < 2.8% |
Pro L Enhanced |
1500 |
1500 |
CGB-50 |
Scalar difference < 1.6% |
3000 |
2800 |
CGB-50 |
Scalar difference < 2.8% |
|
Laser L Enhanced |
1500 |
1500 |
CGB-50 |
Scalar difference < 1.6% |
3000 |
2800 |
CGB-50 |
Scalar difference < 2.8% |
|
Laser L V3S |
3000 |
2800 |
CGB-50 |
Scalar difference < 2.8% |
If the scalar difference in the Intrinsic Parameter Check Results dialog box meets the qualification standard, the camera intrinsic parameter check is passed and the camera can be used.
If the scalar difference is greater than the threshold of the qualification standard, the intrinsic parameter check fails, and intrinsic parameters need to be corrected by referring to the following section.
Correct Intrinsic Parameters
When using the Correct Intrinsic Parameters function, place the calibration board according to the following requirements:
-
Make the calibration board perpendicular to the camera’s central axis:

-
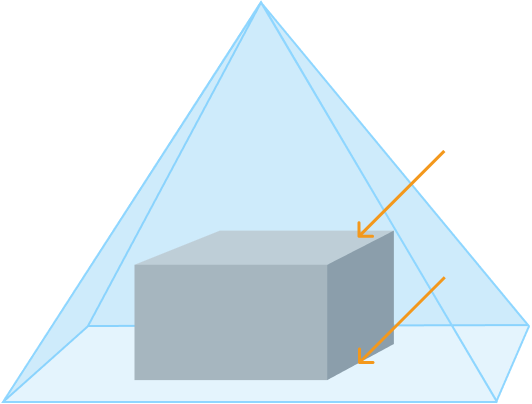
Place the calibration board at the following heights:
-
Top of the target object
-
Bottom of the target object
For example, for bin-picking or (de)palletizing applications, the calibration board should be placed at the top and bottom of the bin or palletized load.
-
-
At the above two heights, acquire five sets of data of the calibration board at the center and four corners of the target object.
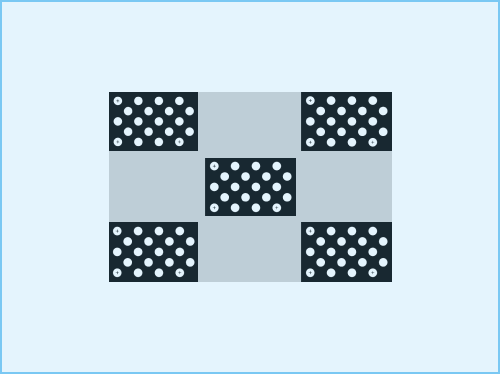
 : camera’s FOV
 : target object
 -
If the size of the target object is close to the maximum FOV of the camera, avoid placing the calibration board close to the edge of the FOV. It is recommended that the distance between the outer edge of the calibration board and the edge of the camera’s FOV should be at least one fifth of FOV length or width:
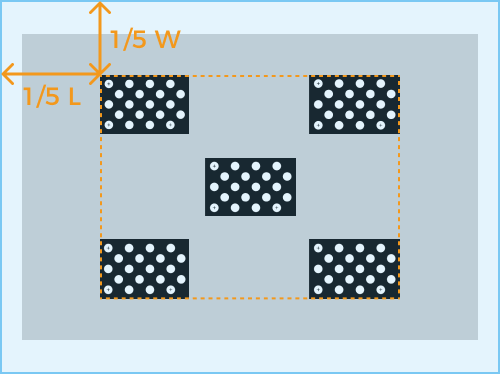
 : camera’s FOV
 : target object
To correct the intrinsic parameters, follow these steps:
-
In the Mech-Eye Viewer software, click the Tool menu in the menu bar, select Intrinsic Parameter Tool and select the Correct Intrinsic Parameters checkbox in the Intrinsic Parameter Tool window.
-
Place the calibration board according to the above requirements.
-
After placing the calibration board into an area, click the Acquire Data button.
-
Move the calibration board and click the Acquire Data button again.
-
After acquiring at least 10 sets of data according to the requirements above, click the Correct intrinsic parameters button. When the correction is completed, a window of the correction results will pop up.
If the intrinsic parameters cannot be corrected successfully, please contact Technical Support to solve the issue.
| The UHP series cannot use the Correct Intrinsic Parameters function. If its intrinsic parameter error is large, please contact Technical Support. |
