Procedure of Instance Segmentation
Detecting the location of target objects in an image by instance segmentation provides segmentation masks and target object classes for point cloud processing and other operations.
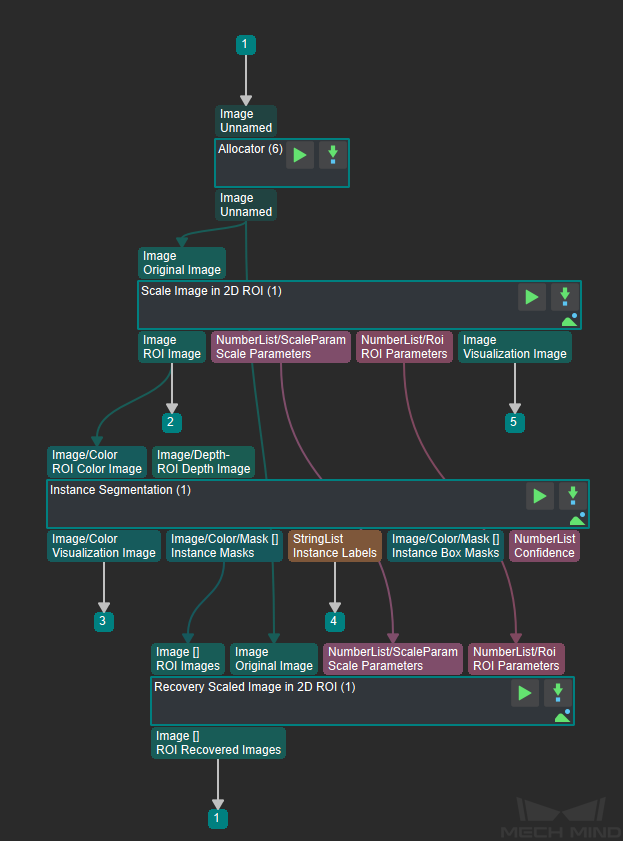
Figure 1 Combination Step of Instance Segmentation
Process Description
As shown in Figure 1, the flow of the Instance Segmentation procedure is as follows.
Scale Image in 2D ROI step extracts and scales the ROI region of the image.
Instance Segmentation step performs the recognition of 2D images and obtains the recognition result (category + mask).
The Recover Scaled Images in 2D ROI step scales the result of the Instance Segmentation step back to the original input image size to get the result of the instance segmentation on the original image.
Example implementation
Input
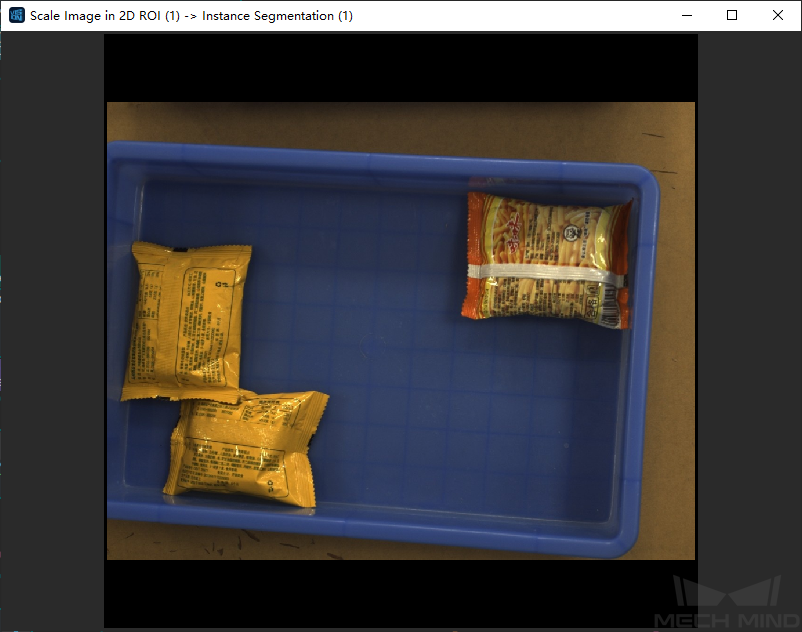
Figure 2 RGB Original Image
Identification Results
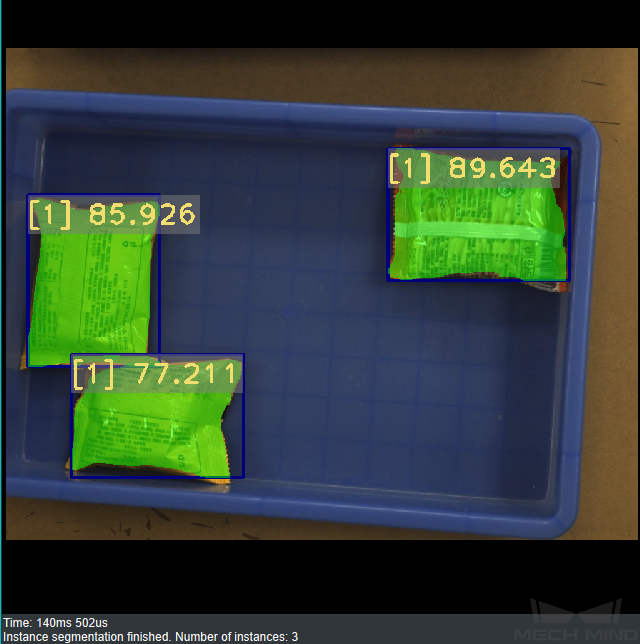
Figure 3 Image of Recognition Results
Precautions
The result of instance segmentation is largely affected by the ROI area and zoom ratio. If the user wants to obtain a more ideal instance segmentation result, the user must adjust the ROI and zoom ratio. For specific adjustment methods, refer to Deep Learning Deployment ROI Settings.
The maximum number of recognition of Instance segmentation: its modified value is too large (that is, the actual detection amount is large) . There may be insufficient GPU resources, and GPUs with higher computing power can be replaced according to specific project requirements.
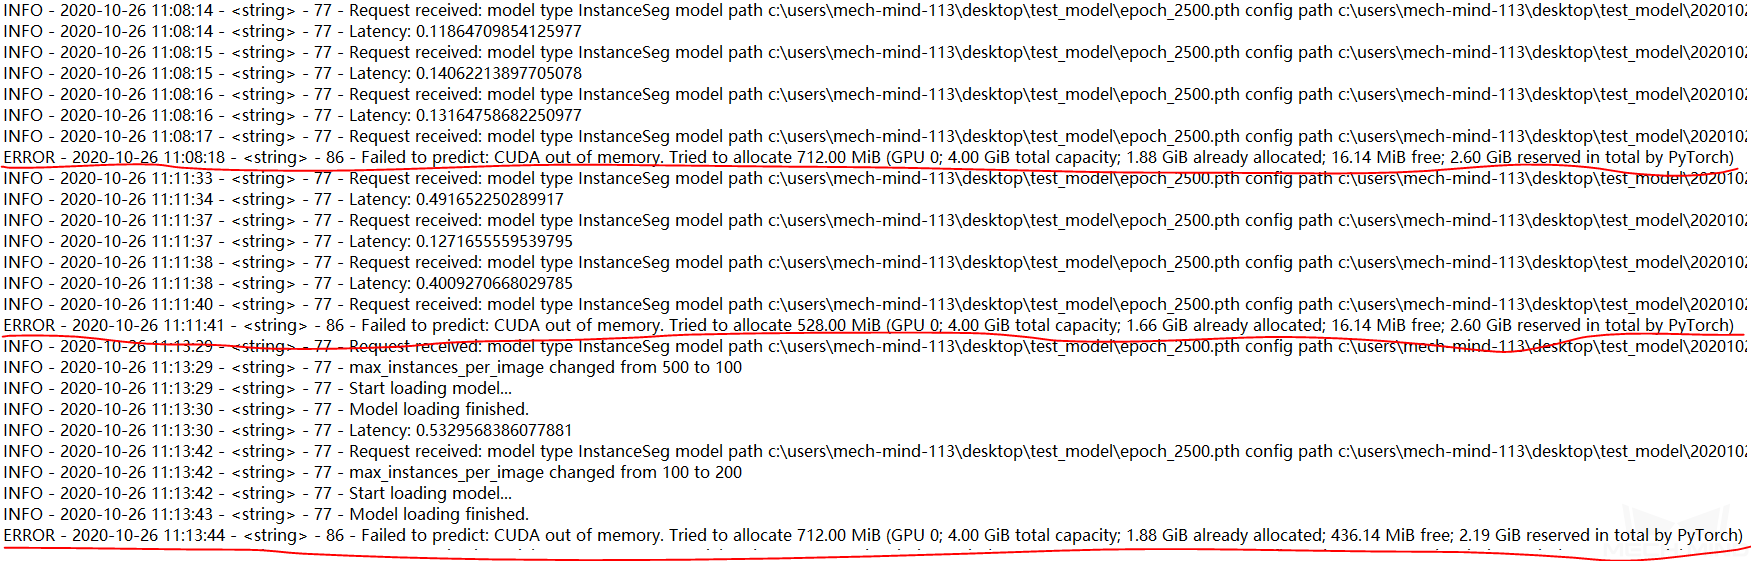
Figure4 Mech-Vision GPU Resource is Insufficient and Error Image is Reported
Deep Learning Deployment ROI Settings
ROI area and zoom ratio settings are divided into two situations. When the collected image is the same as the collected scene environment, the user can use the color image ROI file or parameter settings. When it is different from the scene of the collection environment, the user needs to calculate the zoom ratio by himself.
Consistent with the collection site environment
The following two methods are recommended to use the first one. When using the color image ROI file to set and zoom the ROI area, please refer to the method of obtaining the color image ROI file.
Use color image ROI file

Figure5 Image ROI Zoom File Settings
Select ROIByFile in Color Map ROI Settings .
The obtained color ROI file.
Check Auto zoom .
Use parameters

Figure6 Image ROI Scaling Parameter Settings
Select ROIByParam in Color Map ROI Settings .
Adjust the value of startX and startY to determine the starting point in the upper left corner.
When changing the size of the ROI area, try to ensure that the aspect ratio of the ROI is consistent with that during training. For example, during training, width is
1000, height is1200, Then the new width is1000 * some ratio, and the new height is1200 * some ratio.Check Auto zoom .
Inconsistent with the collection site environment
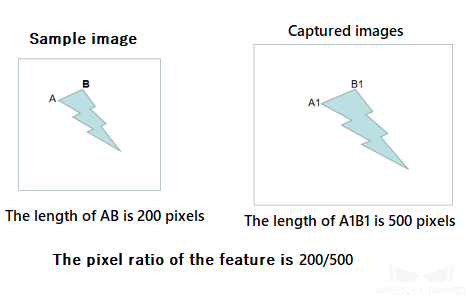
Figure7 Ratio Calculation
Use the Sample image in the model folder and the images collected on site to select the same feature of the object to be detected, such as Figure 8.In the calculation example, the selected feature is the AB edge.
Measure the pixel of this feature, and get the pixel length in the Sample image as
200, and the pixel length in the collected image as500.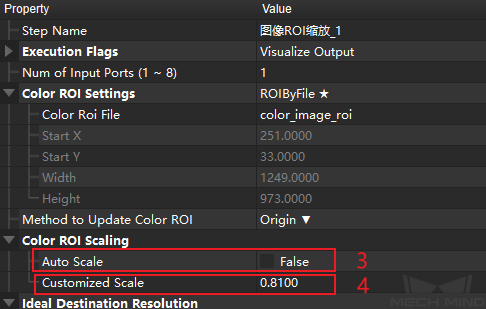
Figure8 Image ROI Zoom Setting
Uncheck Auto zoom .
Calculate the ratio of the two, that is,
200/500, and fill in the value into the custom zoom factor.