Getting Started
This section will introduce how to easily depalletize single-case sacks from a beginner’s perspective. The overall process is shown in the figure below.

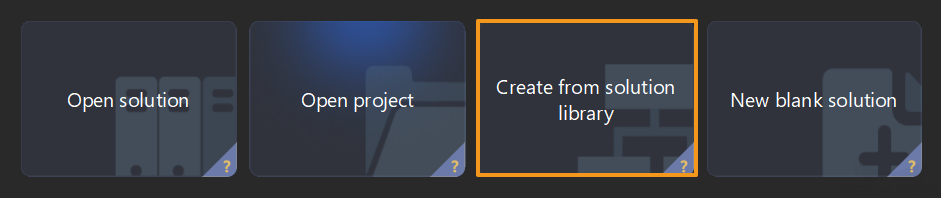
Acquire the Solution
-
Open Mech-Vision.
-
In the welcome interface of Mech-Vision, click Create from solution library to open the Solution Library.
-
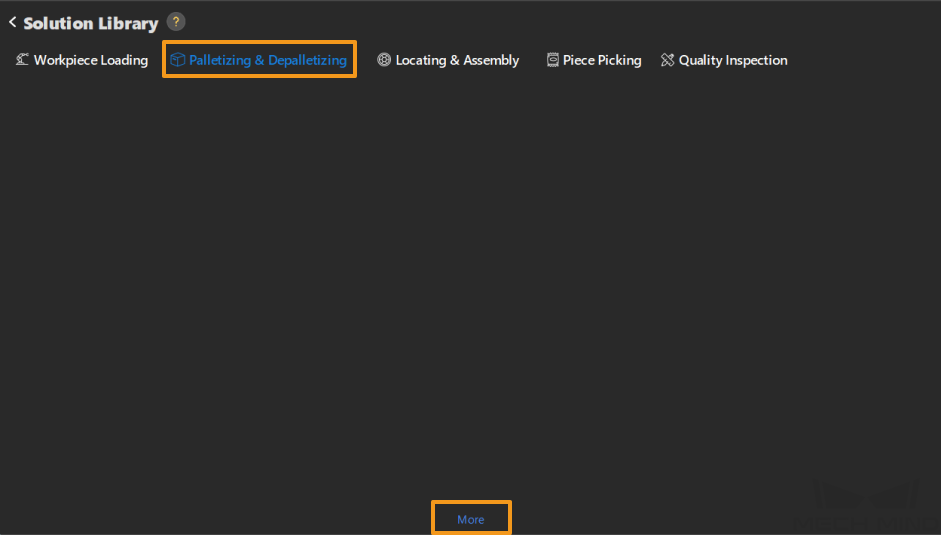
In the Palletizing & Depalletizing category, click More at the bottom, and then click Yes in the pop-up window.
-
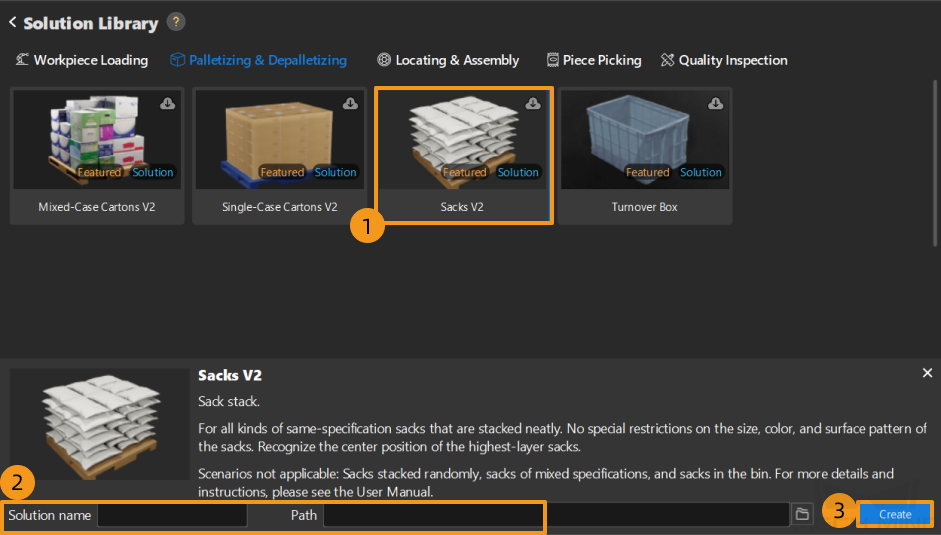
After acquiring the solution resources, select Sacks V2. Then, enter the solution name and path at the bottom, and finally click Create to download the single-case sack depalletizing solution.
Once the solution is downloaded, it will be automatically opened in Mech-Vision.
Set up Communication
When deploying a vision solution provided by Mech-Mind, you need to set up the communication between Mech-Mind Vision System and robot side (robot, PLC, or host computer).
The single-case sack depalletizing solution uses Standard Interface communication. For specific operations, please refer to Set up Standard Interface Communication.
Hand-Eye Calibration
Hand-eye calibration establishes the transformation relationship between the camera and robot reference frames. With this relationship, the object pose determined by the vision system can be transformed into that in the robot reference frame, which guides the robot to perform its tasks.
Please refer to Hand-Eye Calibration Guide to complete hand-eye calibration.
|
Every time the camera is mounted, or the relative position of the camera and the robot changes after calibration, it is necessary to perform hand-eye calibration again. |
Locate Sacks
After communication setup and hand-eye calibration, you can use Mech-Vision to locate sacks. The workflow is shown in the figure below.

Connect to the Camera and Capture Images
-
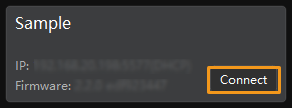
Connect to the camera.
Open Mech-Eye Viewer. Find the camera to be connected and click Connect.
-
Set the parameter group.
Select Sack depalletizing from the drop-down list under Parameter Group.
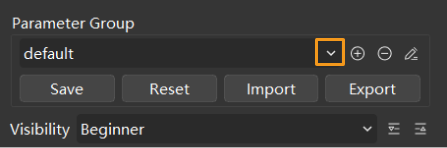
In addition to the default parameter group, Mech-Eye Viewer will also display parameter groups of other typical solutions.
-
Capture images.
After the camera is successfully connected, and the parameter group is set, you can start capturing sack images. Click the
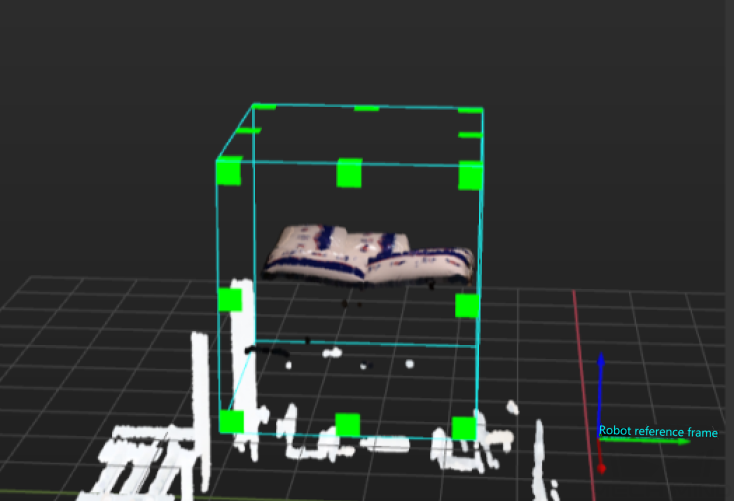
 button on the interface top to capture an image. At this time, you can view the captured 2D image and point cloud of the sacks. Ensure that the 2D image is clear and that no points missing from the sack point cloud, and the edges are clear. The qualified 2D image and point cloud of sacks are shown on the left and right in the figure below, respectively.
-
Add the camera in Mech-Vision.
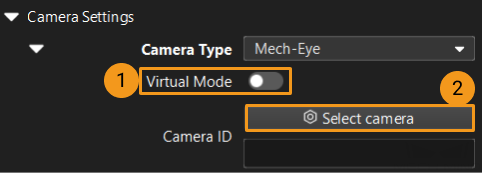
Click the Capture Images from Camera Step, then disable the Virtual Mode option from the Step Parameters panel, and click Select camera.
In the pop-up window, click the
 button on the right of the camera serial number. When the button turns into
  , the camera is connected successfully.
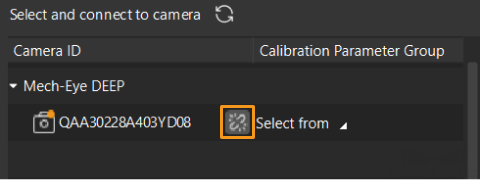
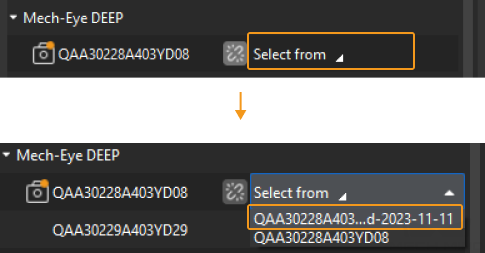
After that, you can click Select from and select the corresponding calibration parameter group, as shown below.
Once the above settings are complete, you can connect to a real camera. Other parameters can remain at their default values. Click the
 button on the right of the “Capture Images from Camera” Step to run this Step. If no error message occurs, the camera is connected successfully and images can be captured normally.
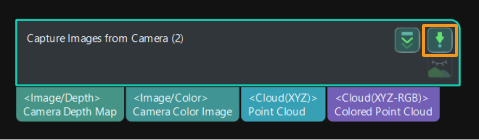
Obtain Sack Point Cloud
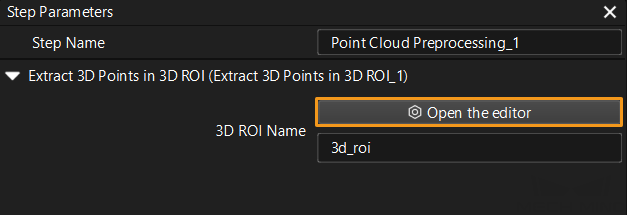
Set 3D ROI
-
Select the Point Cloud Preprocessing Procedure, then click the Open the editor button in the Step Parameters panel to open the Set 3D ROI window.
-
In the Set 3D ROI window, drag the default 3D ROI in the point cloud display area to a proper position. Make sure that the highest and lowest areas of the sack stack are within the green box and that the green box does not contain any other interfering point clouds, as shown in the following figure.
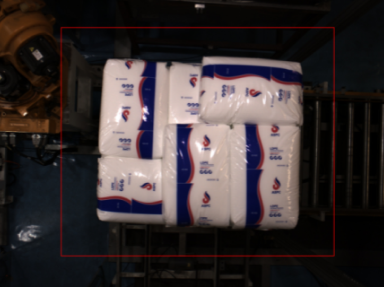
Segment Individual Sacks
-
Select the Segment Masks of Individual Sacks Using Deep Learning Procedure and then click Open the editor button next to Roi Path to open the window of Set ROI.

-
Set the 2D ROI in the Set ROI window. The 2D ROI needs to cover the highest-layer sacks, leaving an appropriate margin of about one-third, as shown in the figure below.
Calculate the Pose of Individual Sacks
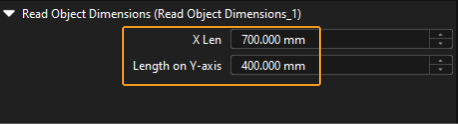
Select the Recognize Center Poses of Sacks Procedure and input the Sack Length, Sack Width, and Sack Height in the Step Parameters panel.
Plan a Path
Given that the sacks have been located, you can use Mech-Viz for path planning. The process of path planning is shown in the figure below.

|
The Standard Interface communication is used for path planning in the single-case sack depalletizing solution. For more information on path planning under the Master-Control communication, please download the Viz_Single_Case_Sacks.zip. |
Configure Scene Objects
Scene objects are introduced to make the scene in the software closer to the real scenario, which facilitates the robot path planning. For specific operations, please refer to Configure Scene Objects.
Configure the Tool
The tool should be imported and configured so that its model can be displayed in the 3D simulation area and used for collision detection. For specific operations, please refer to Configure the Tool.
Adjust the Workflow
The workflow refers to the robot motion control program created in Mech-Viz, taking the form of a flowchart. After the scene objects and end tools are configured, you can adjust the workflow.
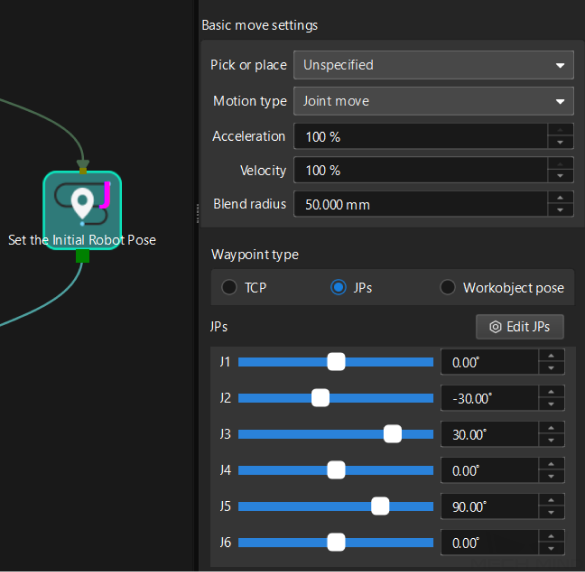
Set the Initial Robot Pose
Move the robot to approach the object picking area. When the robot does not block the camera’s FOV, set the JPs of the robot in the software according to those displayed on the robot teach pendant.
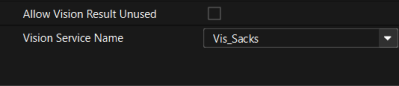
Set Vision Service Name
Click the Vision Look_1 Step and select the corresponding vision project Vis_Sacks in the drop-down list of Vision Service Name.
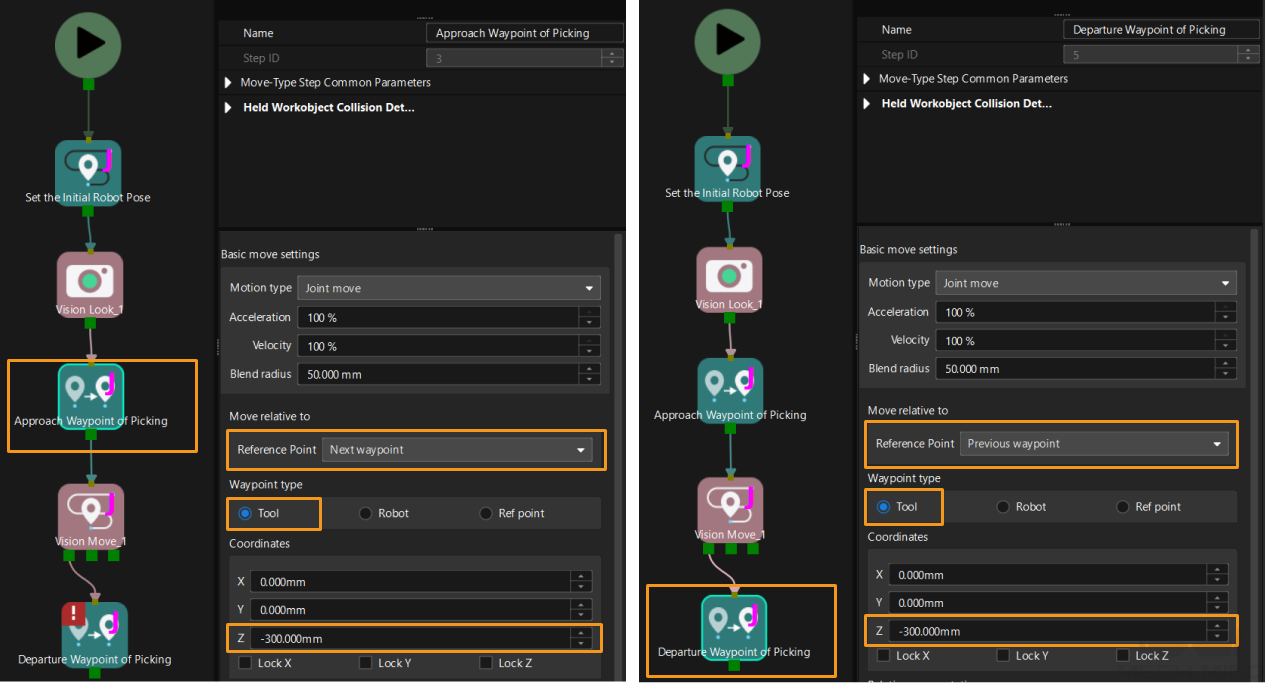
Set Approach Waypoint and Departure Waypoint of Picking
Click the Approach Waypoint of Picking Step. Then, set the Reference Point under Move Relative to to Next waypoint, the Waypoint type to Tool, and Z under Coordinates to -300.
|
The Z value should be set according to actual situation, whose value, in general, is slightly greater than the actual thickness of sacks. In addition, the Z value should be highly consistent with the height of the Approach Waypoint of Picking in the robot program. |
Similarly, click the Departure Waypoint of Picking Step. Then, set the Reference Point under Move Relative to to Previous waypoint, the Waypoint type to Tool, and Z under Coordinates to -300.
Simulate and Run the Project
-
Click the Simulate button on the toolbar to simulate the Mech-Viz project.
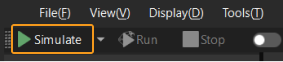
-
If the simulation performance meets expectations, a Standard Interface program can be used to run the real robot.
Please refer to the picking example program and interface commands in Standard Interface communication to learn how to write the robot program.
|
It is recommended that the robot should move at a low speed and that you pay close attention to the robot motion trajectory. In an emergency, press the emergency stop key on the teach pendant. |
So far, you have learned how to get started with path planning.