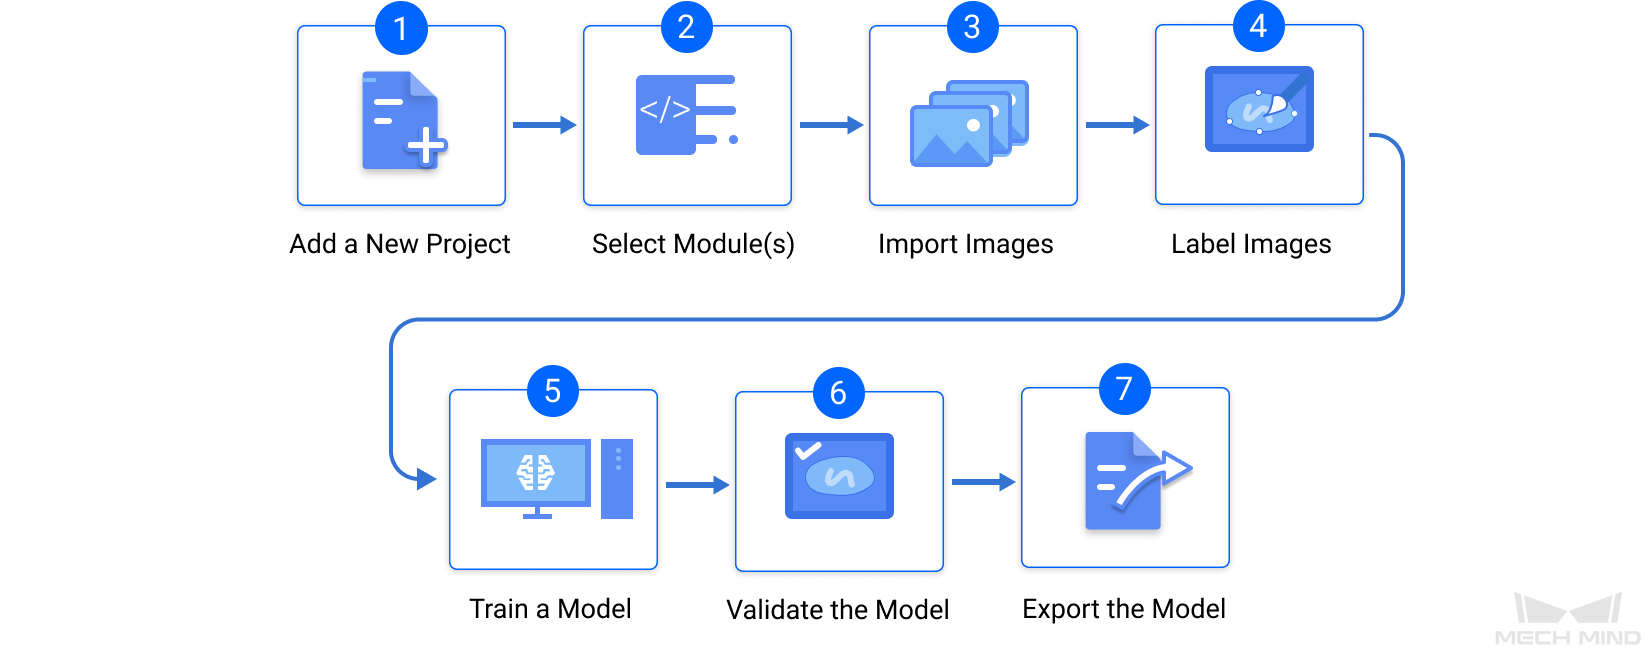
Train Your First Model
This section shows how to train and export an example deep learning model that can be used for defect segmentation. The data used for training is from an image dataset of Ethernet ports.
Preparation
-
The software running device should satisfy relevant system requirements. See the System Requirements section to check these requirements.
-
Click here to download the image data and unzip the file.
|
When Mech-DLK is running, the resolution and scale of the screen should follow the correspondence in the table below. If the resolution and scale of your screen do not match those in the table below, some display problems may occur. If you are using dual monitors, make sure that both have the same resolution and scale.
|
Training Process
-
Create a New Project: Click New Project in the interface, name the project, and select a directory to save the project.
Do NOT include Chinese characters in the path name. 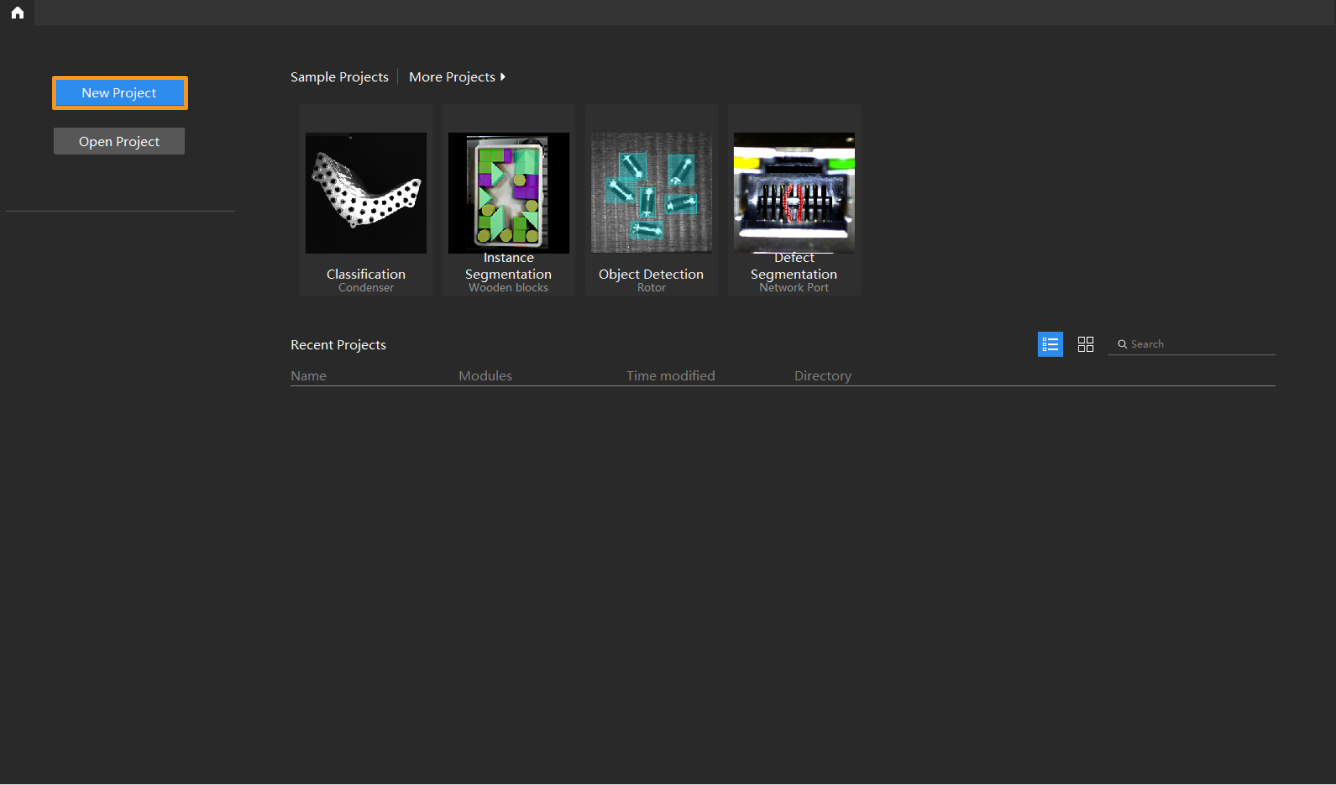
-
Add the Defect Segmentation Module: Click
 to add a module. Select Defect Segmentation and then click OK.
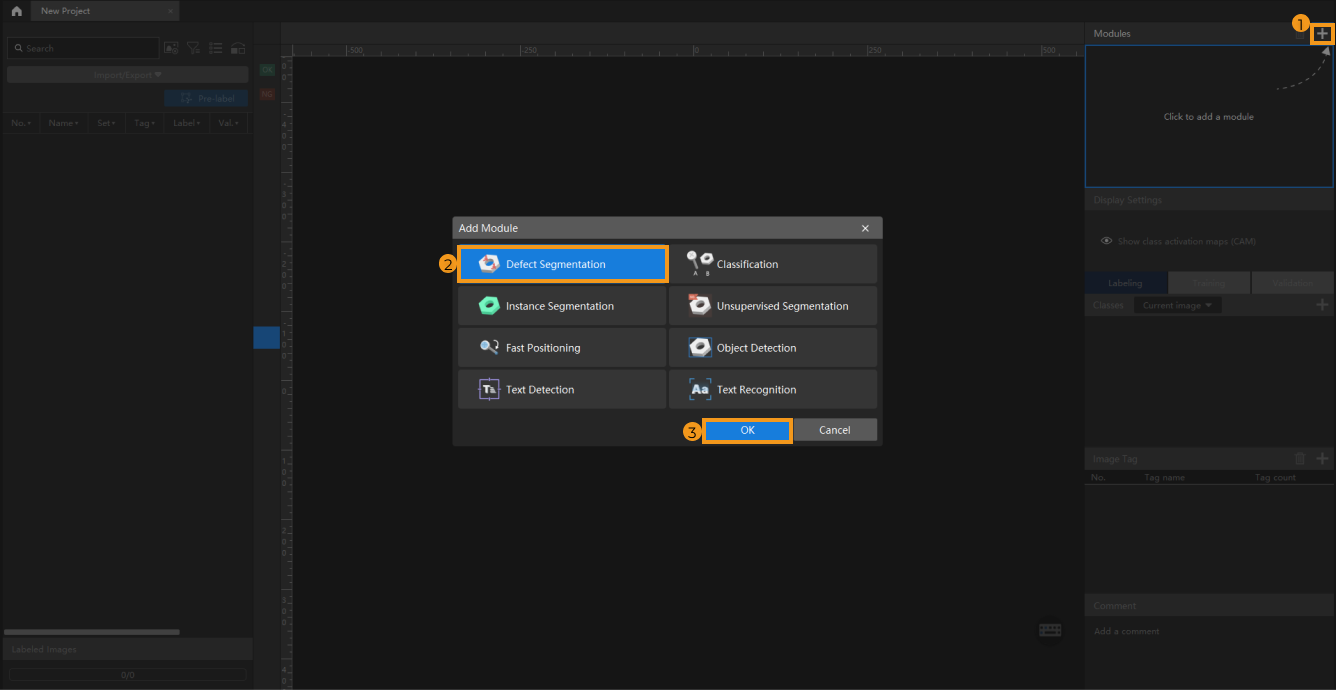
-
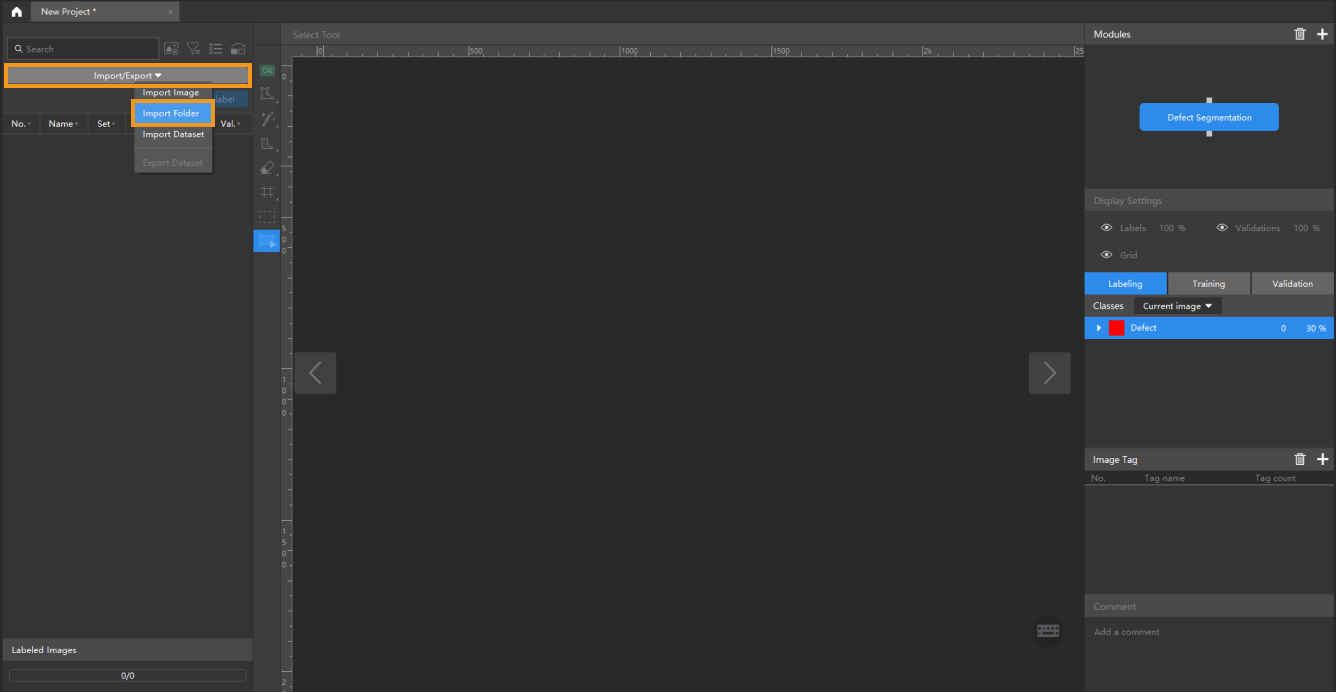
Import Image Data: Click Import/Export in the upper-left corner, select Import Folder and import the image folder you have downloaded.
-
Import Image: import one or more images.
-
Import Folder: Import all images from the selected folder.
-
Import Dataset: Import a dataset that contains images and corresponding labels. You can only import datasets in the DLKDB format (.dlkdb), which are datasets exported from Mech-DLK.
-
-
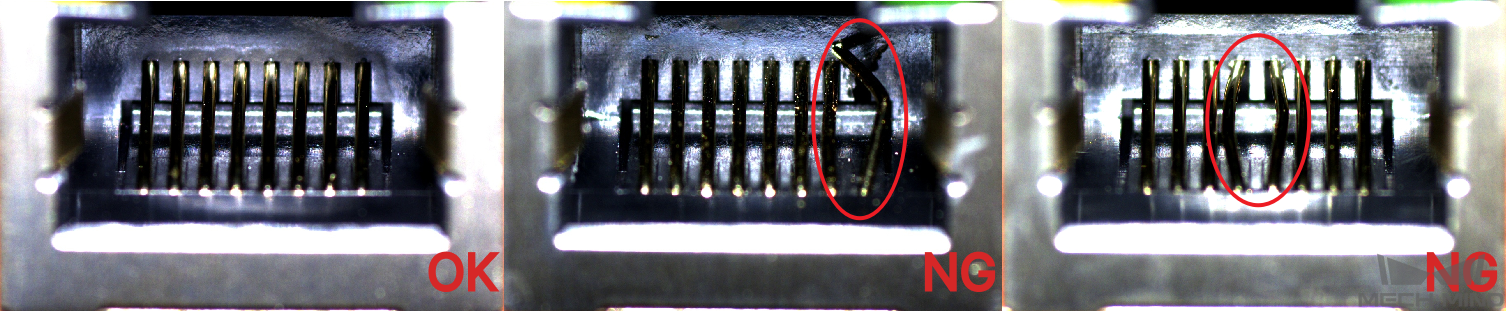
Labeling: In this example, you will need to label the OK images and NG images in each dataset. OK means that the connectors meet quality requirements and NG means that there are defects such as deformations and fractures on the Ethernet ports. Labeling is to provide the information required by deep learning training.
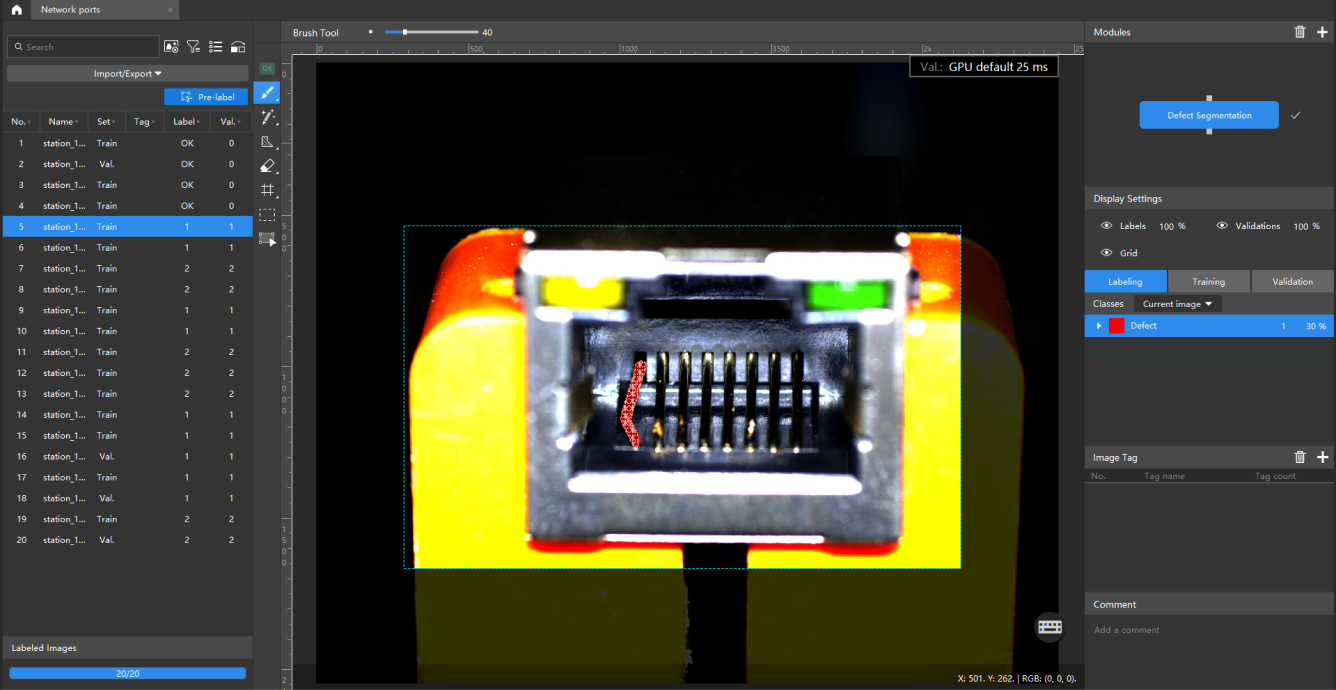
For NG images, long press the left mouse button or right-click
 on the toolbar and then use the Brush Tool to select the regions with defects.
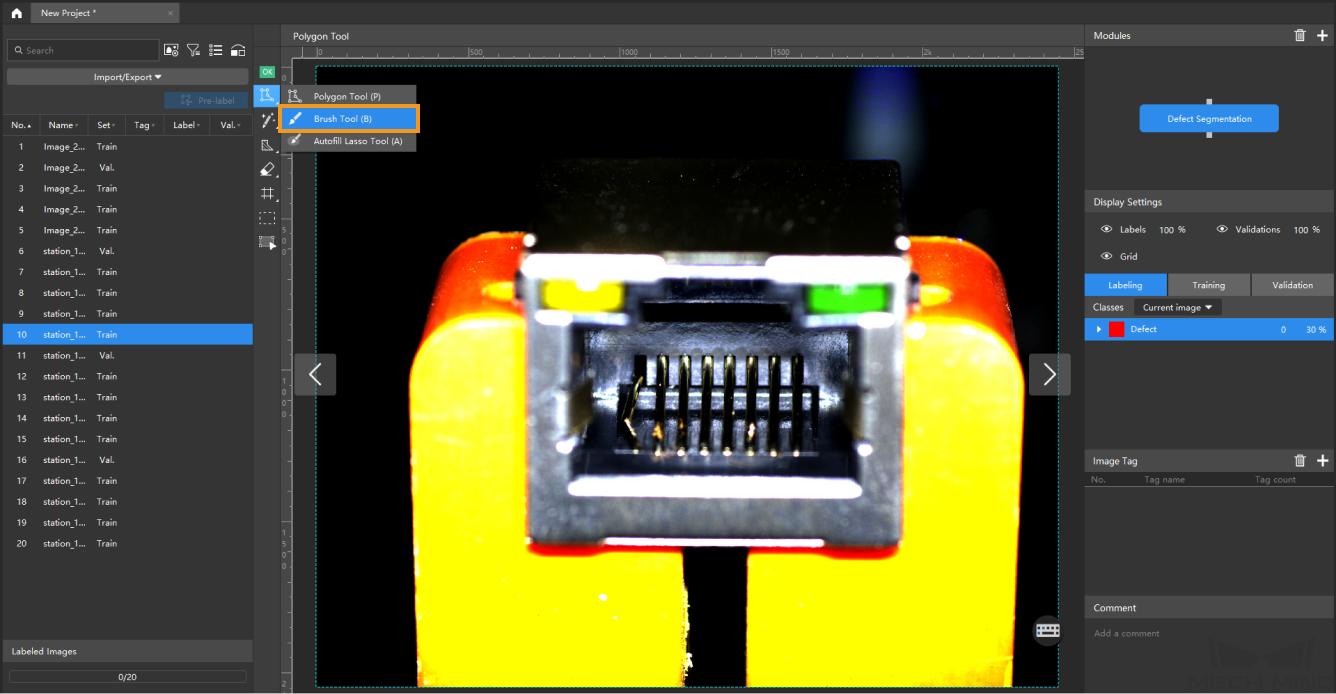
Click
 to use the eraser tool to remove the labeled region.
For OK images, select an image and click the OK Label
 on the labeling toolbar, or right-click the image and select Set to OK. The image will be labeled as OK. Please make sure that there is at least one OK image in each dataset.
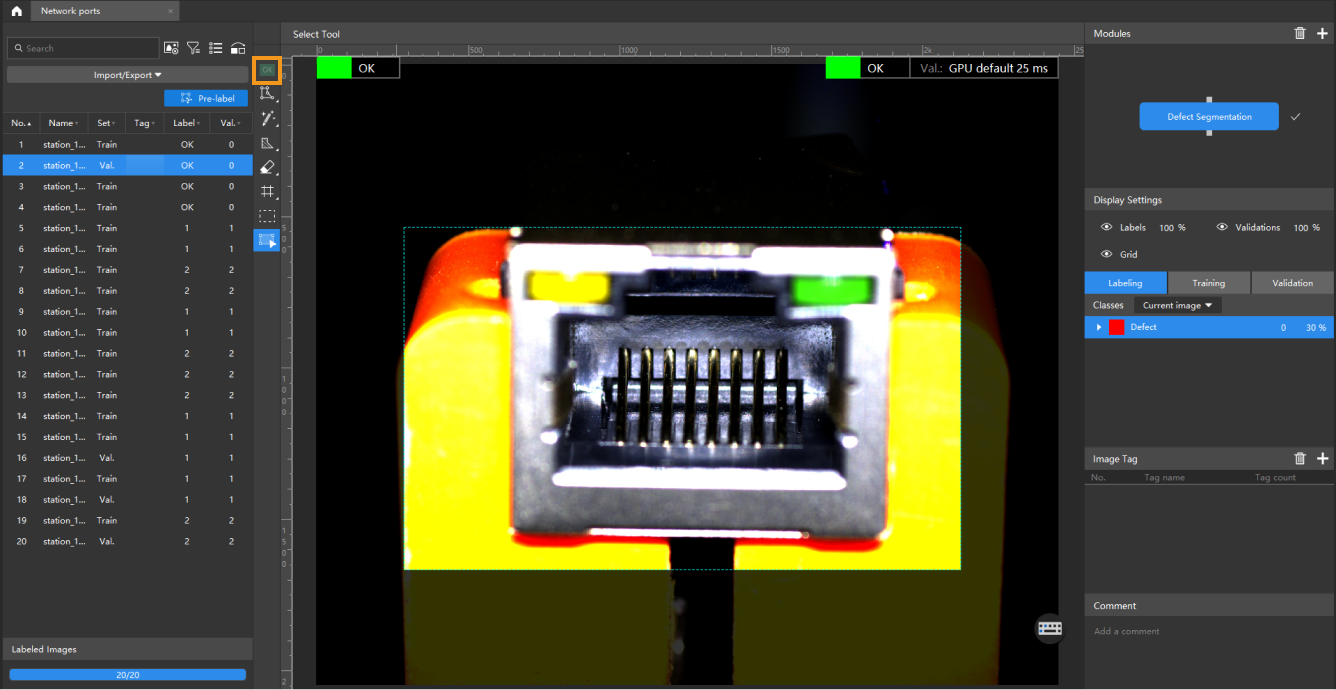
-
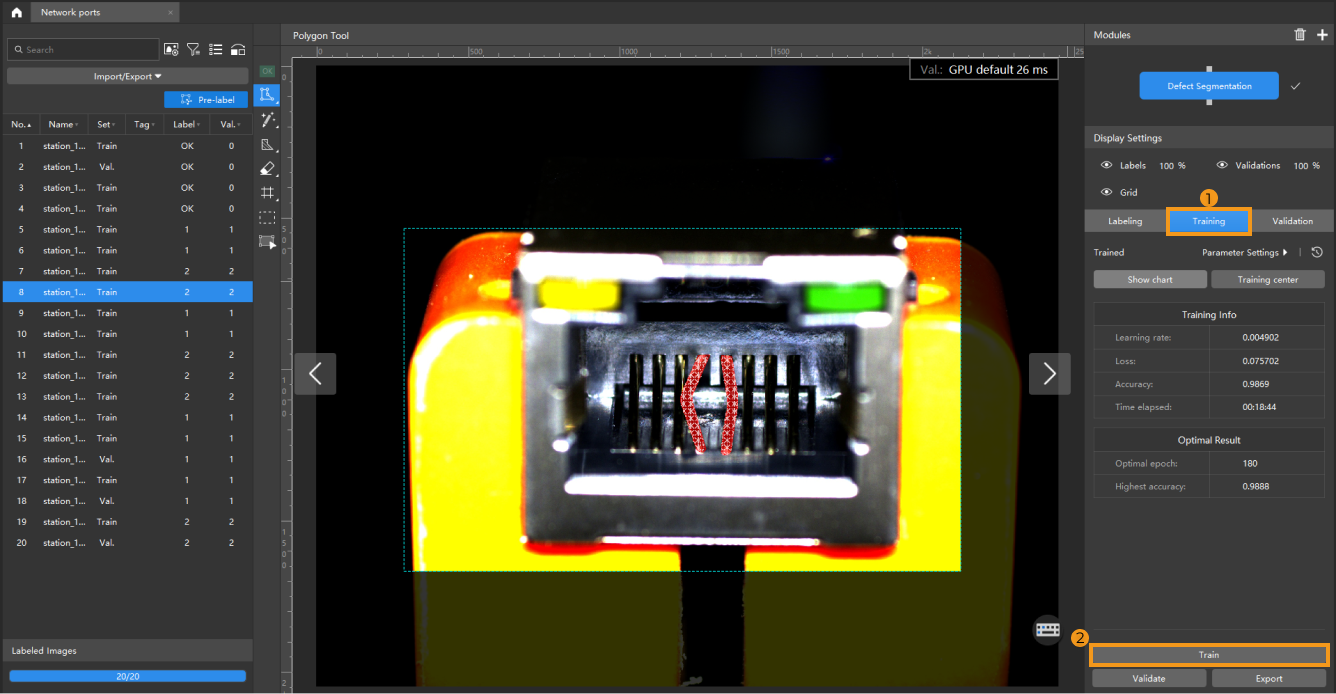
Train the Model: On the Training tab,click Train in the lower-right corner of the interface to start training the model.
-
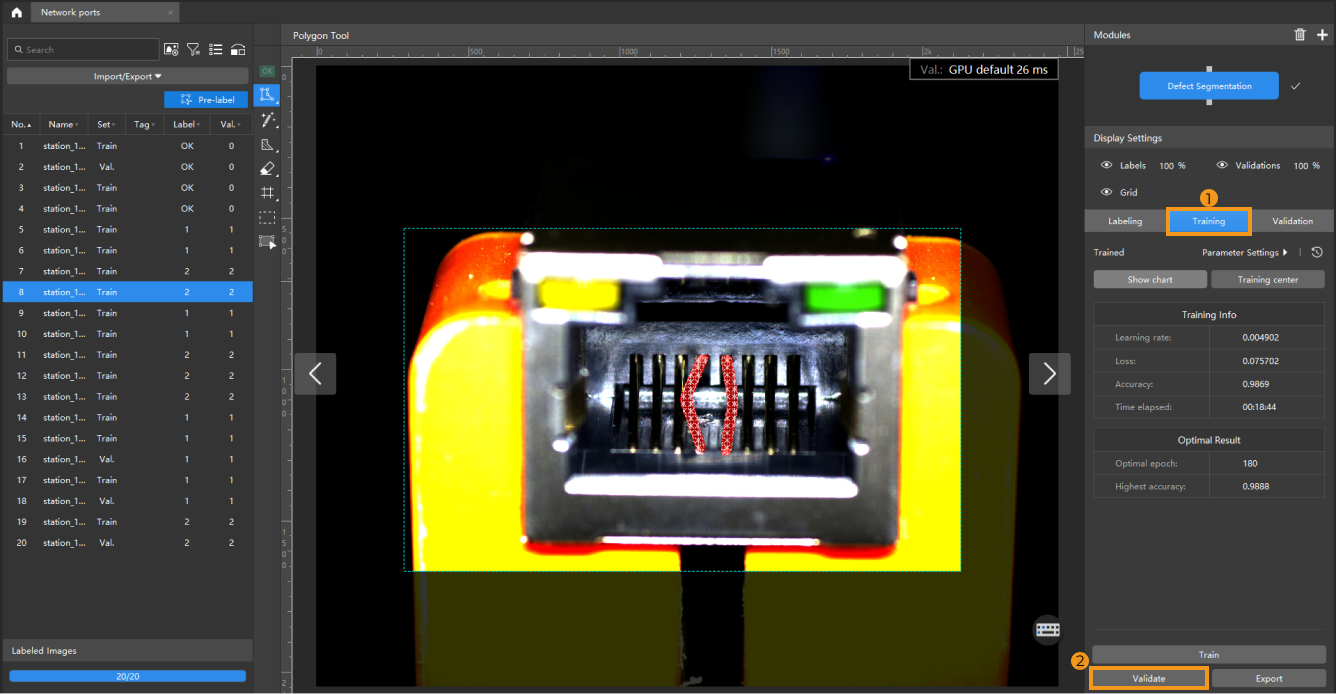
Validate the Model: After the training is completed, click Validate to validate the model and check the results.
-
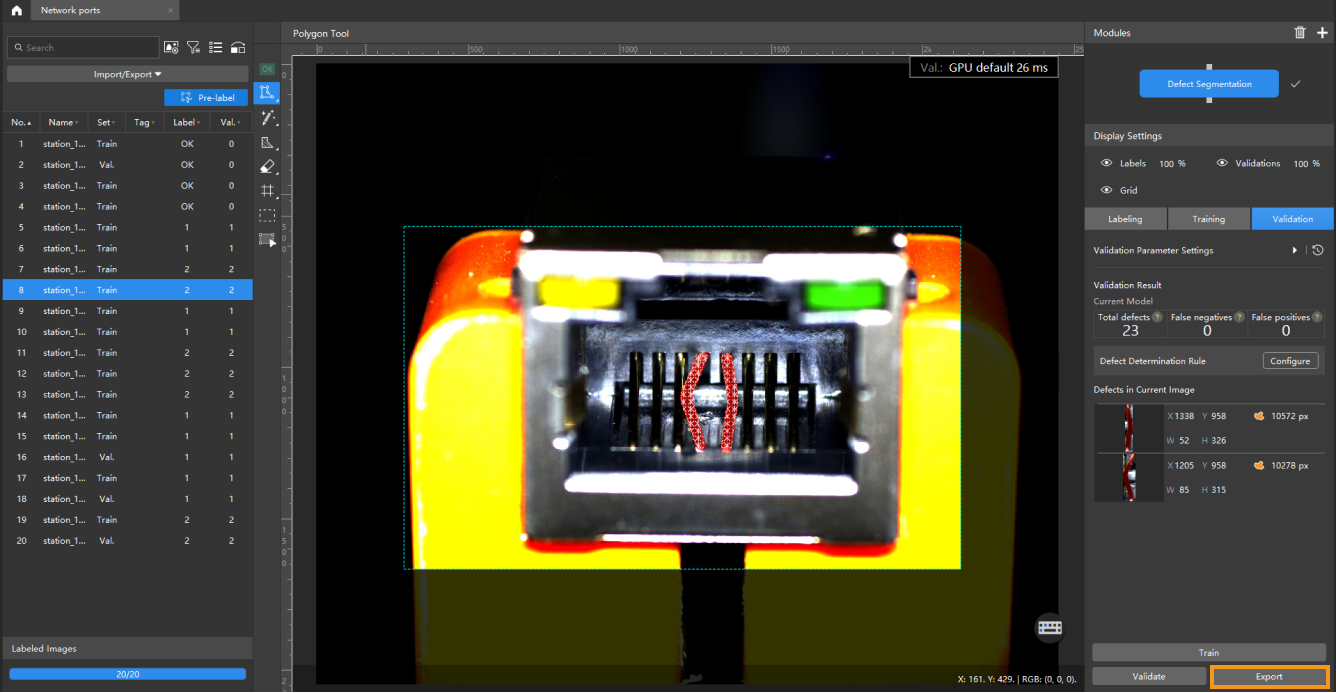
Export the Model: Click Export and select a directory to save the exported model (with file extension of .dlkpack).
Now, you have completed the training of the first model. Continue your reading to learn all the details of modules.