Data Storage
This tool is used to save on-site data for efficient tracing of issues.
Instructions
After opening the project, add the step Save Images and Step Properties in the project, and connect the step (input port 1 is the depth map, port 2 is the 2D image) as shown in Figure 1.
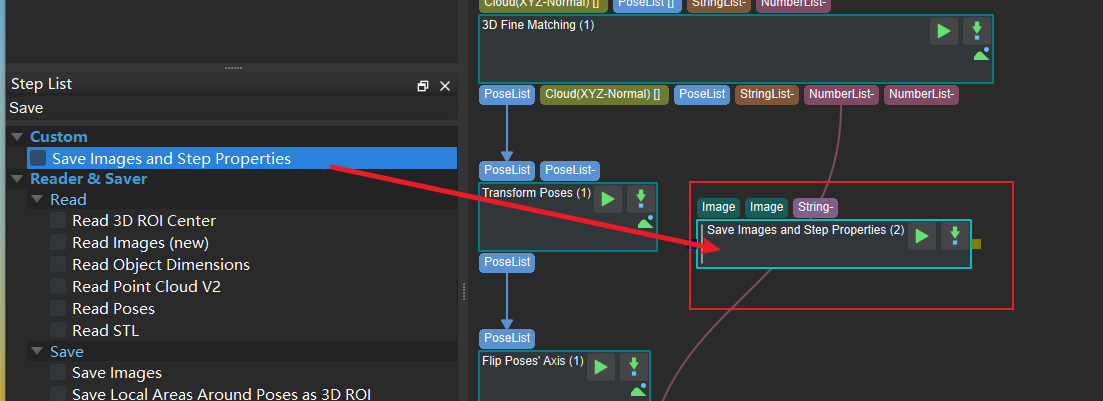
Figure 1. Add Step Save Images and Step Properties and Connect
Relevant settings can be adjusted in parameters. It is recommended to use the default settings except for Max Subdirectories’ Number.
Directory Settings: The directory path for saving images.
Create Subdirectories by Date: After checking, a subdirectory named after the current date will be created.
Max Subdirectories’ Number: The maximum number of subdirectories (one subdirectory each day).
Save Contents Settings: Whether to save the camera parameters, flange pose.
Max Images’ Number: Set the maximum number of images saved. If the number of images saved exceeds the maximum, the sequence number of the next picture will be reset to 0.
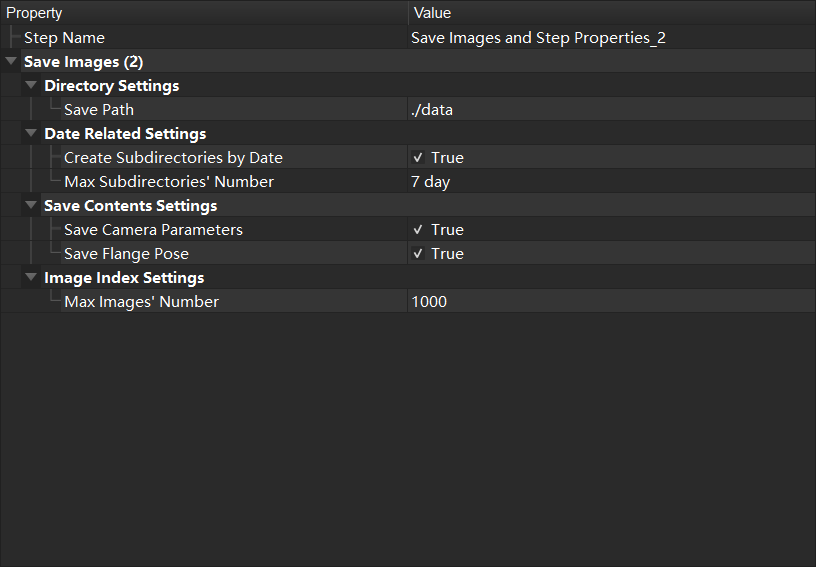
Figure 2 . Set related parameters
The Parameter Recipe used the running the project is saved by default for data playback. In addition to the parameter recipe, data that needs to be saved can be added by the steps shown in Figure 3.
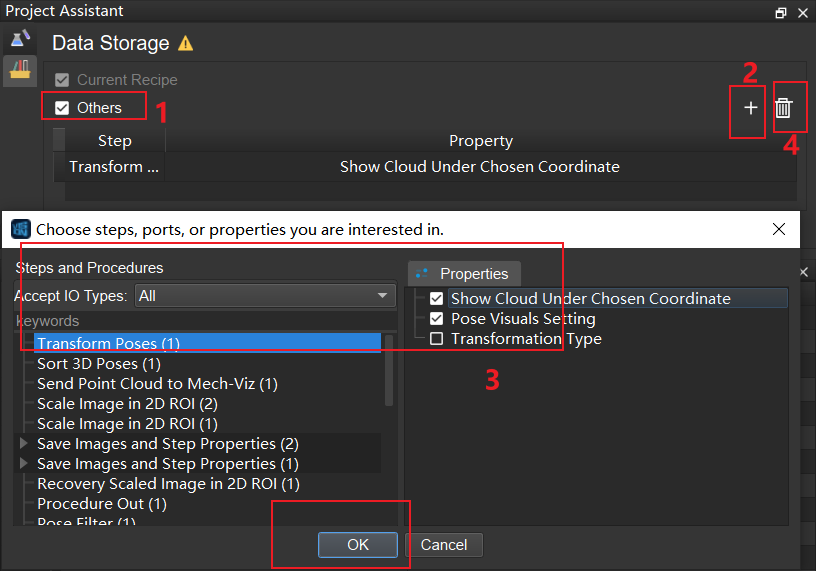
Figure 3. Add Step parameters
In window, check Others.
Click + to pop up the window Choose steps, port, or parameters you are interested in.
Check the parameters that need to be added, and click OK to confirm.
Click
 to delete a selected parameter.