Pose Editor
The Introduction of Pose Editor
Th main function of the pose editor is to improve the ease of use of the pose adjustment, provide the visualaztion and reduce the learning cost. The pose editor has the following two main modes :
Preset Edit Mode: use the preset functions, coordinate system transformation, adjustment and sorting to quickly edit pose.
Customized Edit Mode: add the corresponding step to edit the pose, user can check the edited pose in the scene view.
The Introduction of Pose Editor Main Interface
As shown in figure 1, The pose editor interface can divided into four areas:

figure 1 Interface of Pose Editor
Toolbar
Scene View (visualaztion area)
Editing Area
Edit Mode Selection
Toolbar
The main function of is to adjust the pose more easily by using these tools:
 Back to input poses.
 Edit a target position or orientation of a pose in the scene.
 Run through all existed steps.
 Show world coordinate in scene.
 Copy the current position.
 Copy X-axis vector.
 Copy Y-axis vector.
 Copy Z-axis vector.
 Save configs into a JSON file.
 Show step library(only used in Customized Edit Mode)。
Scene View
The main function is to review the poses after editing and to facilitate the subsequent further adjustments.
Editing Area
The main function is to edit the pose quickly and conveniently. The editing area will be different according to the selected editing mode, as shown in figure 2and figure 3.

figure 2 Interface of Preset Edit Mode
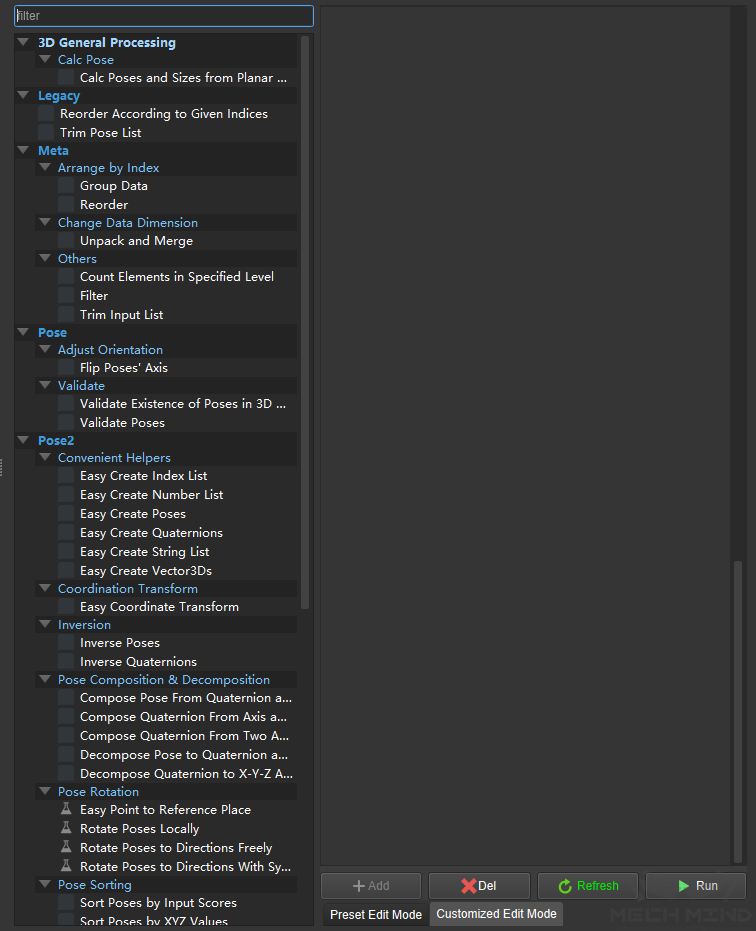
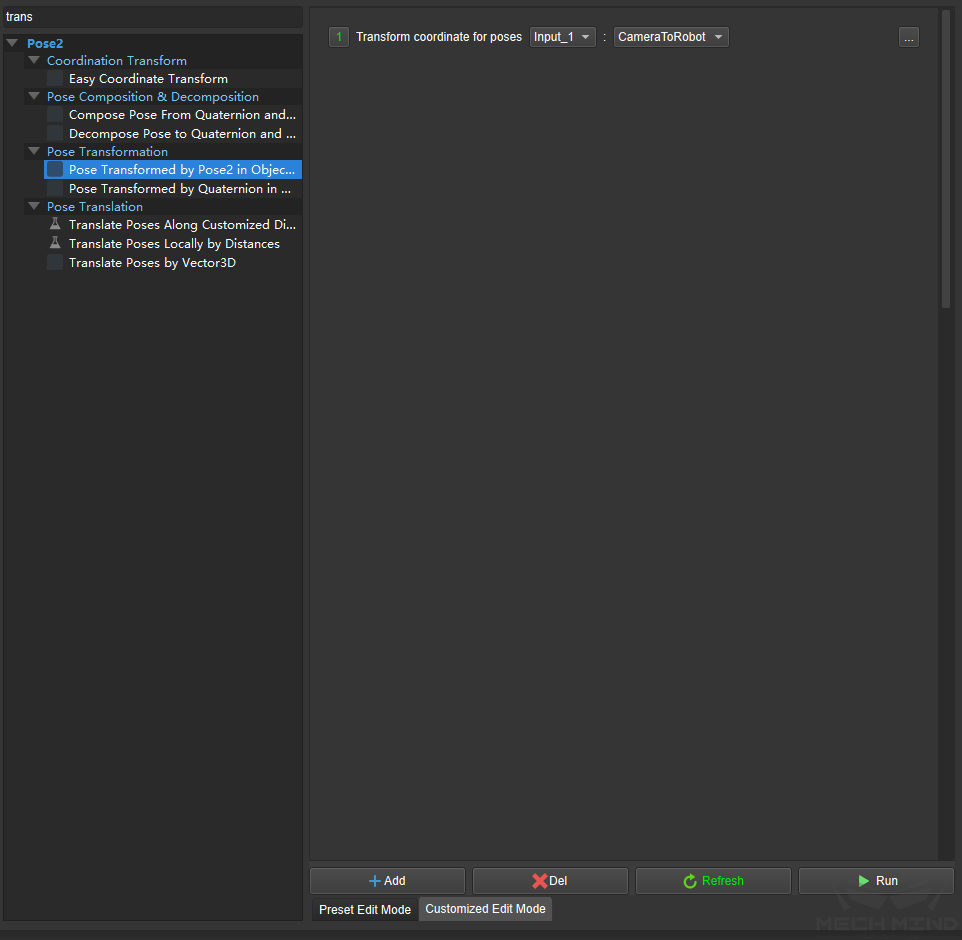
figure 3 Interface of Customized Edit Mode
Edit Mode Selection
Seclect different edit modes to adjuste the pose according to actual needs. It is recommended to mix the two modes to adjust the pose, it will be more conveniently and faster.
The Introduction of Pose Editor Mode
Preset Edit Mode
In the preset edit mode, there are three types of preset editing functions:
Transform Type: Transform the coordinate system of the pose by selecting camera to robot or robot to camera , as shown in figure 4.
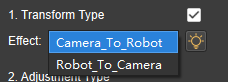
figure 4 Coordinate transformation
Adjustment Type: There are three adjustment types: Align, Outwards and Point to .
Sorting Type: There are five sorting types to choose: Sort_By_Cusom_Direction, Sort_By_Dist_to_Point, Sort_By_Dist_to_Point_On_XY_Plane, Sort_By_Position_XYZ, Sort_By_Row_Col .
How to use Pose Editor
Let’s take a project as an example to introduce the process of using the pose step editor:
Step 1: Firstly, at the place where the pose needs to be edited, add the step “Pose Adjustment Collection”, as shown in figure 6.
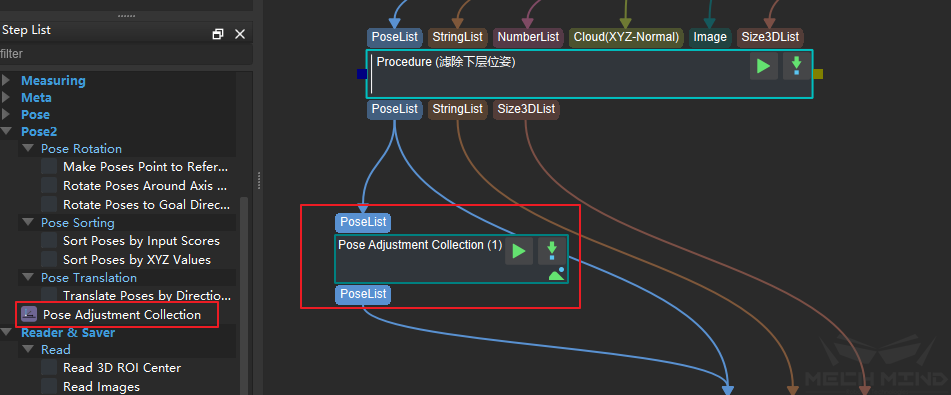
figure 6 Add step “Pose Adjustment Collection”
Step 2. Run the project to get the input pose, and then click the ![]() button in the Operations input box in the property bar to enter the pose editor, as shown in figure 7.
button in the Operations input box in the property bar to enter the pose editor, as shown in figure 7.

figure 7 Enter the Pose Editor
Step 3. By using the preset editing mode, select the preset function that needs to be used: 1. Transform the pose to the robot coordinate system, 2. Align the pose direction, 3. Sort the pose by row and column, 4. Run the programme to preview the result. The result is shown in figure 8.
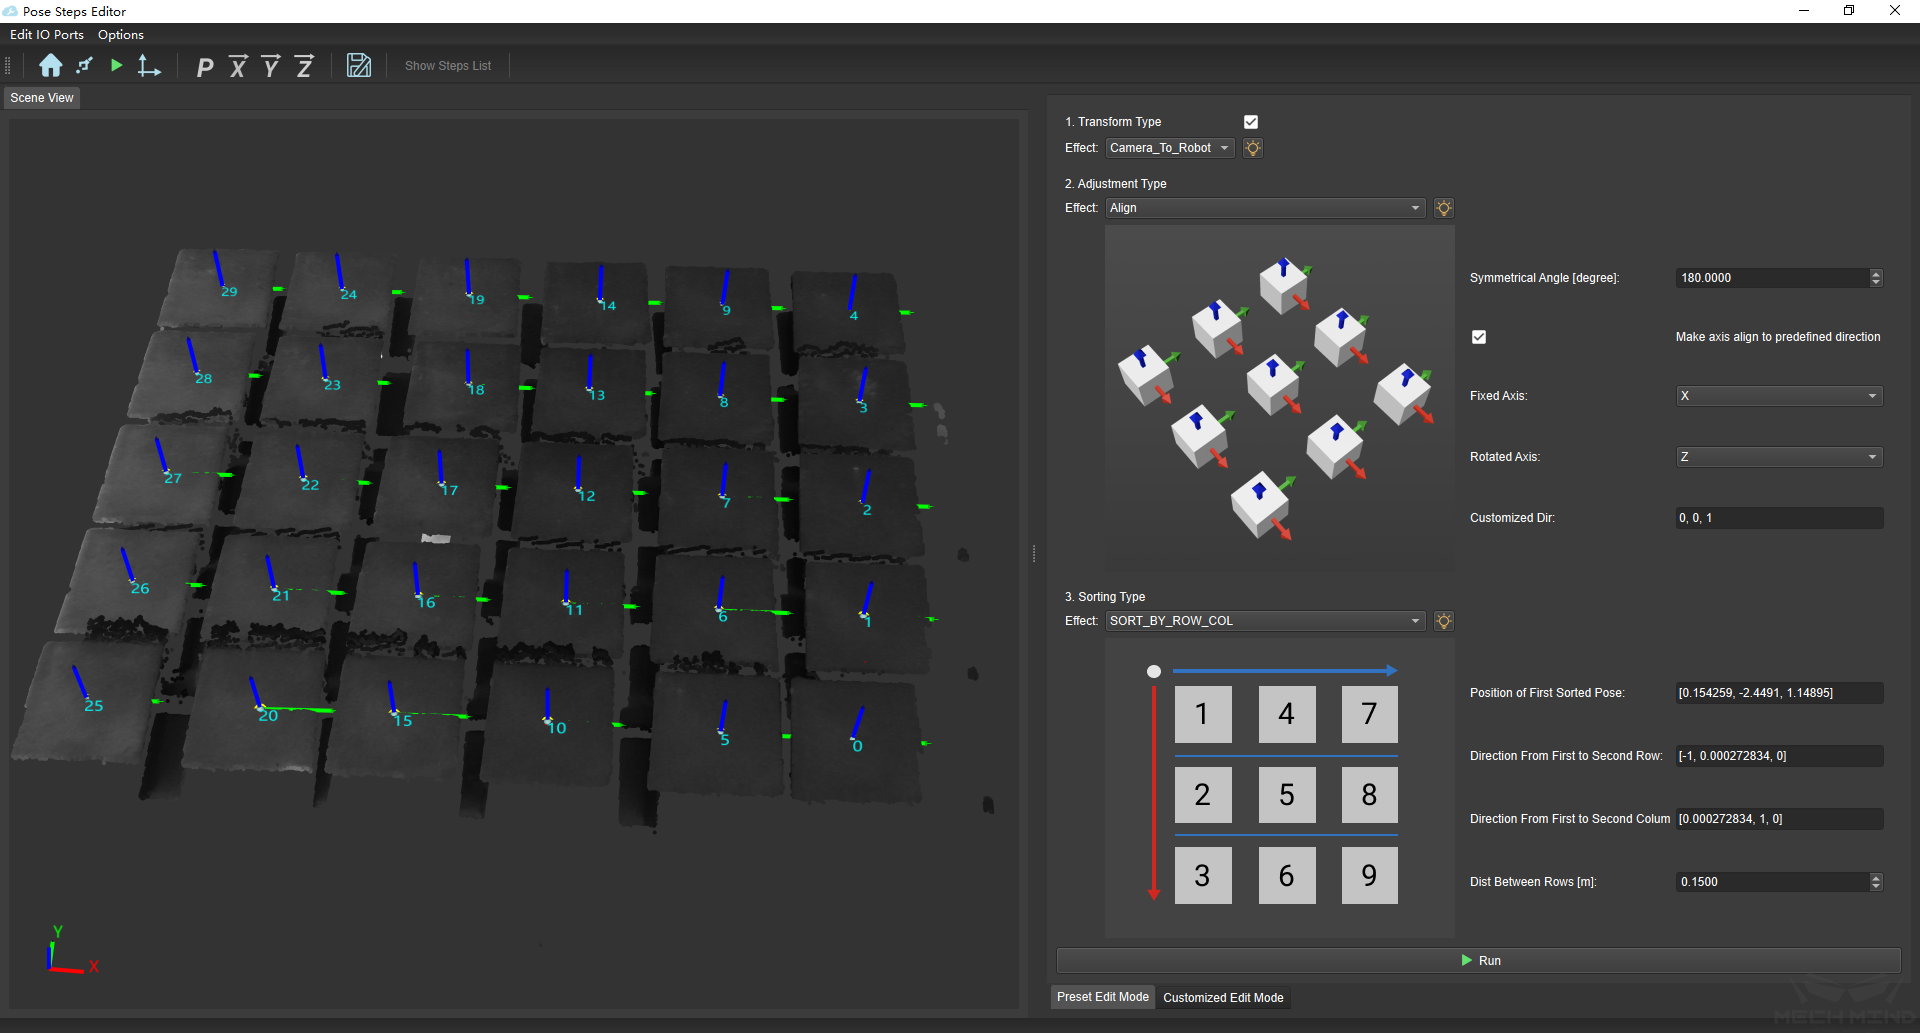
figure 8 Edit pose in Preset Edit Mode
Step 4. By using the production mode (custom), add the output quantity limit: 1. Click and get into the custom editing mode, 2. Display the step library, 3. Add the corresponding step, 4. Select the number of displayed outputs, 5. Fill in the limit number , 6. Run the programme to preview the results. The result is shown in figure 9.
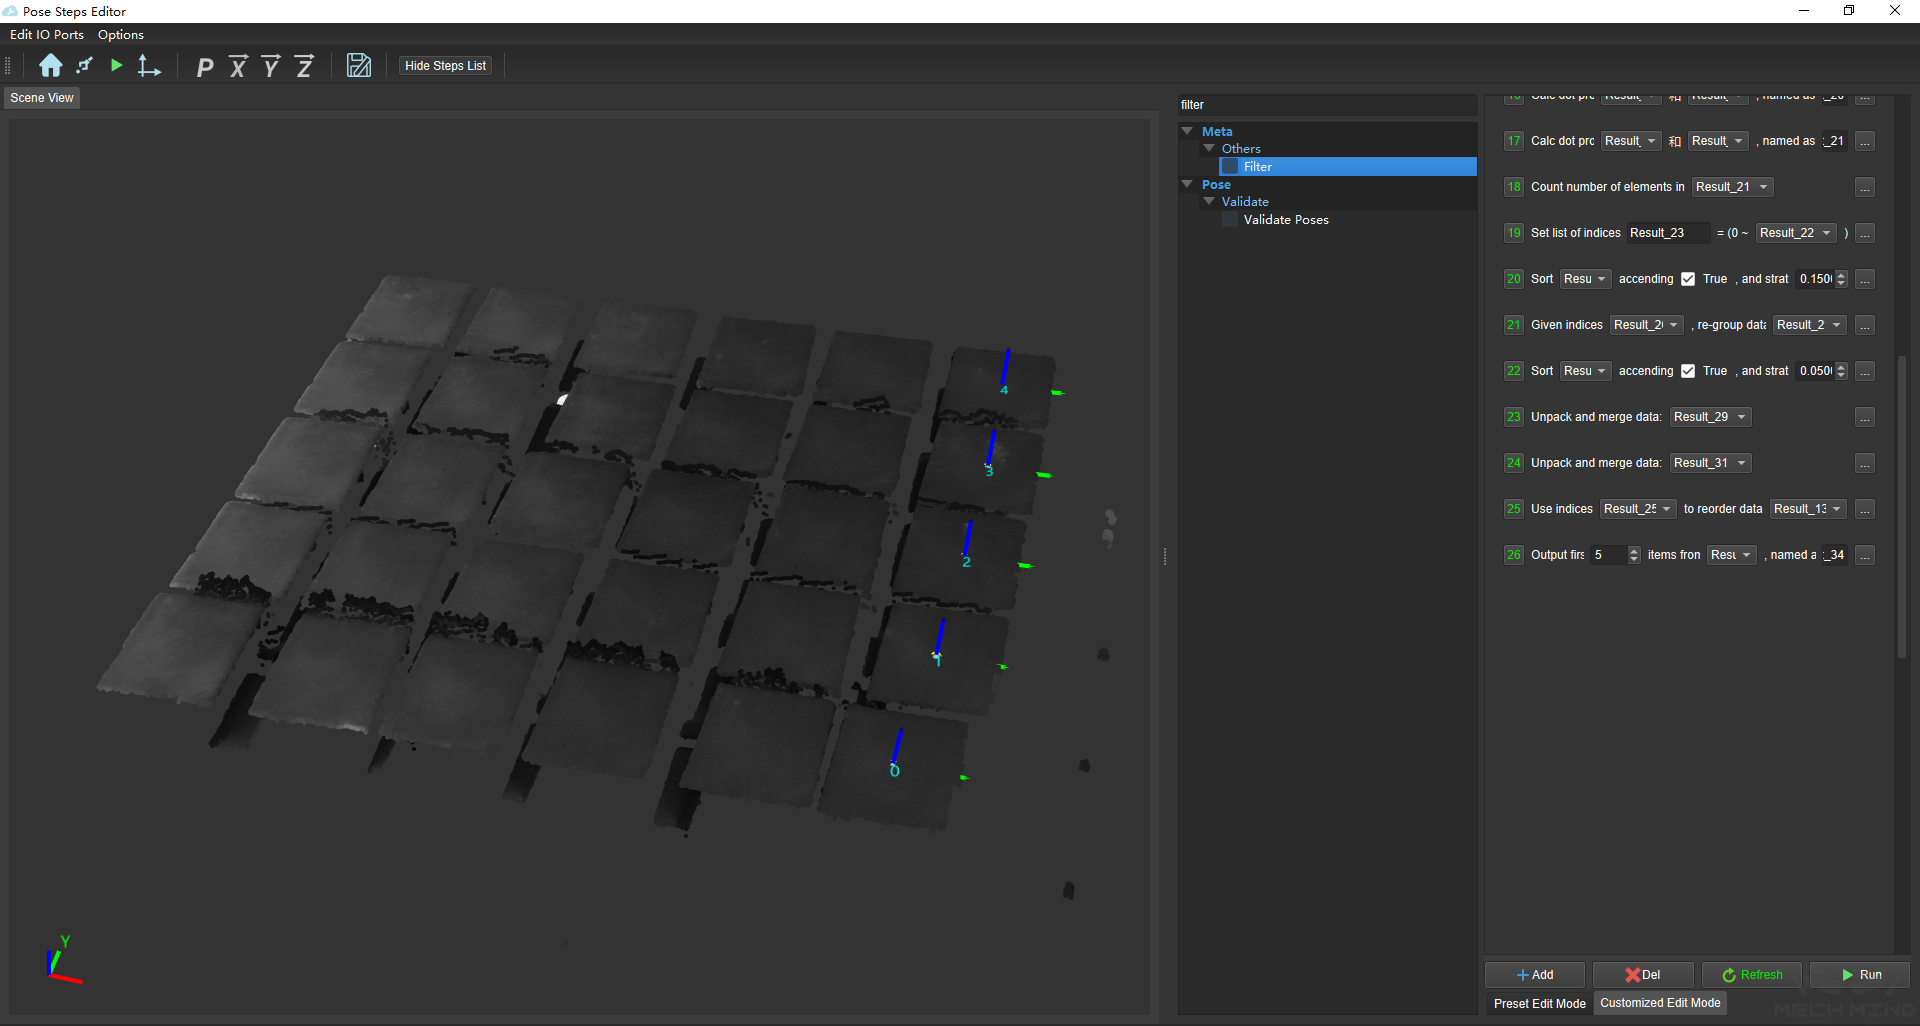
figure 9 Edit pose in Customized Edit Mode
Step 5. After finishing the pose editing, click the exit button, as shown in figure 10, to save the edited pose.
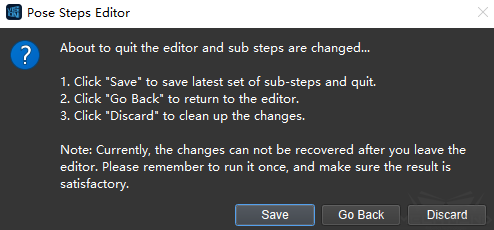
figure 10 Exit and Svae
Step 6. Run the project to quickly review the results.