Data Playback
Data Playback Introduction
The data playback tool can playback and verify a large amount of data in the project to find and correct small problems, so as to improve the efficiency of the regression test in the final stage of the project.
There are two modes of Data Playback tool:
All Data Playback: Replay a large amount of data quickly to pick out problematic data, or select and save excellent data for archiving.
Invalid Data Playback: Perform playback verification on a specific data group, mostly after adjusting the project.
Operation Procedure
Selecting the project that needs to be set, and proceed to .
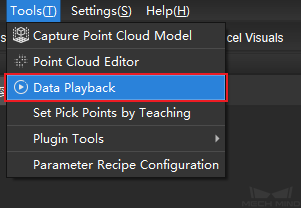
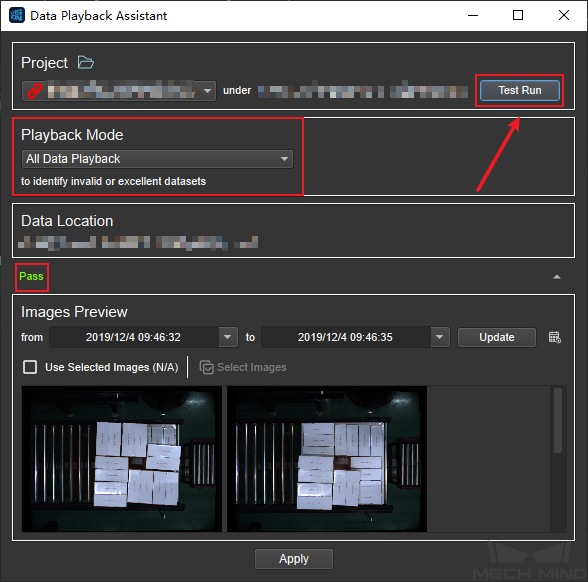
Data Playback Assistant window will pop up as shown in the figure.
Check whether the project information and path are correct, and click Test Run. Pass appears if the project runs successfully.
Choose one playback mode from the drop-down list:
All Data Playback
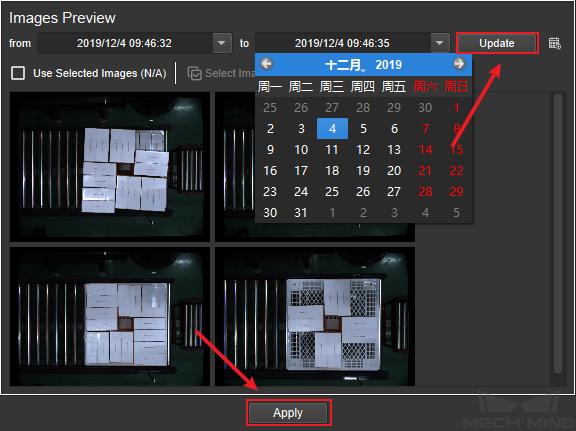
Set the time range in the Image Preview at the bottom of the interface shown below, and then click update to filter out undesired images. Click apply to proceed to the next step.
Enter the step selection interface, and click + to add Base Results and Companion Results.
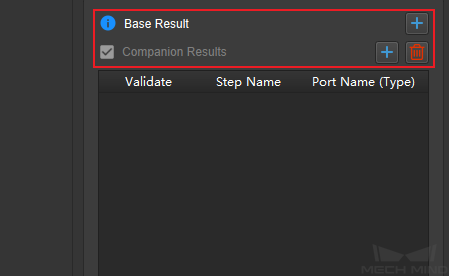
Select a Base Result that can output point cloud, and click Add.
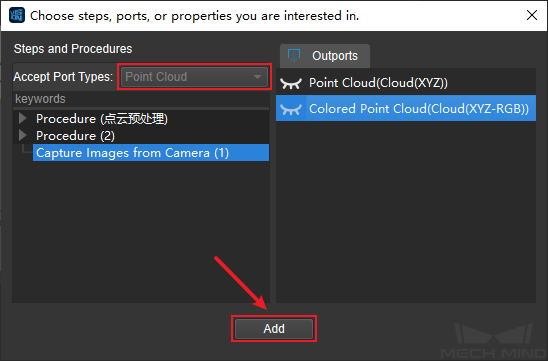
Note
Base Result is a reference for Companion Results. For example, after the background point cloud is selected, it can be compared with the point cloud and pose in Companion Results to judge whether the output is correct.
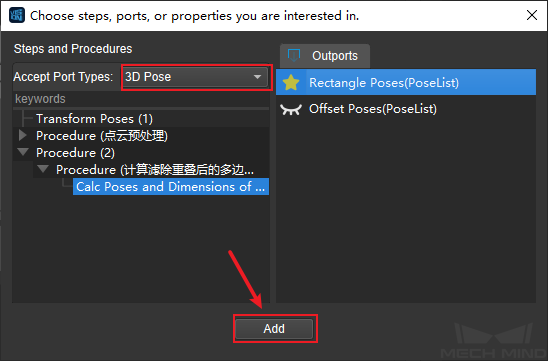
Select one or more Companion Results to output point cloud/3D pose, and click Add.
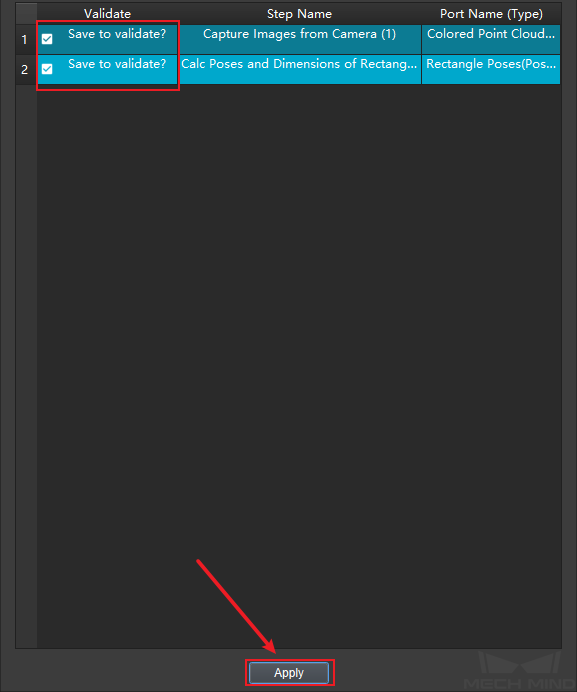
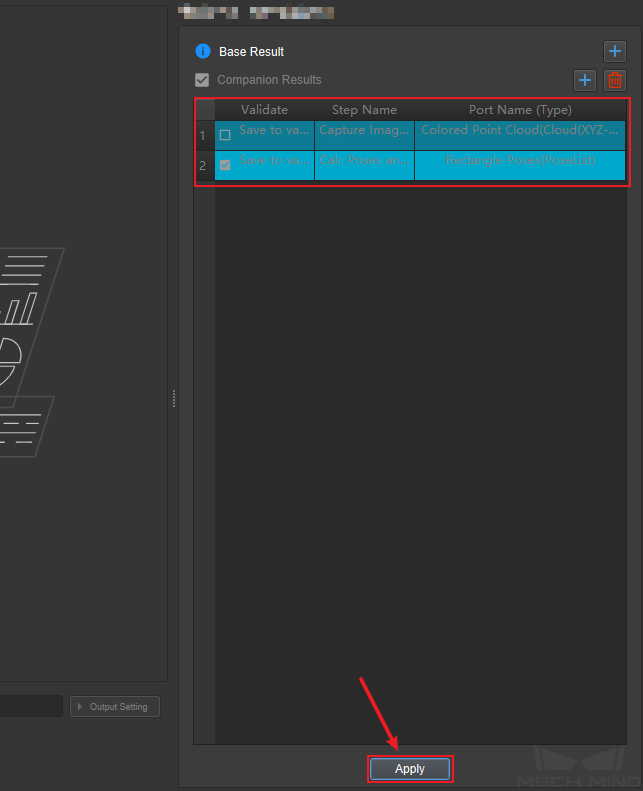
5. The selected options will appear in the list on the right side of the interface. After confirming that they are correct, click Apply. If the user want to verify the data after the playback is complete, choose Save to validate option. Then, the data will be saved and compared during Invalid Data Playback in the later stage (only available for 3D pose data).
Note
The selected “Base Results” cannot be deleted, but can be replaced; “Companion Results” can be deleted by pressing the delete key.
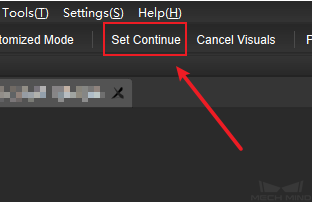
Before operating data playback, click Set Continue on the top of the main interface.
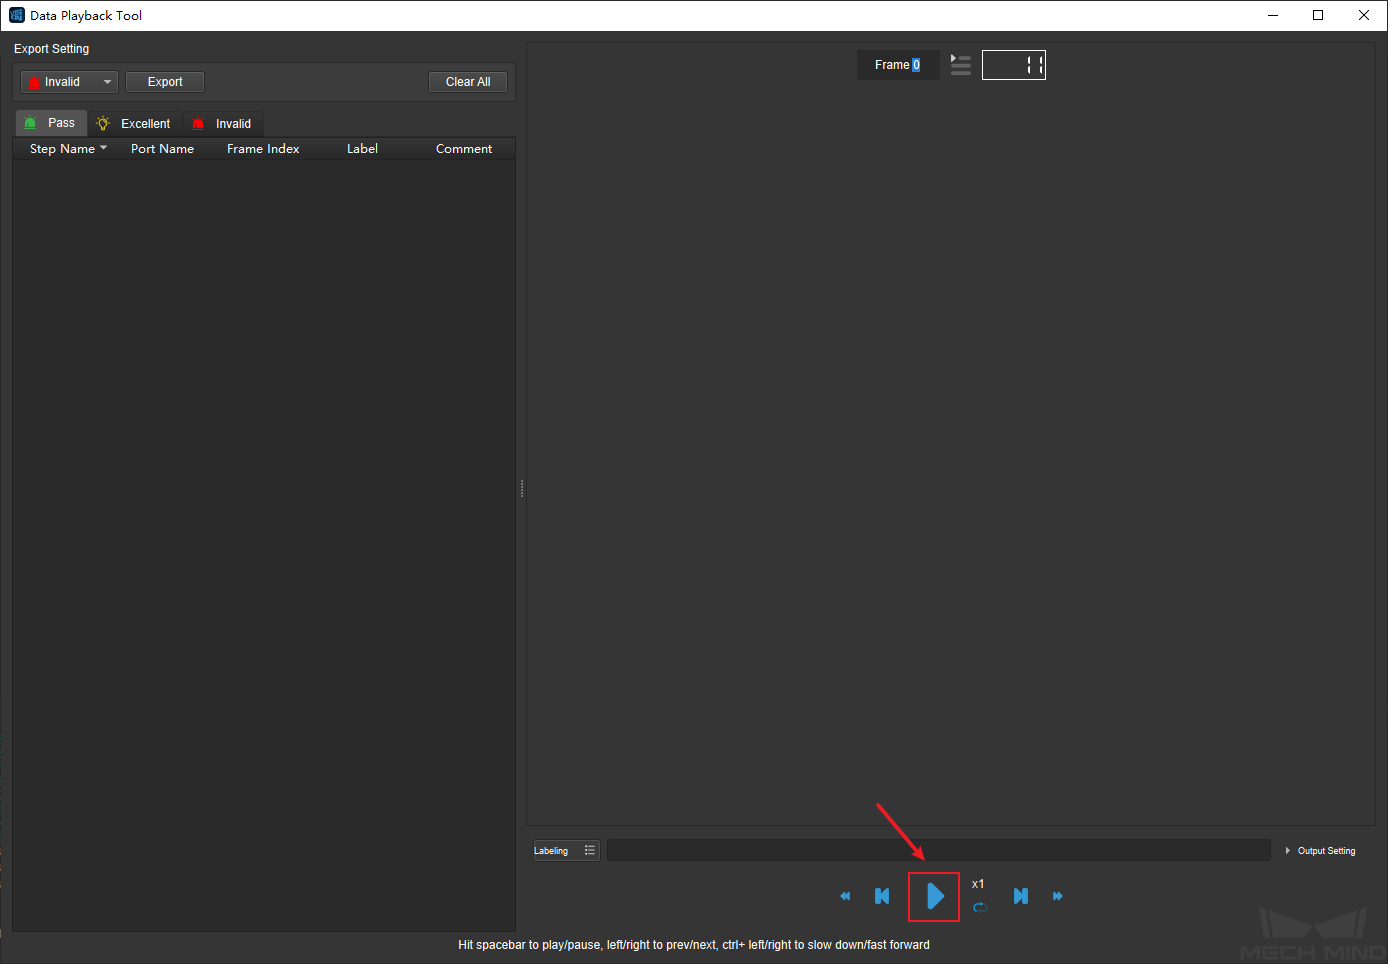
Finally, enter the data playback interface, and click the play button to start.
Note
Play one frame and pause. Choose an angle where the problem can be found, then continue to play.
In order to view the problematic data, double-click the number under Frame to jump to the corresponding frame, or play adjacent frames to check.
If the project is not completed when clicking Pause, there will be a corresponding prompt.
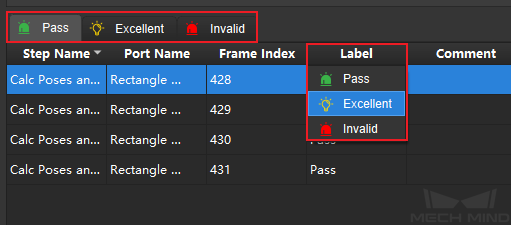
In order to classify the data, select successful, excellent or invalid under Label, and the classified data will be placed in the corresponding list. Also, notes can be added under Comment.
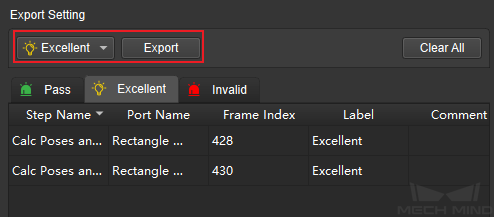
The filtered Excellent or Invalid data can be output by clicking the Output button.
Note
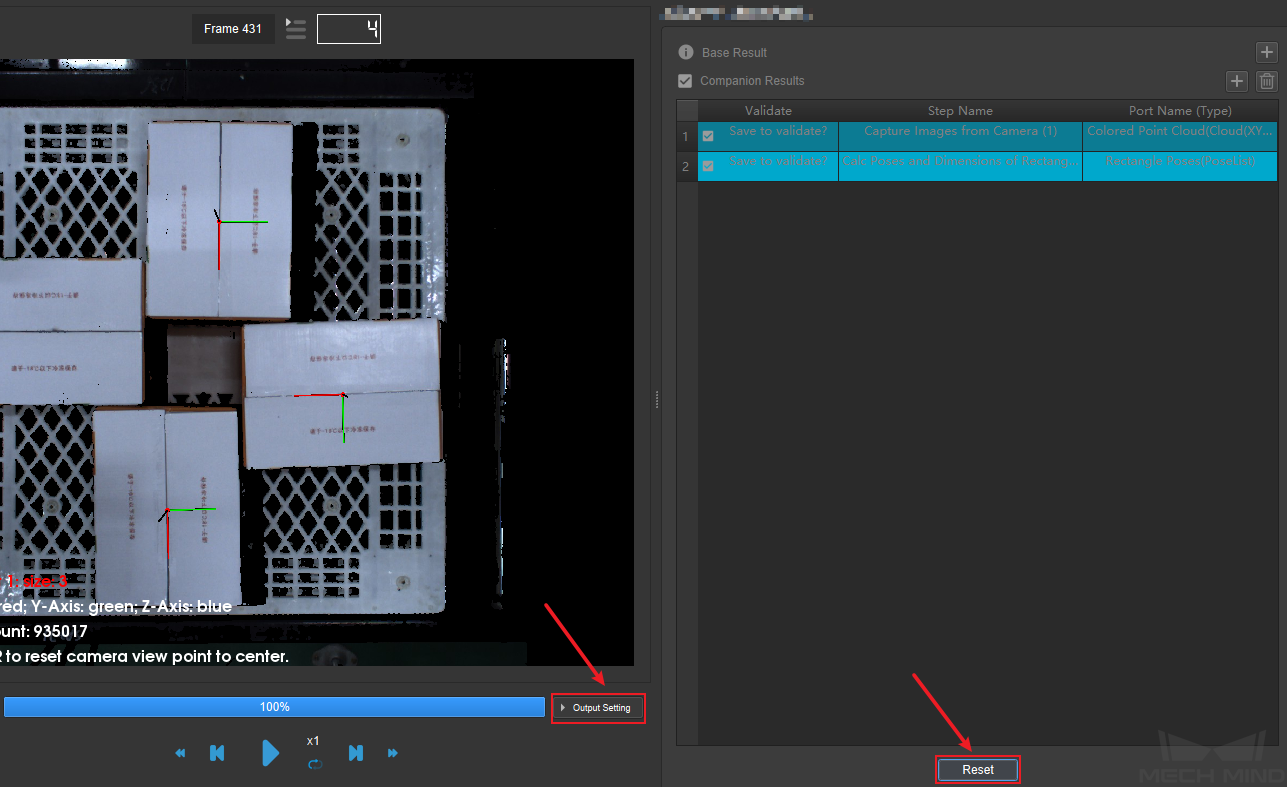
Results resetting can be achieved by clicking the Output Setting and Reset in the sidebar.
Invalid Data Playback
This mode is suitable for validating the data when the project has run All Data Playback mode and “Save to validate” has been chosen. The operation procedure is very similar to All Data Playback mode, but the project needs to be modified before data verification:
Export invalid data in All Data Playback mode, and directly use this data to run the project. View and modify the invalid data, and use this mode again for verification after the modification is completed.
Enter the playback interface of this tool, double-click the frame to view the invalid data, and modify the project directly based on the problem found (no need to close the tool). Then, use this mode for verification after the modification is completed.
Operating procedures
Click Test Run and see the green Pass, then click Apply to proceed to the next step.

Enter the step selection interface. This project has run the data playback mode before, so the operations that have been performed are saved in the list on the right, and can be used directly.
Note
“Save to validate” option cannot be changed here.
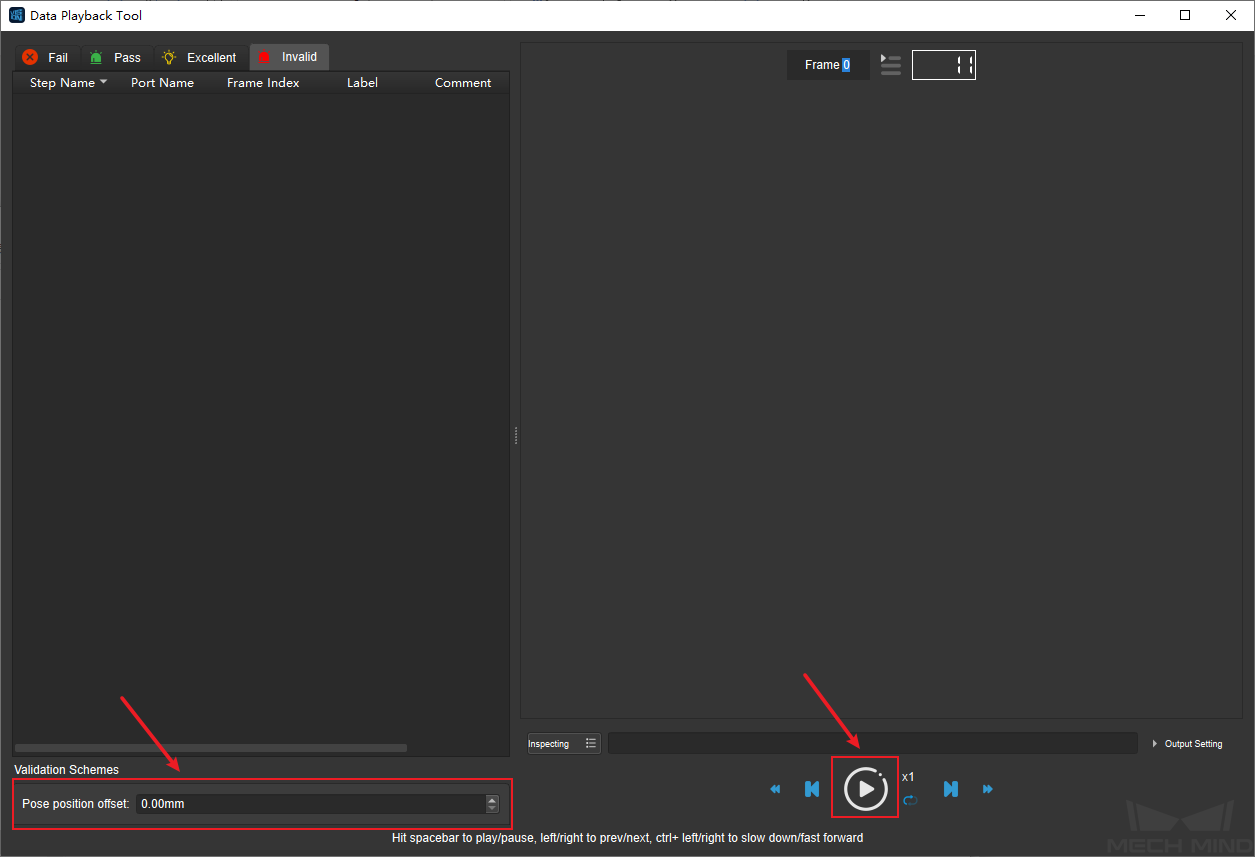
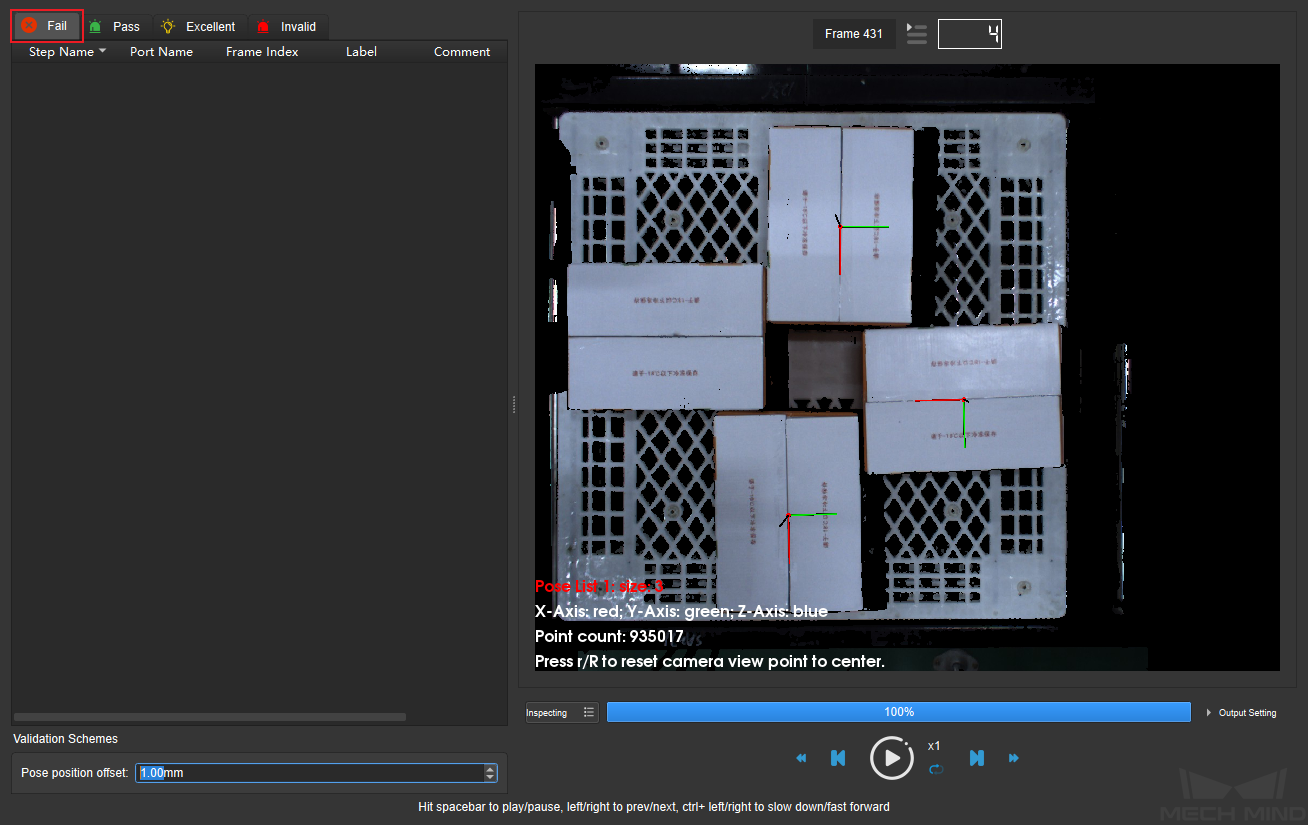
3. After confirming that all options are correct, click Apply. The data playback interface shown in the figure below will pop up, and set Pose position offset in the lower left corner. If the offset between new and odd data is larger than this value, the corresponding data will be automatically classified as “Fail”. Then, click the play button to start the playback.
Note
If this dialog box pops up, select Yes.
If there is no “Fail” data after the playback has finished, it is proved that the project meets the conditions. Otherwise, the data still needs to be modified.
Note
When Invalid Data Playback starts, it is not possible to pause and resume verification. If it is suspended, the verification needs to be performed again.
This mode doesn’t allow to reset the base or companion results. If you want to adjust the settings after the first pass of verification, you need to manually switch them to re-verify.