Camera Viewer
Instruction of Camera Viewer
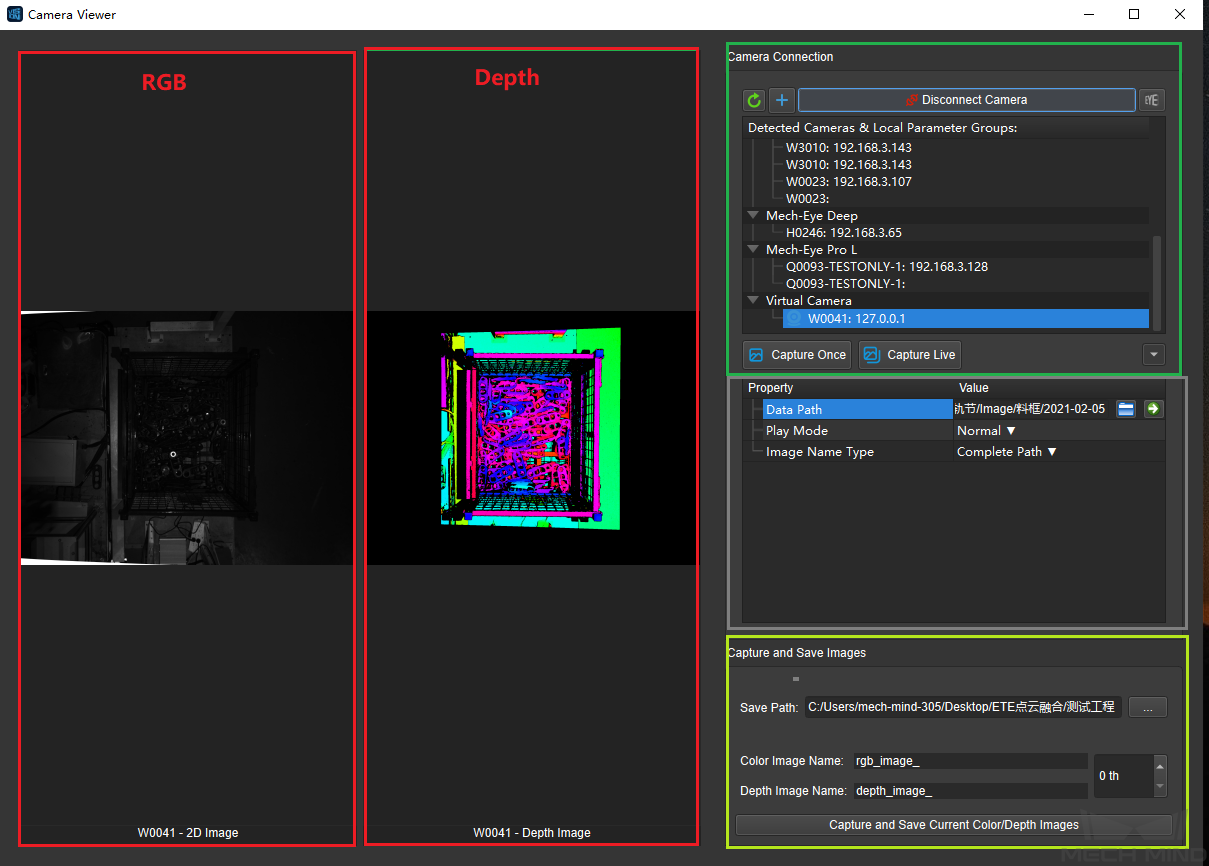
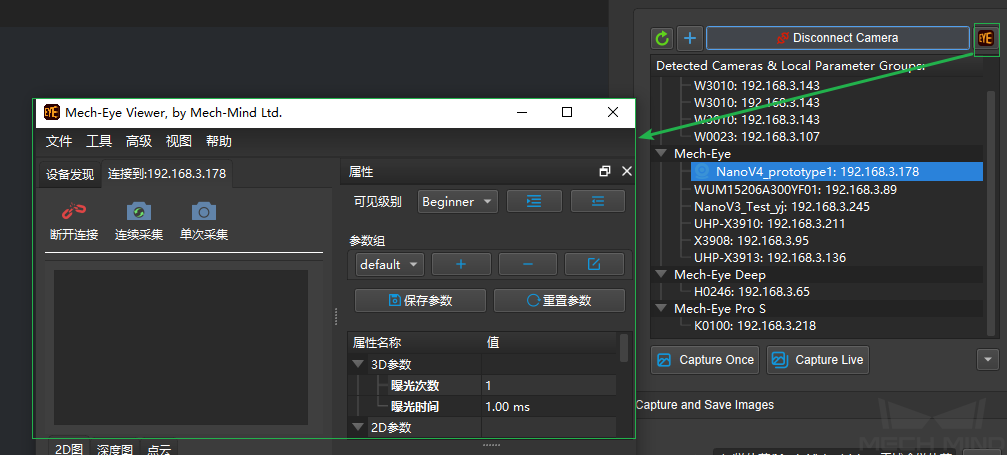
The functions of camera viewer are: 1. connect and control the camera to take pictures; 2. set the attributes of the camera; 3. display RGB and Depth images; 4. specify the save path and save the image. The function introduction of each part of the camera viewer is shown in the figure below.
Operation Procedure of Camera Viewer
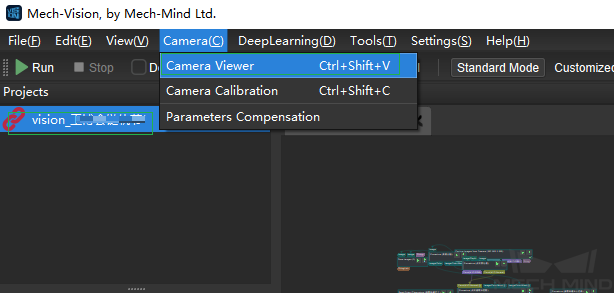
Open the project in Mech-Vision. Enter “Camera Viewer” from .
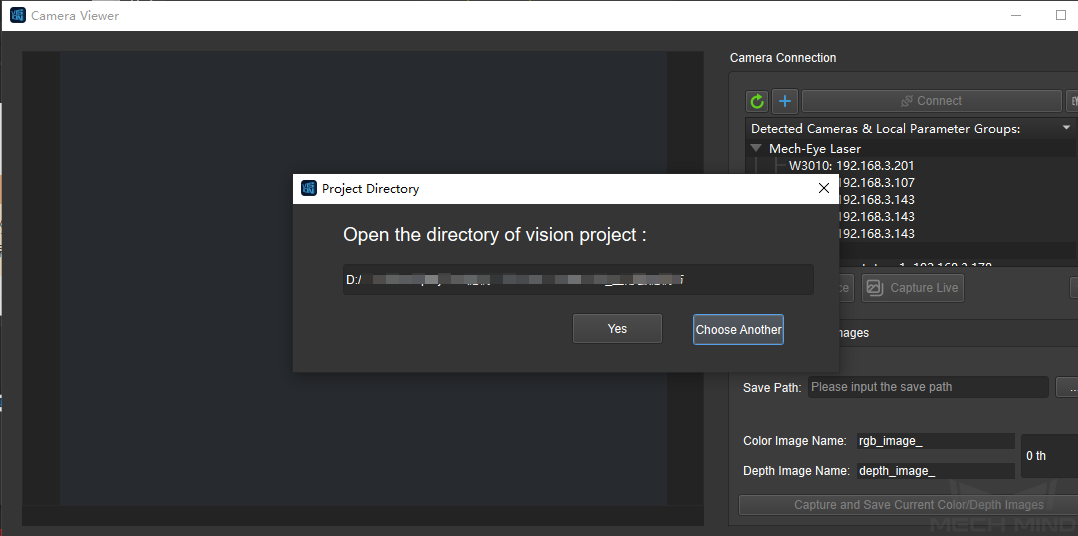
Load camera parameters.
Attention
The camera needs to load the corresponding intrinsic and extrinsic parameters when taking pictures. The intrinsic and extrinsic parameters are saved in the corresponding project directory, so just load the corresponding project directory; you can also enter without loading any directory.
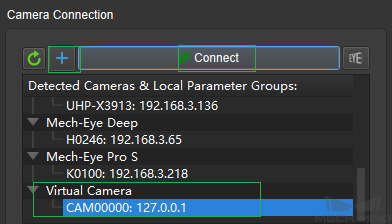
3. If the user choose to use a virtual camera, click + in the camera connection bar to create a virtual camera. Select “CAM0000: 127.0.0.1” to connect the camera.
To use the virtual camera, the user need to select the image data path. If the selected image data path is correct, the log window prompts that the intrinsic and extrinsic parameters are successfully loaded. The camera configuration is updated, and the picture can be collected normally. The user can also change the Play Mode (Normal, Repeat One, Rpeat all, Shuffle), and change the output Image Name Type (Complete path, File Name, Base name).
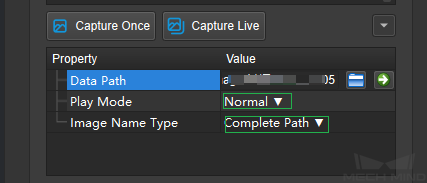
When selecting the image data path ,if the depth image, color image, camera parameters, and flange poses files in the selected folder are not stored in a fixed format, it will trigger the “Virtual Camera Assistant” to assist in selecting image data. Refer to Capture Images from Camera for specific usage. After the settings are completed, the images can be captured normally.
4. If it is a real camera, click the single acquisition or continuous acquisition to obtain the color image and the depth image, or click the Mech-Eye Viewer in the upper right corner to enter the Mech-Eye Viewer software window for more detailed settings. For the use of Mech-Eye Viewer software, please refer to Mech-Eye Viewer.
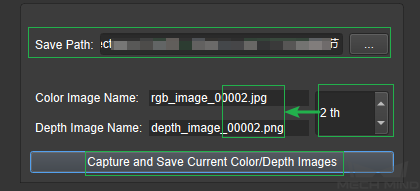
5. Set the image save path and the file name. Set the serial number of color image and depth image. Finally, click the Capture and save Current Color/Depth Images to complete the operation.