From Depth Map to Point Cloud
Function
Generate a point cloud from a depth map and a corresponding color image.
Sample Scenario
This Step is usually connected after the Step Capture Images from Camera and can generate point clouds from depth maps. You can set an ROI in the depth map in this Step to improve the processing speed.
Input and Output

Parameter
Depth ROI File Name
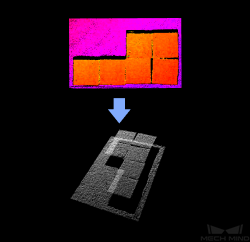
Description: this parameter is the name (“depth_image_roi.json” by default) of the depth map ROI file.Instructions on setting the ROI:1. Click on the parameter value and click on the right to pop up the Set ROI window.2. Set the ROI in the window.3. Click on OK to save the settings and a file named “depth_image_roi.json” will be generated.Example: comparison of different ROI settings.
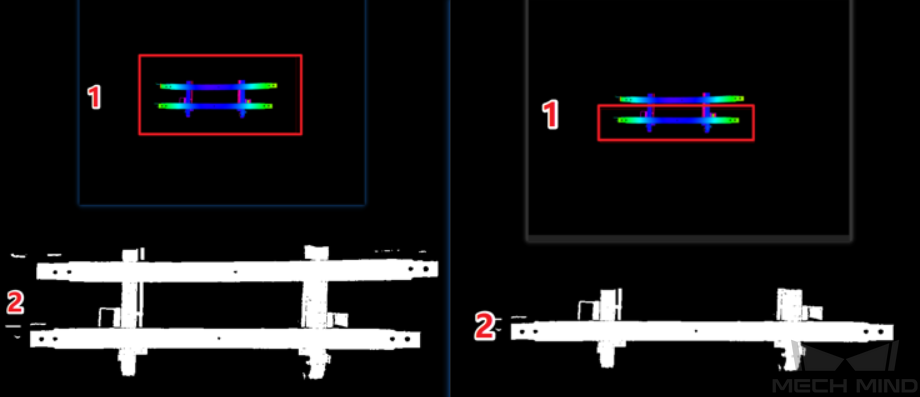
Figure 2. Comparison of different ROI settings
ROIs in the depth map.
Output point clouds.
Remove Background by Depth Image
When set to
True, the background will be removed based on the settings of the two parameters Depth Background Filename and Variation of Background Depth. The two parameters are displayed only when Remove Background by Depth Image is set toTrue.Depth Background Filename
Instructions: Click on the parameter value and click on the right to pop up the Set Background window.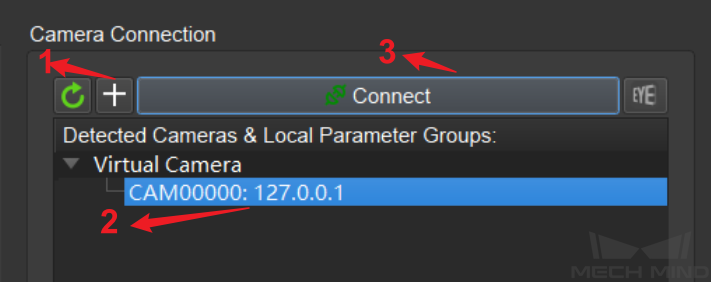
Figure 3. Connect to a virtual camera
Add a virtual camera.
Select a virtual camera.
Connect to the selected camera.
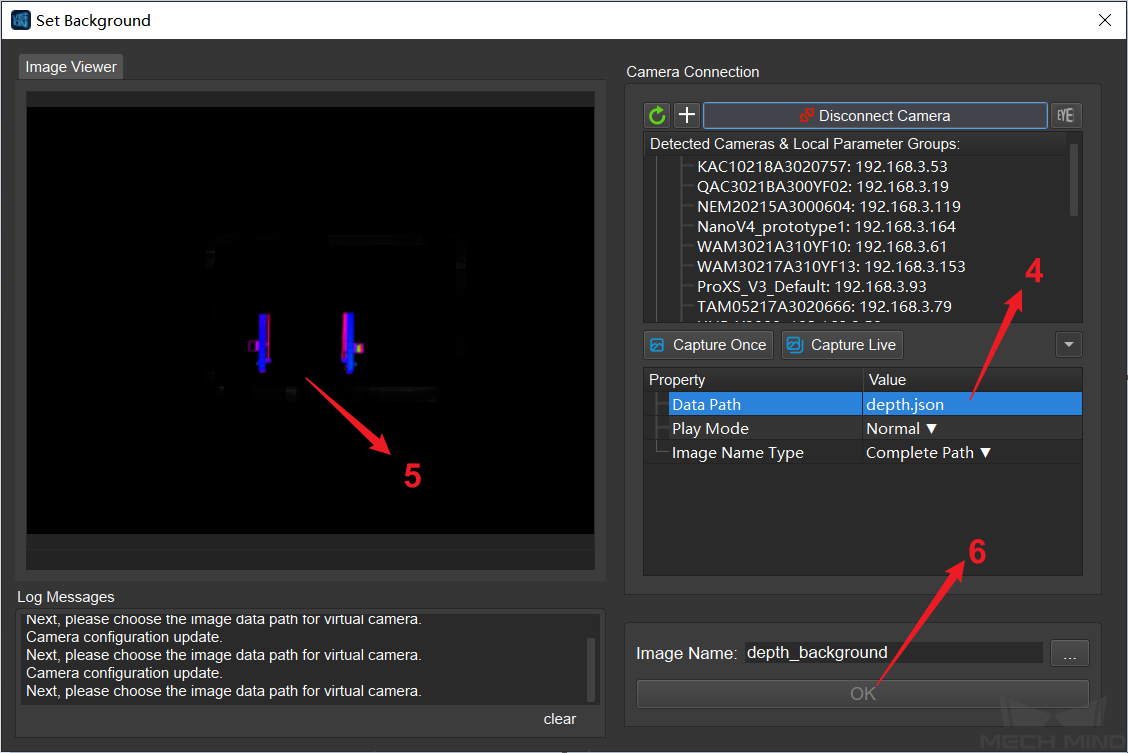
Figure 4. Capture the background depth map
Set the file path.
Display the background depth map.
Save the background depth map to the path.
Variation of Background Depth
Description: In input depth maps, points within the variation of the depth map in the file specified by Depth Background Filename will be regarded as background points and will be deleted.Example: Figure 5 compares background removal effects under different values of Variation of Background Depth.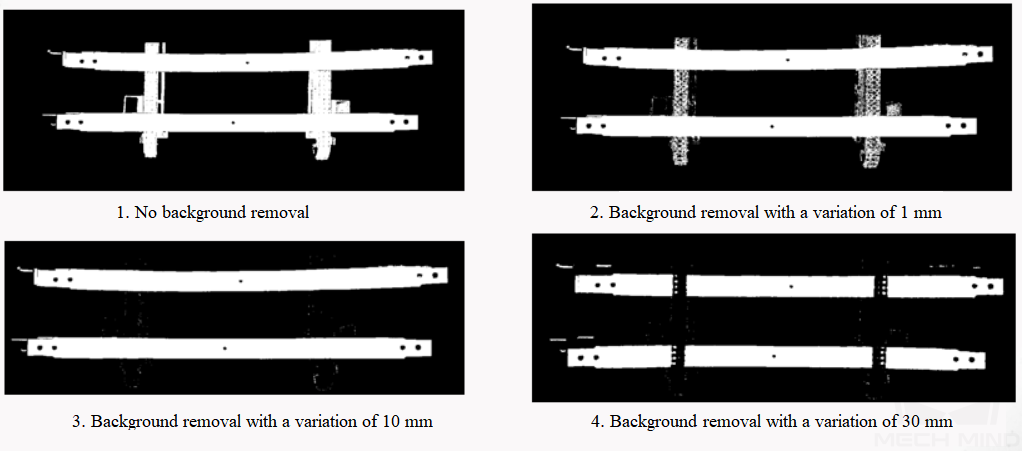
Figure 5. Background removal effects under different values of Variation of Background Depth
If the variation is too small, the background cannot be completely removed. If the variation is too large, the object part will also be removed.Please set the variation to an appropriate value. Usually, the recommended value is 10 mm.
Parameter Tuning Example
An example of parameter tuning for removing the background part based on the background depth file and only keeping the object(s) is shown below.
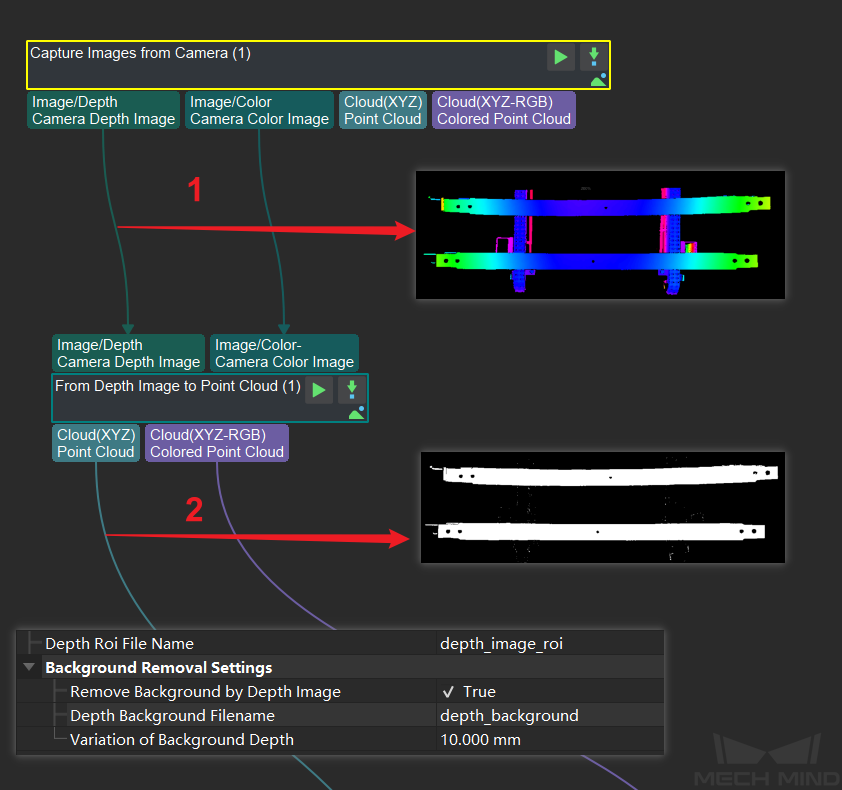
Figure 6. Parameter tuning and comparison of input and output
Input depth map.
Input point cloud.
Parameter tuning (please see the links above for instructions).
Comparison of Similar Steps
Capture Images from Camera can also output point cloud and color point cloud.
However, to accelerate project running, please use From Depth Map to Point Cloud to obtain point cloud and color point cloud.
Tip
To accelerate project running, please set an ROI in From Depth Map to Point Cloud to avoid generating unnecessary point cloud parts.