Plan Motion Trajectory
The planning of motion trajectories is done in the Workflow panel. Drag a task from the skill list to the workspace in the middle and set the corresponding task parameter in the parameter panel on the right, and in the end, connect the tasks to implement the designed program functions.
In this example, you only need to implement simple picking and placing, and you can plan the motion trajectory as follows.

1. Set the Home point.
The Home point is the starting point of the robot’s motion trajectory, and it is a safe position. At this point, the robot should be away from the objects to pick and surrounding devices and should not block the camera’s field of view.
You can use a move task to set a target pose in the robot’s motion trajectory and the way to move to the pose. In the task, you can simulate any pose within the robot’s range of motion. Therefore, you can use move to set the Home point.
Click on Sync Robot on the toolbar, and the pose of the robot model will be synchronized with that of the real robot.
Use the teach pendant to move the real robot to the Home point you define.
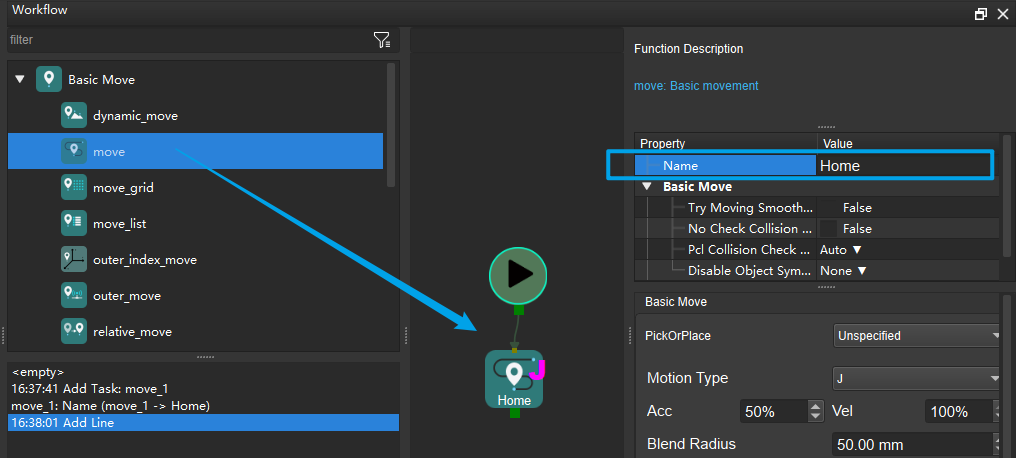
Find , and drag it to the workspace. This Move task will record the current pose of the robot.
Rename the task as Home.

2. Set the pick point.
The pick point should be the pose of the object to pick. So, you need to use tasks visual_look and visual_move to set the pick point.
visual_look is for triggering the Mech-Vision project and letting the project send the vision recognition result and point cloud to Mech-Viz.
visual_move is for moving the robot based on the vision recognition result.
Find and drag them to the workspace.
Parameter setting: Click on Get Vision Services, select the Mech-Vision project created before in the drop-down list of service names.
After the robot reaches the picking pose, it triggers the suction cup to pick the object (the end effector is the suction cup in this example).
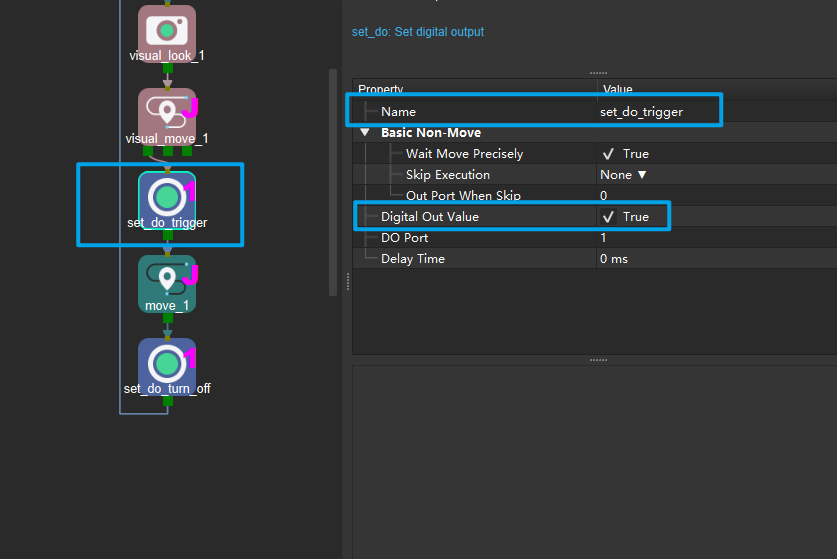
Use set_do to set the specified robot port signal to control the end effector.
Find , drag it to the workspace.
Parameter setting:
Change the task’s name to “set DO_ON”;
Set the DO value to True (when set to True, Mech-Viz will send a control signal to trigger the suction cup).

3. Set the placing point.
After the robot picks the object, it needs to move to a placing point you define and release the object.
Use the teach pedant to let the real robot move to a placing point you define. Then, you can drag a move task to the workspace to record the robot’s pose.
When the robot moves to the placing point, it needs to turn off the suction cup to release the object.
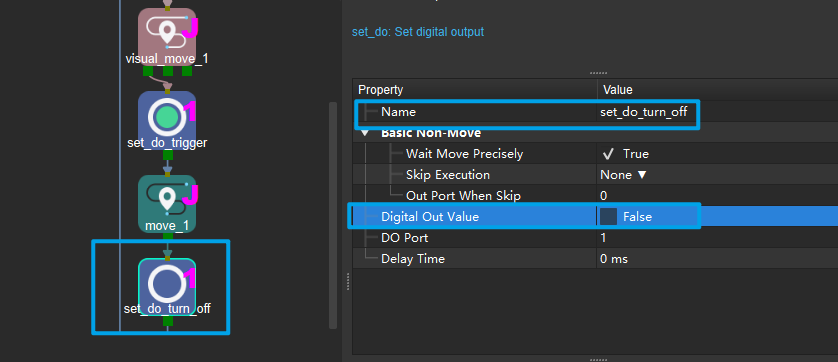
Find , drag it to the project editing area.
Parameter setting:
Rename the task as set_do_off.
Set the DO value to False (when set to False, Mech-Viz will send a control signal to turn off the suction cup).

4. Return to the Home point.
After releasing the object, the robot needs to return to the Home point.
Please connect the exit port of the task from the previous to the head port of the move task added when adding the Home point.

5. Simulate.
Hint
In the workspace, right-click and get the drop-down menu, and click on Format to align the tasks.
Click on Simulate to start simulating the motion trajectory of the robot.
Although the task built is logically correct, you can still find the following problems during actual simulations:
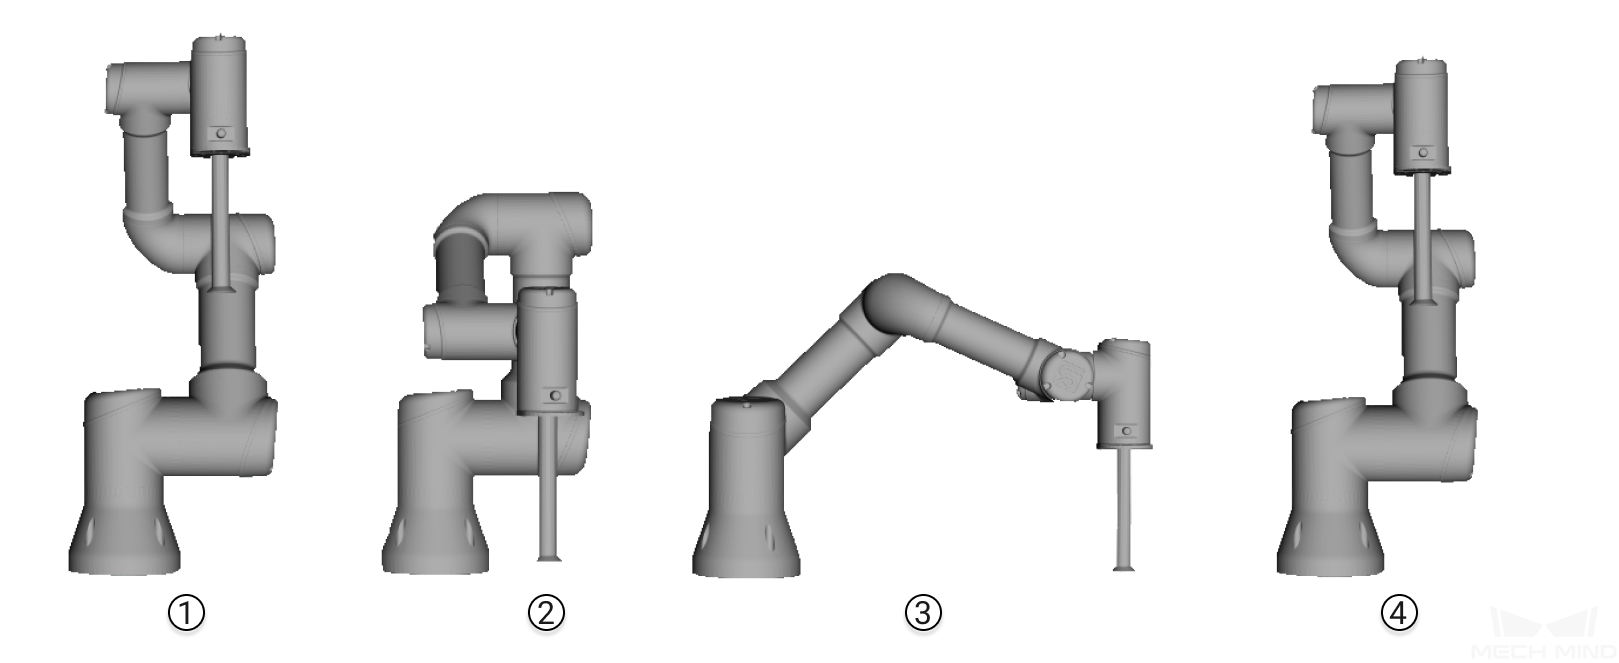
From the Home point to the pick point, the robot displays a large continuous movement range.
Moving to the next point immediately after sending the signal of triggering or turning off the suction cup makes it difficult for the robot to correctly perform picking and placing.
The robot can only pick or place an object by moving vertically above the object.
Please proceed to the next section to learn about how to optimize the robot’s motion trajectory.