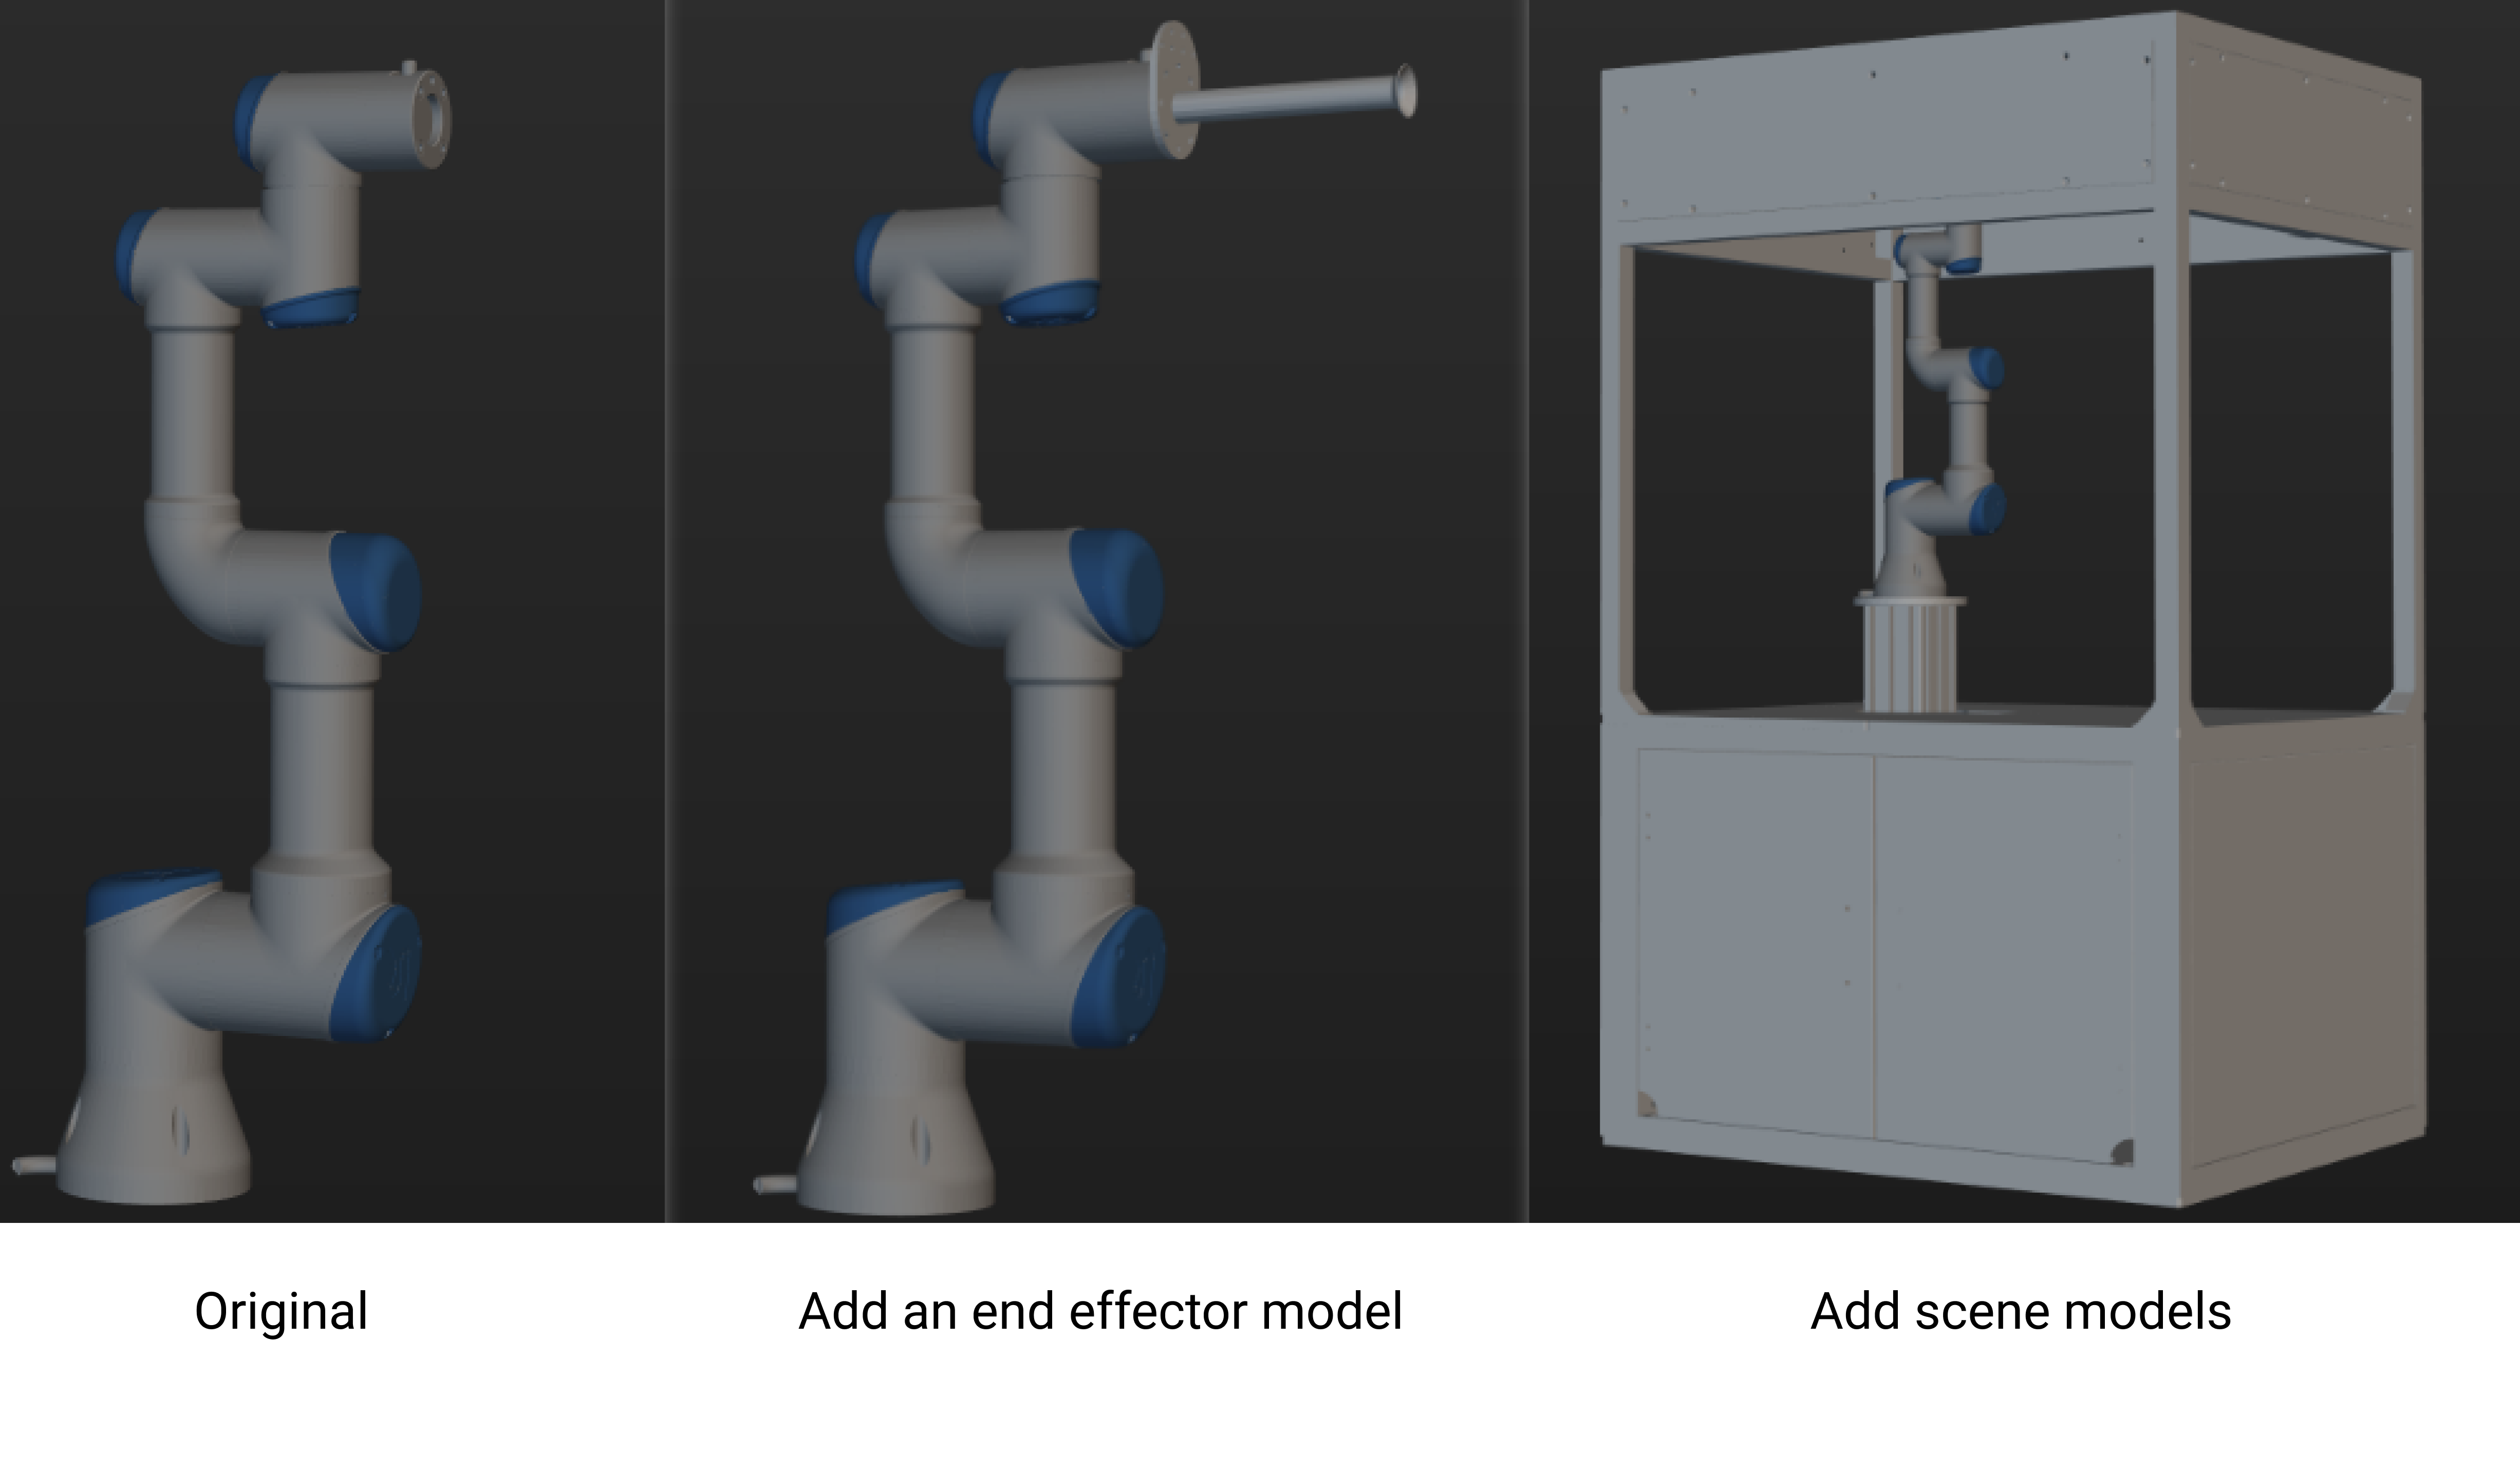
Add Scene and End Effector Models
1. Add the scene models.
The scene models usually make up the 3D model of the robot’s workstation.
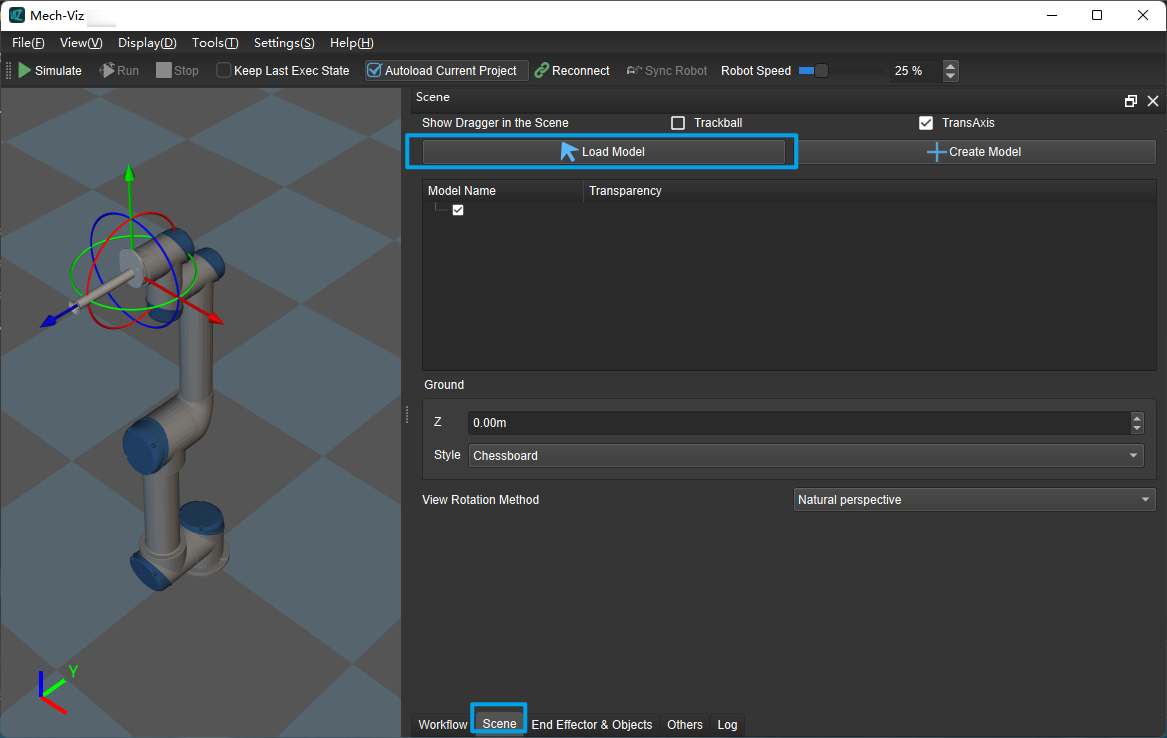
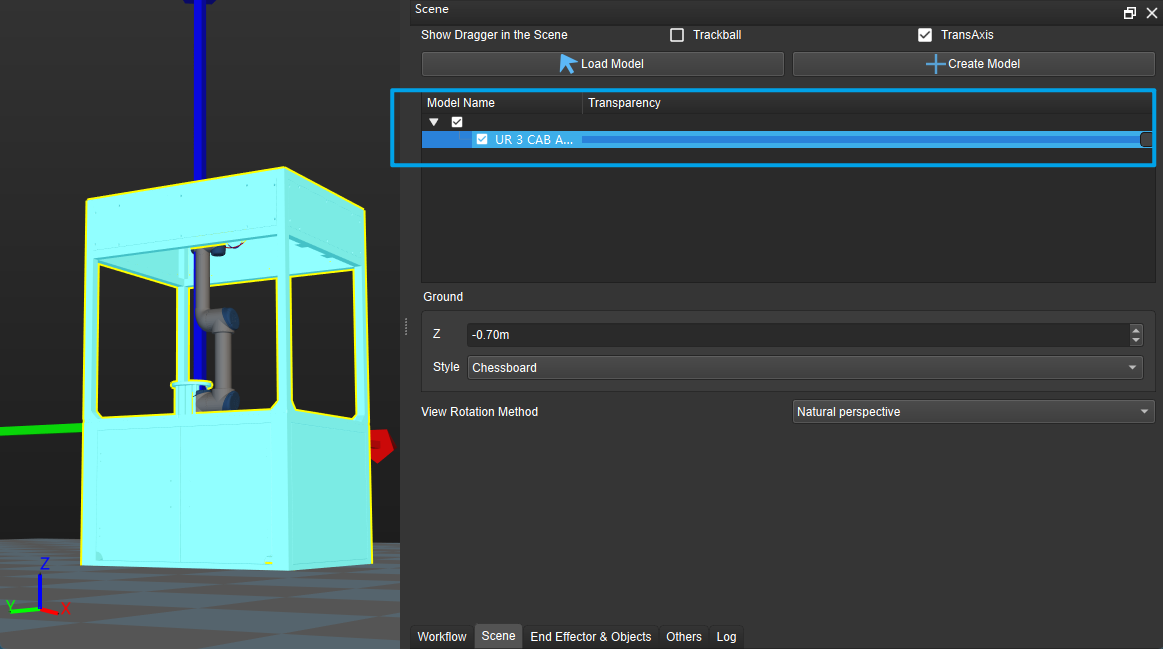
After loading the models, you need to adjust to fit the scene models to the floor.
To facilitate the planning of subsequent trajectories, so that the scene models do not block the robot model, you can reduce the transparency of the scene model by dragging the slider, and restore the default settings after the trajectory planning is completed.
2. Add a model for collision detection.
Below are the instructions for adding a model for collision detection.
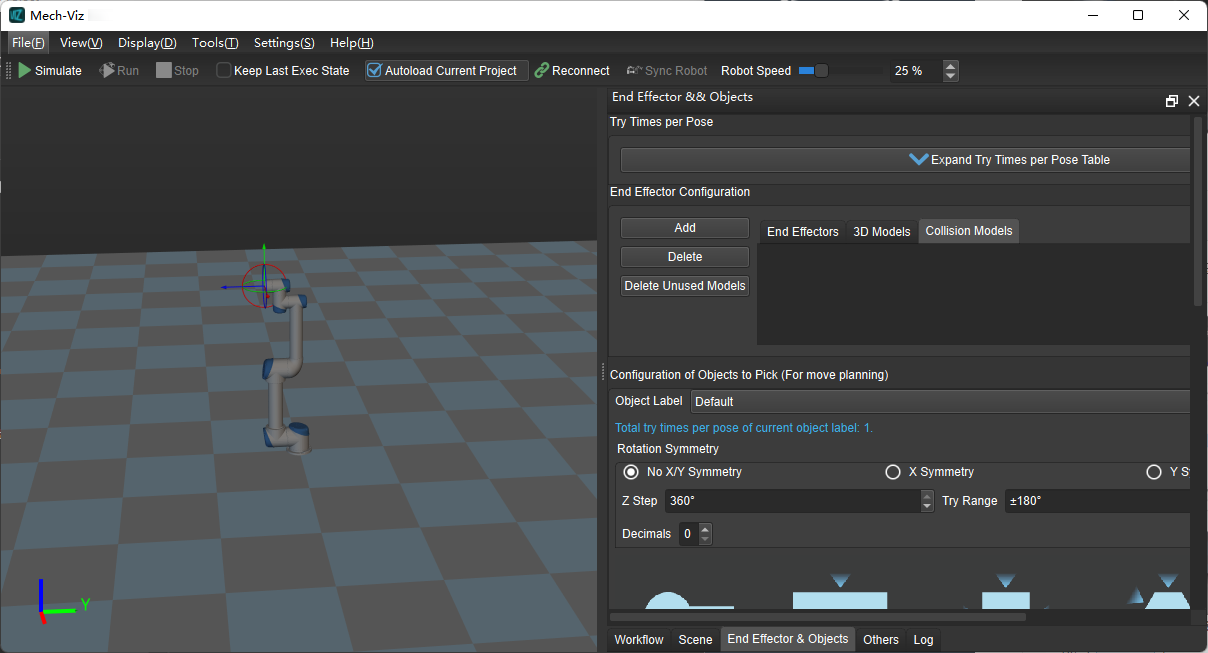
Select the tab End Effector & Objects at the bottom.
Click on Collision Models.
Click on Add.
Select the model you want to load.
Click on Open.
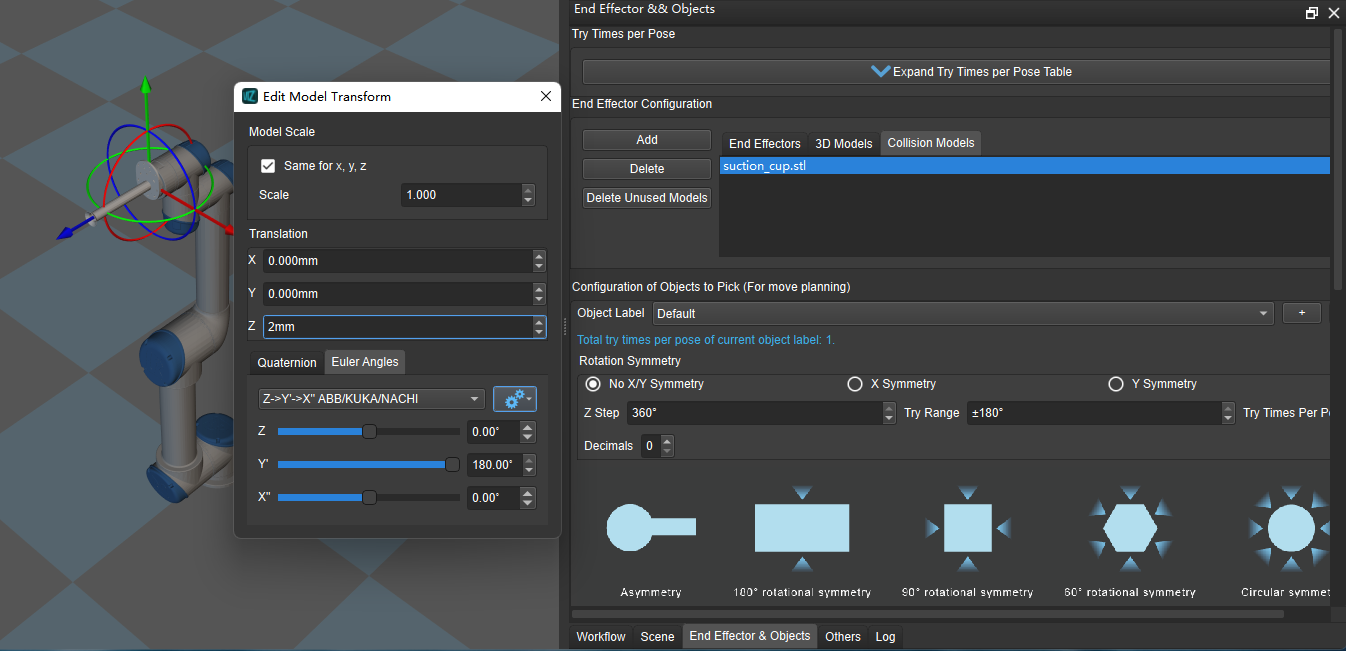
3. Edit model transformation.
Click on the loaded collision model to view its positional status in the simulation. As shown below, the model is obviously in the wrong position.

Double-click on the model and open the window for editing the model. By adjusting the parameters under Object Pose, you can put the model into a correct position, as shown below.
4. Add an end effector.
The model of the end effector is the model of the gripper you mount on the end of the robot’s arm.
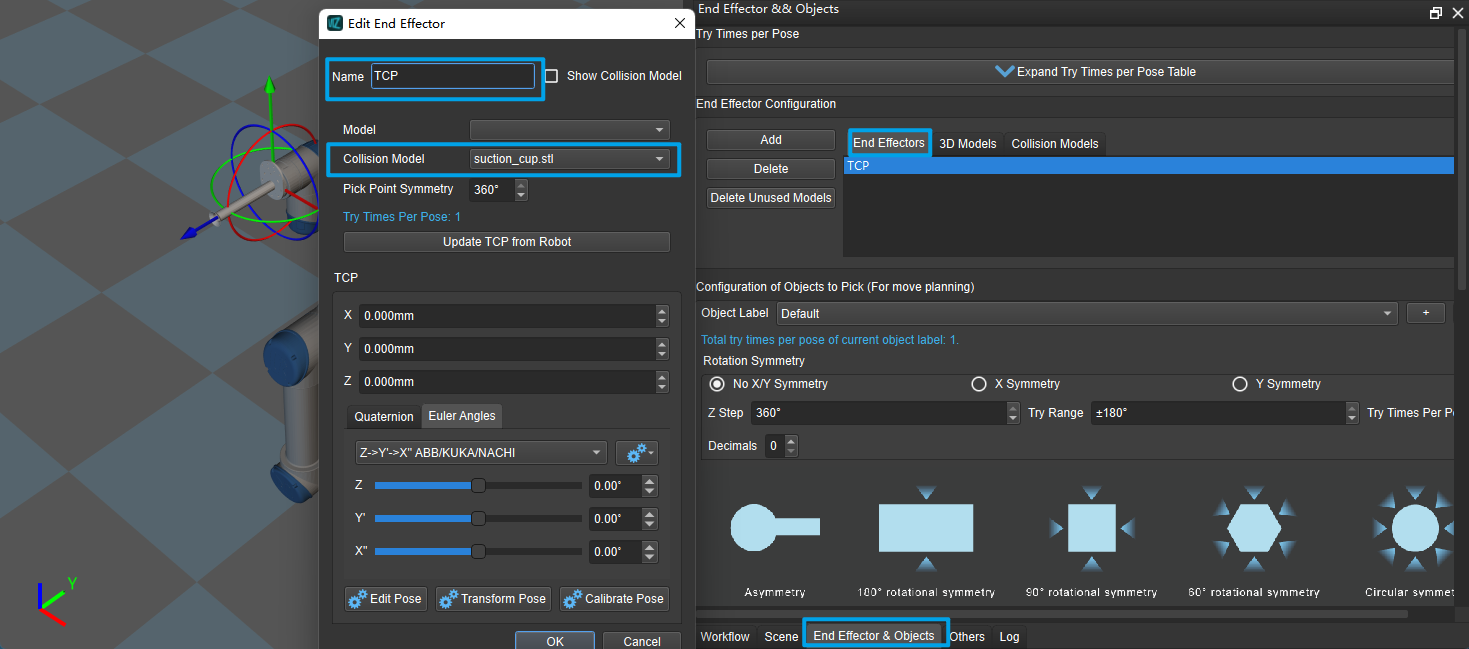
Click on the tab End Effector & Objects tab at the bottom;
Click on end effector;
Click on Add;
Select the collision model loaded in the previous step;
Enter a custom end effector name.
Click on OK .
5. Adjust the tool center point.
The tool center point is represented by the center of the dragger (the coordinate sphere at the end of the robot model).
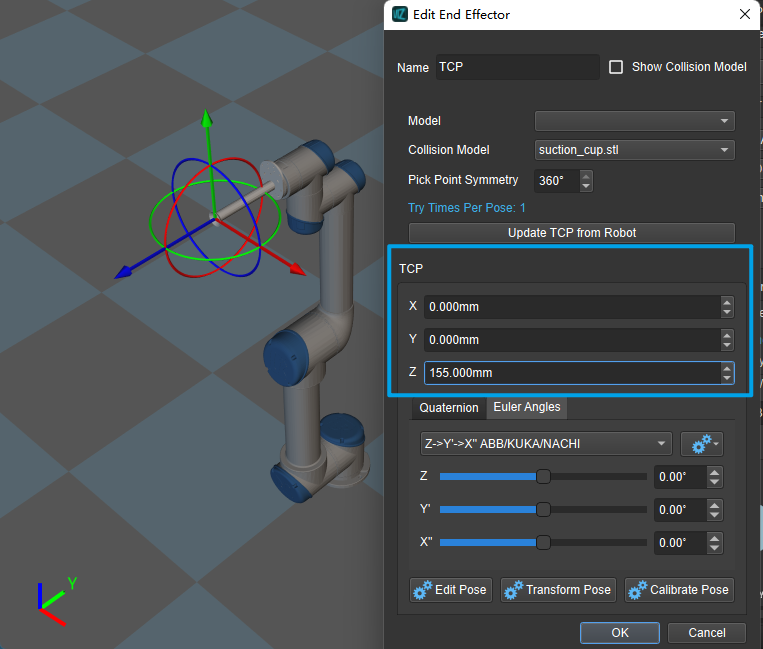
Double-click on the name of the end effector added in the previous step.
Modify the parameters under TCP, and adjust the tool center point to the end of the end effector.
Click OK to complete the setup.
At this point, you have completed the model related settings, please proceed to the next section.
