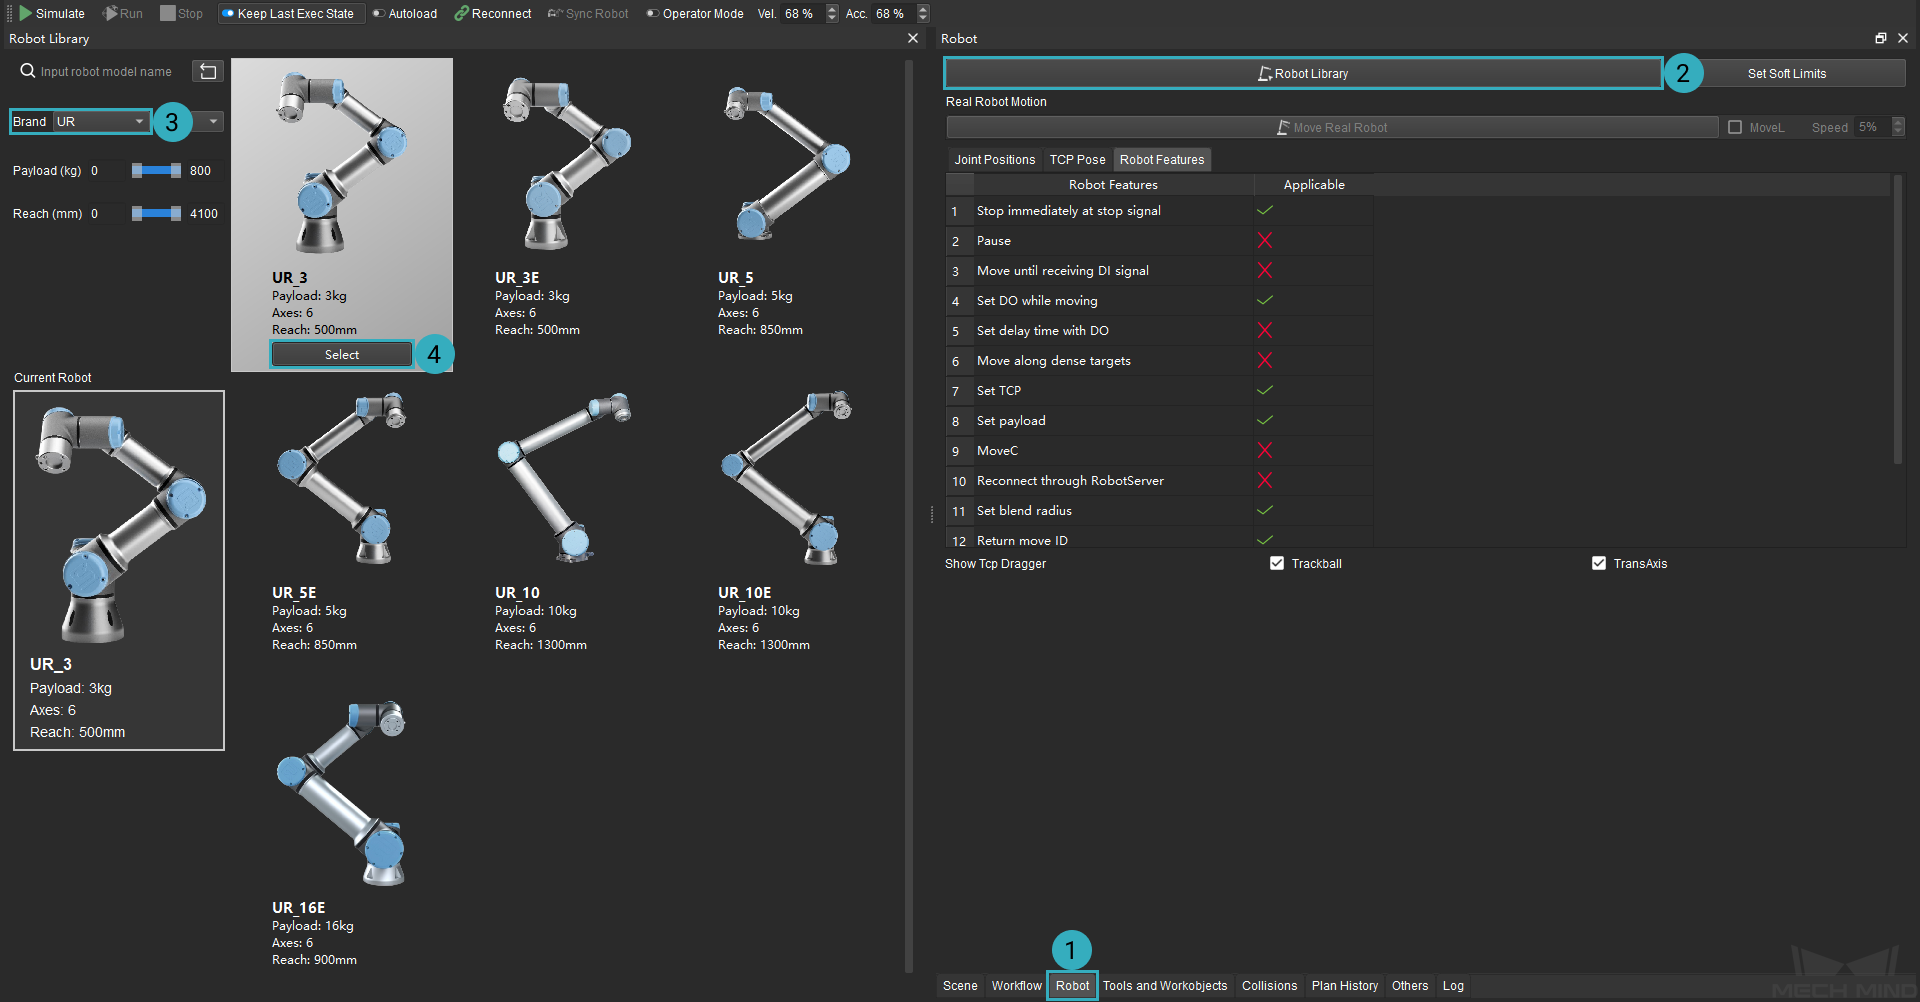
1. Select Robot Model
The first step of building a Mech-Viz project is import the robot model you use to Mech-Viz.
Attention
Starting from version 1.6.0, only robot models from the widely used brands are preloaded in Mech-Viz. All other robot models must be manually imported.
Please refer to Robot Model Package for instructions on downloading and importing robot model packages.
The example Mech-Viz project uses a UR_3 robot. In a real application, please select the robot that you actually use on-site.
After downloading and importing the robot model package, click on the Robot tab in the lower right.
Click on Robot Library at the top of the tab.
On the left side, select the robot brand from the drop-down menu of Brand, or use the search box above it.
Select the robot model.

In the menu bar, click on or use the shortcut Ctrl + S to save the changes to the project.
Attention
While building and configuring the project, remember to save the changes promptly!
Click on
 in the toolbar.
Note
The project must be set to autoload for it to be registered in Mech-Center.
To control the real robot, complete the following in Mech-Center:
Open Mech-Center, and click on
.
The robot is successfully connected if:
A message saying Robot: server connected to the robot shows up in the Log panel, and
shows up in the Service Status panel.