FANUC Calibration Program
This section introduces the process of calibrating the camera extrinsic parameters using the calibration instruction.
The process consists of 4 steps:
Before proceeding, please make sure that:
You have loaded the Standard Interface program onto the robot and can establish communcation with Mech-Center.
You are familiar with the contents in Hand-Eye Calibration Guide.
The calibration process introduced in this section is applicable to scenarios where standard interface is used to communicate and the extrinsic parameters need to be calibrated multiple times.
Calibration Process
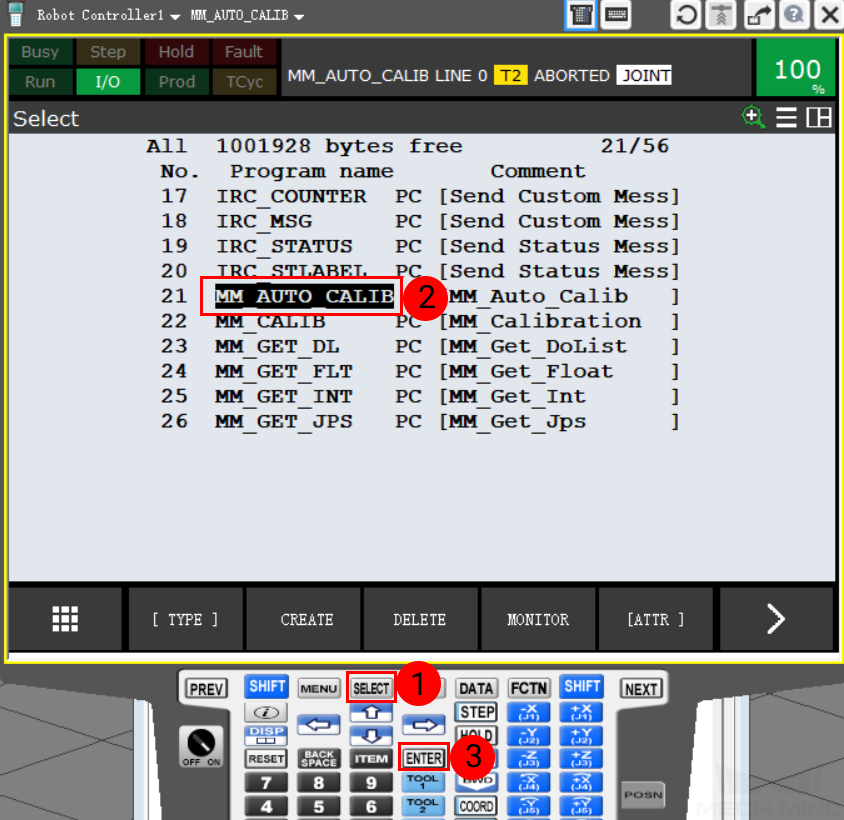
Select the Calibration Program
Press the SELECT on the teach pendant, and then select MM_AUTO_CALIB and press ENTER to open the program.
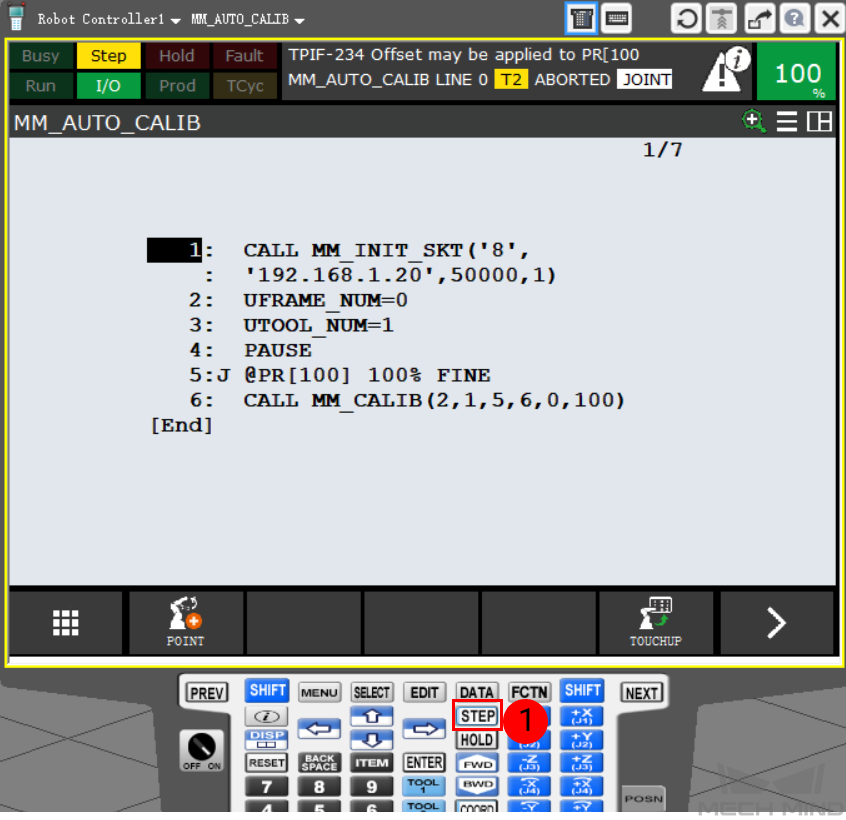
Teach the Calibration Start Point
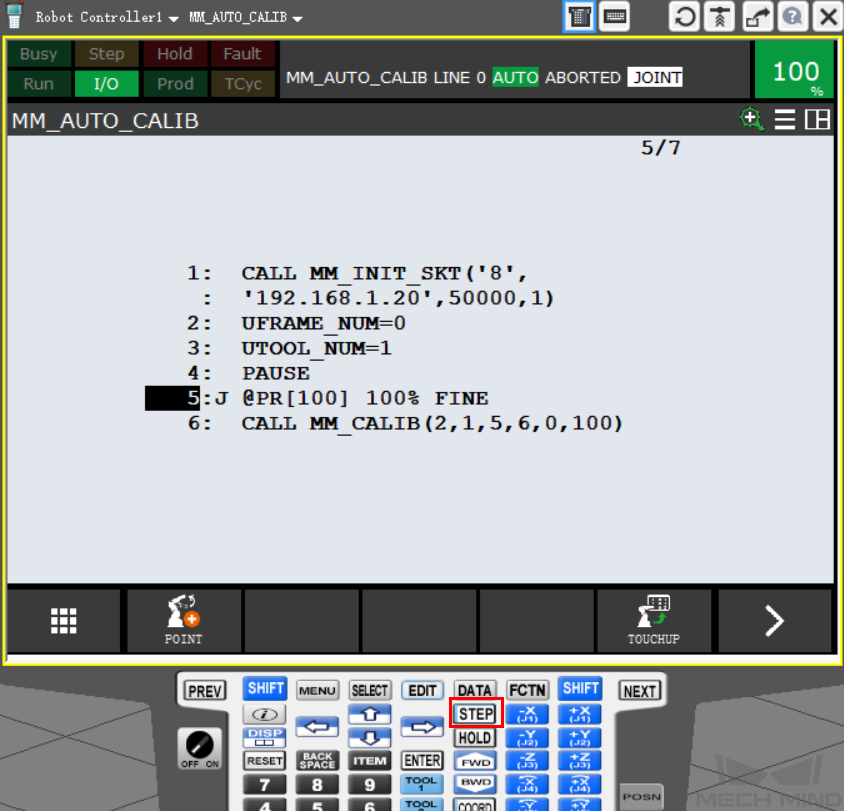
After opening the program, press the STEP key on the teach pendant to switch into Step mode. Then the Step icon on the screen will turn yellow.
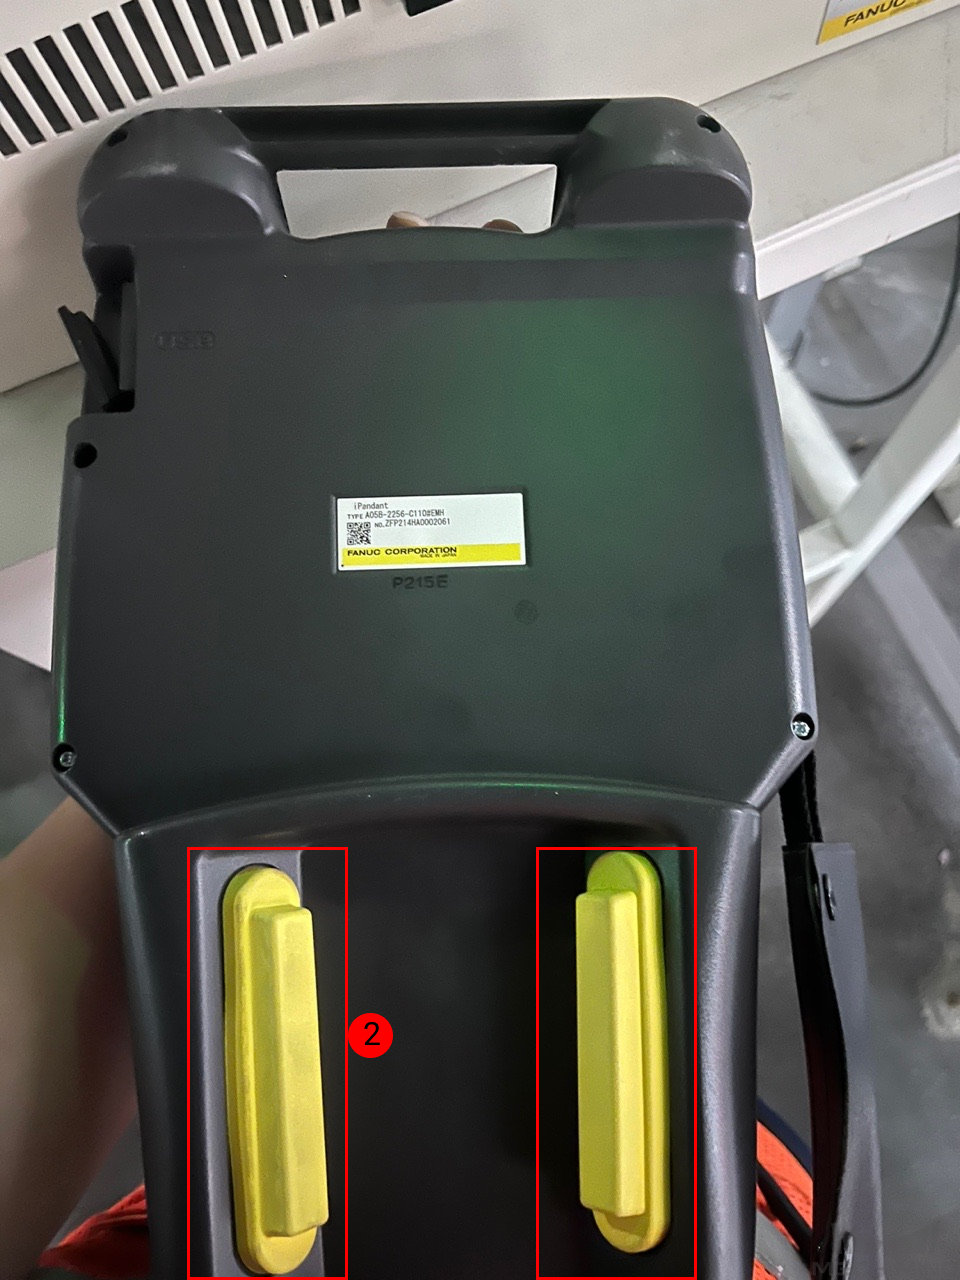
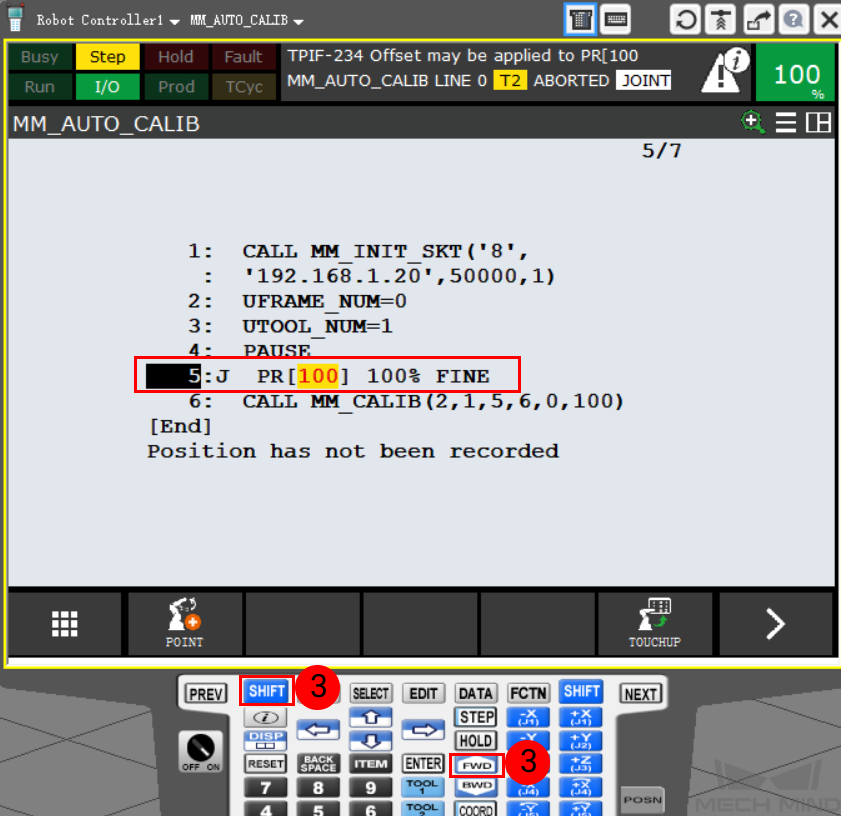
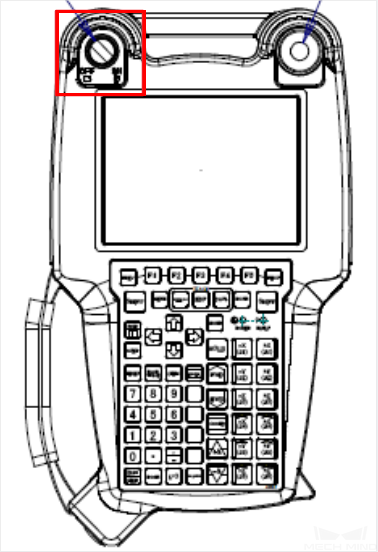
Move the cursor to the 5th line. Press and hold either of the deadman switches on the back of the teach pendant, and then press the SHIFT and FWD keys at the same time to run the command on the 5th line, as shown below.
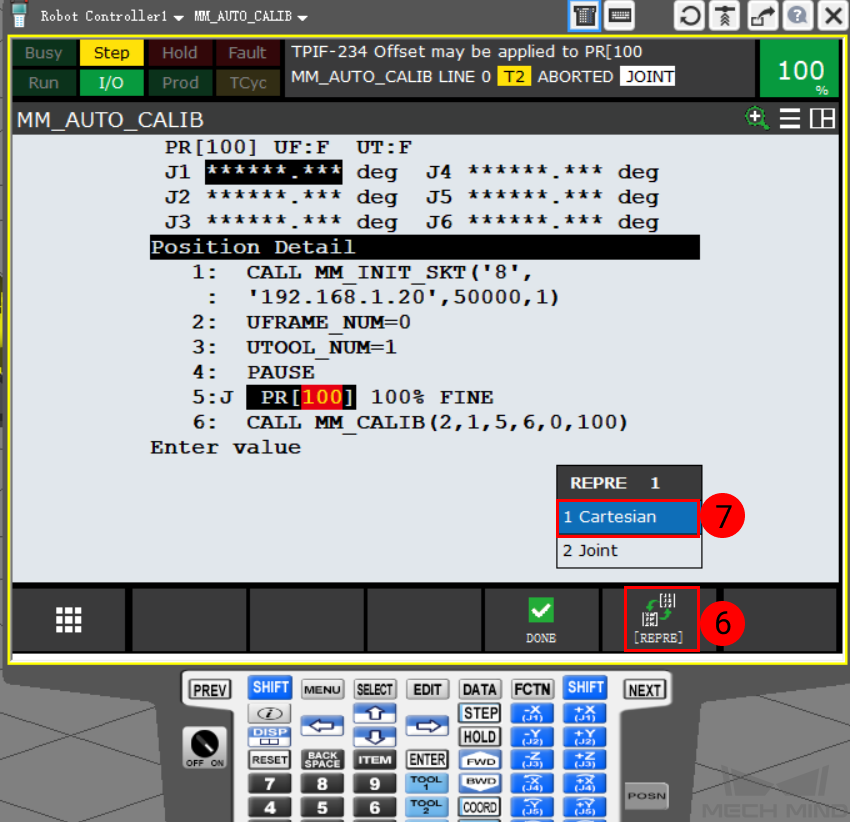
Select [100], and go to .

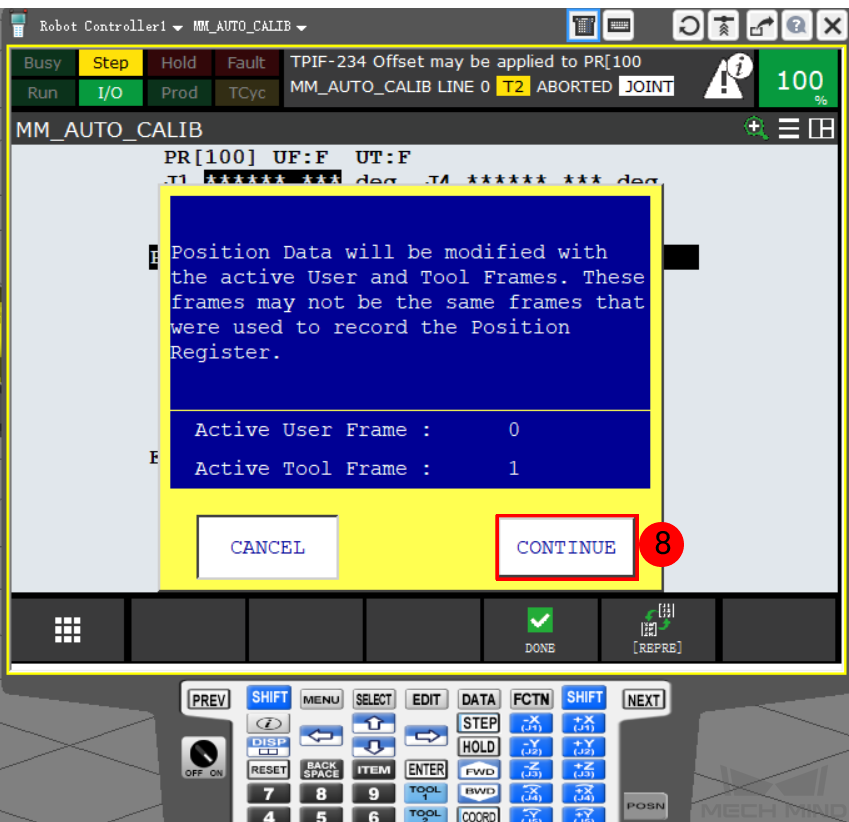
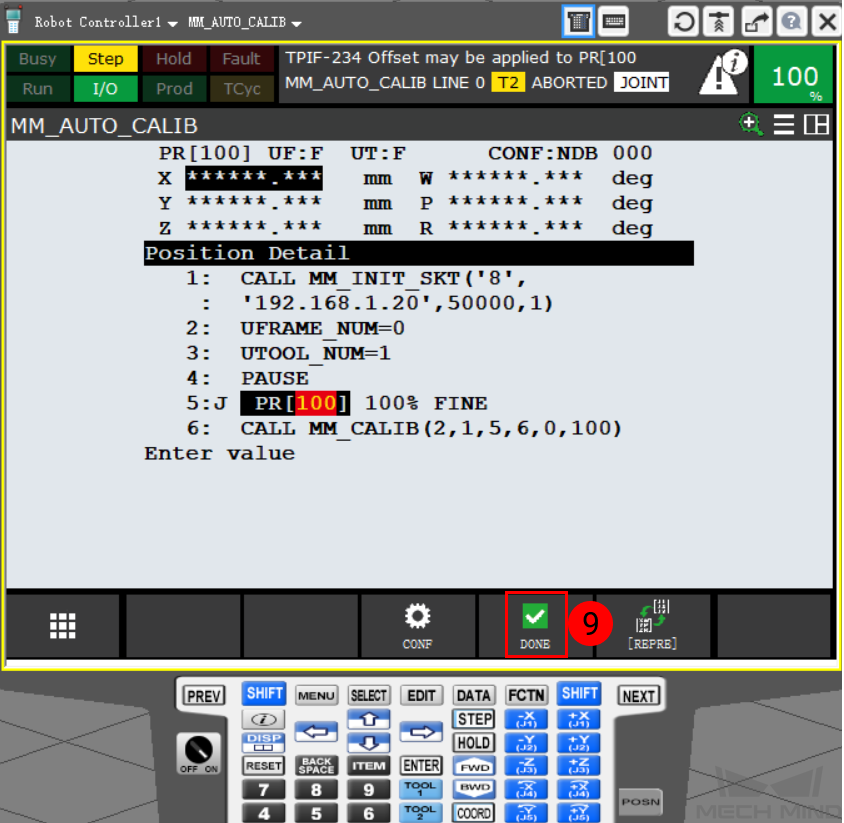
Press on Continue in the pop-up window and then press on DONE.
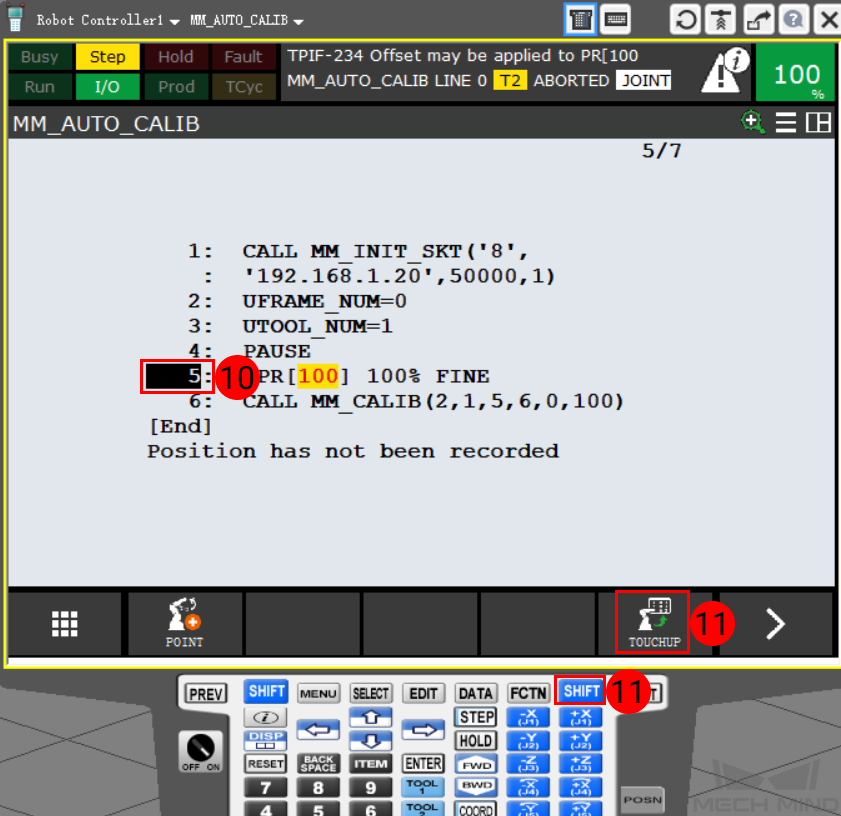
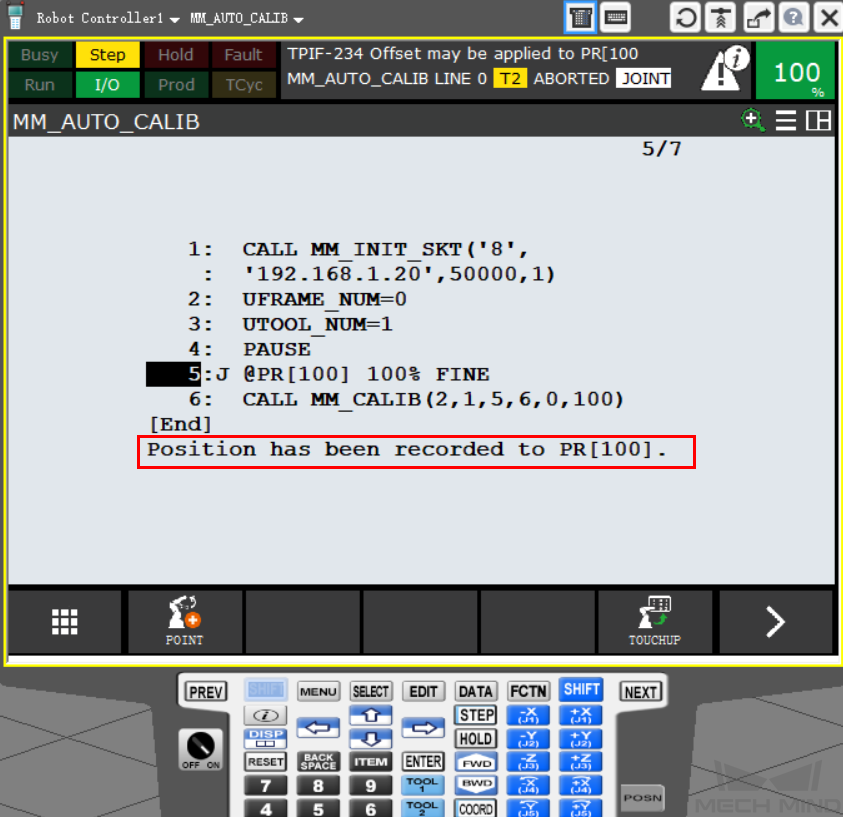
Select the number at the beginning of the 5th line, as shown below. Then press the SHIFT key and TOUCHUP on the screen together. A message “Position has been recorded to PR[100]” will appear.
Press STEP key on the teach pendant to exit the Step mode, then the Step icon on the screen will turn grey.
Run the Calibration Program
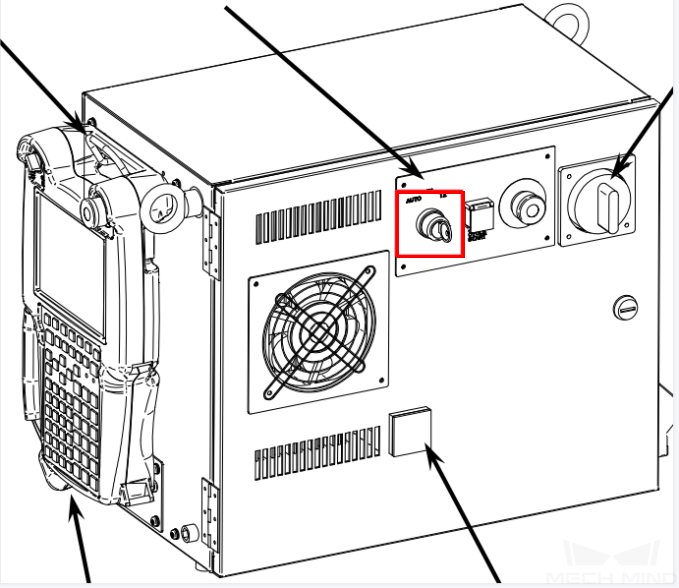
Swith to AUTO mode: turn the switch on the teach pendant to OFF and then turn the switch key on the controller to AUTO, as shown below.
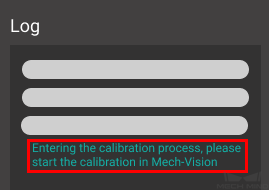
Press the green button on the controller to auto-run the calibration program. If the following message appear in Mech-Center Log panel, you can start calibration in Mech-Vision.
Start Calibration in Mech-Vision
In Mech-Vision, go to .
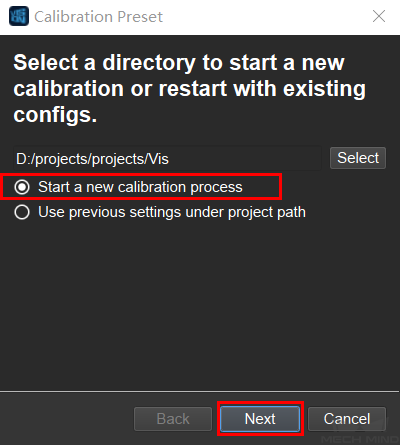
Follow the instructions in Mech-Vision to complete the following configuration:
Select Start a new calibration process;
Select the camera mounting method;
Select Multiple random board poses for adding calibration points.
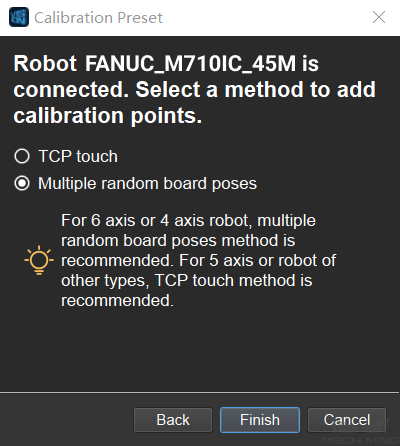
Note
If after selecting the camera mounting method, the window says No robot is connected, the connection between the robot and Mech-Center is not properly established. Please re-run the robot program.
Follow the instructions in Mech-Vision to finish the calibration.
Note
In 5 Add Marker-Images and Poses after you click on Move Robot along Trajectory and Add Board Images, if the robot does not reach the next calibration point within 60 seconds, Mech-Vision will report a timeout error and stop the calibration process. In such case, please select and run MM_AUTO_CALIB on the teach pendant again, and restart the calibration process in Mech-Vision.