KUKA Setup Instructions
This section introduces the process of loading the robot full-control program onto a KUKA robot.
The process consists of 4 steps:
Please have a flash drive ready at hand.
Check Controller and Software Compatibility
Compatibility requirements are as follows:
Controller model: KUKA KR C4
Controller system software version: KSS 8.2 to 8.6
Add-on software package: Ethernet KRL (V 2.2.8 or above)
Mech-Center: latest version recommended
Note
All teach pendant actions in this chapter are performed on KSS 8.6. The specific steps and menu selections may differ slightly in older versions of system software.
Setup the Network Connection
Hardware Connection
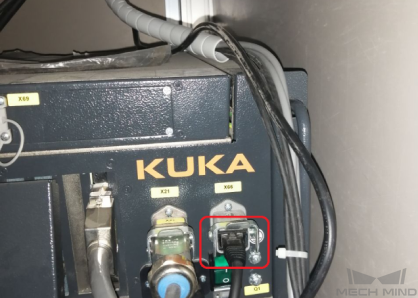
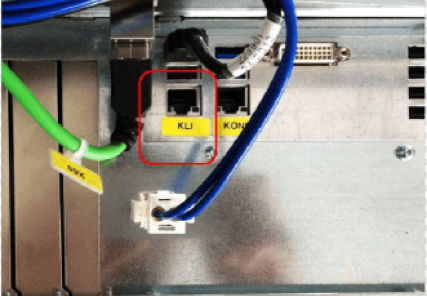
Plug the Ethernet cable into:
An Ethernet port on the IPC
The X66 port on KR C4 compact and KLI port on other KR C4 controllers
IP Configuration
To allow communication between the IPC and the robot controller, both must have an IP address in the same subnet. This means that the first three numbers of the IP addresses should be the same. For example, 192.168.100.1 and 192.168.100.2 are in the same subnet.
Check the IP address of the IPC: please use the ipconfig command in Command Prompt or PowerShell to check the IP address.
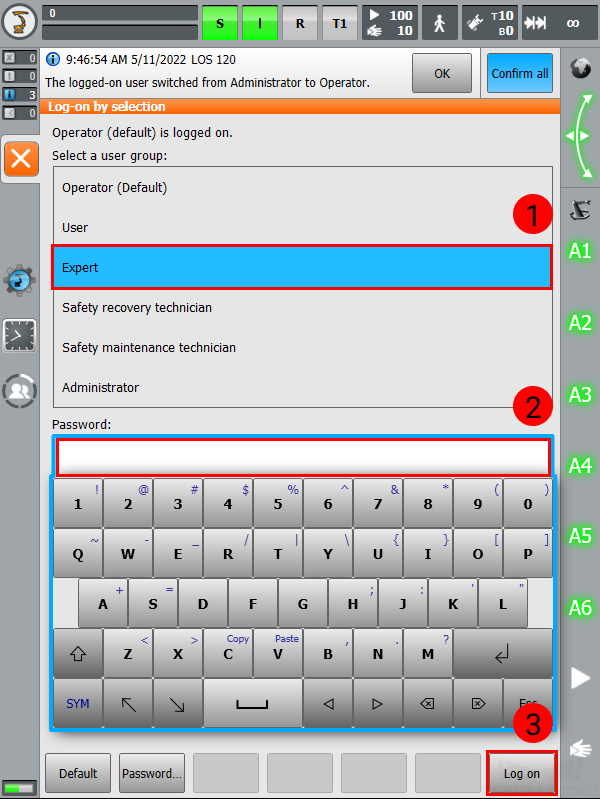
Switch to expert mode:
Press on
 , and then select .
Select Expert, enter the password (the default password is kuka), and press on Log on.
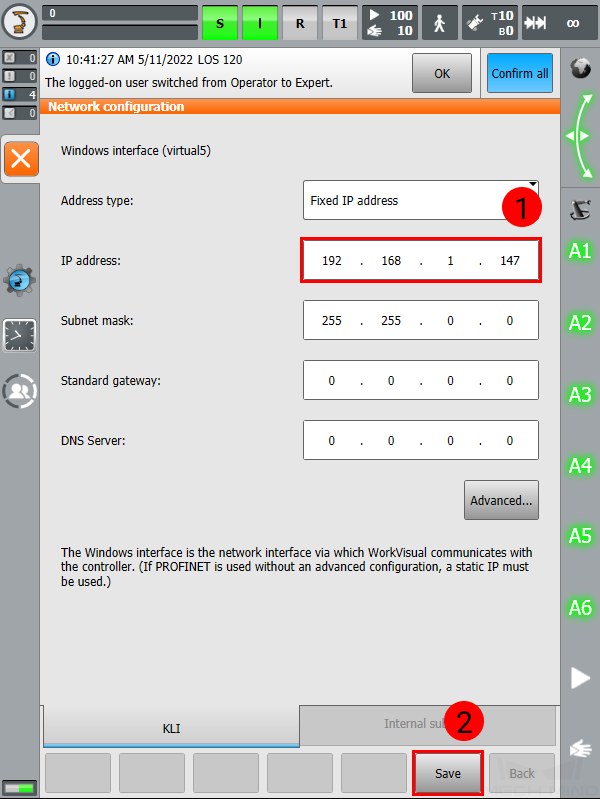
Press on
, and then select .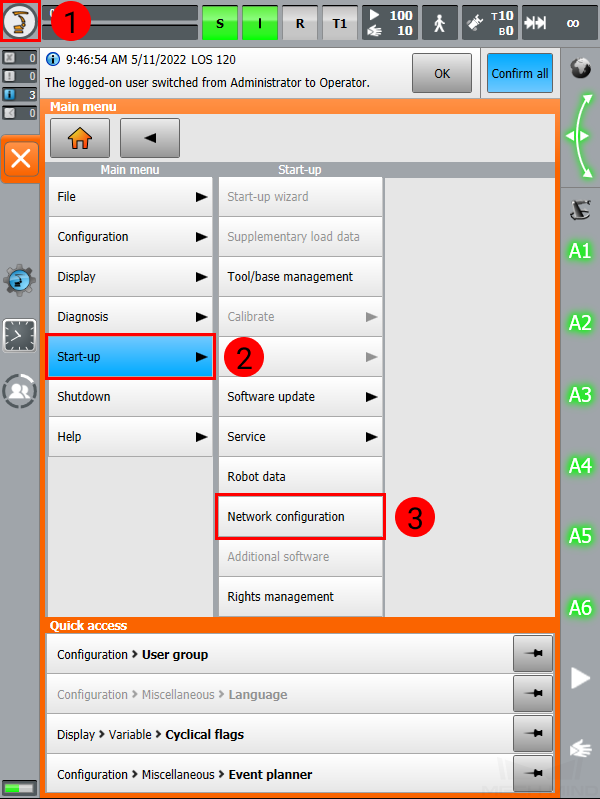
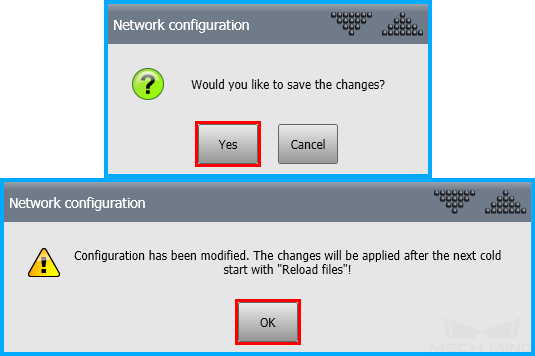
Input an IP address in the same subnet as that of the IPC, and then press on Save. In the next two pop-up windows, press on Yes and OK, respectively.
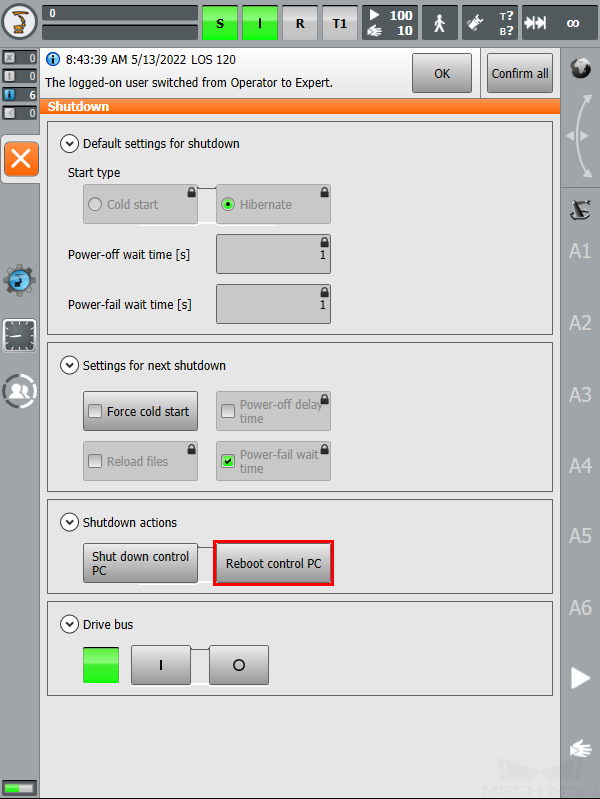
Restart the robot to finish setting the IP address:
Press on
, and select Shutdown.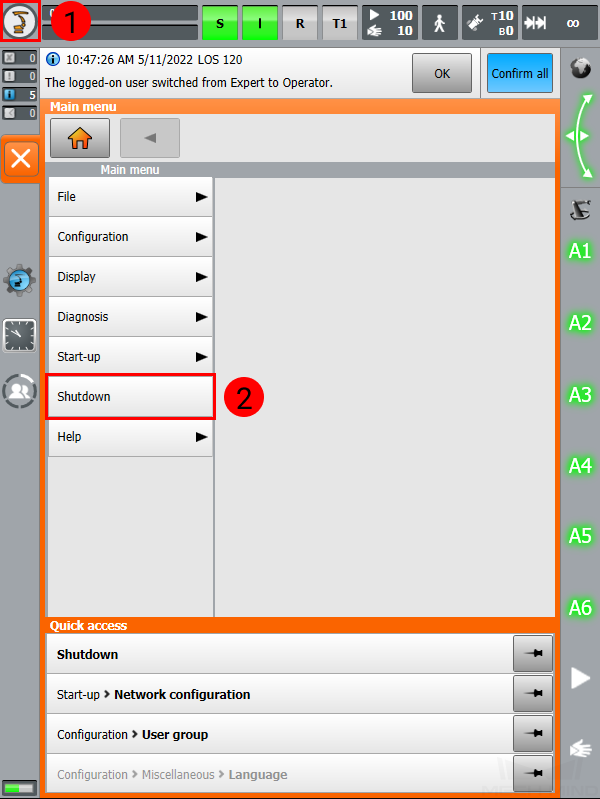
Press on Reboot control PC.
Load the Program Files
Prepare the Files
The program files are stored in the installation directory of Mech-Center. The default directory for Mech-Center 1.5.2 is C:/Mech-Mind/Mech-Center.
Navigate to xxx/Mech-Center/Mech-RobServ/install_packages/kuka/kuka_new, and copy the following files to your flash drive.
mm_motion.xml
mm_status.xml
mm_server.dat
mm_server.sub
motion_control.src
mainmodule.src
mainmodule.dat
Load the Files to the Robot
Note
Make sure you have switched to expert mode on the teach pendant. For instructions, see step 2 in IP Configuration.
Plug the flash drive to the controller.
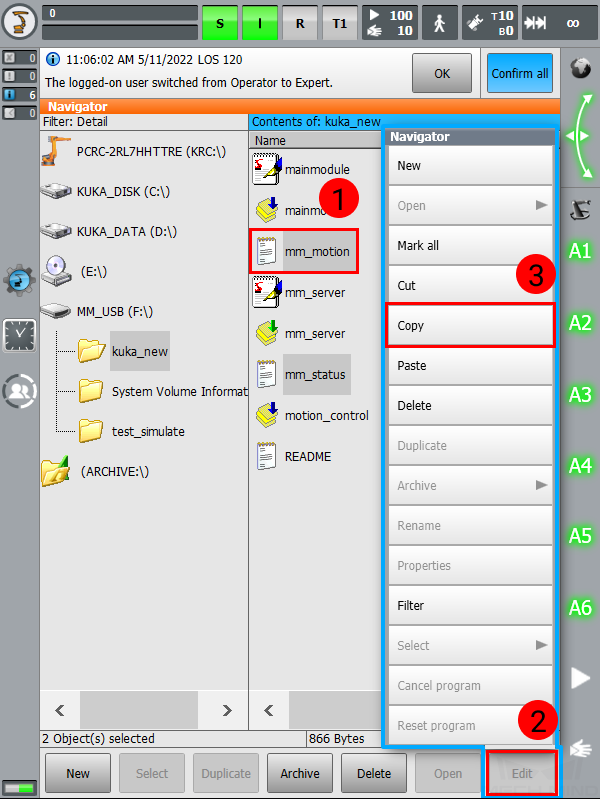
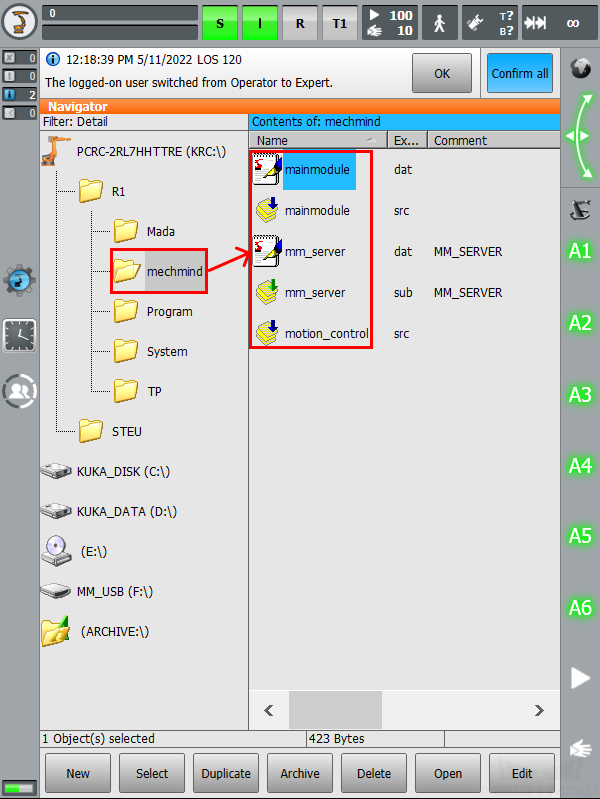
Select the flash drive, and locate the above files.
Select mm_motion.xml, press on Edit, and then select Copy.
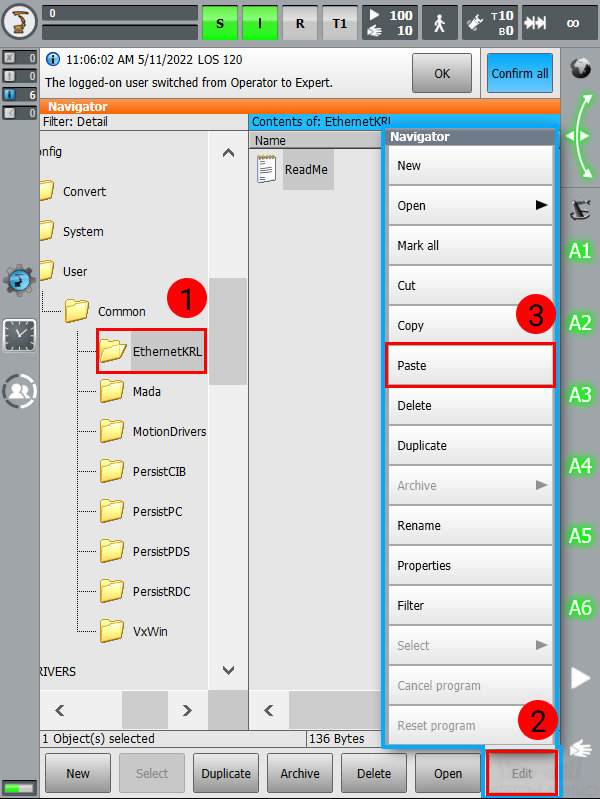
Navigate to C:/KRC/ROBOTER/Config/User/Common/EthernetKRL, press on Edit, and then select Paste.
Navigate back to the flash drive, and repeat steps 3 and 4 for mm_status.xml.
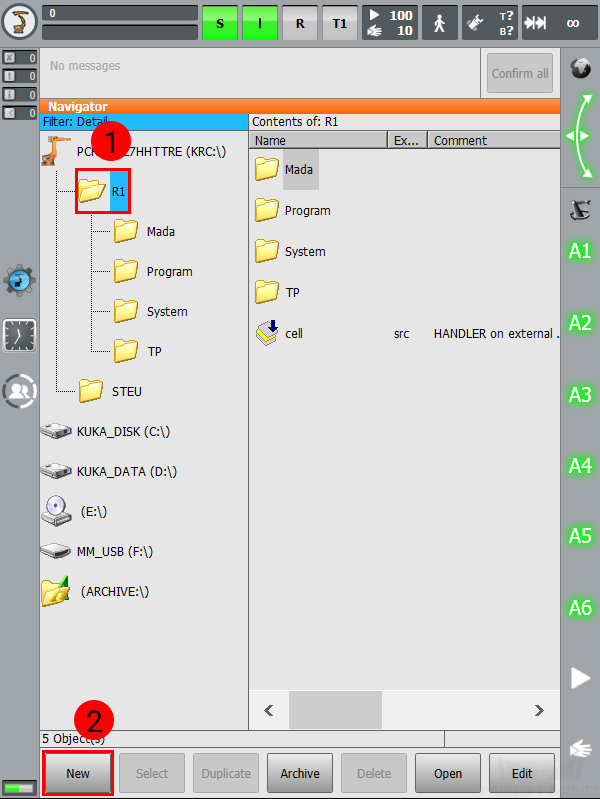
Navigate to KRC:/R1, and press on New.
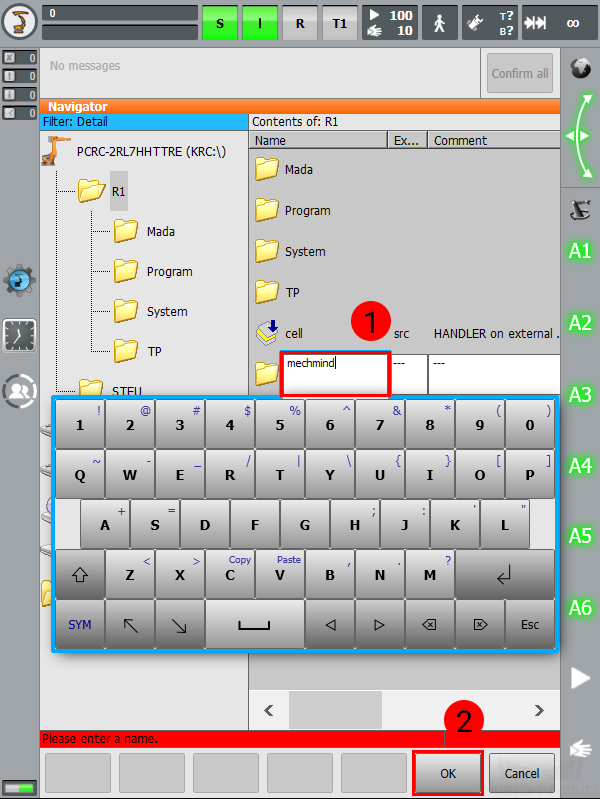
Input mechmind for the folder name, and press on OK.
Navigate back to the flash drive, and copy and paste the other 5 files to KRL:/R1/mechmind.
Note
Long-press and drag to select multiple adjacent files.
Set Autostart for Background Porgram
Note
Make sure you have switched to expert mode on the teach pendant. For instructions, see step 2 in IP Configuration.
Press on
 and then Display/Assign.
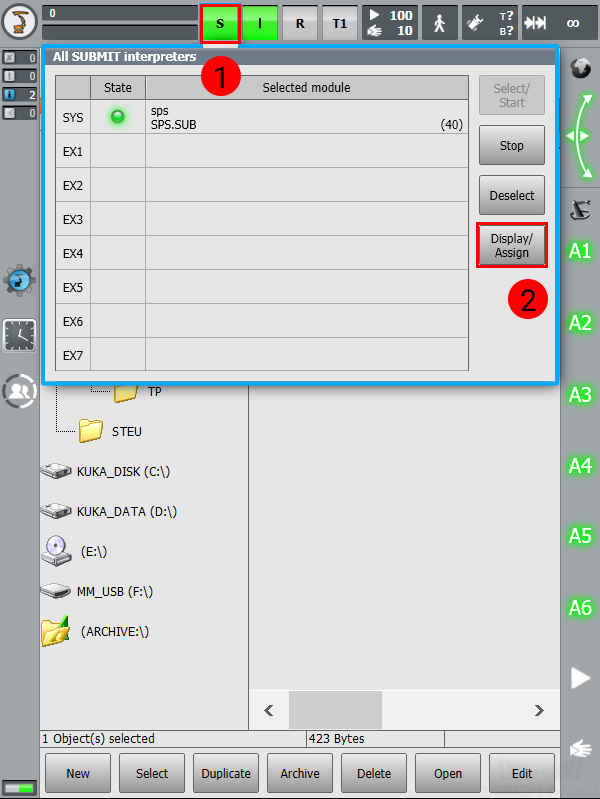
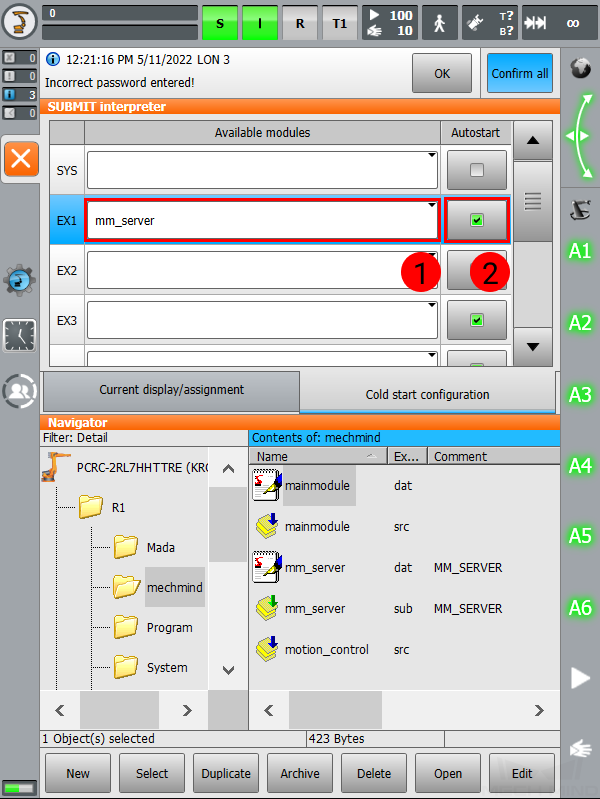
Press on Cold start configuration, and then press on the text box to the right of SYS.
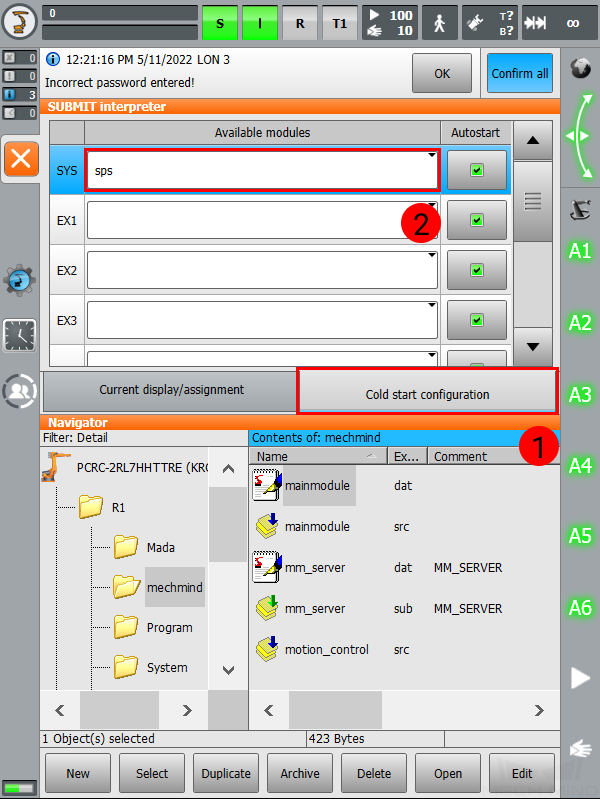
Select the blank in the drop-down menu, and then press on the check-box in Autostart to uncheck it.
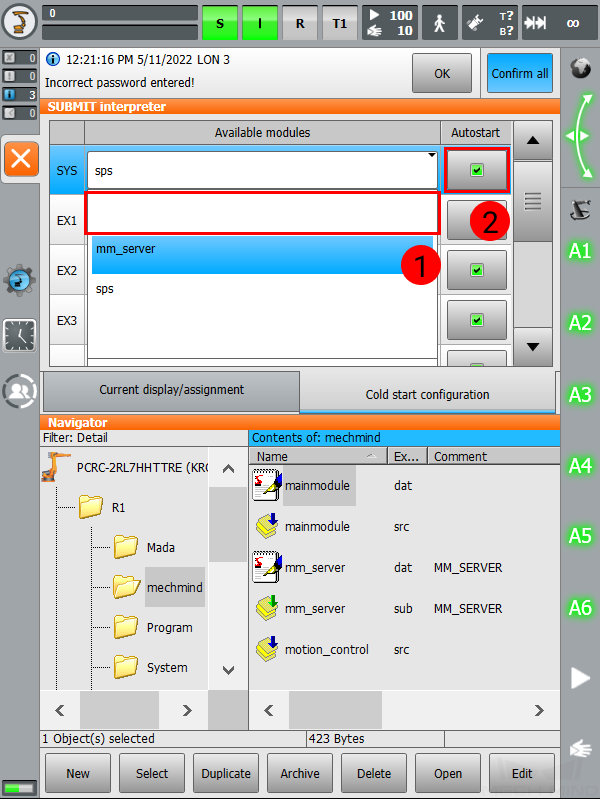
Similarly, select mm_server from the drop-down menu for EX1, and make sure Autostart is checked.
Press on Current display/assignment, press on the text box to the right of SYS, and then press Deselect.
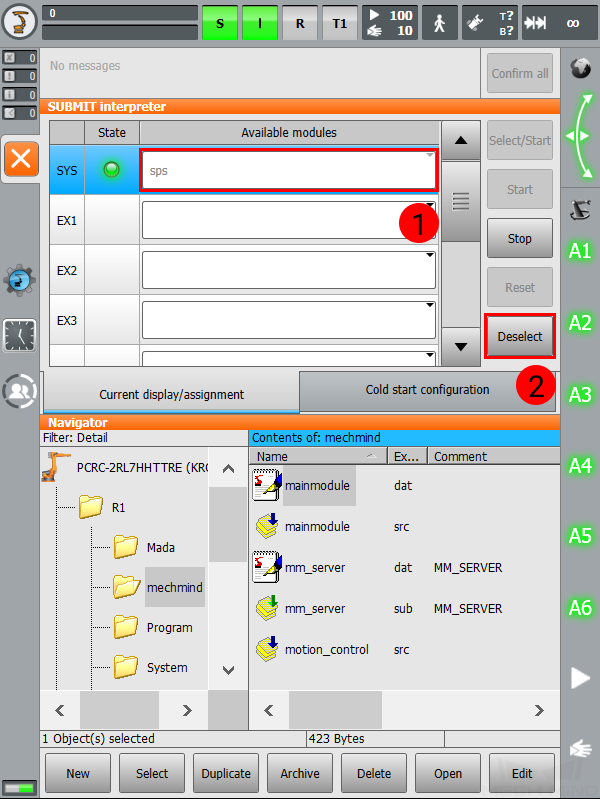
Press on the text box to the right of SYS again, and select the blank in the drop-down menu.
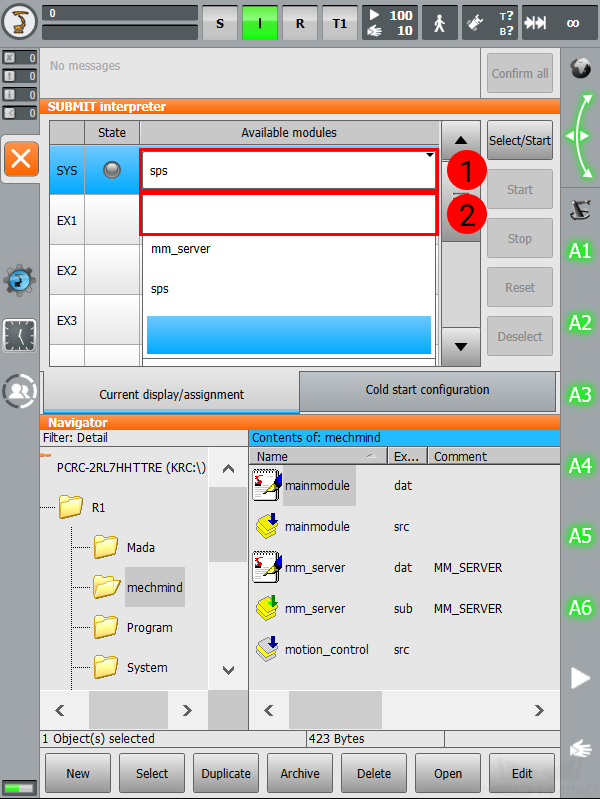
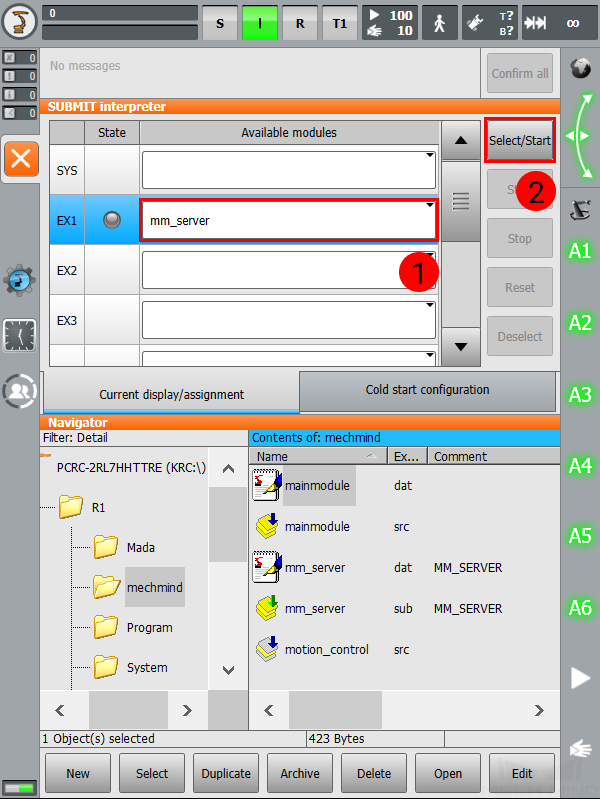
Similarly, select mm_server from the drop-down menu for EX1, and press on Select/Start.
Select Foreground Program
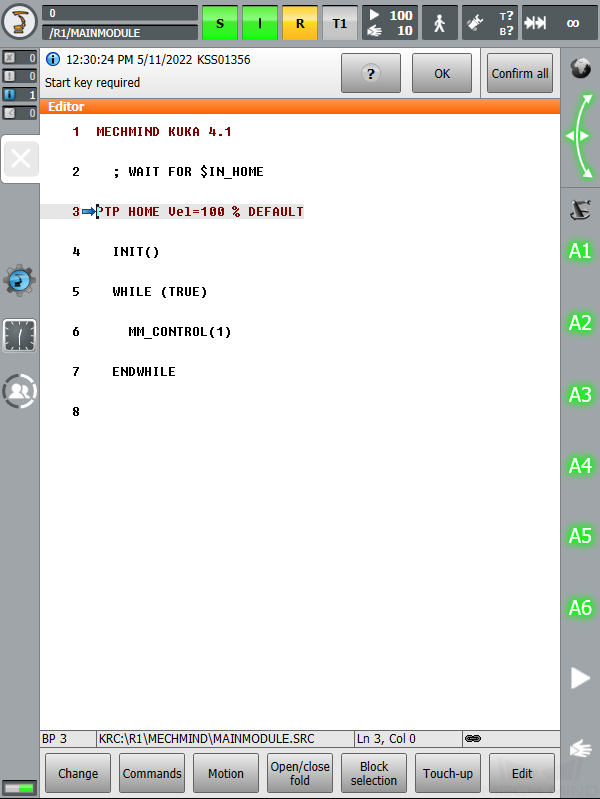
Open the mechmind folder, select mainmodule.src, and then press on Select.
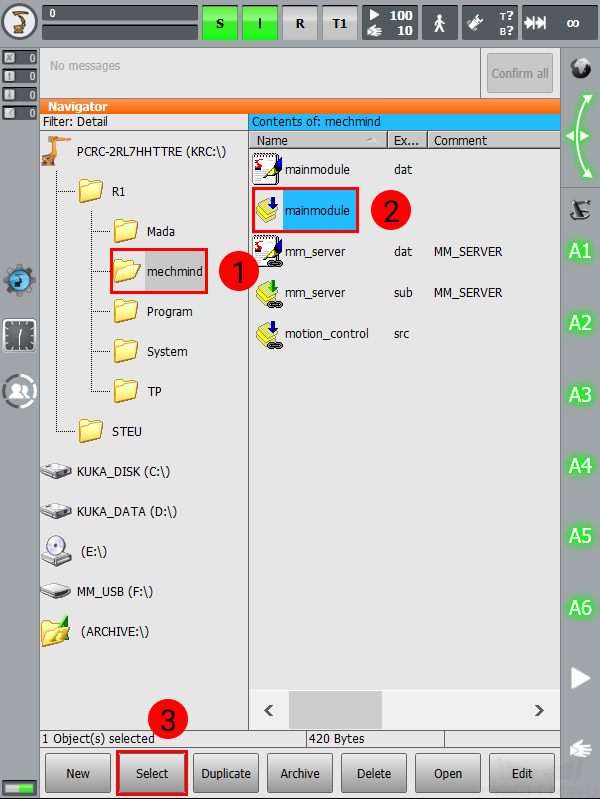
The following should appear on the screen.
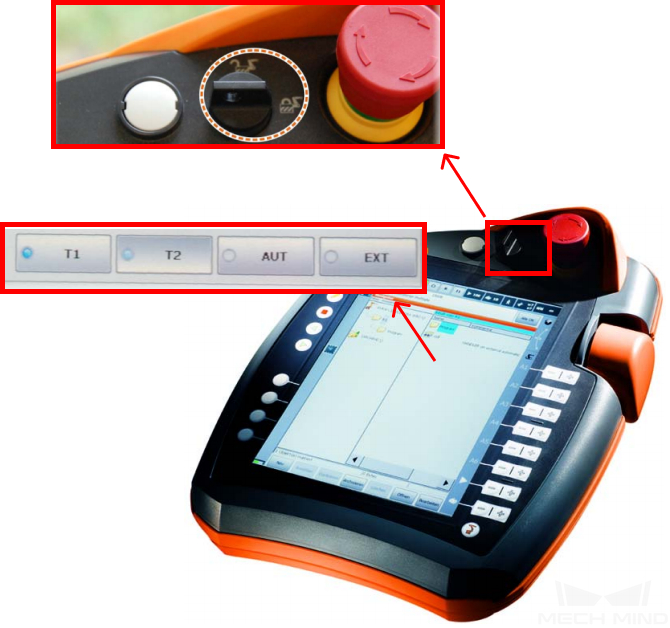
Run Program in AUT Mode
Turn the key switch to horizontal, select T1 on the screen, and then turn the switch back to vertical.
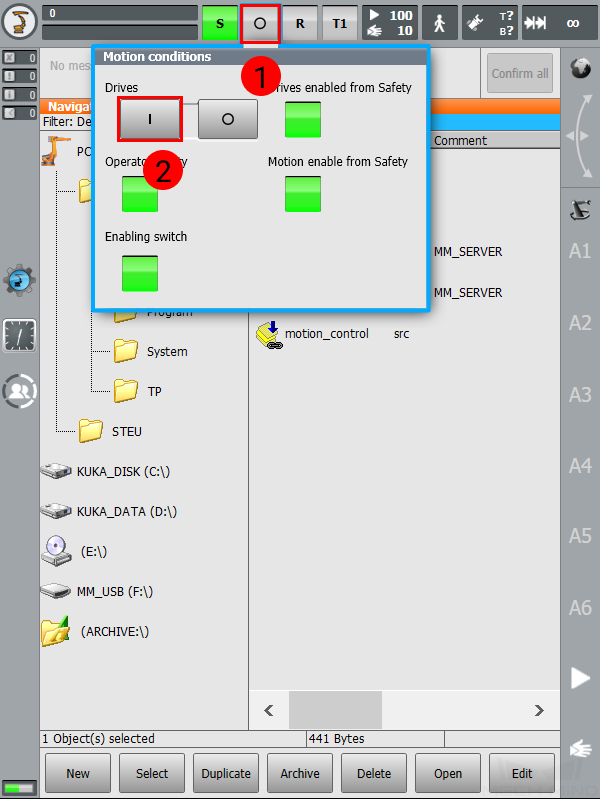
Check the icon to the right of
:If it looks like
 , then skip this step.
If it looks like
 , then press on it and select
  in the drop-down window.
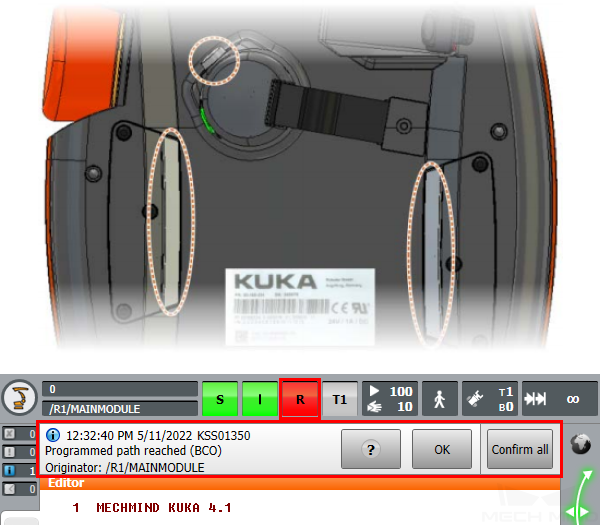
Press on the enabling switch (either one of three) on the back of the pendant and
 on the front at the same time to move the robot back to Home position. When the screen displays a message saying Programmed path reached (BCO), and
  turns red, release the enabling switch and .
Note
Set an appropriate speed for the robot before moving it, and observe its motion carefully to avoid accidents.
Switch to AUT mode as described in step 10, and press on
to start running the full-control program ( should turn green).
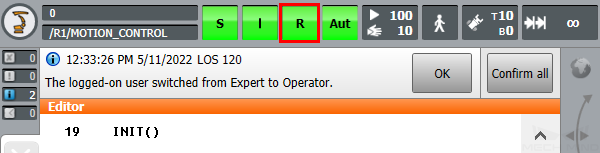
Test Robot Connection
Please refer to Test Robot Connection for detailed instructions.