ELITE Setup Instructions
This section introduces the process of setting up full control of an ELITE robot.
Check Controller and Software Compatibility
Controller software version: 2.19.2 or lower
Note
See step 2 in IP Configuration for instructions on checking the software version.
Setup the Network Connection
Hardware Connection
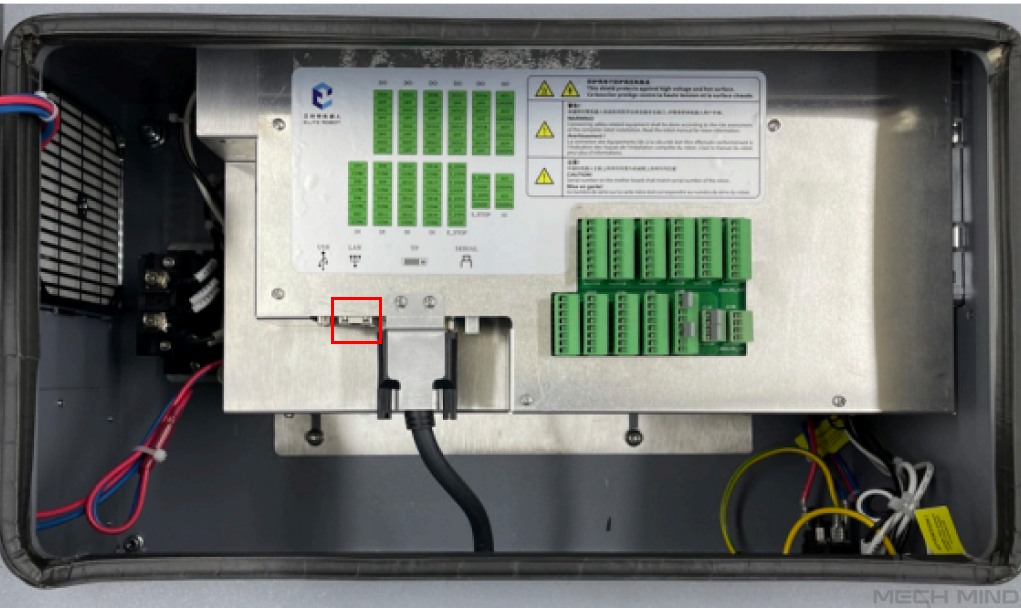
Plug the Ethernet cable into:
An Ethernet port on the IPC
The Ethernet port inside the controller
IP Configuration
To allow communication between the IPC and the robot controller, both must have an IP address in the same subnet. This means that the first three numbers of the IP addresses should be the same. For example, 192.168.100.1 and 192.168.100.2 are in the same subnet.
Check the IP address of the IPC: please use the ipconfig command in Command Prompt or PowerShell to check the IP address.
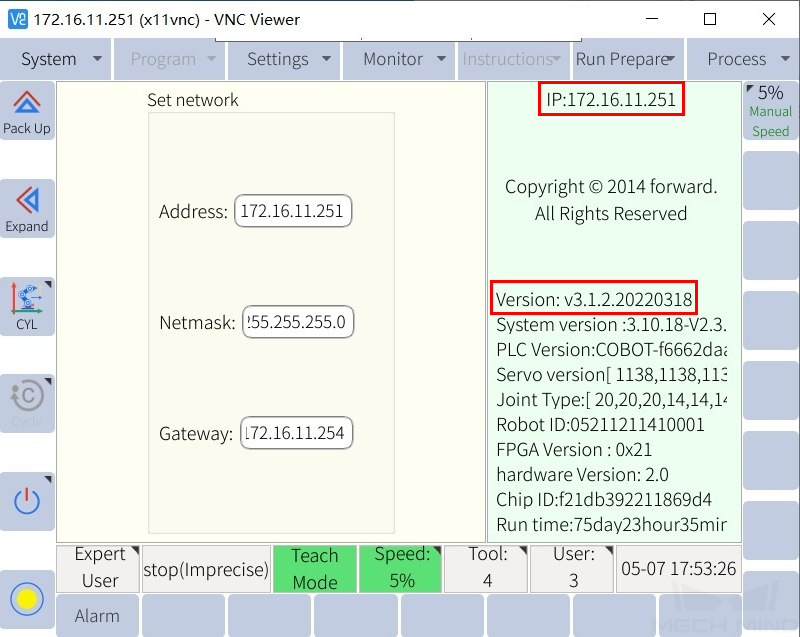
Press on to check the current IP address and software version.

If the IP address isn’t in the same subnet as the IPC, change it with the following steps:
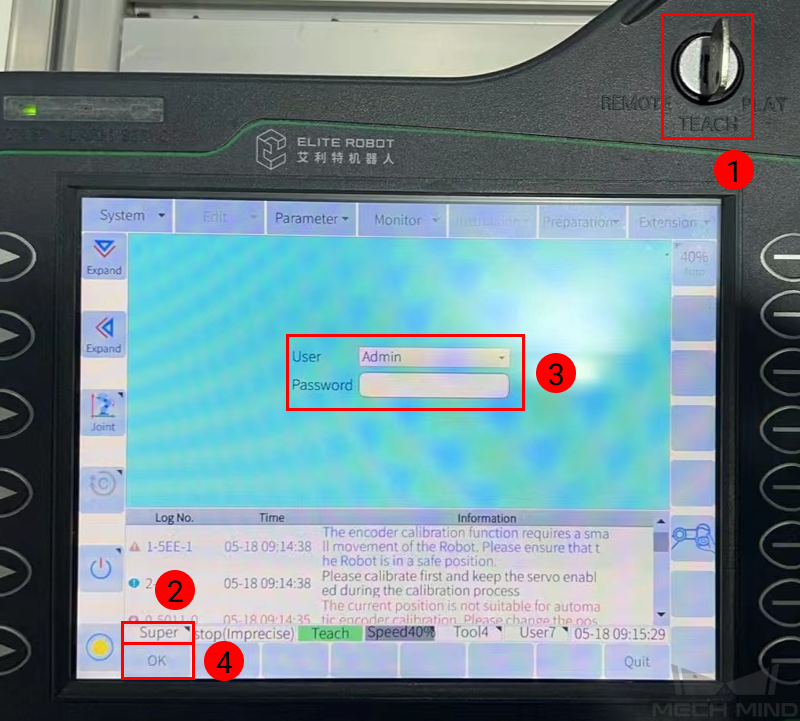
Turn the key to TEACH, and check the current user mode in the lower left. If it’s not Admin mode, press and select Admin. Then, enter the Password and press OK.
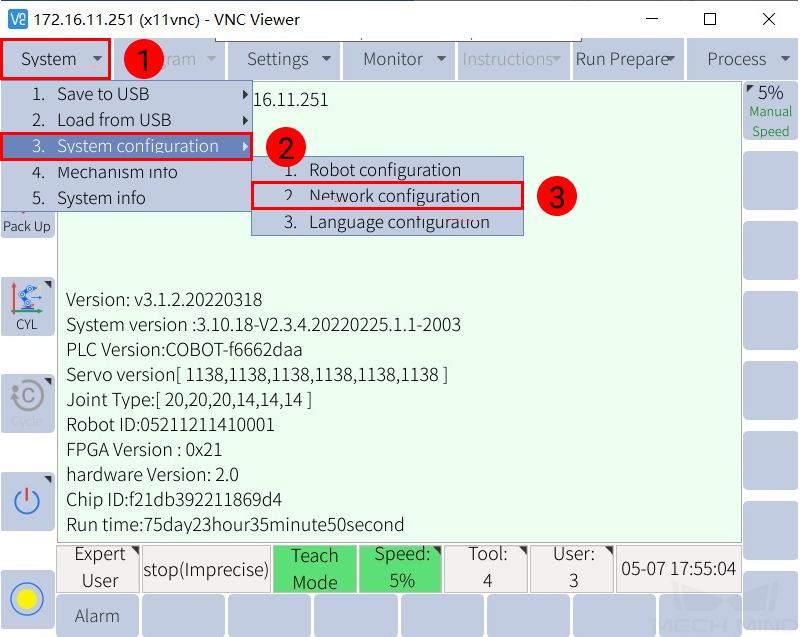
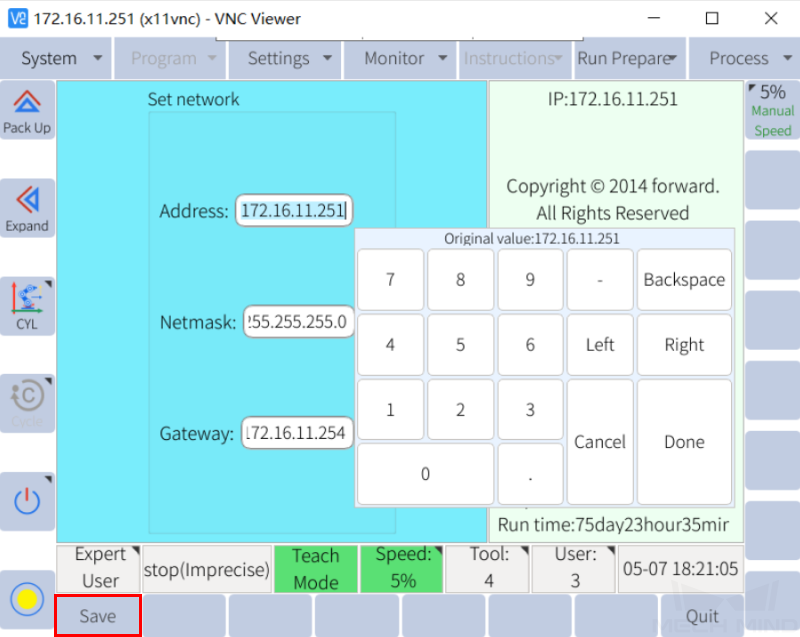
Select .
Set the IP address to one in the same subnet as the IPC. Press Save to save the change.
Test Robot Connection
Turn the key to REMOTE, press the Servo key in the lower right of the teach pendant, and make sure the SERVO indicator in the upper left lights up.
Connect to the robot in Mech-Center. Please refer to Test Robot Connection for detailed instructions.