JAKA Setup Instructions
This section introduces the process of setting up full control of a JAKA robot.
The process consists of 3 steps:
JAKA robots are controlled through the mobile or PC application JAKA Zu APP, instead of a teach pendant.
Before proceeding, please make sure you have downloaded and installed JAKA Zu APP on the device you wish to use for controlling the robot.
Please download the application here, under .
Check Controller and Software Compatibility
Controller version: 1.5.12_28_x86
Note
The controller version must be 1.5.12_28_x86. If your controller is of a lower version, please upgrade it; if higher, please downgrade.
JAKA Zu APP version: V 1.5 (for both Android and Windows)
Mech-Center: latest version recommended
Setup the Network Connection
Hardware Connection
The hardware setup differs depending on what device you have installed JAKA Zu APP on.
If you installed JAKA Zu APP on the IPC:
Plug the Ethernet cable into:
An Ethernet port on the IPC
The Ethernet port inside the accessory panel on the front of the controller

If you installed JAKA Zu APP on a mobile device:
Prepare a router with wireless function.
Connect both the IPC and the controller to the router with Ethernet cables.
Connect the mobile device to the router’s wireless network.
Note
If you are using multiple cameras, make sure the router has enough LAN ports for the IPC and cameras.
IP Configuration
To allow communication between the IPC and the robot controller, both must have an IP address in the same subnet. This means that the first three numbers of the IP addresses should be the same. For example, 192.168.100.1 and 192.168.100.2 are in the same subnet.
Check the IP address of the IPC: please use the ipconfig command in Command Prompt or PowerShell to check the IP address.
Open JAKA Zu APP, click on
 in the upper right, and then click on
  .
.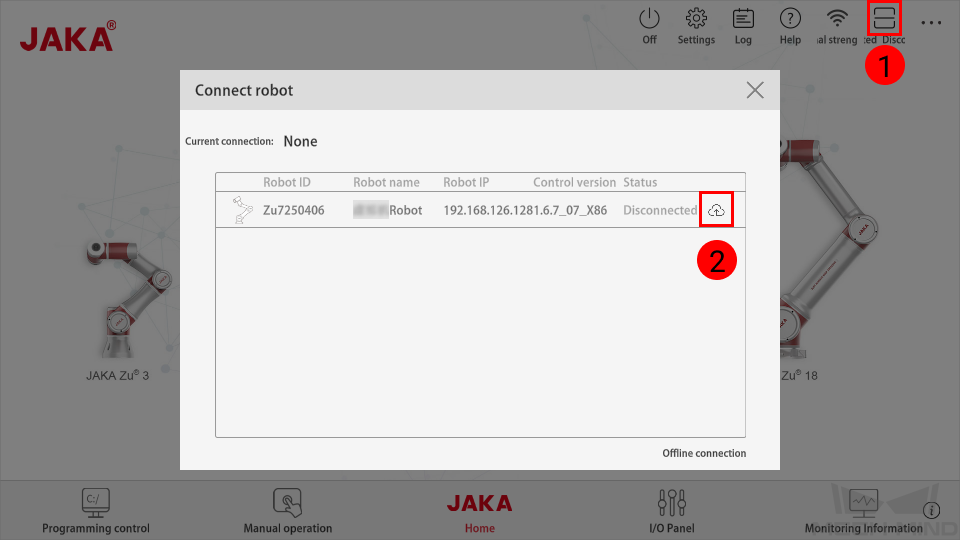
Enter the password for administrator (the default password is jakazuadmin), and click on Connect robot.

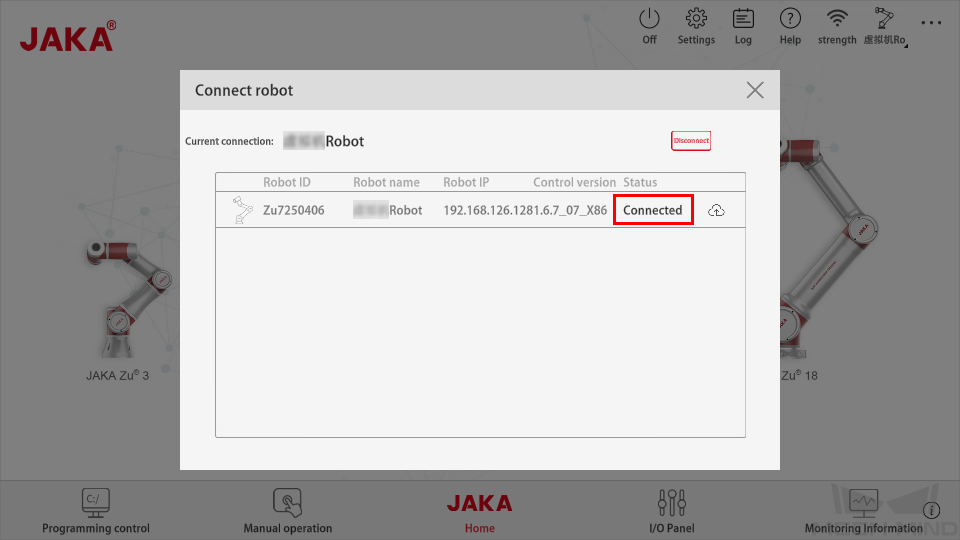
If successfully connected, the Status of the robot should change to Connected. Close the Connect robot window.
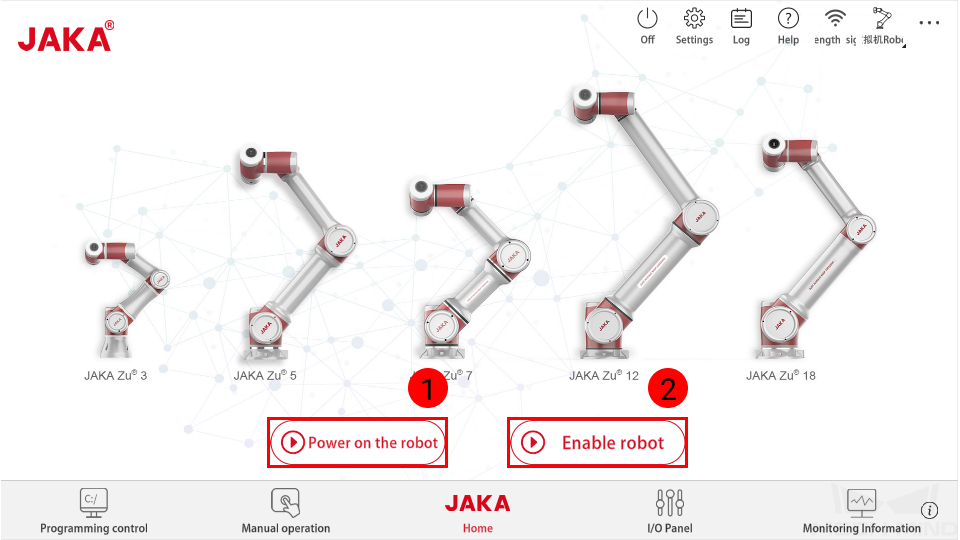
Click on Power on the robot and then Enable robot to power on the robot.
Click on
 in the lower right to check the controller version. The controller version must be 1.5.12_28_x86. If not, please upgrade or downgrade the controller to this version.
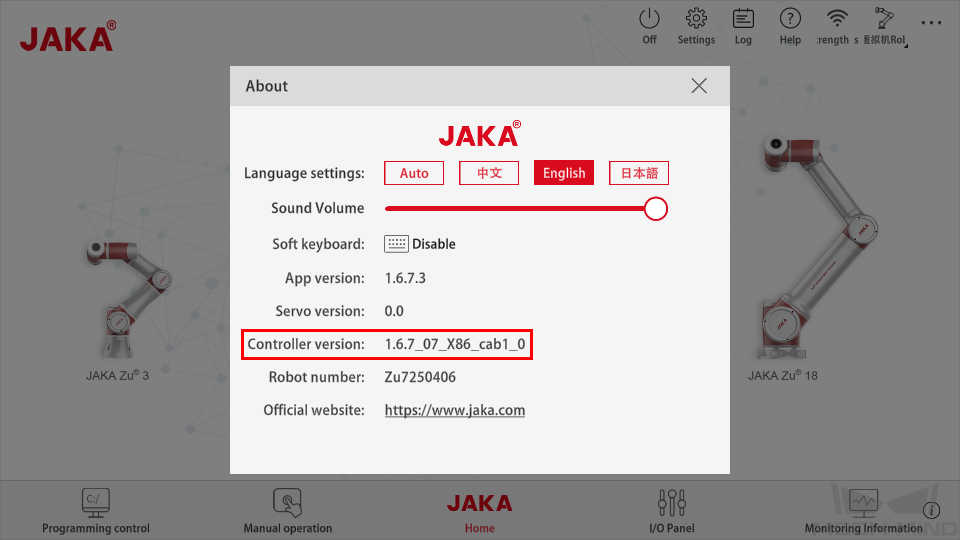
Close the About window, and click on
 in the upper right. In , select Use the following IP address, and set the IP address to one in the same subnet as the IPC, and Subnet mask to 255.255.255.0.
Test Robot Connection
Please refer to Test Robot Connection for detailed instructions.