ROKAE Xmate 7 Collaborative Robot Setup Instructions
This section introduces the process of setting up full control of a ROKAE Xmate 7 collaborative robot.
The process consists of 4 steps:
Please have a flash drive ready at hand.
Upgrade Software
Start the robot and open the ROKAE Xmate7 control system software.
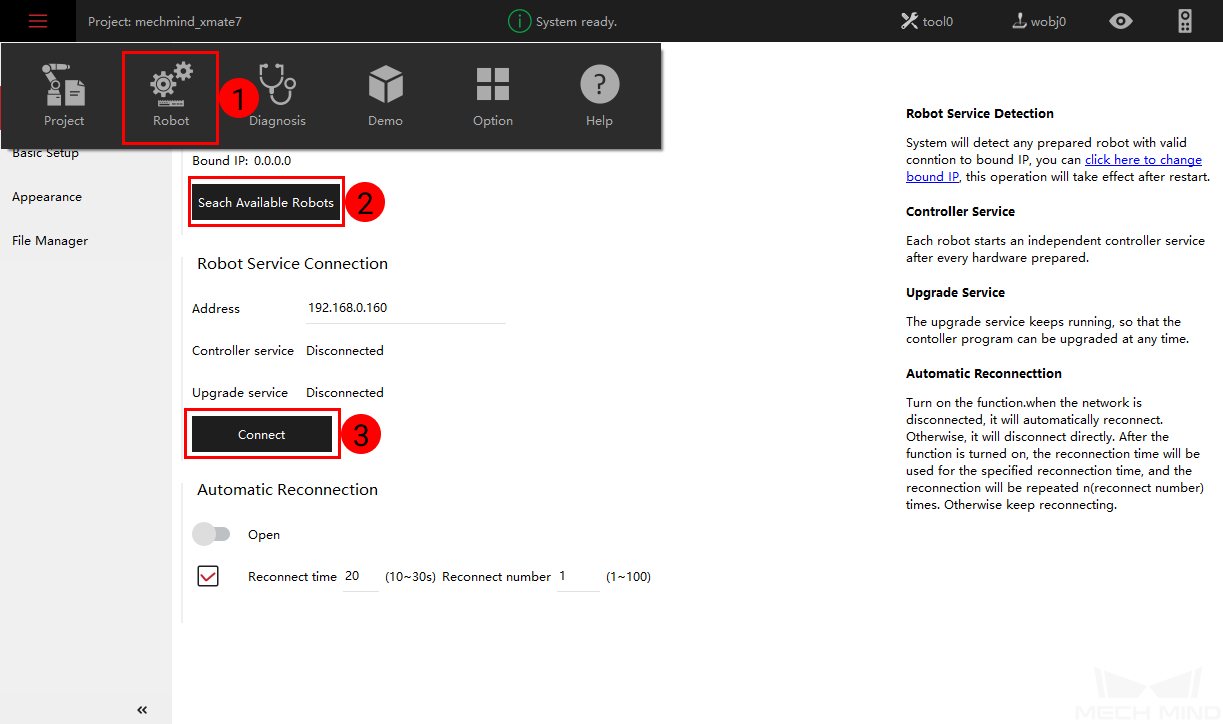
Click on to connect the robot as shown below.
If an alert window pops up, showing that the current control system is not compatible with the robot model, please upgrade the system according to the instruction.
After upgrading the control system, you will need to upgrade the controller software manually.
Please download the ROKAE upgrade package first and then copy and paste it into a USB flash drive.
Select Help.

Go to to select the upgrade package in the USB flash drive, and then click on Upload.

Note
The ROKAE controller of 3.6 version is compatible with Mech-Center 1.5.0 or higher. If you are using a controller whose version is lower than 3.6, please use the Mech-Center of a previous version.
Setup the Network Connection
IP Configuration
The default robot IP address is 192.168.0.160, please set the IP address of the IPC to 192.168.0.222. After configuration, you can check the connection by entering the command ping 192.168.0.160 in the Command Prompt window.
Load the Program Files
Prepare the Files
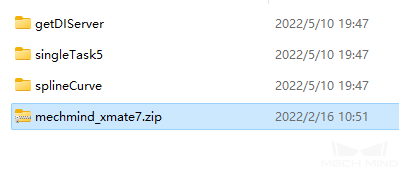
Go to the folder where Mech-Center is installed and copy the mechmind_xmate7.zip on the path XXX\Mech-Center\Mech_RobServ\install_packages\rokae, and paste it into the flash drive.
Connect the Robot
Click on to connect the robot again.
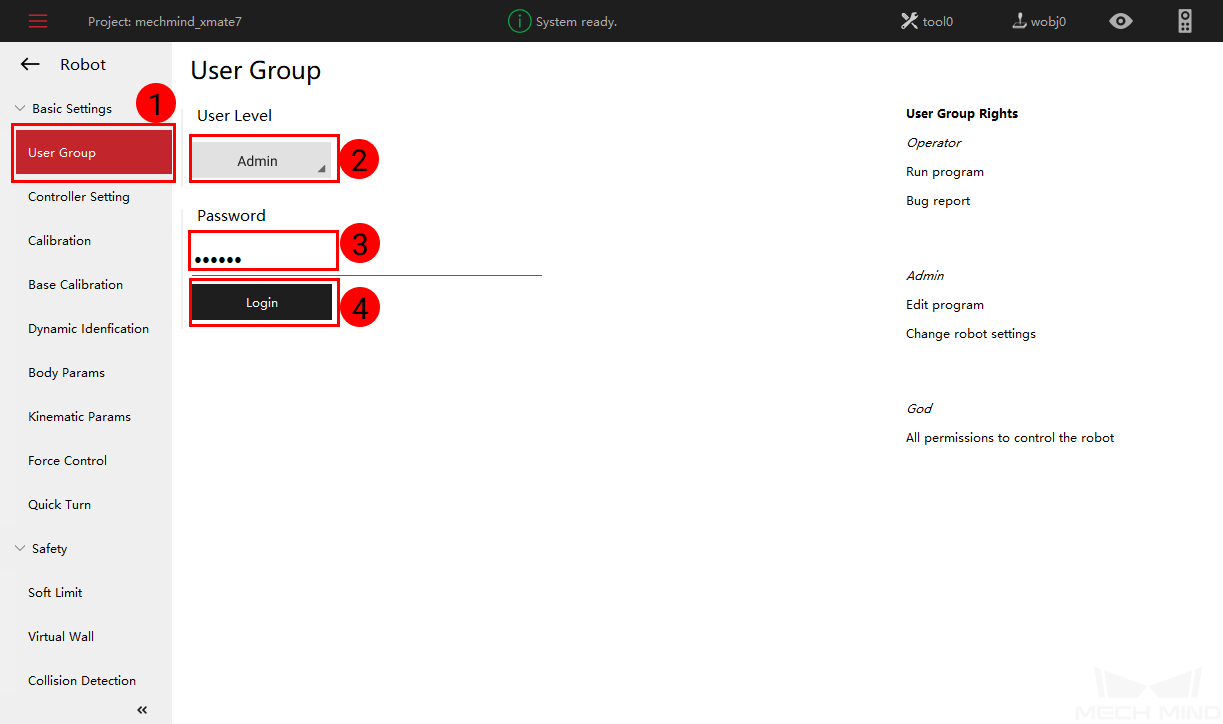
Switch the Level
Go to and select Admin as the user level, enter the default password 123456, and then click on Login to finish setting.
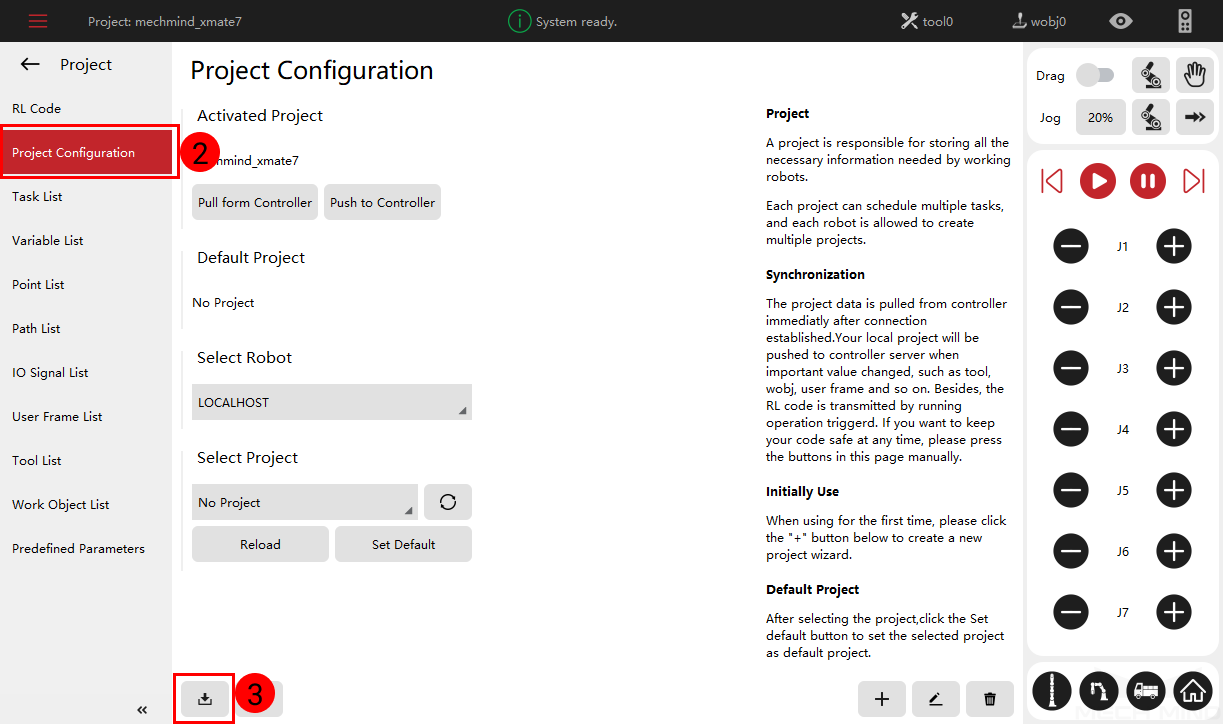
Load the Files to the Robot
Please follow the steps below to load the full-control program to the robot.
Go to .

Open the program file to be imported, and then click on Next Step.
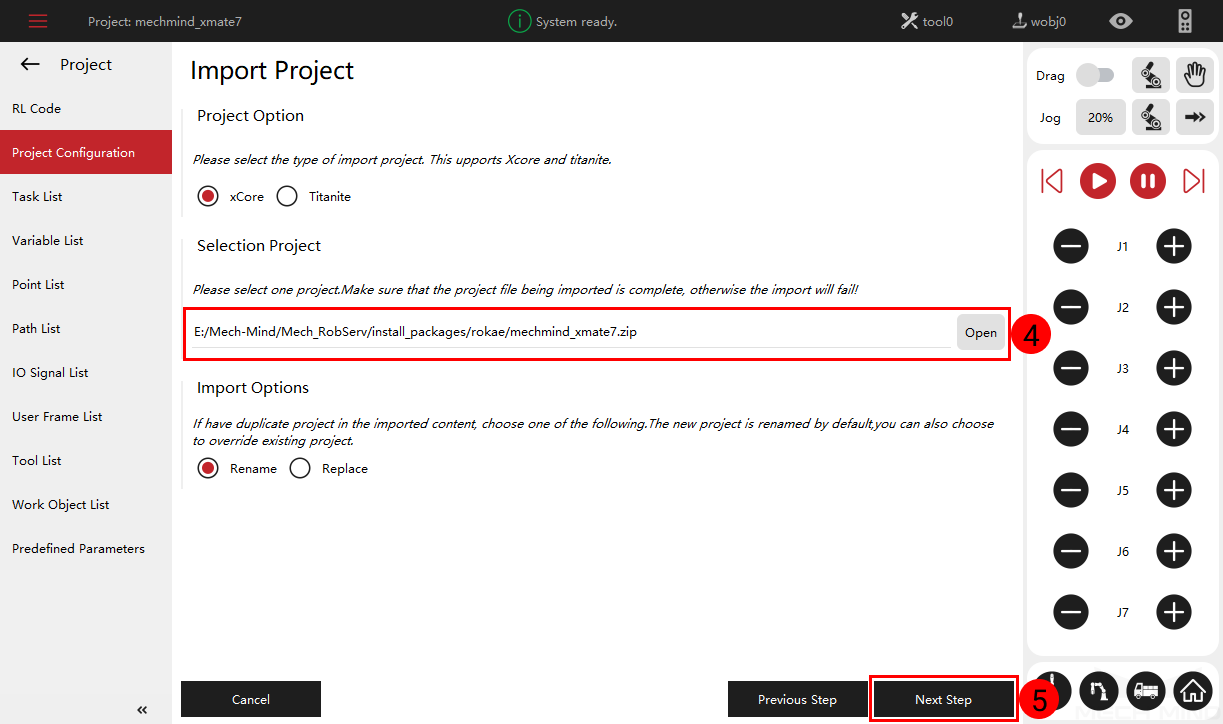
An “Import Success” message will appear in the lower right corner.

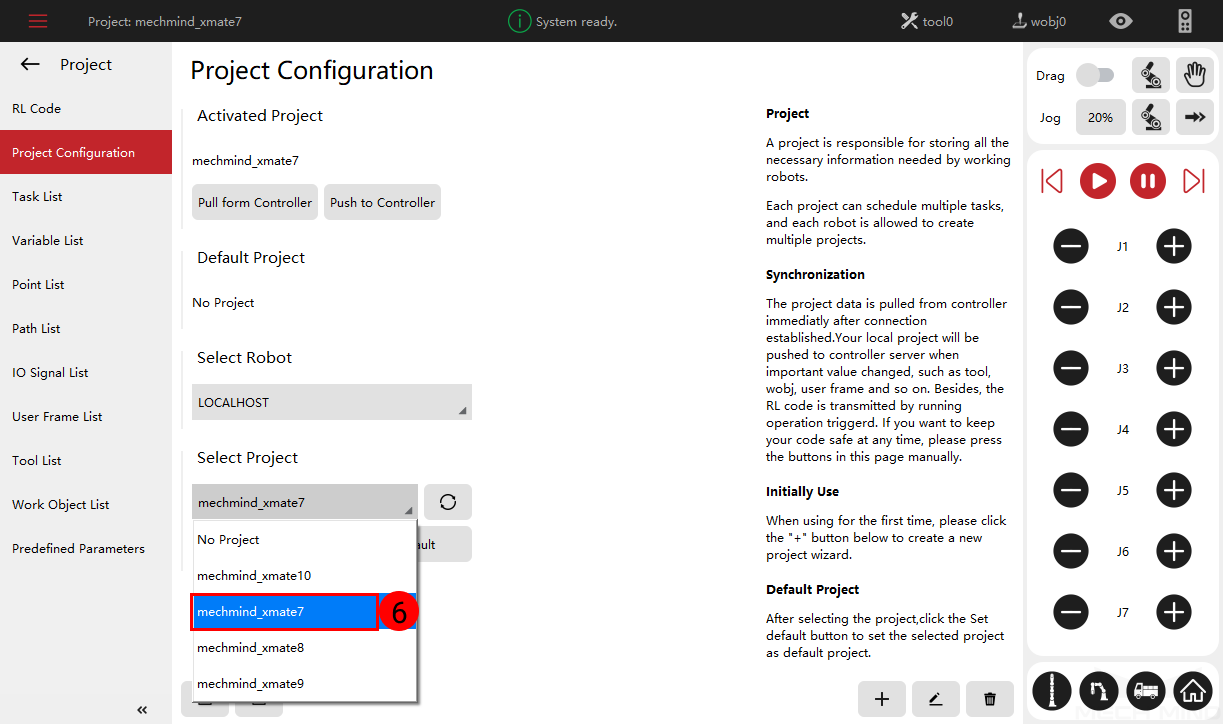
Select the program to be loaded.
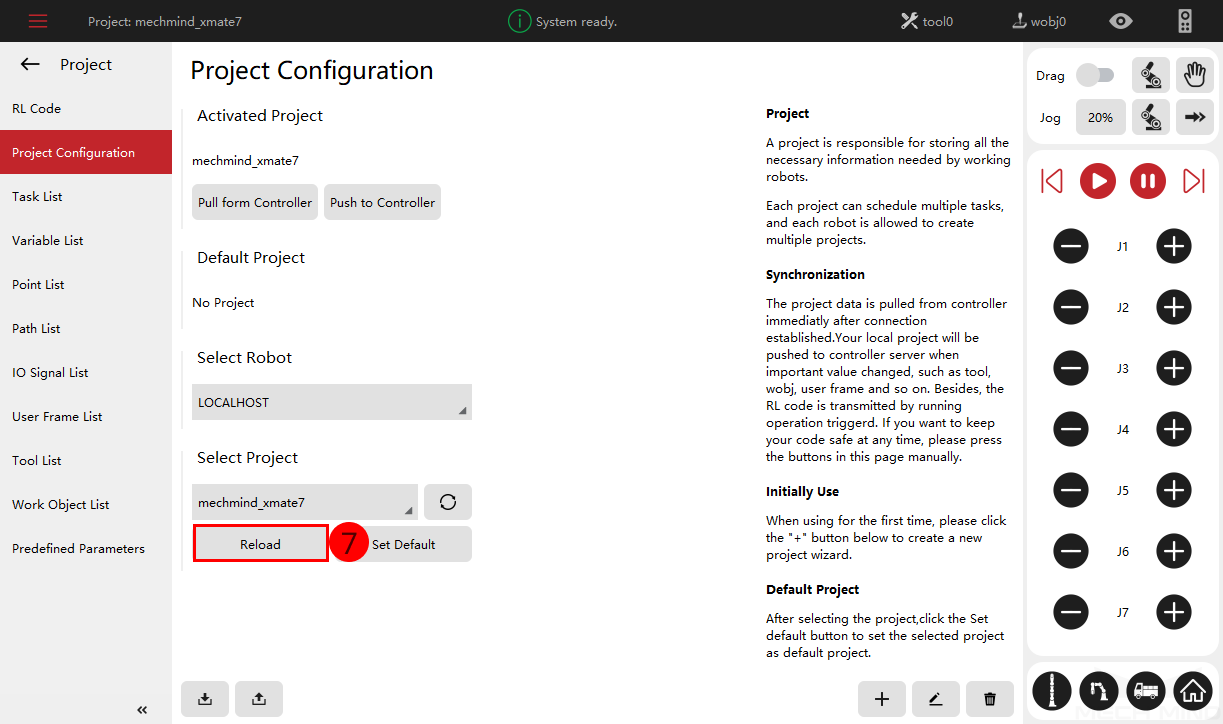
Click on Reload.
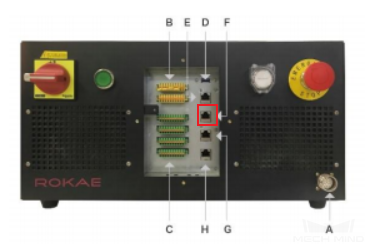
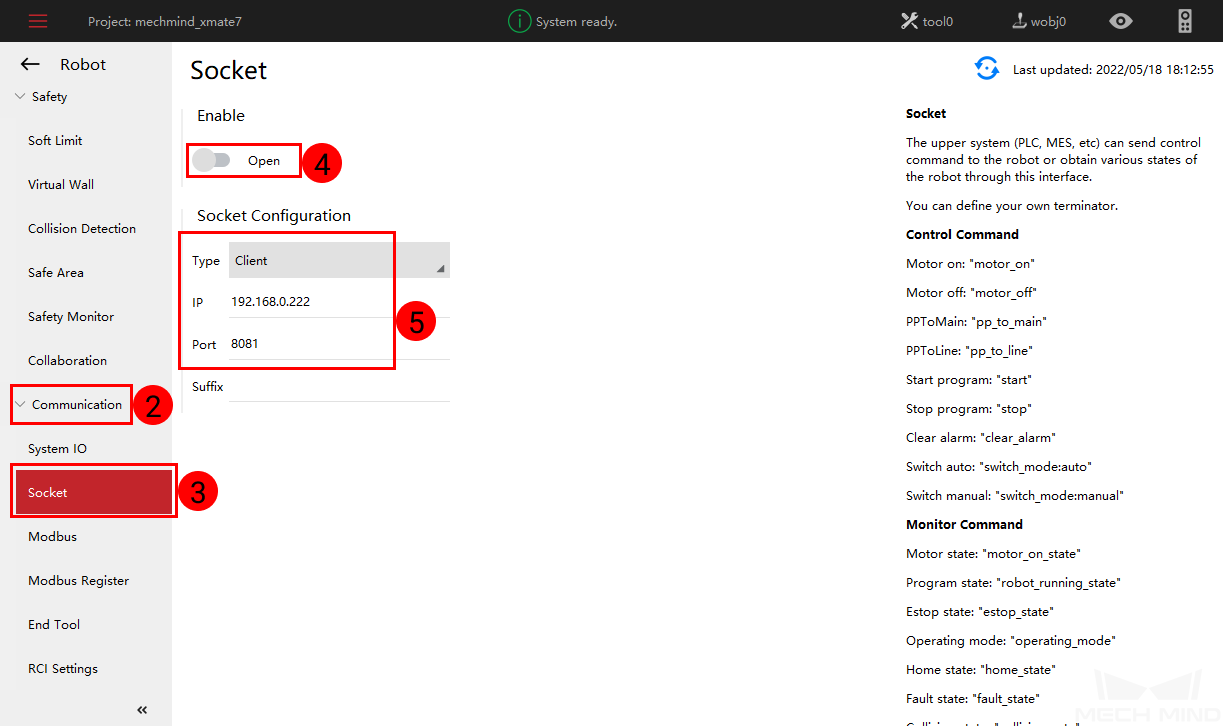
Socket Configuration
Click on Robot.

Go to and then follow the steps as shown in the figure below to configure the socket.
Test Robot Connection
Click on Connect Robot in Mech-Center.
Run the full-control program, as shown below.
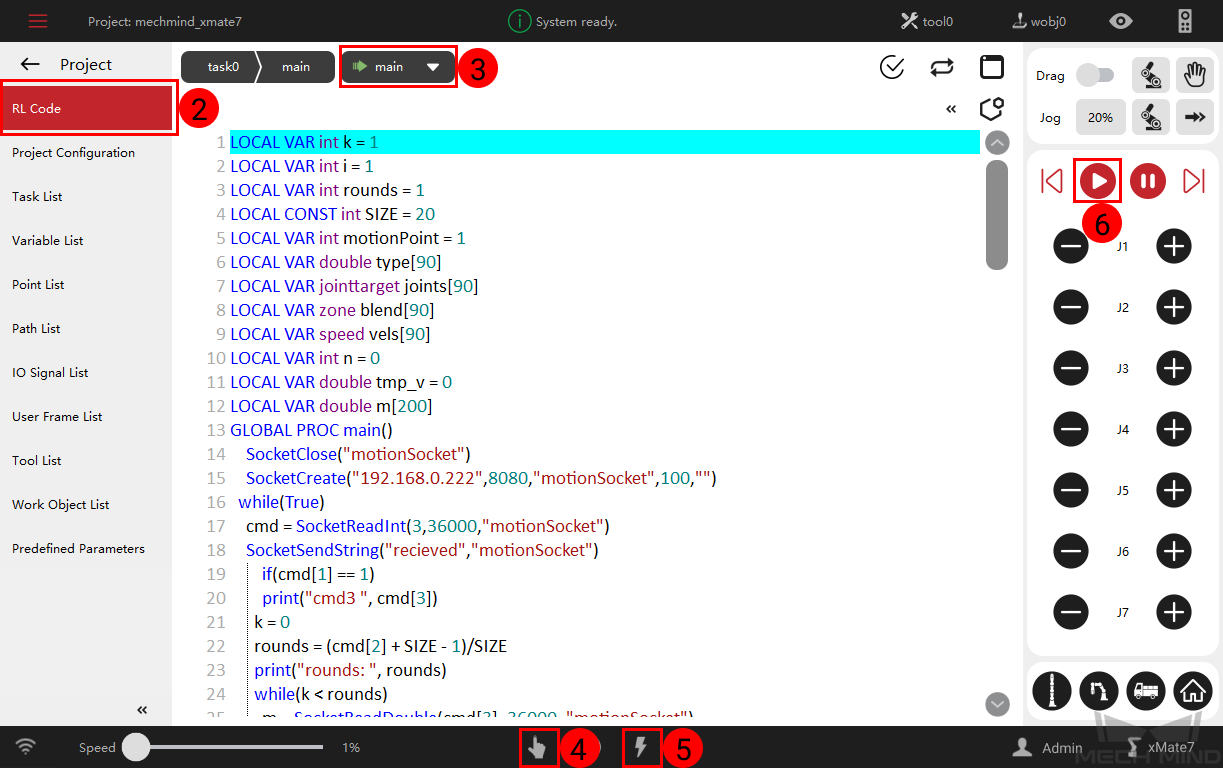
If a message saying Robot: server connected to the robot shows up in the Log panel, the robot is successfully connected.