FANUC Setup Instructions
This section introduces the process of loading the robot full-control program onto a FANUC robot.
The process consists of 4 steps:
Please have a flash drive ready at hand.
Check Controller and Software Compatibility
Controller: no requirement
Controller system software version: V7.5, V7.7, V8.*, and V9.*
Additional controller software packages:
R651 or R632 (karel) - used to enable karel function
R648 (User Socket Msg)
Mech-Center: latest version recommended
Setup the Network Connection
Hardware Connection
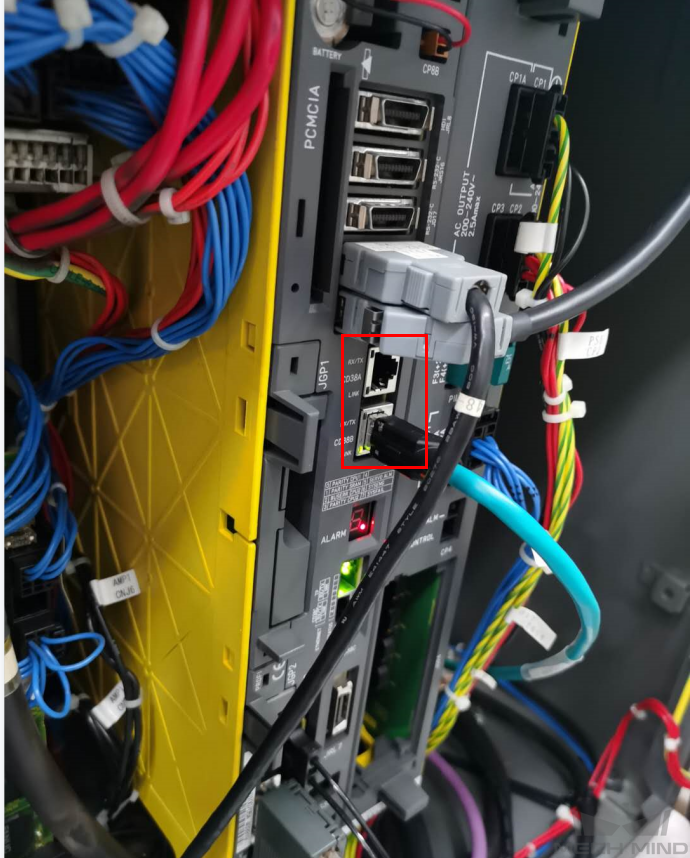
Plug the Ethernet cable of the IPC into the Ethernet port of robot controller as shown in the figure. You can plug the cable into either CD38A port or CD38B port. CD38A corresponds to Port#1 in the robot IP setting, while CD38B corresponds to Port#2.
IP Configuration
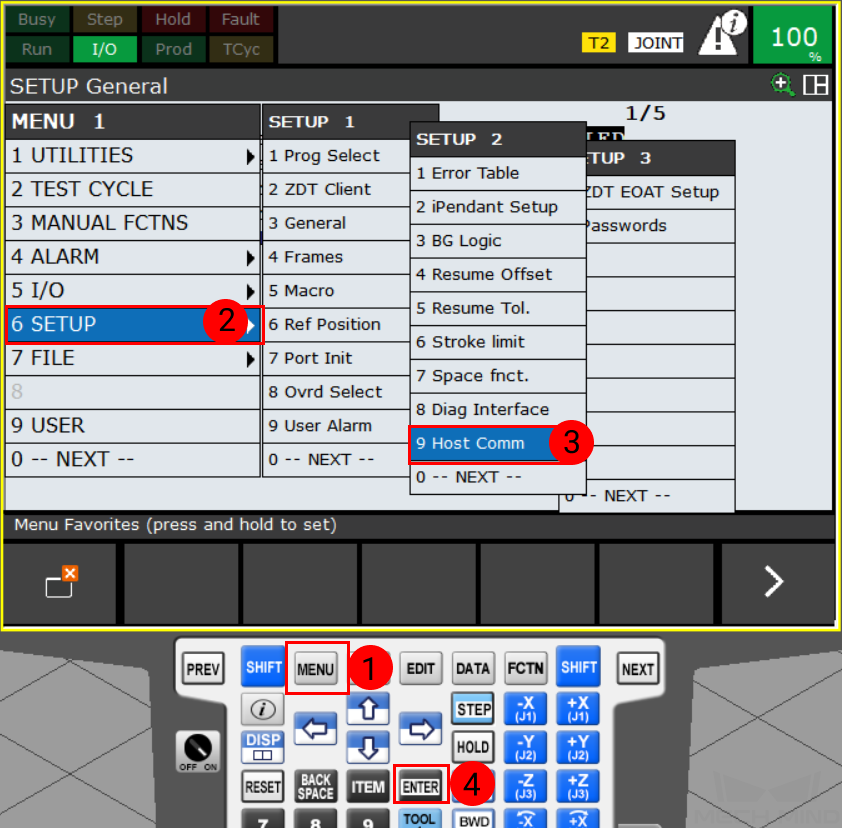
Press on , select Host Comm in the context menu, and then press ENTER to open the SETUP Protocols window.
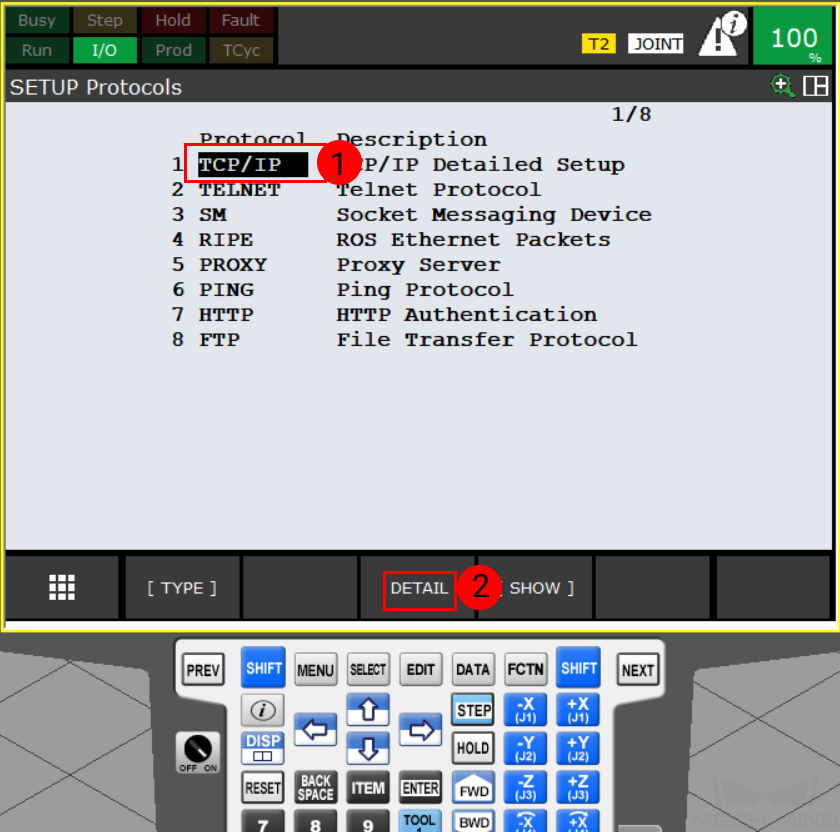
Select TCP/IP and press on DETAIL to open the SETUP Host Comm window.
Enter the robot IP in the IP address line with the keyboard of the teach pendant. The robot IP should be in the same subnet as the IPC.
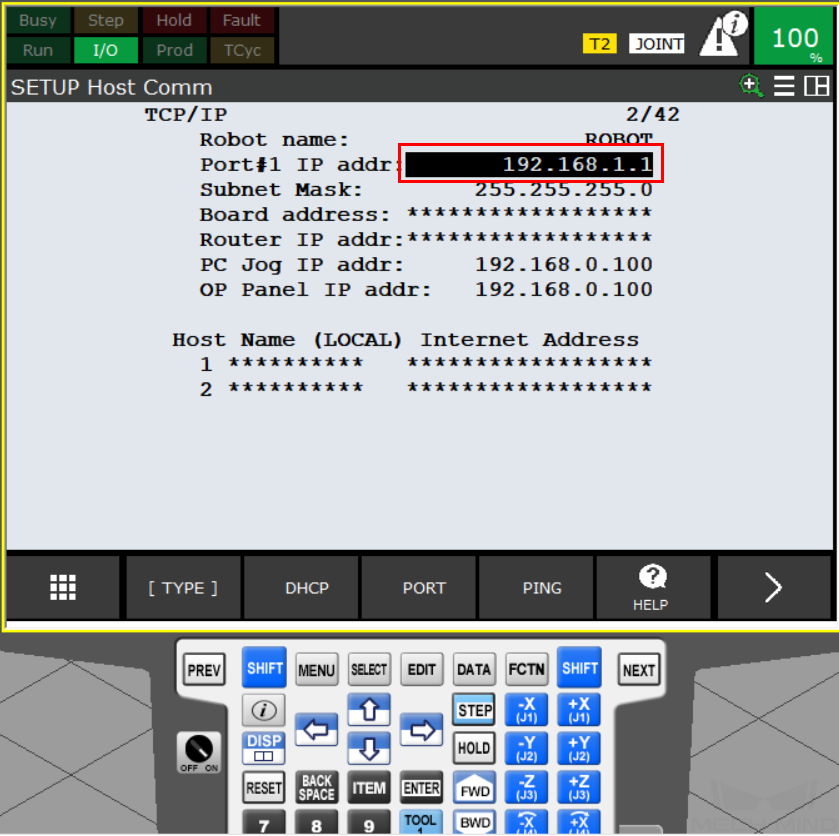
If the Ethernet cable is connected to port 2, please press Port to switch the port. Then you can enter the robot IP in the IP address line.

Load the Program Files
Prepare the Files
The program file is stored in the installation directory of Mech-Center. The default directory for Mech-Center 1.5.2 is C:/Mech-Mind/Mech-Center.
Navigate to xxx/Mech-Center/Mech-RobServ/install_packages/fanuc, and copy all the contents of this folder to your flash drive:
Note
The folders and files must be saved in the root directory of the USB flash drive. Do not rename them.
Load the Files to the Robot
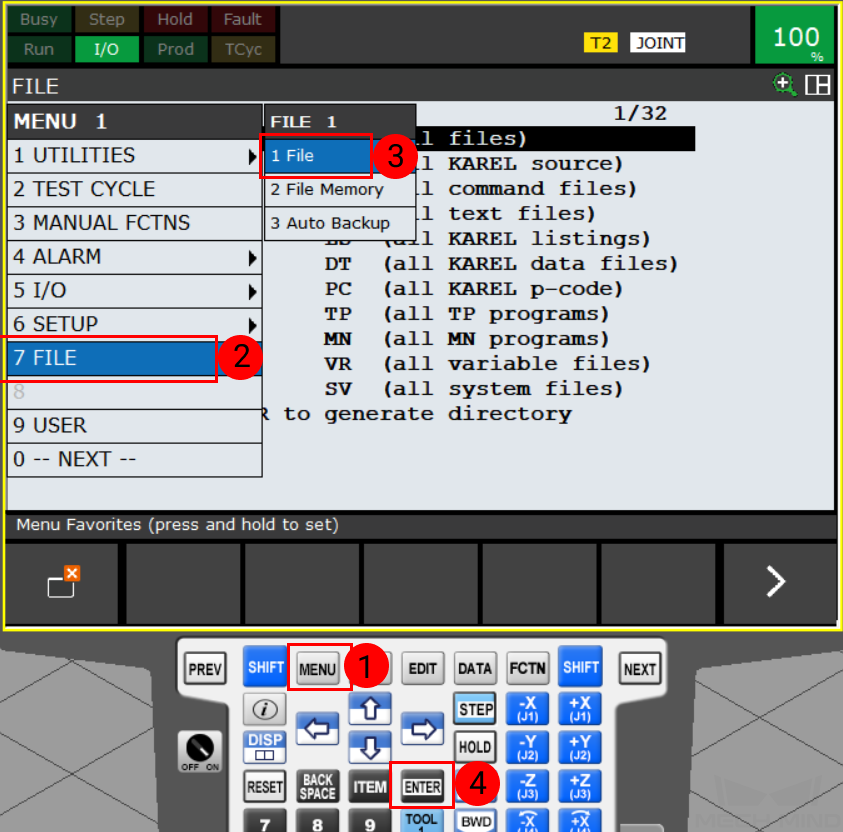
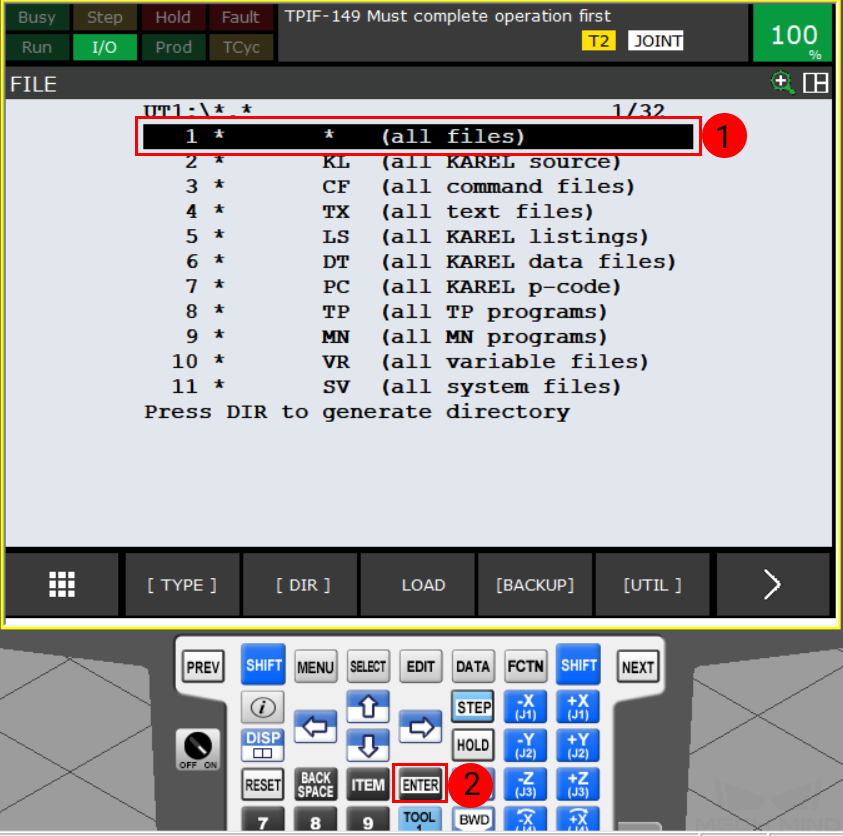
After connecting the USB flash drive, press MENU and select , and then press ENTER to open the FILE window.
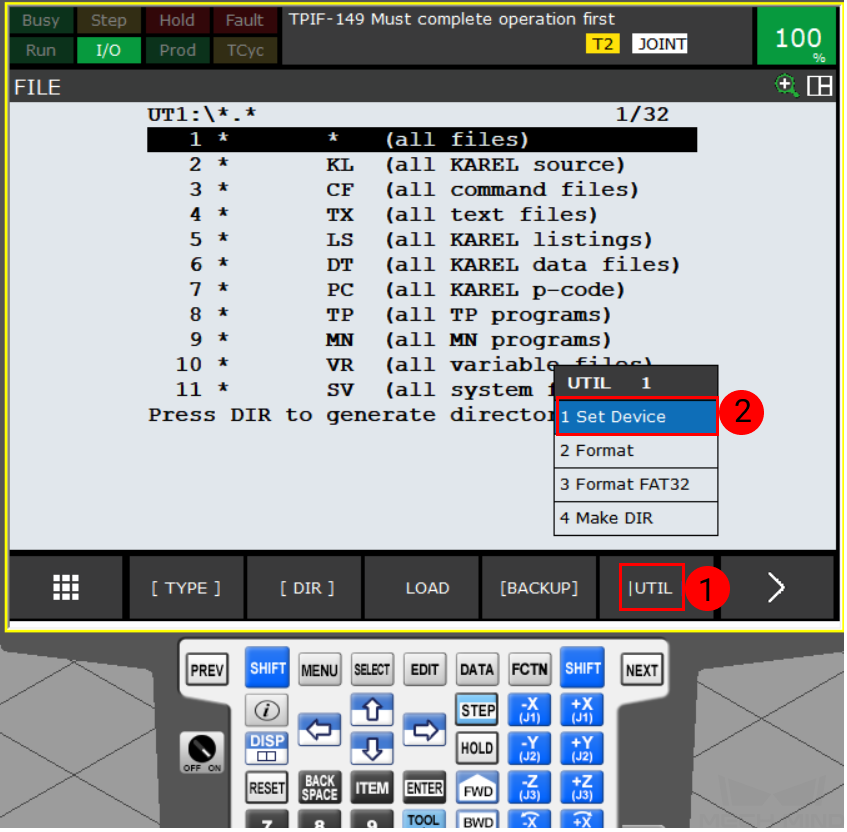
Press UTIL and select Set Device in the context menu.
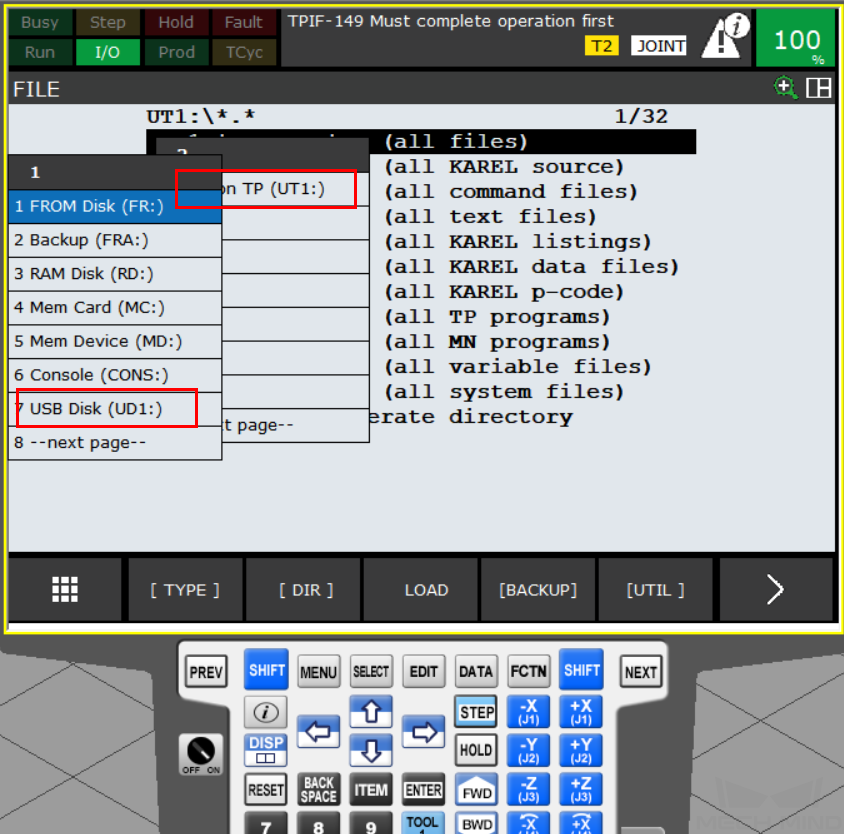
Select the USB flash drive. If your flash drive is connected to the controller, please select USB Disk (UD1:); if your USB flash drive is connected to the teach pendant, please select USB on TP (UT1:).
Select the first line (all files) and press ENTER to enter the root directory of the USB flash drive.
Hint
For the next step:
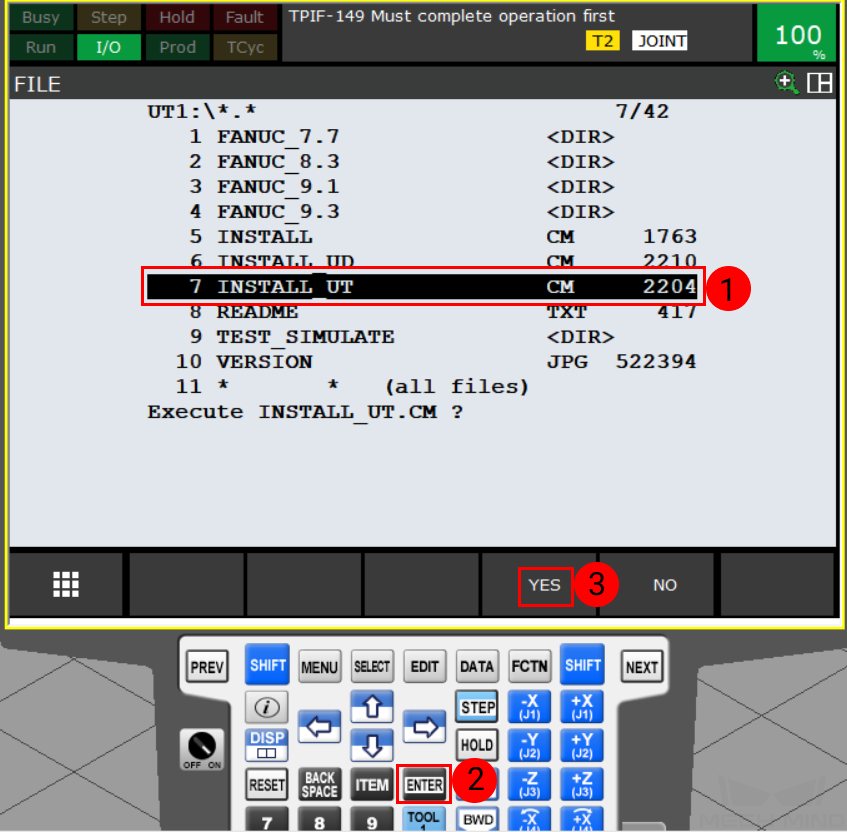
If the USB flash drive is connected to the robot controller, please select INSTALL_UD.cm.
If the USB flash drive is connected to the robot teach pendant, please select INSTALL_UT.cm.
Select the corresponding CM file and press ENTER key on the teach pendant. Choose YES to start loading the programs.
When the following screen is displayed, the loading and relavent configuration are completed. Press F4 to exit the program.
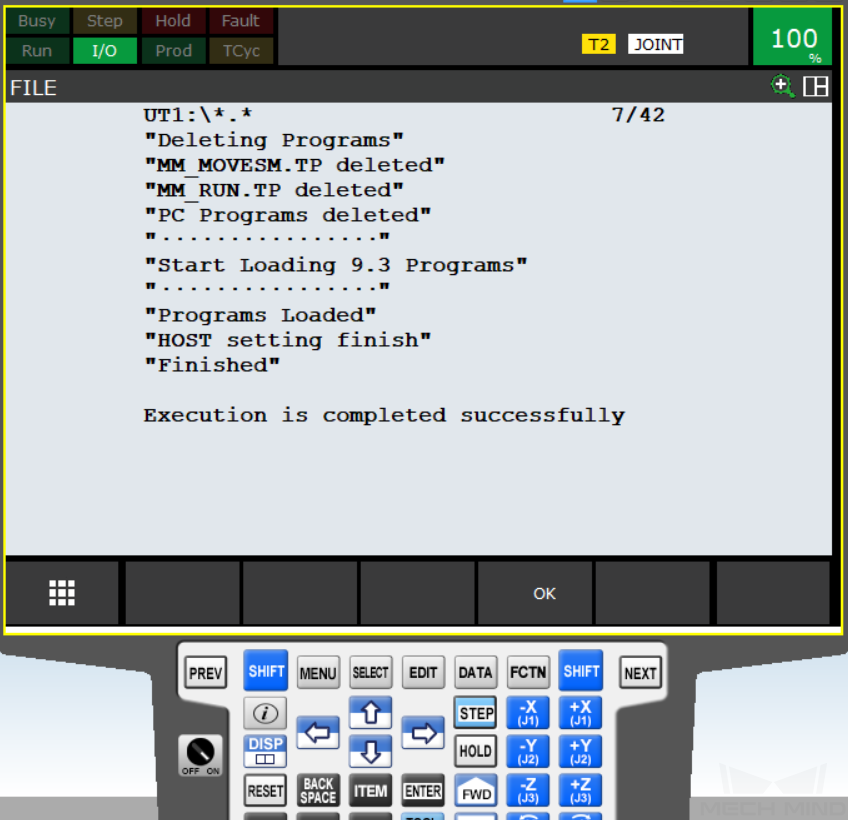
Attention
Please restart the robot after exiting the program.
Run the Program
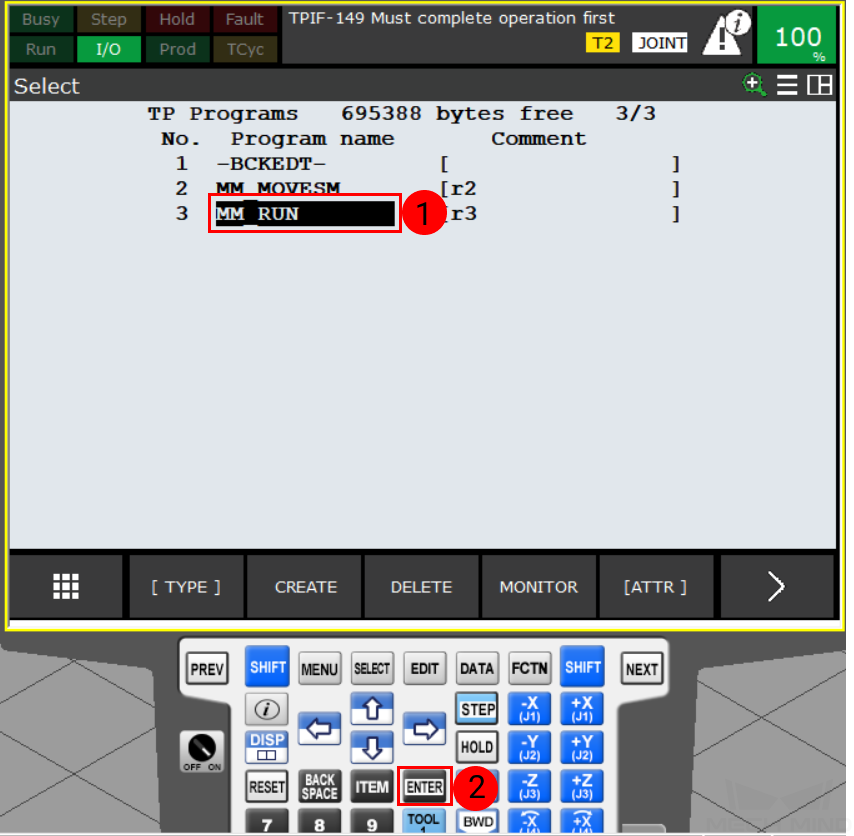
Press SELECT key on the teach pendant to open the program selection window, and then select , as shown below.
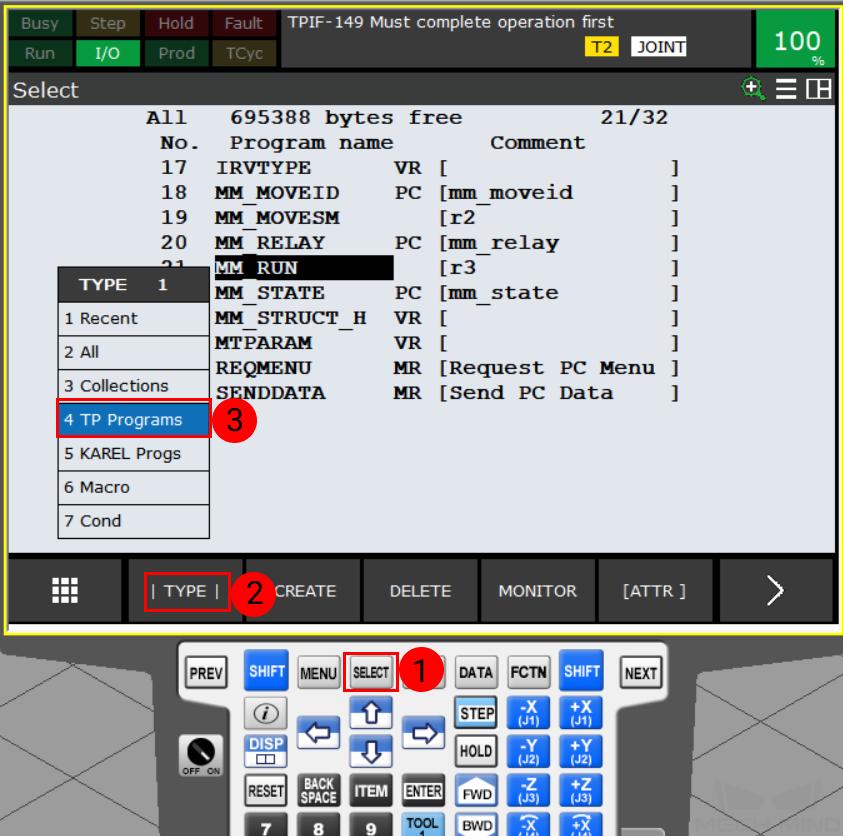
Select MM_RUN and press ENTER to open the program. Then press the green button on the controller to auto-run the program.
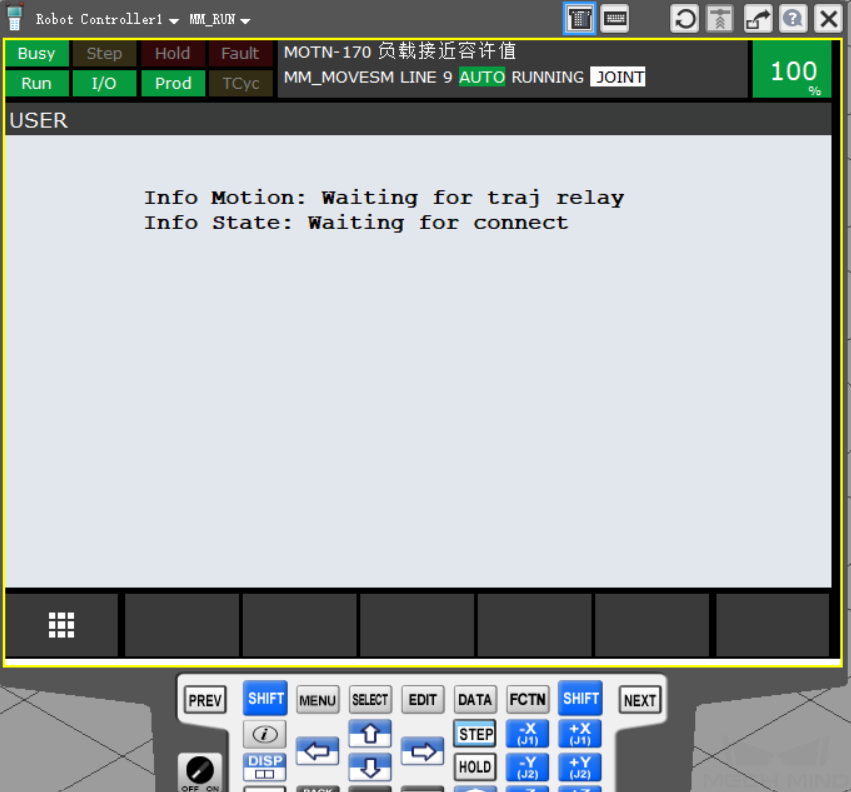
If the following screen is displayed, you can proceed to the next section.
Test Robot Connection
Please refer to Test Robot Connection for detailed instructions.