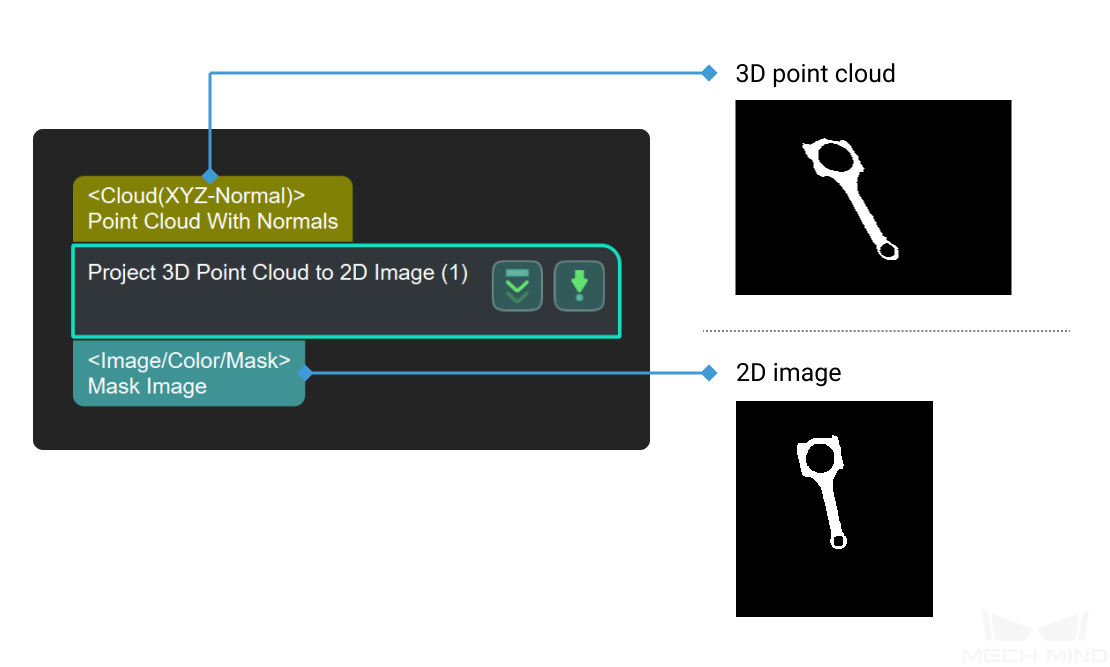
Project 3D Point Cloud to 2D Image
Function
Convert a 3D point cloud to a 2D image according to the specified projection type.
Sample Scenario
For point cloud preprocessing. First, project the 3D point cloud onto the 2D image. Then, after using 2D image processing methods (such as 2D morphological operations), convert the 2D image back to 3D point clouds through Apply Masks to Point Cloud.
For picking scenarios, it is recommended to set the Projection Type parameter to PerspectiveProjection.
For measurement scenarios, it is recommended to use Orthographic Projection instead.
Input and Output
Parameters
orthogonalProj
useOrthogonalProj
Default Value: FalseList of Values: True, FalseInstruction: Use orthogonal projection to project a 3D point cloud onto a 2D planeprojectAlongObjZAxis
Default Value: TrueList of Values: True, FalseInstruction: Select the projection axis according to actual needs.closingOperateSize
Default Value: 7Instruction: Used to bridge narrow discontinuities, small ravines and holes. The larger the core size, the more obvious the effect.perspectiveProj
imageType
Default Value: ColorList of Values: Color, DepthInstructions: When the color camera map and depth camera used in one project, you can choose to project to the corresponding camera.dilateSize
Default Value: 21Instruction: Expand the highlight or white part of the image, the larger the core size, the more obvious the effect.erodeSize
Default Value: 21Instruction: Reduce or thin the highlight or white part of the image, the larger the core size, the more obvious the effect.