Manual Calibration Procedure
This section introduces the manual calibration procedure that should follow when the robot is unable to connect to the Mech-Mind vision system.
Tip
Before the hand-eye calibration, you should collect the following robot information:
Axes: for example, 4-axis robot, 5-axis robot, 6-axis robot or others. The calibration procedures differ slightly for robots with different axes.
Euler-Angle type: The Euler-Angle type needs to be specified during the manual calibration procedure.
Calibration Preset
Open Mech-Vision, click the Camera Calibration (Standard) button. The Calibration Preset window will be prompted.
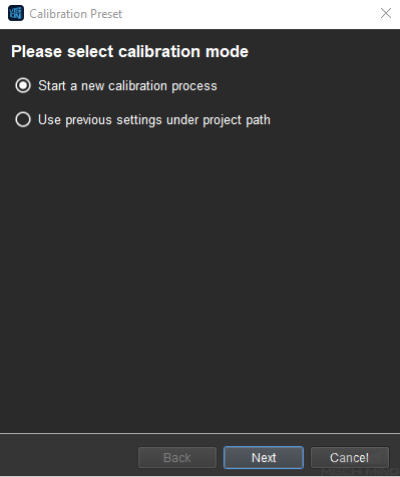
In the Please select calibration mode window, select the Start a new calibration process radio button, and then click the Next button.
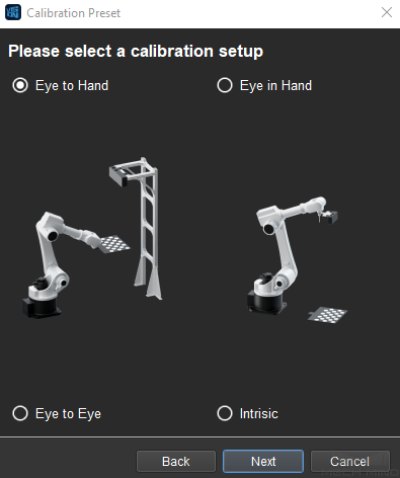
In the Please select a calibration setup window, select the Eye to Hand or Eye in Hand radio button, and then click the Next button.
In the Select a robot type for calibration window, select the 6-axis robot , 4-axis robot or 4-axis robot or other types radio button, and then click the Next button.
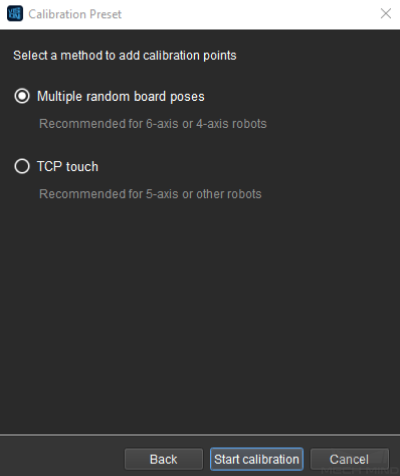
In the Select a method to add calibration points window, select the Multiple random board poses or TCP touch radio button, and then click the Start calibration button.
Till now, the calibration preset work is completed and you will enter the calibration procedure.
Calibration Procedure
Compared with the procedure of the automatic calibration, that of the manual calibration differs only in several steps in different calibration scenarios.
Manual Calibration Procedure for ETH Calibration Using the Multiple Random Board Poses Method
Connect to the Camera
Refer to Connect to the Camera .
Mount the Calibration Board
Refer to Mount the Calibration Board .
Check Camera Intrinsic Parameters
Refer to Check Camera Intrinsic Parameters .
Set the Euler-Angle Type
If the Euler-Angle type is known, in the the Set Euler-Angle Type window, select the Known Euler-Angle Type radio button and select the corresponding type from the drop-list box.
If the Euler-Angle type is unknown, follow these steps:
Select the Unknown Euler-Angle Type radio button and then click the Get Euler-Angle Type button.
Install a fixed sharp point in the robot work area, then rotate the robot around this point using the teach pendant and record three different robot poses.
Click the Get Euler-Angle Type button and the Euler-Angle type will be calculated.
Add Marker-Images and Poses
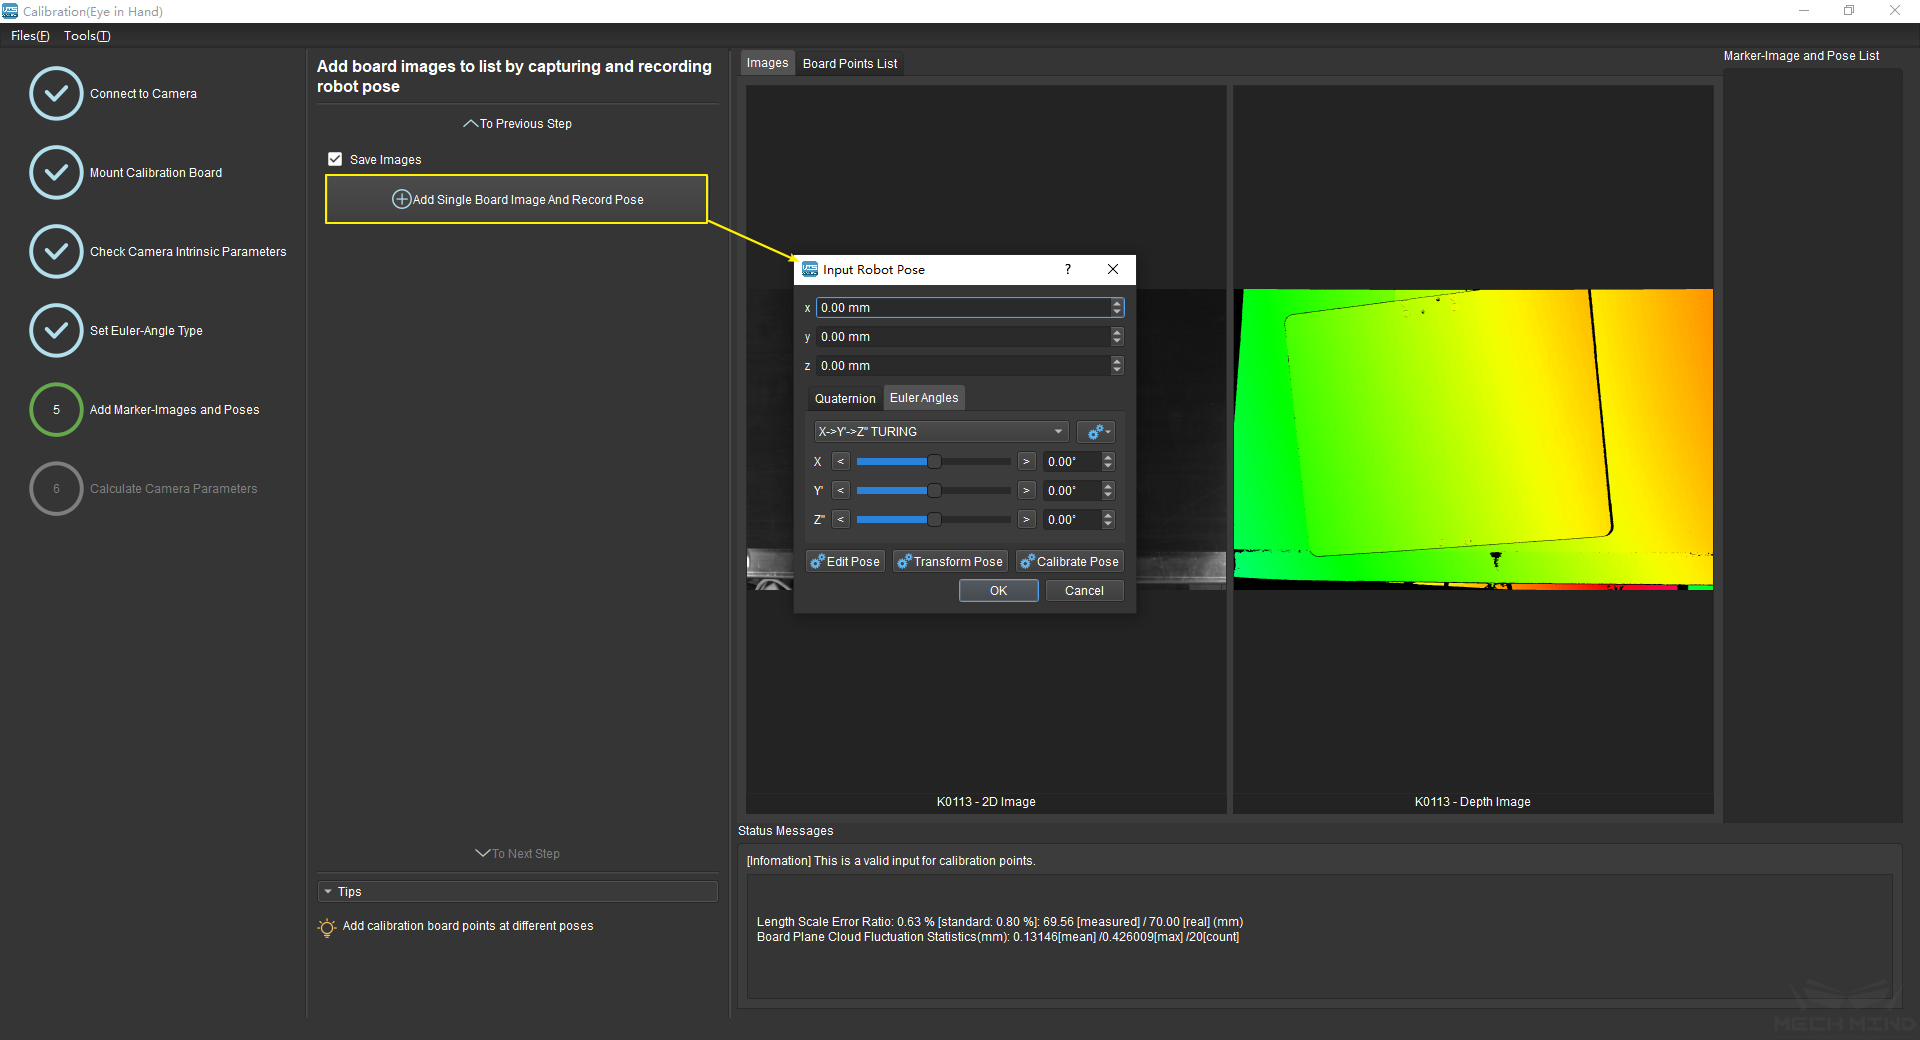
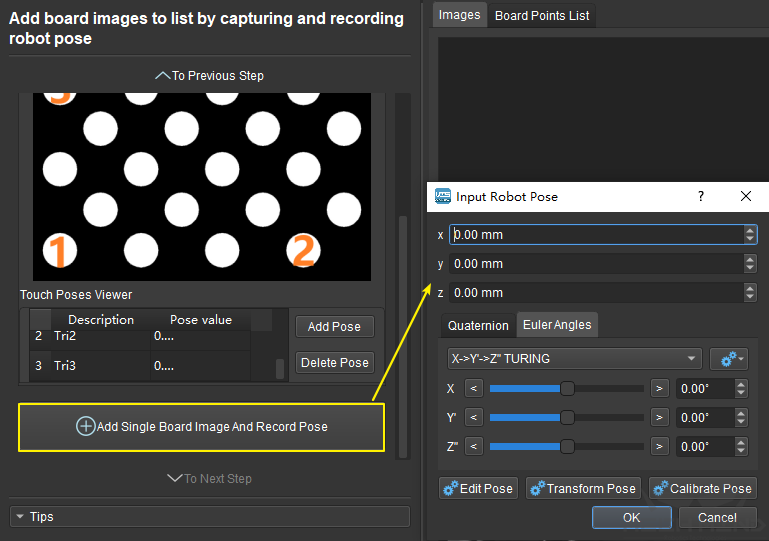
Everytime a calibration image is added, manually add the current pose of the robot, as shown in the following figure.
Calculate Camera Parameters
Refer to Calculate Camera Parameters .
(Conditional) Adjust Camera Parameters
Refer to (Conditional) Adjust Camera Parameters .
Manual Calibration Procedure for EIH Calibration Using the Multiple Random Board Poses Method
Connect to the Camera
Refer to Connect to the Camera .
Mount the Calibration Board
Refer to Mount the Calibration Board .
Check Camera Intrinsic Parameters
Refer to Check Camera Intrinsic Parameters .
Set the Euler-Angle Type
Refer to Set the Euler-Angle Type .
Add Marker-Images and Poses
Refer to Add Marker-Images and Poses .
Calculate Camera Parameters
Refer to Calculate Camera Parameters .
(Conditional) Adjust Camera Parameters
Refer to (Conditional) Adjust Camera Parameters .
Manual Calibration Procedure for ETH Calibration Using the TCP Touch Method
Connect to the Camera
Refer to Connect to the Camera .
Mount the Calibration Board
Refer to Mount the Calibration Board .
Check Camera Intrinsic Parameters
Refer to Check Camera Intrinsic Parameters .
Set the Euler-Angle Type
Refer to Set the Euler-Angle Type .
Set the TCP Value
Refer to Set the TCP Value .
Add Marker-Images and Poses
Use the teach pendant to move the robot touch P1, P2 and P3 on the calibration board. Everytime the robot touches a point, click Add Pose and enter the current post of the robot in the prompted window, as shown in the following figure.
Move the robot to a pose where the camera could capture the entire calibration board. Click the Add Single Board Image And Record Pose button to make the camera take a photo and detect the circles on the calibration board. In EIH calibration scenario, you still need to enter current post of the robot in the prompted window.
Then click the Next button to complete the adding of calibration point poses.
Attention
Make sure the calibration board is stationary in the whole process.
Calculate Camera Parameters
Refer to Calculate Camera Parameters .
(Conditional) Adjust Camera Parameters
Refer to (Conditional) Adjust Camera Parameters .
Manual Calibration Procedure for EIH Calibration Using the TCP Touch Method
Connect to the Camera
Refer to Connect to the Camera .
Mount the Calibration Board
Refer to Mount the Calibration Board .
Check Camera Intrinsic Parameters
Refer to Check Camera Intrinsic Parameters .
Set the Euler-Angle Type
Refer to Set the Euler-Angle Type .
Set the TCP Value
Refer to Set the TCP Value .
Add Marker-Images and Poses
Refer to Add Marker-Images and Poses .
Calculate Camera Parameters
Refer to Calculate Camera Parameters .
(Conditional) Adjust Camera Parameters
Refer to (Conditional) Adjust Camera Parameters .
