YASKAWA Calibration Program
This section introduces the process of calibrating the camera extrinsic parameters using the calibration program.
The process consists of 4 steps:
Before proceeding, please make sure that:
You have loaded the Standard Interface program onto the robot and can establish communcation with Mech-Center.
You are familiar with the contents in Hand-Eye Calibration Guide.
Note
This section is intended for scenarios where the communication between the robot and Mech-Center is established through Standard Interface, and calibration has to be performed frequently.
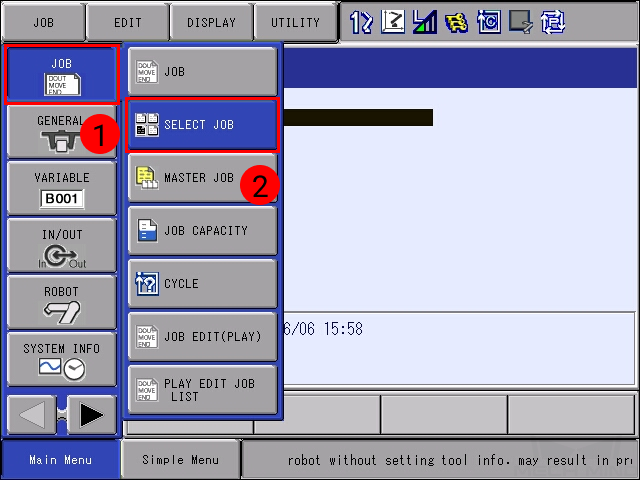
Select the Calibration Program
Select .
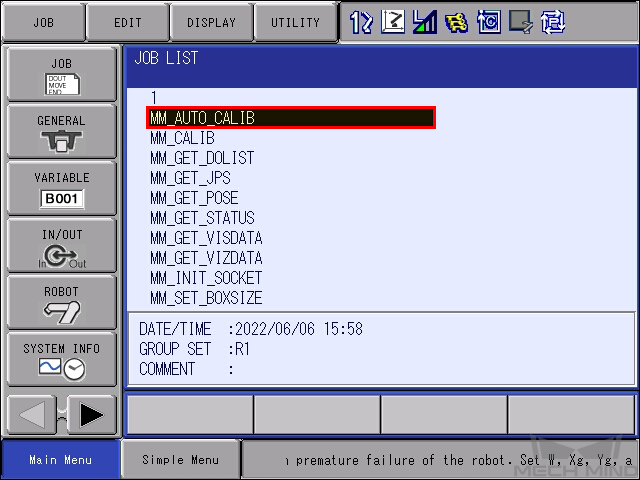
Select MM_AUTO_CALIB in the JOB LIST, and then press the SELECT key.
Teach the Calibration Start Point
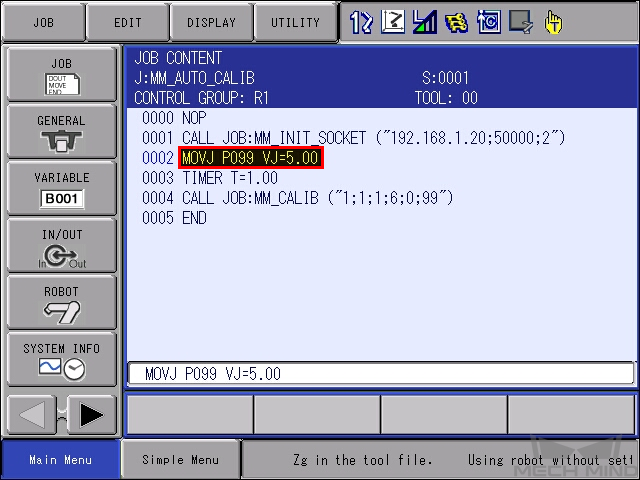
Move the robot to the start point for the calibration.
Move the cursor to the instruction side of line 2, and press the DIRECT OPEN key.
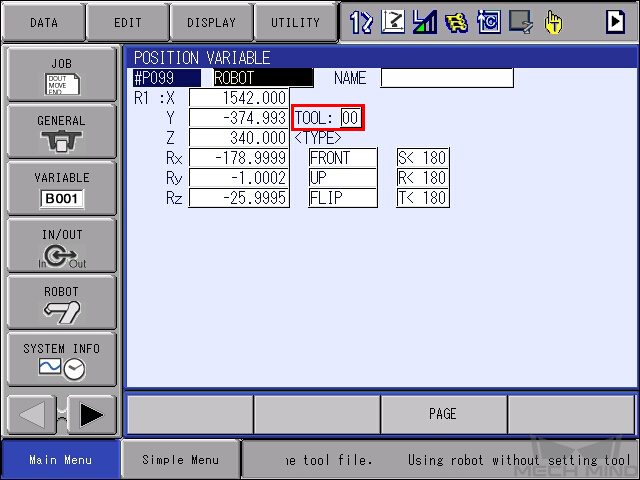
Change the value of P099 to the current pose of the robot: press SERVO ON READY key, and then press MODIFY and then ENTER while holding down the enable switch on the back. Make sure the value for TOOL is 00.
Press DIRECT OPEN again to return to the job.
Run the Calibration Program
Move the cursor back to line 0000, and turn the mode switch to PLAY mode, and press the SERVO ON READY key.
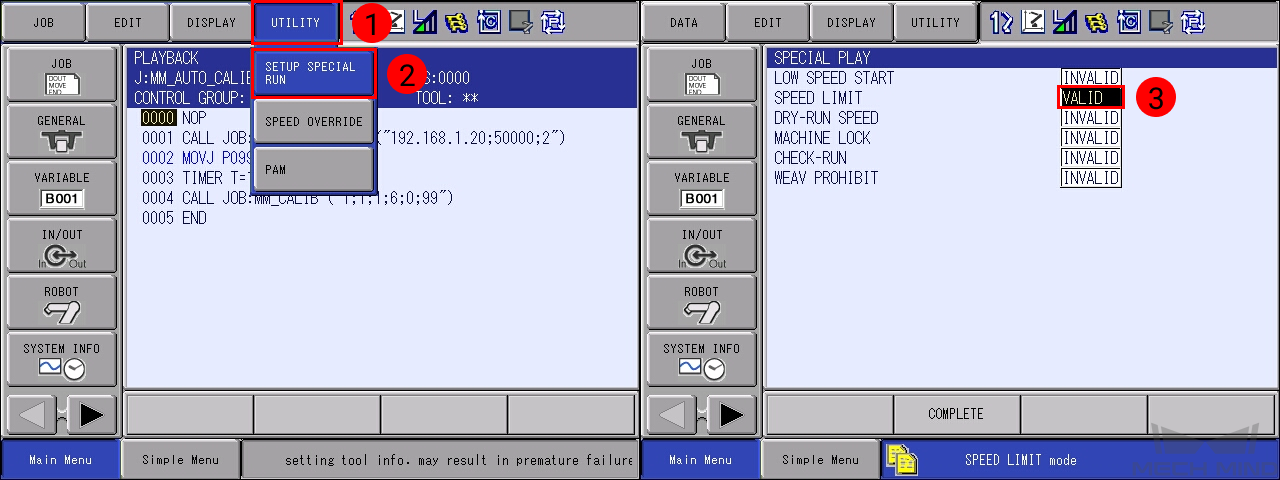
To move the robot at low speed, go to , and change SPEED LIMIT to VALID.
Press the START button. The program starts to run when the button lights up.
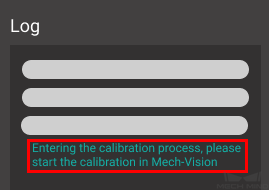
Proceed to the next section when the following message is displayed in Mech-Center’s Log panel:
Entering the calibration process, please start the calibration in Mech-Vision
Start Calibration in Mech-Vision
In Mech-Vision, click on Camera Calibration (Standard) in the Toolbar, or select from the Menu Bar.
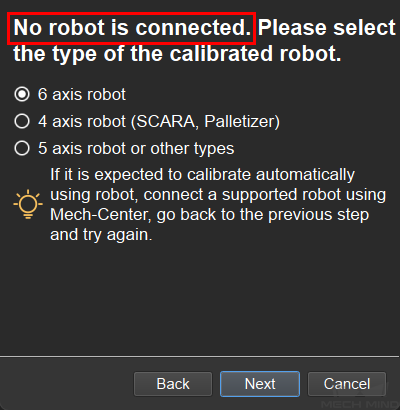
Follow the instructions in Mech-Vision to complete the following configuration:
Select Start a new calibration process;
Select the camera mounting method;
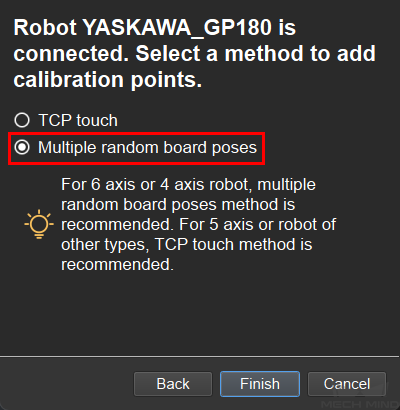
Select Multiple random board poses for adding calibration points.
Follow the instructions in Mech-Vision to finish the calibration.
Note
In 5 Add Marker-Images and Poses after you click on Move Robot along Trajectory and Add Board Images, if the robot does not reach the next calibration point within 60 seconds, Mech-Vision will report a timeout error and stop the calibration process. In such case, please select calibration in the program directory and run this program again, and restart the calibration process in Mech-Vision.
