Scale Image in 2D ROI

Function

Scale the region of ​​interest (ROI) in an image to a specified size.
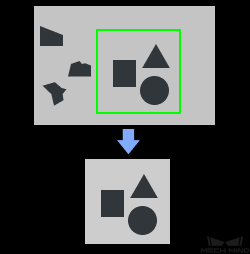
../../../../../_images/function_description4.png

Sample Scenario

It is usually used for image preprocessing in deep learning related Steps and is usually used with Recover Scaled Images in 2D ROI and deep learning related steps.

Input and Output
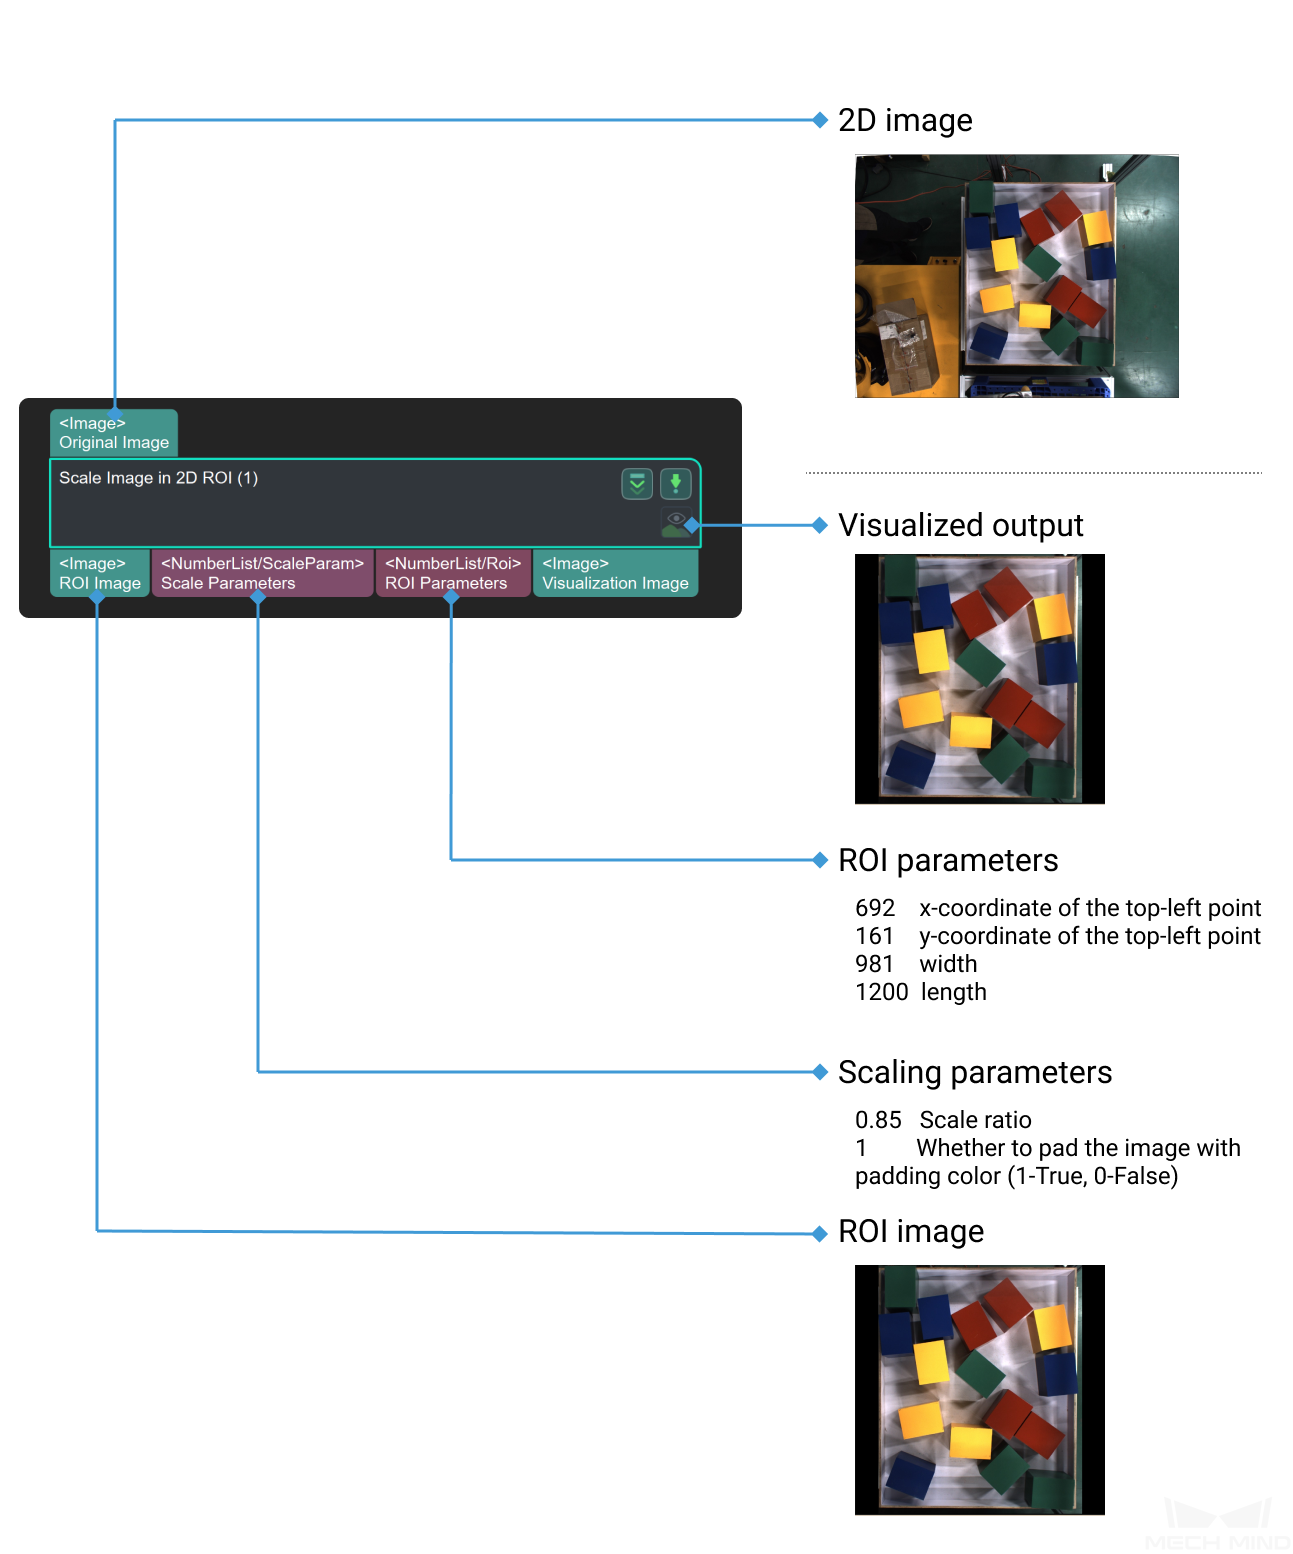
../../../../../_images/input_output_28.png

Parameters

Color ROI Setting

Default Value: ROIByFile
List of Values: ROIByFile (Read color ROI from file), ROIByParam (Read color ROI from parameters)

ROIByFile

Color roi File
Instruction: Click Open an editor to enter the Set ROI window. Create and connect a virtual camera when using parametric simulation. After selecting the image data to be loaded, the selected image appears in the “Image Display” column. If it is an actual application scenario, connect the real camera to collect the image and select the area of interest.

ROIByParam

Start X
Default Value: 0
Instruction: Manually set ROI. It cannot be greater than the maximum X value of the image.
Start Y
Default Value: 0
Instruction: Manually set ROI. It cannot be greater than the maximum Y value of the image.
Width
Default Value: 0
Instruction: Manually set ROI. It cannot be greater than the maximum width of the image.
Height
Default Value: 0
Instruction: Manually set ROI. It cannot be greater than the maximum height of the image.

Parameter Adjustment Instructions

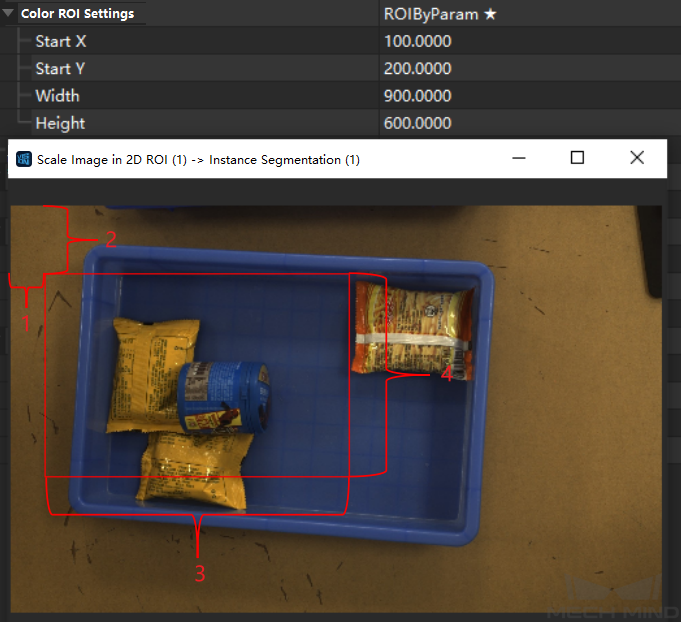
As shown in Figure 2 , 1 is Start X and 2 is Start Y to determine the upper left corner of the ROI area; 3 is Width and 4 is Heigth to determine the ROI area.
../../../../../_images/scale_parameter.png

Figure 2 Example of Setting ROI Area With Parameters

Method to Update Color ROI
Default Value: Origin
List of Values: Origin, AdaptivemodifiedRoiOrigin, BoundRect
  • Origin: Extract color ROI according to setting.

  • AdaptivemodifiedRoiOrigin: Use the border of the image to adjust the color ROI.

  • BoundRect: Extract the bounding rectangle area of the input image.

Instruction: Adjust the area corresponding to the input image. Origin uses the original image. AdaptivemodifiedRoiOrigin adaptively adjusts the center of the non-zero point area of the image to the center of the ROI. BoundRect replaces the original image with the circumscribed rectangle of the non-zero point of the image to calculate the zoom ratio. When the position of the object to be detected in the input picture is uncertain and the proportion of the area of the whole picture is small, choose from the latter two according to actual needs.

Color ROI Scaling

Auto Scale
Default Value: True
List of Values: True, False
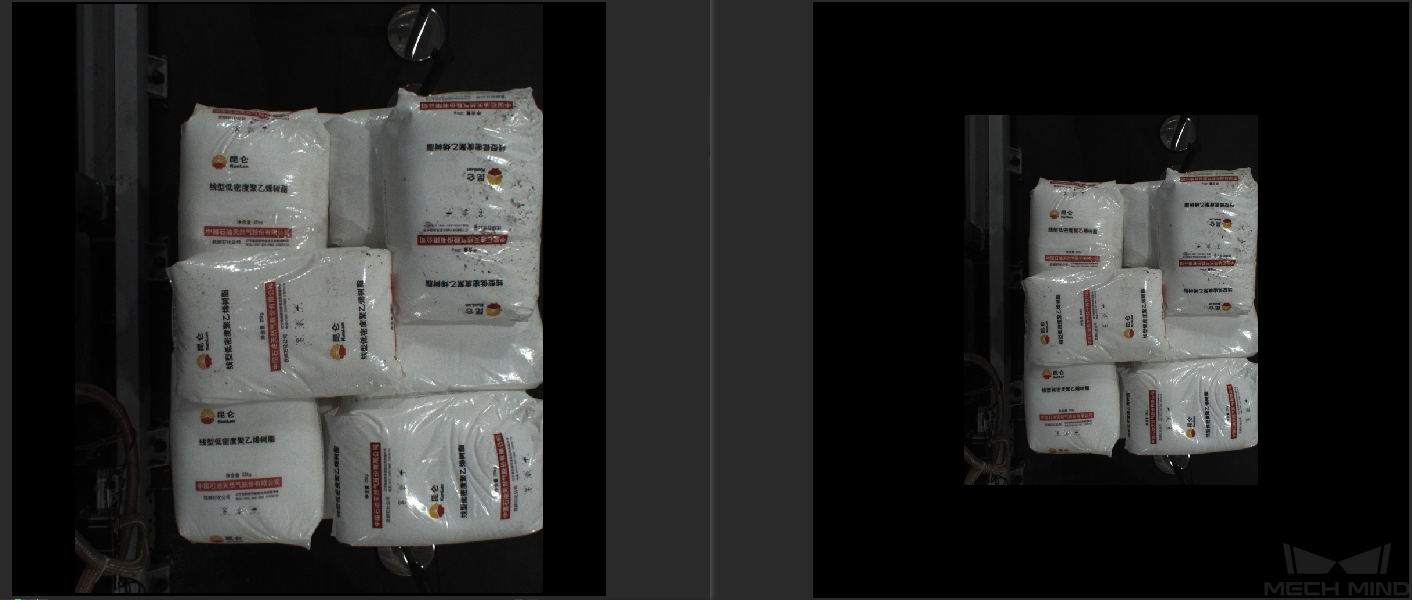
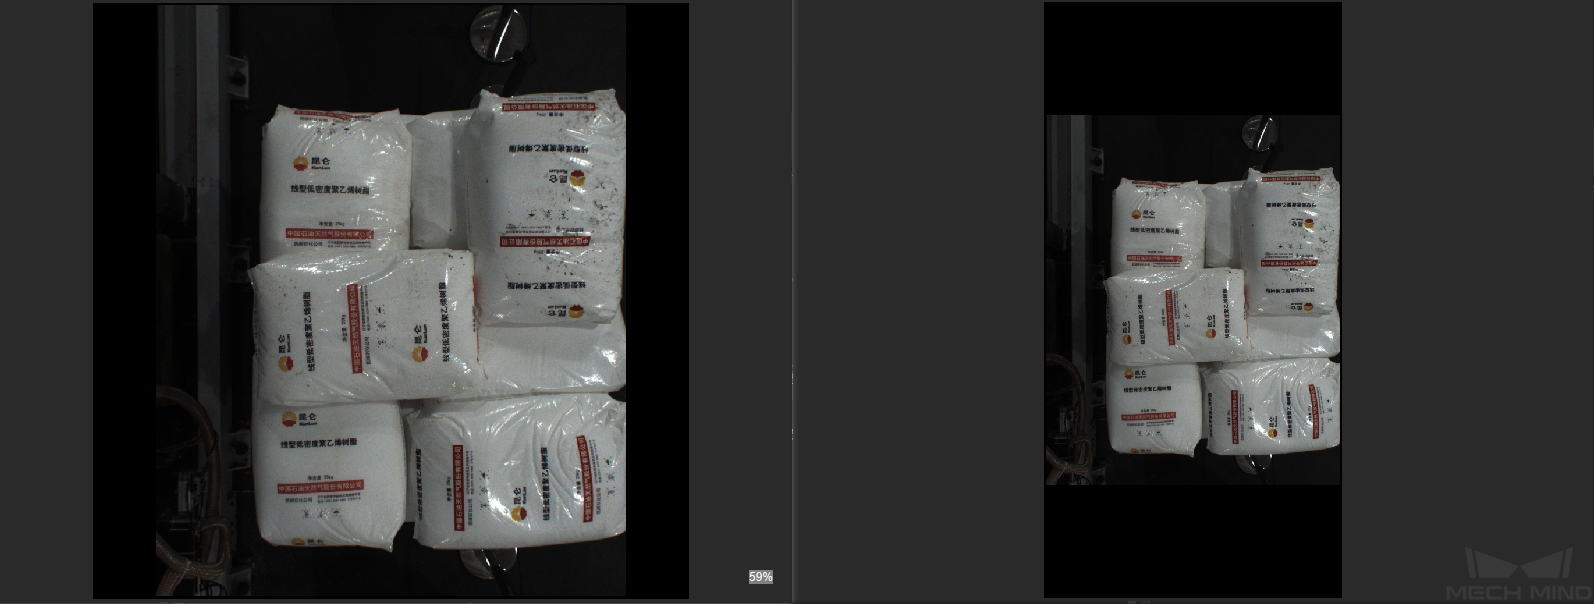
Instruction: When set to False, the zoom factor can be changed (default is 1). As shown in the figure below, the left side is the output diagram in the default state, and the right side is the output diagram with the custom zoom factor changed to 0.5.
Adjustment Example: The steps to calculate the scaling are described in detail in Custom scaling factor calculation example.
../../../../../_images/scale_zoom.png

Figure 3 Changing The Scaling Factor

Ideal Destination Resolution

Same as Input Color ROI & Skip Scaling
Default Value: True
List of Values: True, False
Instruction: Adjust the input image. Origin means using the original image. AdaptivemodifiedRoiOrigin can adpatively adjust the center of the non-zero area of ​​the image to the center of the ROI. BoundRect can replace the original image with the external rectangle of the non-zero area of the image. When the object to be detected accounts for a small proportion of the entire image and its position is uncertain, it is recommended that choose one from the latter two types.
When using the default value, the horizontal length (default is 1024 pixel) and vertical width (default is 1024 pixel) can be modified, and it can be set according to actual engineering requirements on time. In the figure below, the left image is the output image in the default state, and the right is the output image with the length changed to 512 pixels and the vertical width to 1024 pixels.
../../../../../_images/scale_pixel.png

Figure 4 Modifying The Image Size

Padding Color

Padding
Default Value: True
List of Values: True, False
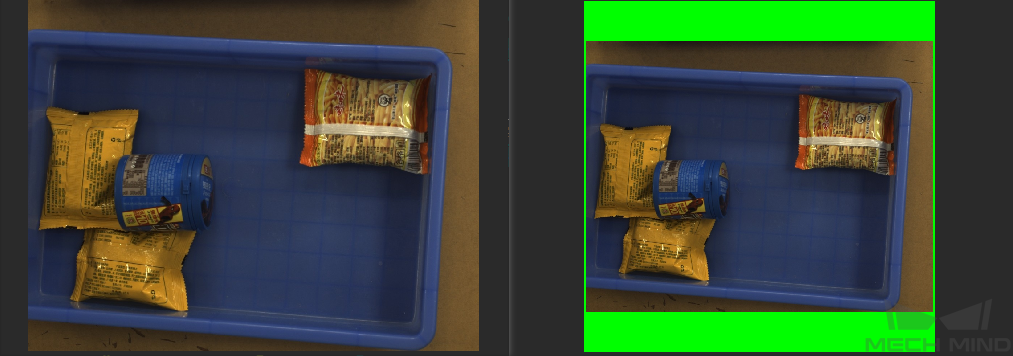
Instruction: The value of True fills the missing area with the specified colour. In general it will be filled to black (0,0,0) or grey (128,128,128).
Adjustment Example: As shown in Figure 5 , the left-hand side shows the result for a fill value of False and the right-hand side shows the result for a fill value of (0,255,0).
../../../../../_images/scale_padding.png

Figure 5 Image Fill Comparison

r
Default Value: 0
Instruction: The number of red channel. The value range is 0~255. Set according to actual needs.
g
Default Value: 0
Instruction: The number of green channel. The value range is 0~255. Set according to actual needs.
b
Default Value: 0
Instruction: The number of blue channel. The value range is 0~255. Set according to actual needs.

Common Procedures

Procedure of Instance Segmentation