Deep Learning Model Package Inference (Mech-DLK 2.2.0+)
Mech-Vision 1.6.0 provides built-in environment for deep learning inference. With this Step, the deep learning inference can be enabled without installing Mech-Mind Software Environment.
The compatibility information of this Step is shown in the table below.
Function
This Step unpacks the DLKPACK model file exported by Mech-DLK, completes model inferencing, and filters the inferencing results based on the parameter settings.
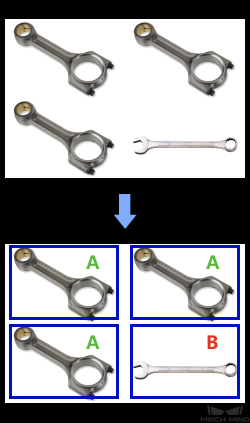
Sample Scenario
This Step is usually used for classification, object detection, defect detection, etc., and utilizes the deep learning model packages to infer the images to be detected.
Input and Output
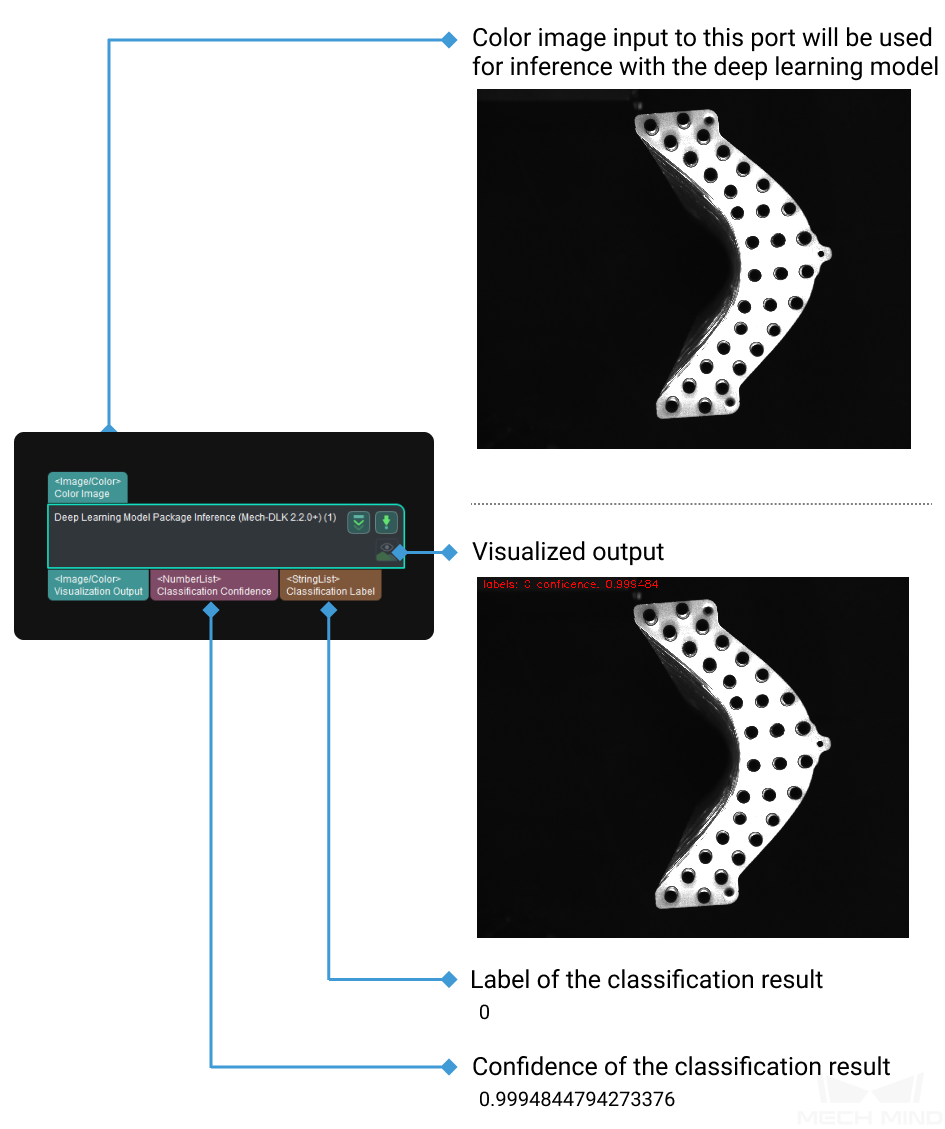
Classification
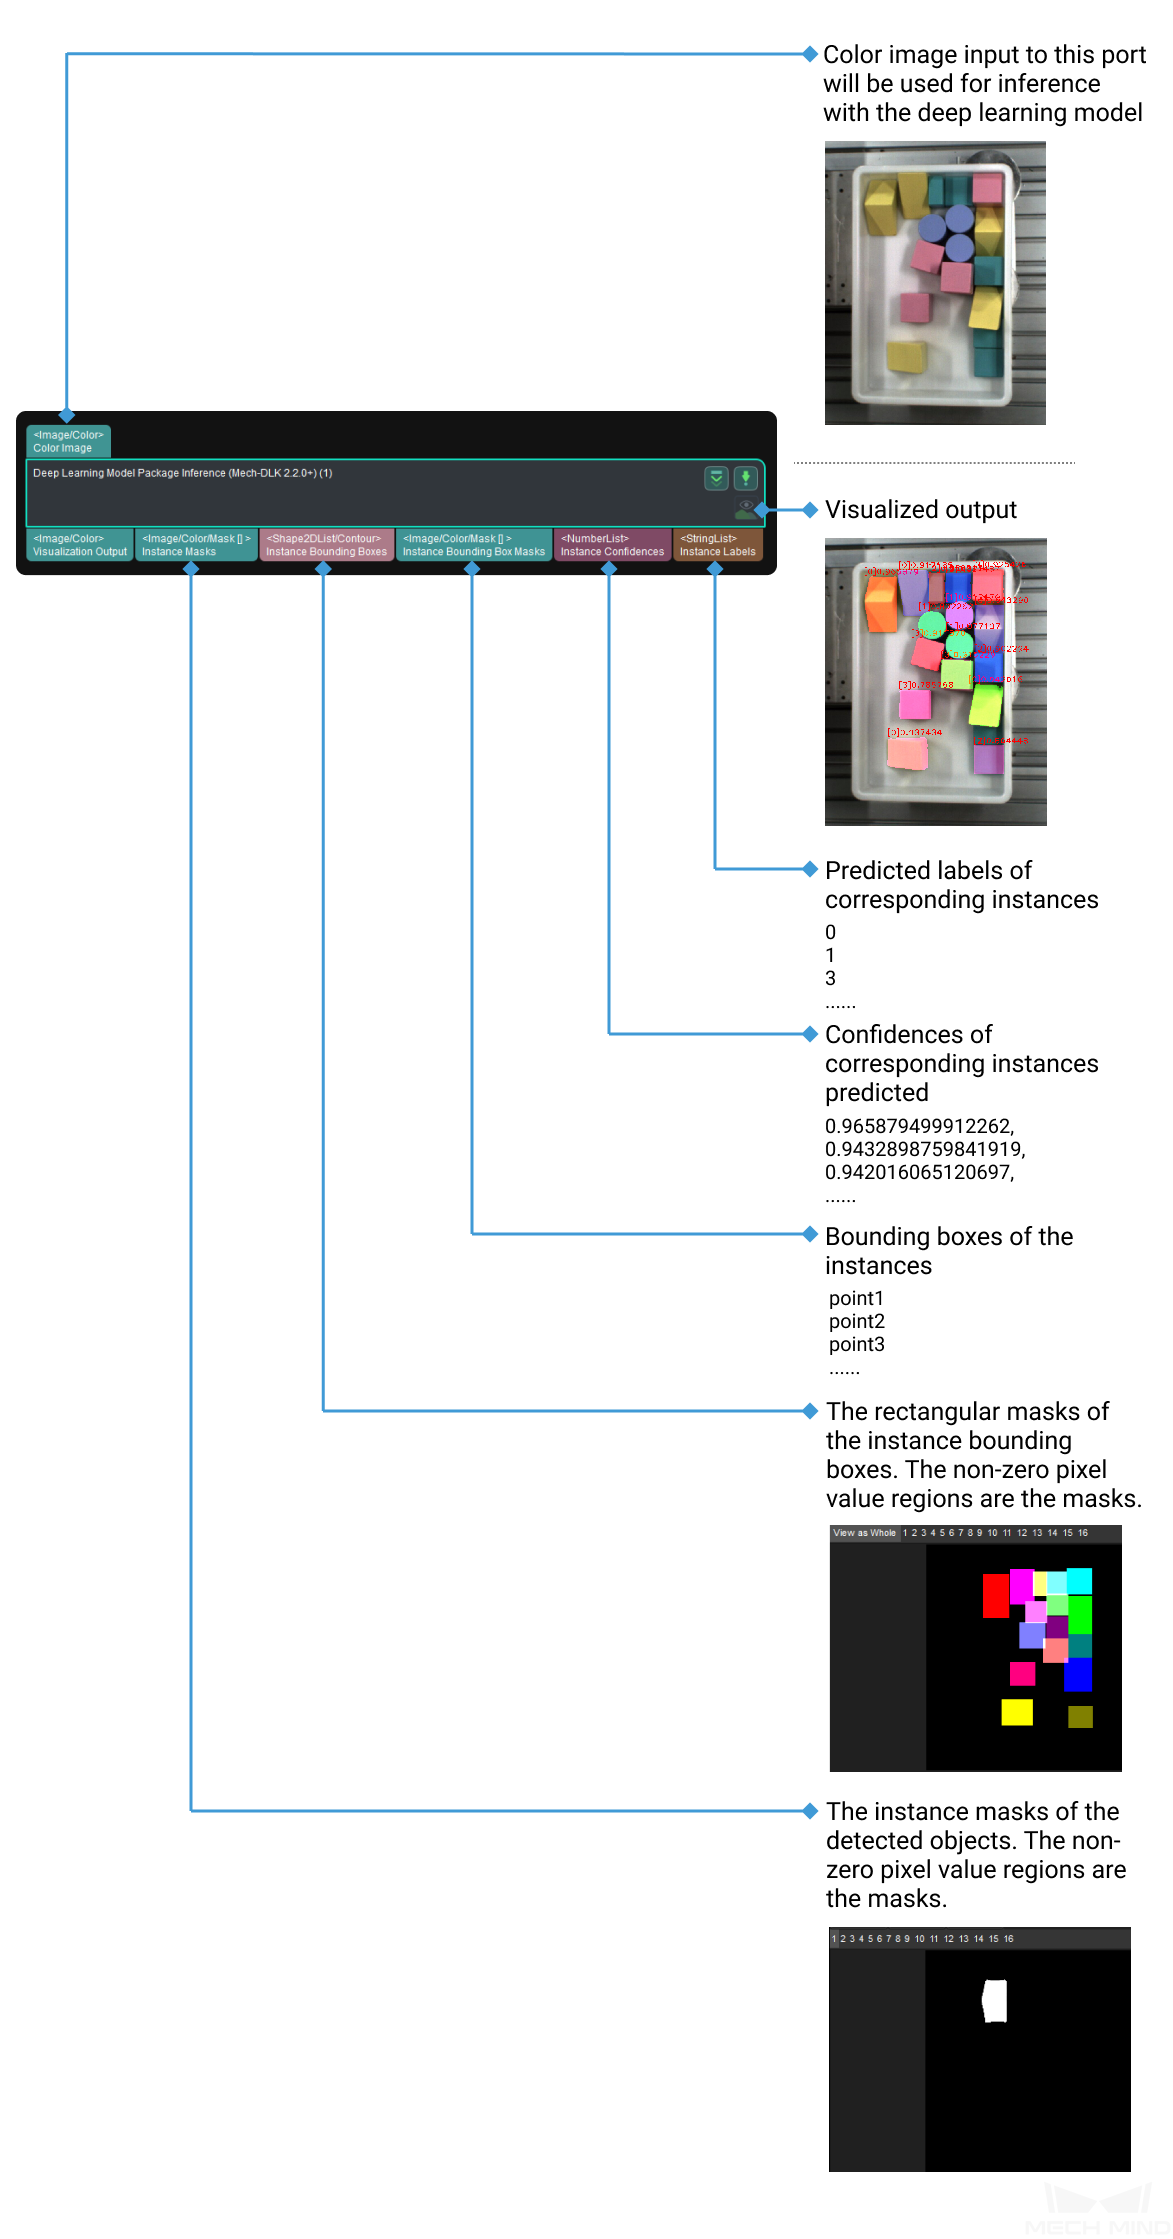
Instance Segmentation
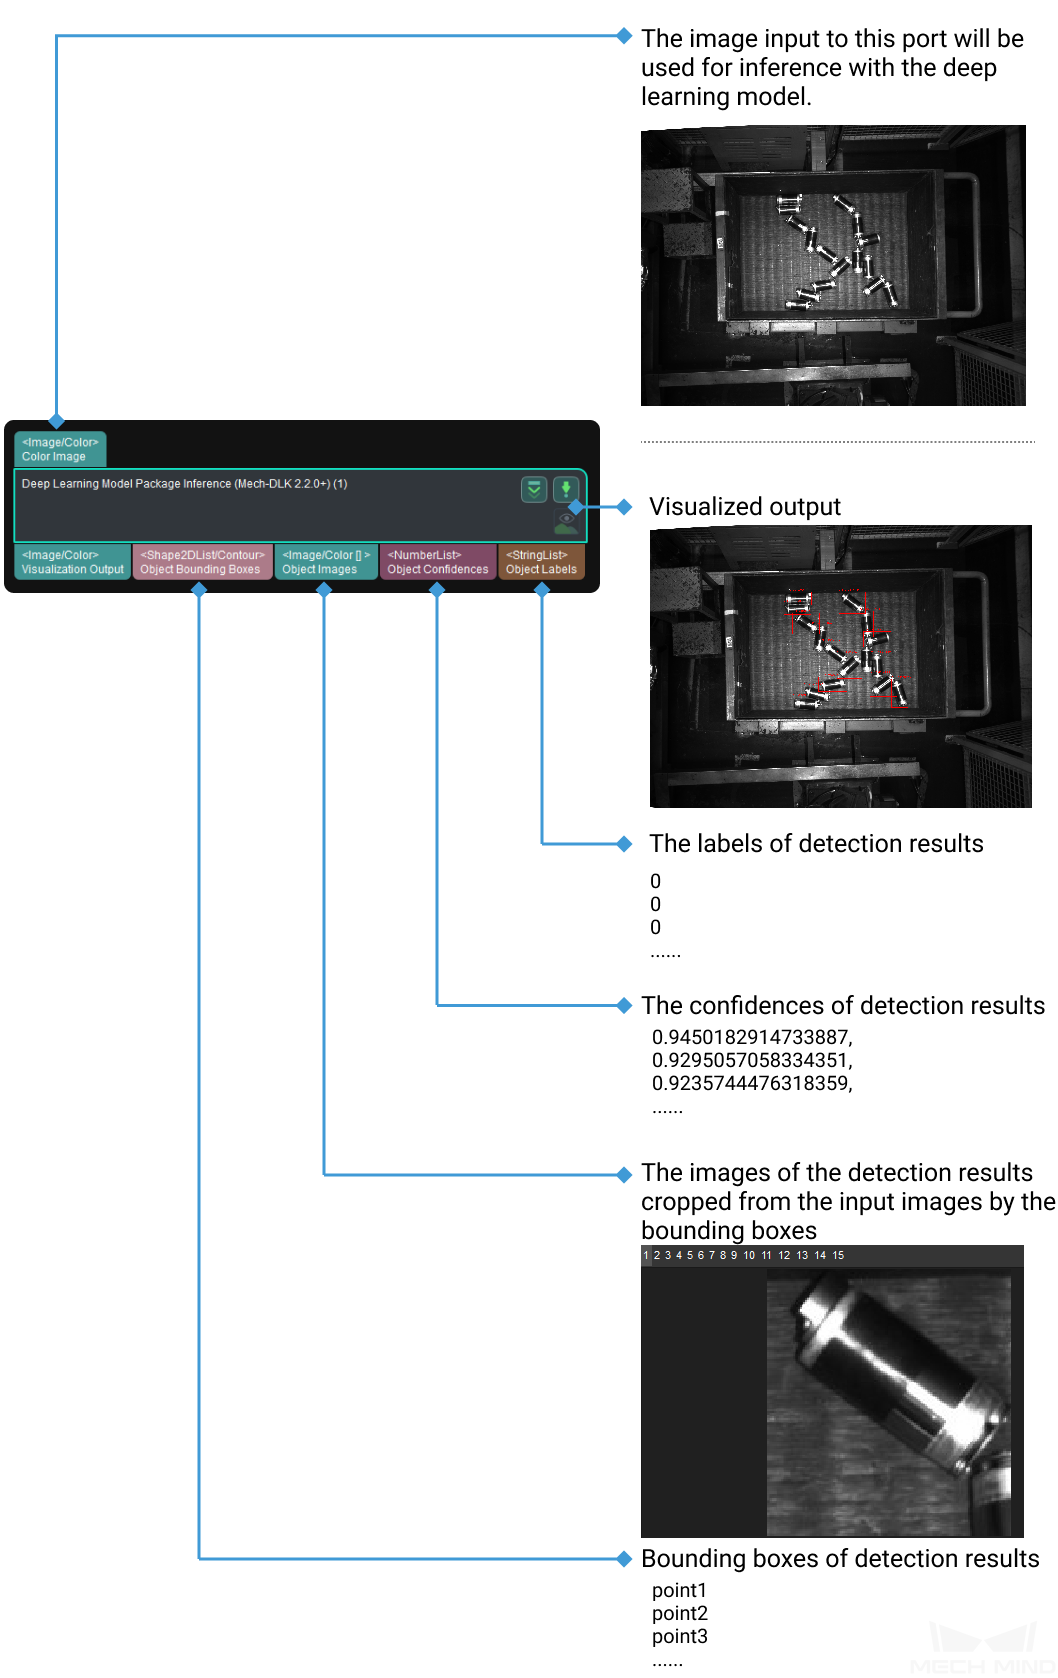
Object Detection
Defect Segmentation
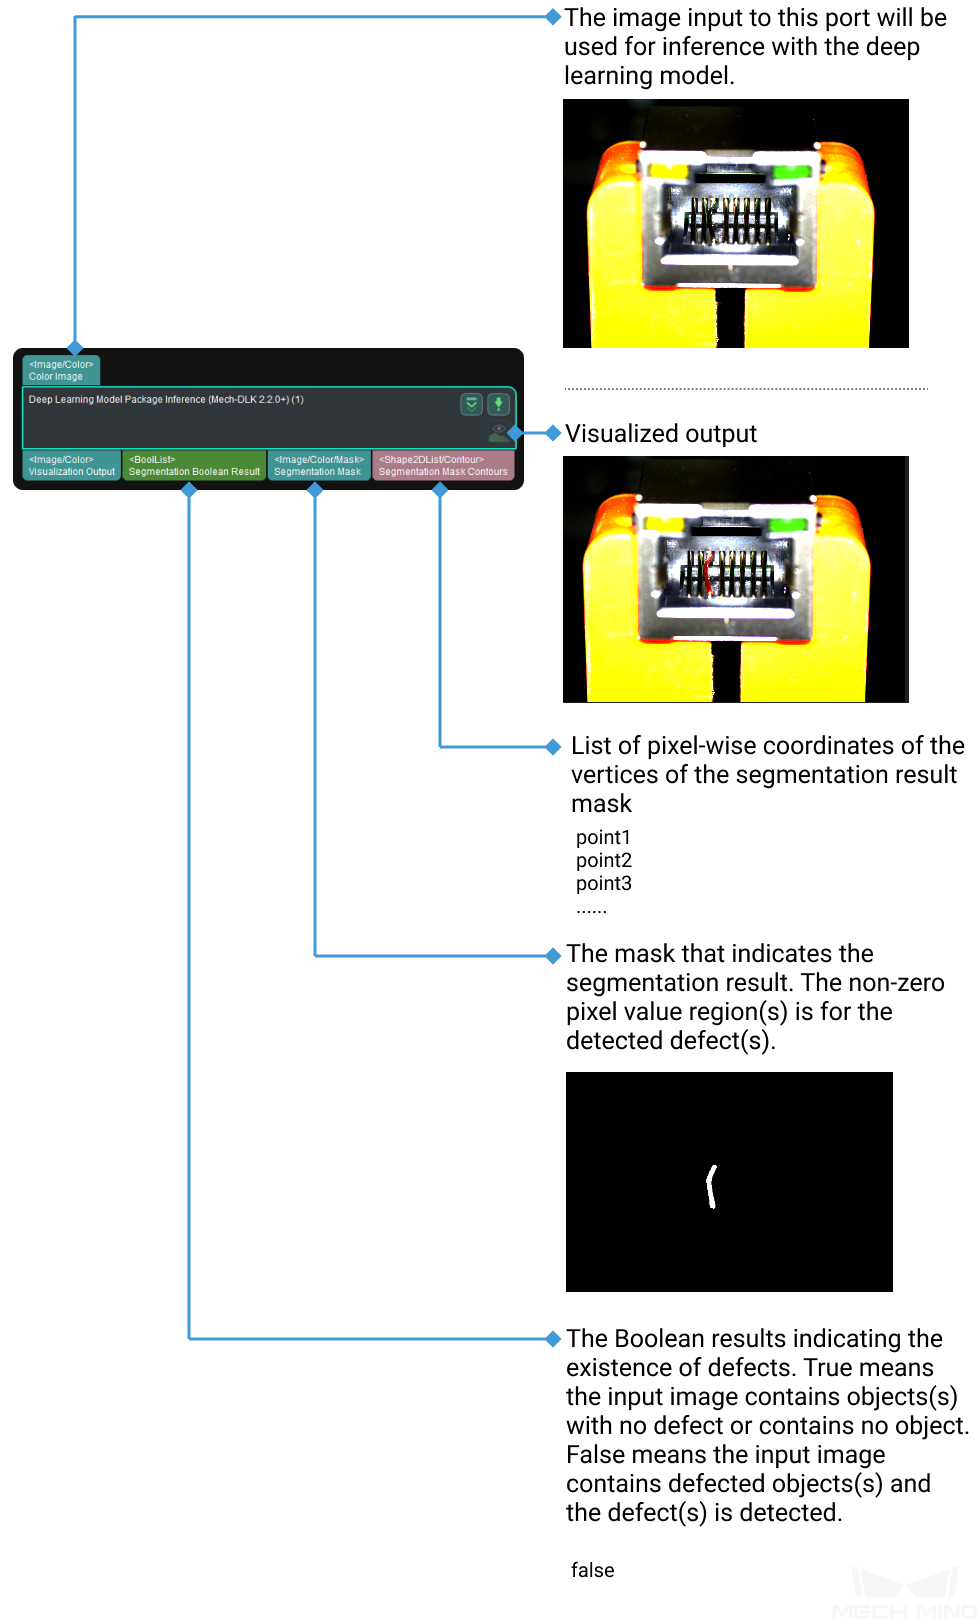
Parameter Tuning
General Parameters
Model Package Path
Instruction: Click on the
button and select the deep learning model package file that is in DLKPACK format.
Attention
When the model package is loaded for the first time, the model package will be optimized according to the PC used for deep learning inference, and the load time for the first time takes about 2 to 20 minutes. It is recommended not to load multiple model packages at the same time, and do not delete Steps, close the project, or exit the program while loading the model package.
ROI Settings
Instruction:
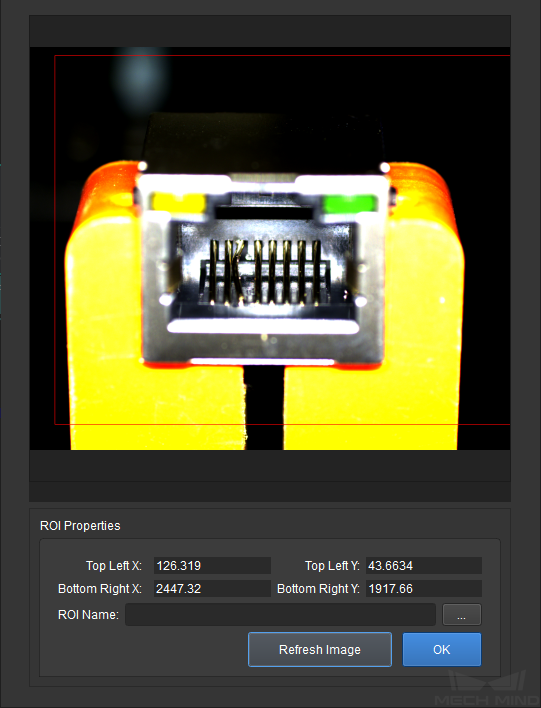
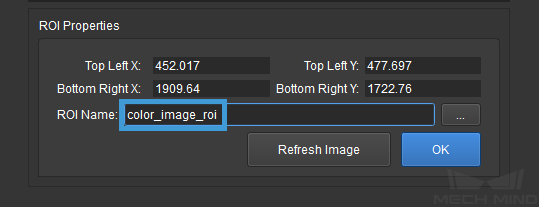
Once the deel learning model is imported, a default ROI will be applied. If you need to edit the ROI, click Open an Editor.

Edit the ROI in the pop-up set ROI window.
Enter an ROI Name, and then click OK.
Note
If the size of the set ROI is larger than the image size, a Failed to save ROI error message as shown below will pop up.

If ROI Name is left empty, a Failed to save ROI error message as shown below will pop up.

If the ROI is set successfully, the ROI file name will be displayed under the Open an Editor button, as shown below.

If you would like to use the default ROI again, please delete the ROI File Name directly.
Font Settings
- Customized Font Size
- Default setting: UnselectedInstruction: Select to customize the font size.
- Font Size (0~10)
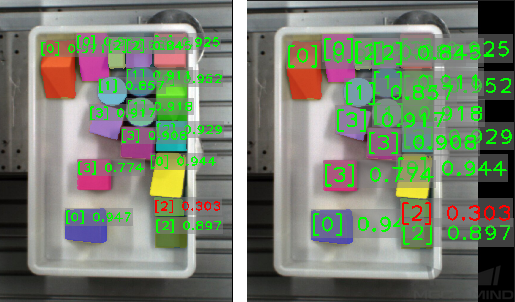
- Default setting: 3.0Instruction: Set the font size according to actual situation.Example: The figure below shows the font sizes set to 3.0 and 5.0 respectively in an instance segmentation project.
Hint
This parameter is not available for defect segmentation models.
Module-Specific Parameters
Classification
Classification Confidence Threshold (0.0~1.0)
Default value: 0.7000
Description: The results above this threshold will be kept.
Instance Segmentation
Visualization Settings
- Draw Objects on Image
- Default setting: UnselectedInstruction: Select to display the masks and bounding boxes on the image.
- Method to Visualize Objects
- Default setting: InstancesOptions: Threshold, Instances, Classes, CentralPointInstruction:
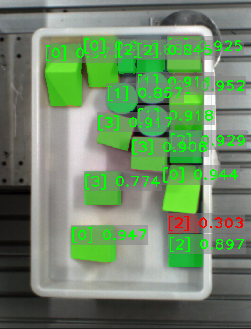
Threshold: If the computed confidence is above the threshold, the corresponding objects will be displayed in green, or else the objects will be displayed in red, as shown below.
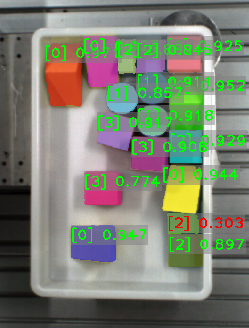
Instances: Each detected object is displayed in an individual color, as shown below.
Classes: Objects with the same label will be displayed in the same color, as shown below.
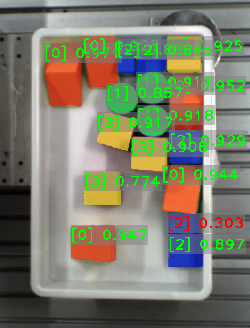
CentralPoint: Display the original color of the object, as shown below.
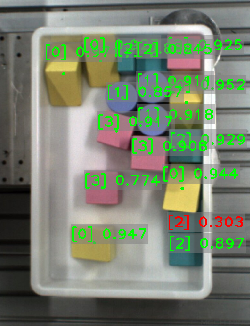
Instance Segmentation Confidence Threshold (0.0~1.0)
Default value: 0.7000
Description: The results above this threshold will be displayed in green and the results below this threshold will be desplayed in red.
Object Detection
Visualization Settings
- Draw Objects on Image
- Default setting: UnselectedInstruction: Select to display the masks and bounding boxes on the image.
- Method to Visualize Objects
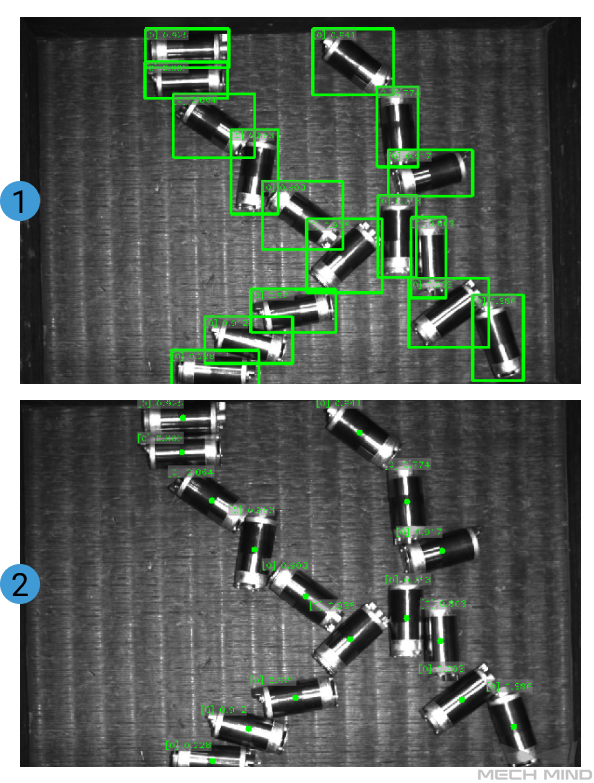
- Default setting: CentralPointOptions: BoundingBox, CentralPointInstruction: Figure 1 is an example of visualization in BoundingBox method and Figure 2 is an example of visualization in CentralPoint method.
Object Detection Confidence Threshold (0.0~1.0)
Default value: 0.7000
Description: The results above this threshold will be kept.
Defect Segmentation
Visualization Settings
- Draw Defect Mask on Image
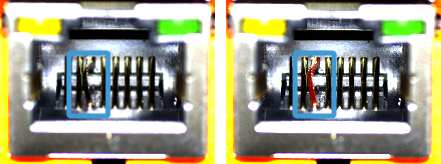
- Default setting: UnselectedInstruction: Select to draw a mask on the input image. The figure below shows the result before and after selecting this option.
