Predict Pick Points (Any Object)
Function
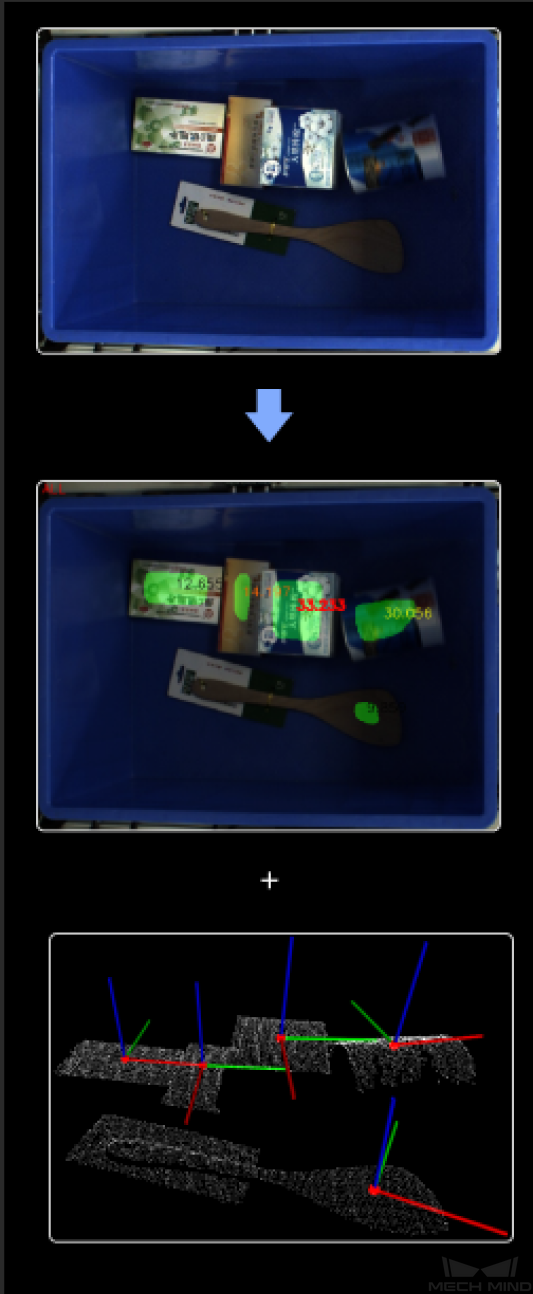
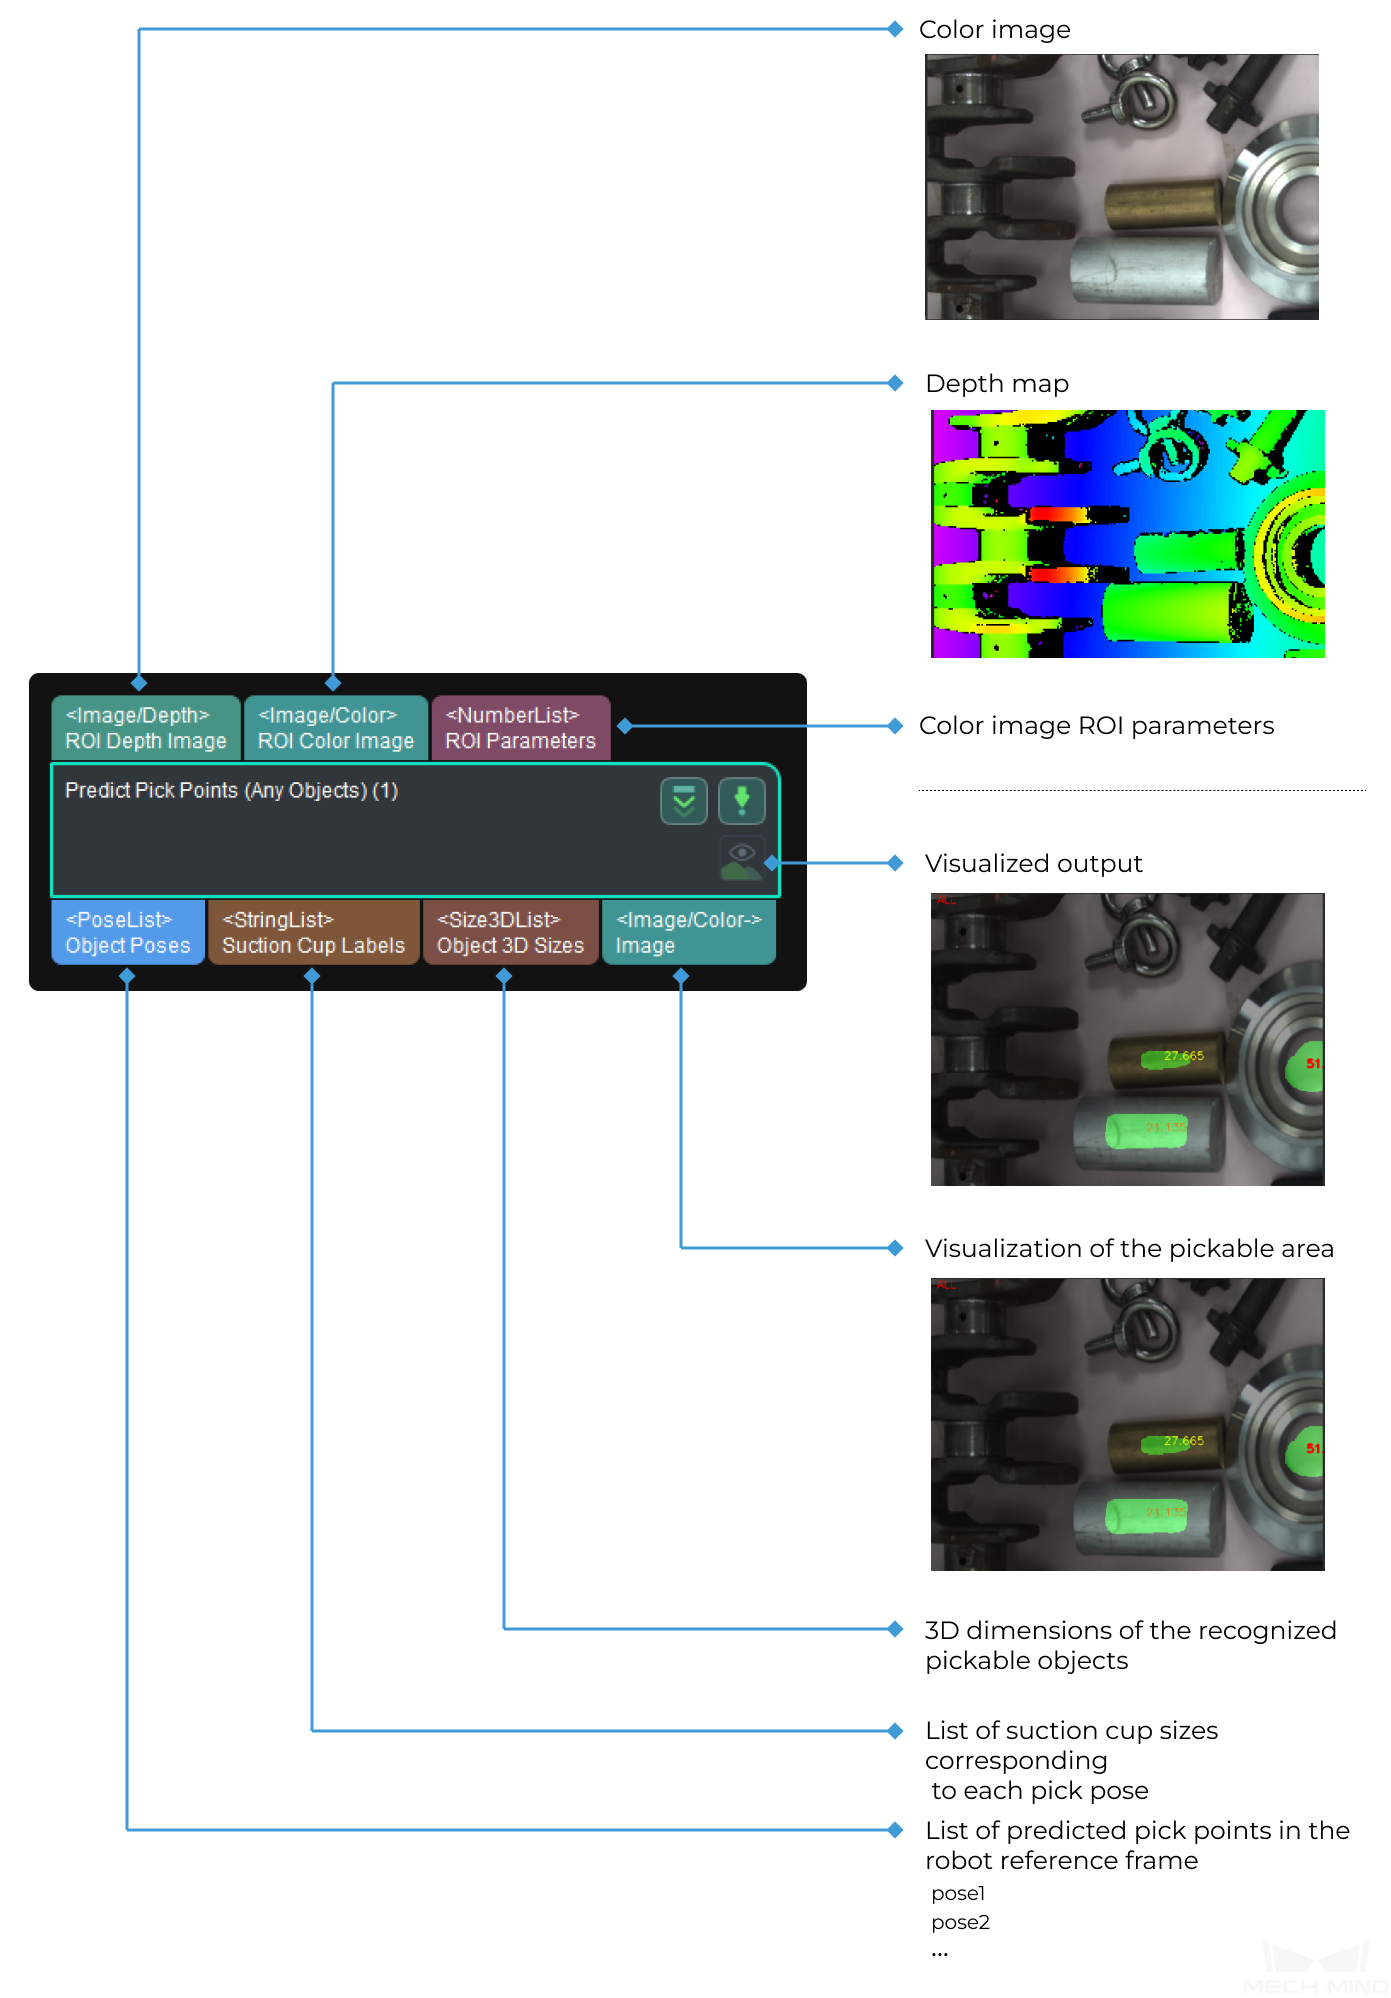
Based on 2D images and depth maps, this Step recognizes the pickable objects in the image and outputs corresponding picking poses.
Usage Scenario
This Step is usually used for sorting different objects heaped or scattered.
Input and Output
Parameter Tuning
Server
- Server IP
- Default setting: 127.0.0.1Instruction: Please set the IP address of deep learning server according to the actual requirement.
- Server Port (1 ~ 65535)
- Default setting: 60052Instruction: For Pick Anything and Pick Anything (Without Bin) projects, you should use a port number of 60000 or above.
Working Distance
- Minimum Working Distance
- Default setting: 0Instruction: The shortest distance between the camera and the object(s) in the scene. If a bin is used, please set this value to the distance from the bottom of the camera to the top edge of the bin. Please configure the value according to the actual situation.
- Maximum Working Distance
- Default setting: 3000Instruction: The longest distance between the camera and the object(s) in the scene. If a bin is used, please set this value to the distance from the bottom of the camera to the bottom edge of the bin. Please configure the value according to the actual situation.
Bin Settings
- Use Bin
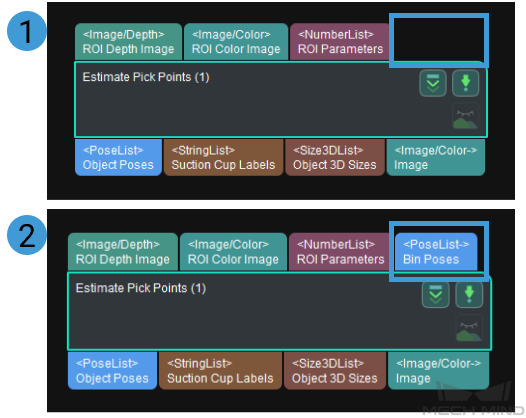
- Default setting: UnselectedInstruction: Please select this option when a bin is used. Once this option is selected, a Bin Poses port will be added, as shown below.
- Length
- Default setting: 100mmInstruction: Once Use Bin is selected, set the value according to the dimensions of the bin.
- Width
- Default setting: 100mmInstruction: Once Use Bin is selected, set the value according to the dimensions of the bin.
Contour Detection (Smart Placement, Special Shape)
- Contour Detection
- Default setting: UnselectedInstruction: Select to detect the contour of the object. Once this option is selected, the Special Shape Filter parameter will appear.
Special Shape Filter (Frequently used for parcel picking scenarios)
- Filter Out Narrow Objects
- Default setting: UnselectedInstruction: Once this option is selected, object whose smallest cuboid bounding box’s shortest edge is below the set threshold will be considered as the narrow object and therefore ignored.
- Short Edge Length Lower Limit
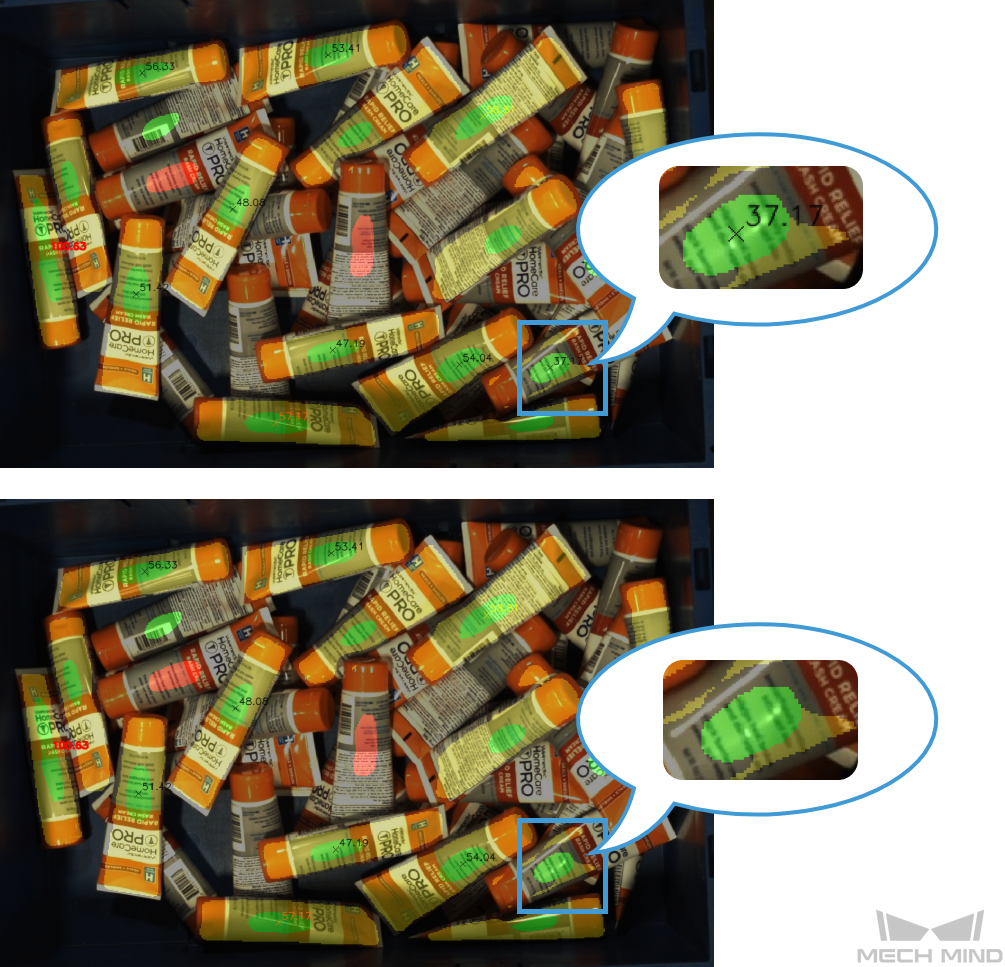
- Default setting: 0Instruction: This option will appear once the Filter Out Narrow Objects is selected. Object whose smallest cuboid bounding box’s shortest edge is below this value will be considered as the narrow object and therefore ignored. Please configure the value according to the actual situation.Example: When the value is set to 30, objects whose actual lengths are less than 30mm will be filtered, as shown below. The top and bottom figure shows the recognition result before and after being filtered respectively.
- Filter Out Long Objects
- Default setting: UnselectedInstruction: Once this option is selected, object whose smallest cuboid bounding box’s longest edge is higher than the set threshold will be considered as the long object and therefore ignored.
- Long Edge Length Upper Limit
- Default setting: 0Instruction: This option will appear once the Filter Out Long Objects is selected. Object whose smallest cuboid bounding box’s longest edge is higher than this value will be considered as the long object and therefore ignored. Please configure the value according to the actual situation.Example: When the value is set to 180, objects whose actual lengths are longer than 180mm will be filtered, as shown below. The top and bottom figure shows the recognition result before and after being filtered respectively.
Overlap Detection
- Overlap Detection
- Default setting: UnselectedInstruction: Please select this option when there are overlapping objects. Once this option is selected, the overlapping objects will be detected and their picking priority will be reduced.
- Max Number of Objects
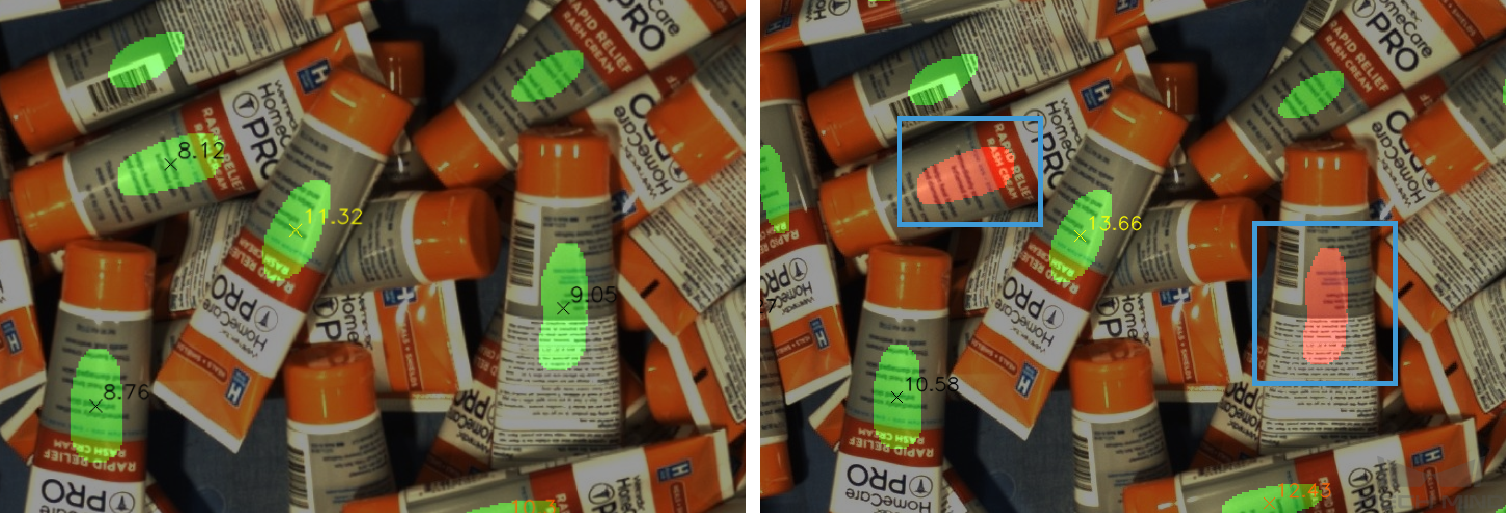
- Default setting: 6Instruction: This option will appear once Overlap Detection is selected. It defines the maximum number of objects which are considered as overlapping objects. Please configure the value according to the actual situation. The higher this value, the more objects will be considered as overlapping, and therefore it will be harder to complete the picking task. However, the target objects are less likely to be damaged.Example: When the value is set to 6, no more than 6 overlapping objects will be detected, as shown below. The left and right figure shows the recognition results before and after setting the value. The objects in red are overlapping objects.
Suction Cup Configuration
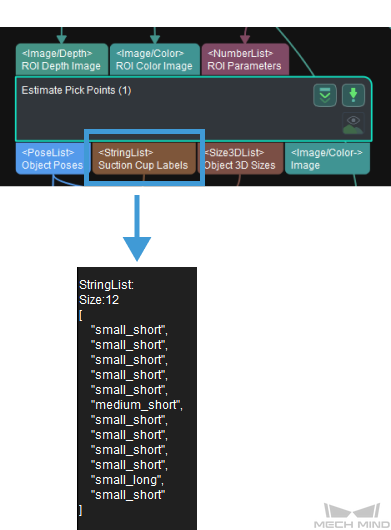
This parameter determines the output result of suction cup labels.
- Allocate by Mask Heftiness
- Default setting: DisableOptions: Disable, Into Two Groups, Into Three GroupsInstruction: The objects will be allocated to different groups according to the smallest inscribed circle’s radii of their masks, and the suction cup configuration of different groups will be different.
- Heftiness Threshold 1
- Default setting: 0Instruction: The first threshold of the smallest inscribed circle’s radii. Objects with radii below this threshold will be allocated to group 1, while objects with radii above this threshold will be allocated to group 2.Example: As shown in the figure below, when the detected inscribed circle’s radius of the object mask is below 20mm, the suction cup’s label will be labeled as “Small”.

- Heftiness Threshold 2
- Default setting: 0Instruction: The second threshold of the smallest inscribed circle’s radii. Objects with radii below this threshold will be allocated to group 2, while objects with radii above this threshold will be allocated to group 3.Example: As shown in the figure below, when the detected inscribed circle’s radius of the object mask is greater than 40mm, the suction cup’s label will be labeled as “Large”, and if the radius is between 20mm and 40mm, the label will be labeled as “Medium”.

- Allocate by Mask Span
- Default setting: DisableOptions: Disable, Into Two GroupsInstruction: The objects will be allocated to different groups according to the smallest bounding box’s diagonal of their masks, and the suction cup configuration of different groups will be different.
- Mask Span Threshold
- Default setting: 80Instruction: Object(s) with diagonals below this threshold will be marked as “Short”, or else will be marked as “Long”.Example: As shown in the figure below, the detected object will be labeled as “Long” when its length is greater than 80mm, or else it will be labeled as “Short”.

Visualization
- Enable
- Default setting: SelectedInstruction: Select to enable visualization.
- Visualization Type
- Default setting: Final ScoreOptions: Final Score, Show Suction Cup Diameter, Show Object Length, Show Pose HeightInstruction: Select the options for visualization.Example:
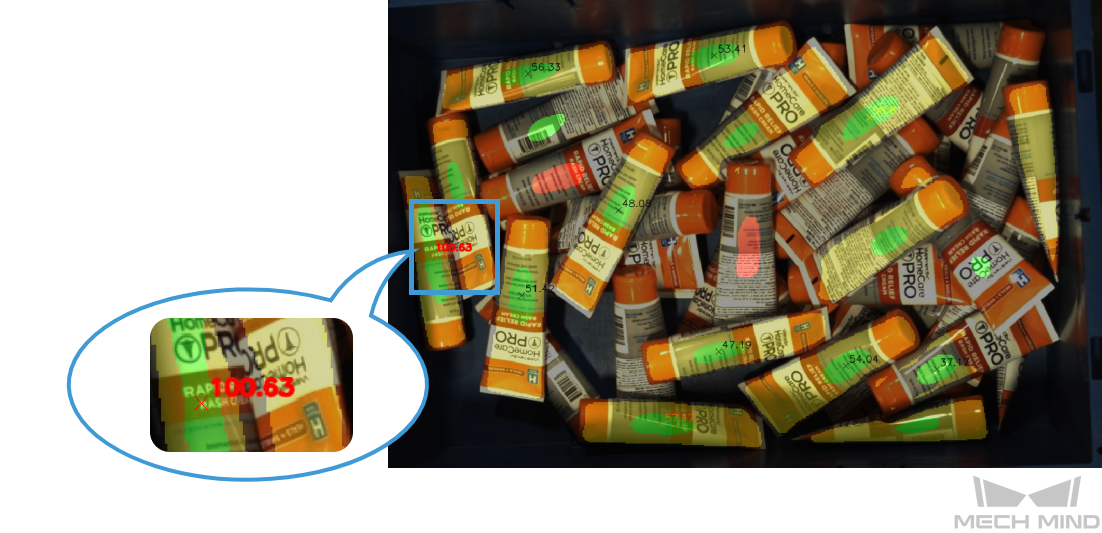
When Final Score is selected as the Visualization Type, the visualization result is shown below. The object with red text on it will be picked first.
When Show Suction Cup Diameter is selected as the Visualization Type, the visualization result is shown below. The object with red text on it will be picked first.
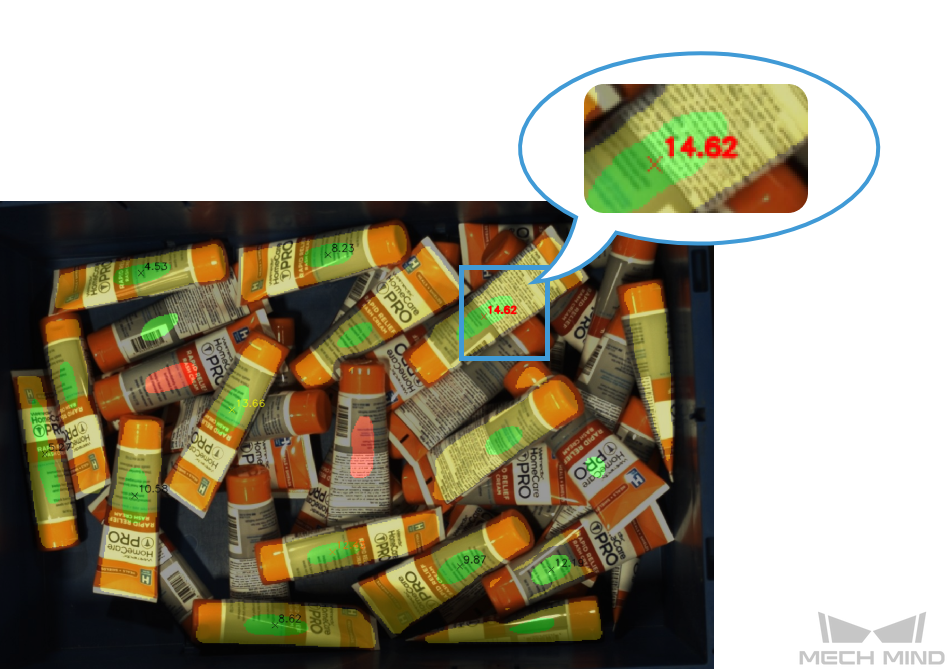
When Show Object Length is selected as the Visualization Type, the visualization result is shown below. The object with red text on it will be picked first.
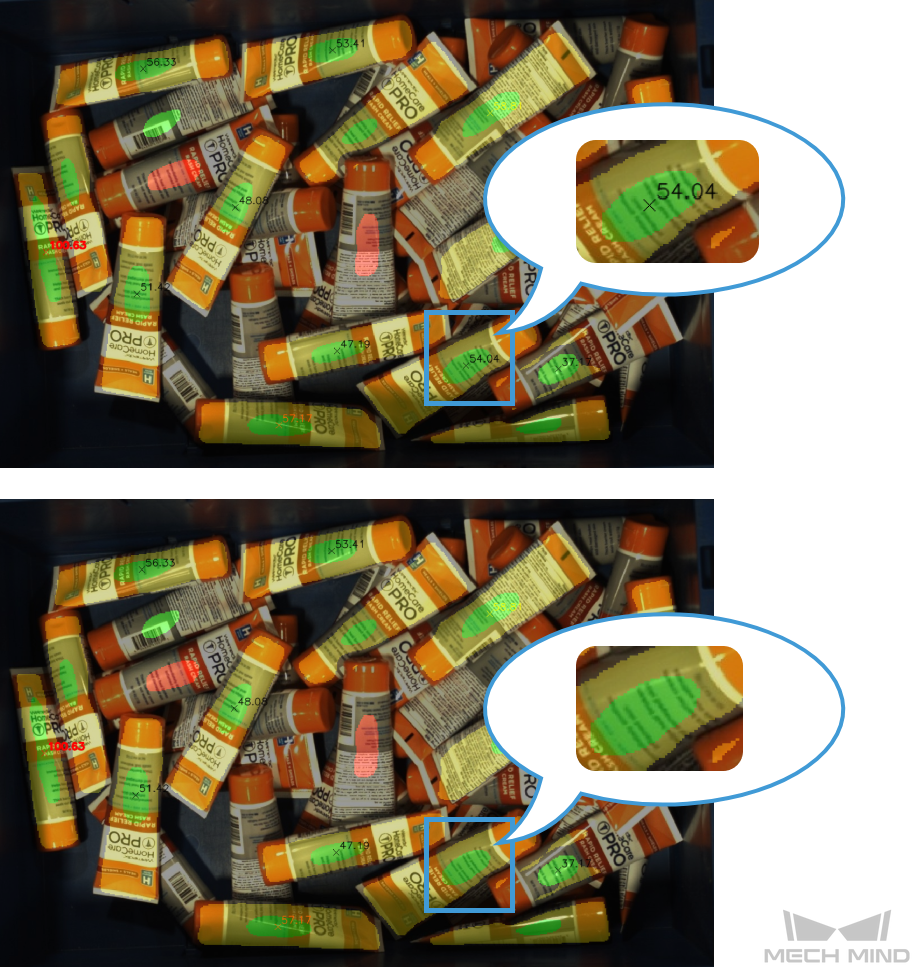
When Show Pose Height is selected as the Visualization Type, the visualization result is shown below. The object with red text on it will be picked first.
Pose Sorting Logic
- Pose Height Weight
- Default setting: 3Options: 1, 2, 3
- Suction Cup Size Weight
- Default setting: 1Options: 0, 1, 2, 3
- Object Length Weight
- Default setting: 1Options: 0, 1, 2, 3
Instruction: When the Pose Height Weight, Suction Cup Size Weight, and Object Length Weight are specified respectively, the final score is calculated according to the equation: Final Score = Pose Height × Pose Height Weight + Suction Cup Size × Suction Cup Size Weight + Object Length × Object Length Weight, and objects with higher final score will be prioritized for picking.
