Instance Segmentation
Function
Recognize target objects in an image and locate them at the pixel scale through deep learning.
Sample Scenario
You can use this Step to infer with model files from Mech-DL Kit and Mech-DLK. The results of inference are closely related to the data on which the model was trained. If you find that the inference results are not as expected, try the following methods in sequence:
Please check after setting the region of interest and scaling whether the sizes of the target objects in the image are similar to those in the training data (if you are using supermodel and this method does not solve the problem, please contact the support team).
Please check whether the objects, ambient light, background, etc. in the input color image are similar to those of the training data.
Adjust the confidence threshold and use the first output port to check the visualized recognition results.
Input and Output
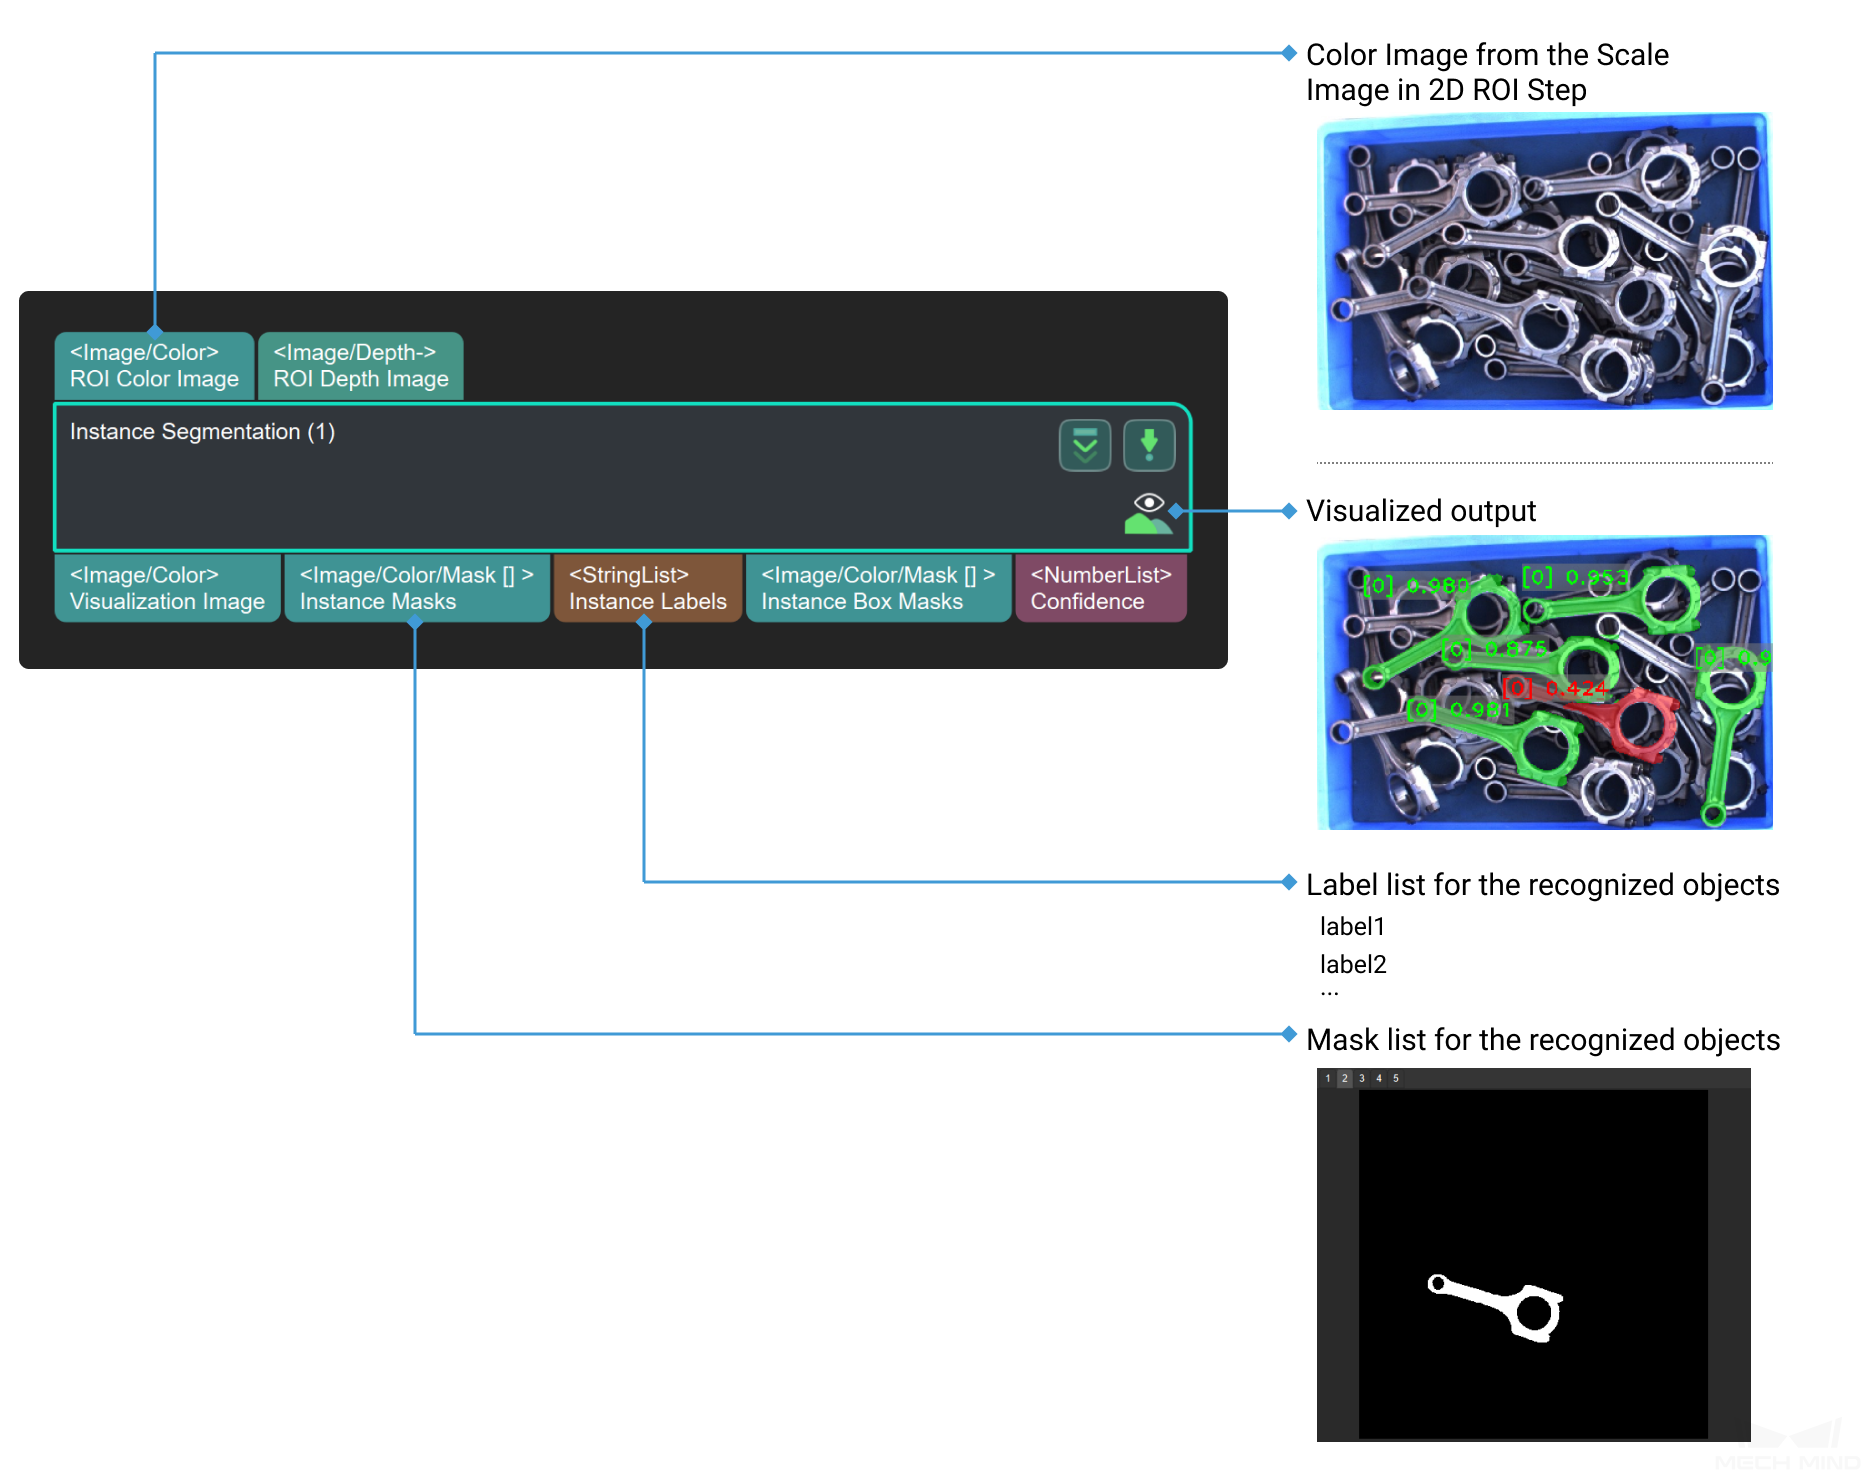
Parameters
Server & Model
- Server Address
- Model File
- Configuration File
Preload Setting
- Preload Model on Project Open
Max Detected Objects
Default Value: 100Instruction: This attribute is used to set the maximum number of instances that can be displayed in the image, and the range is 0~500, which can be adjusted according to actual needs.Acceptable Mean for Gray-scaled Input
This attribute judges whether the average gray value of the input image is in the set gray average value interval, and filters overexposed or over dark images to avoid incorrect instance segmentation, as shown in Figure 1 .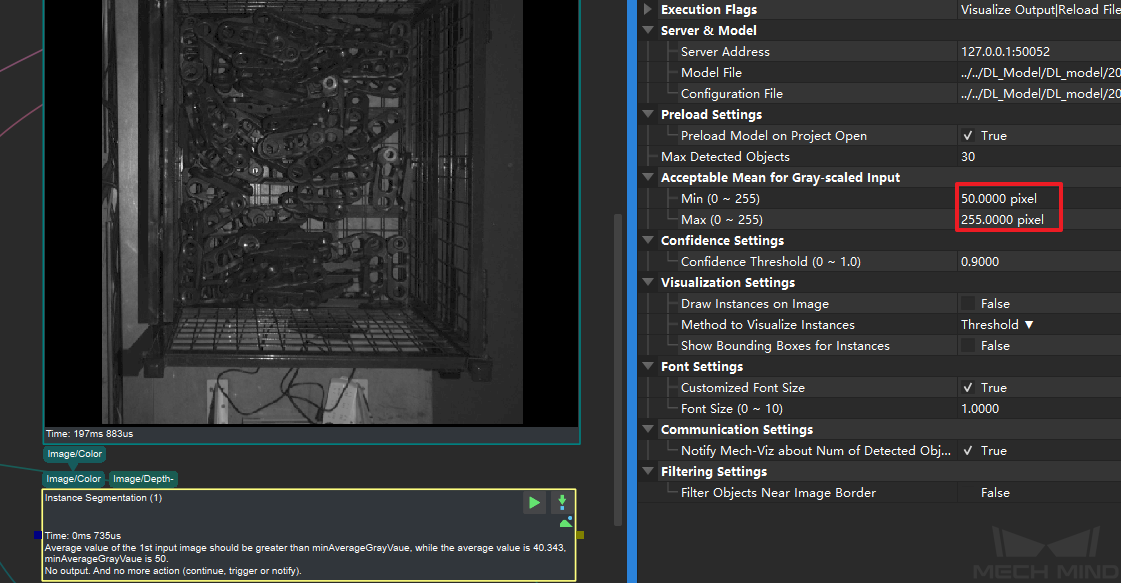
Figure1 Filter Out Dark Images
- Min
- Max
Confidence Settings
- Confidence Threshold
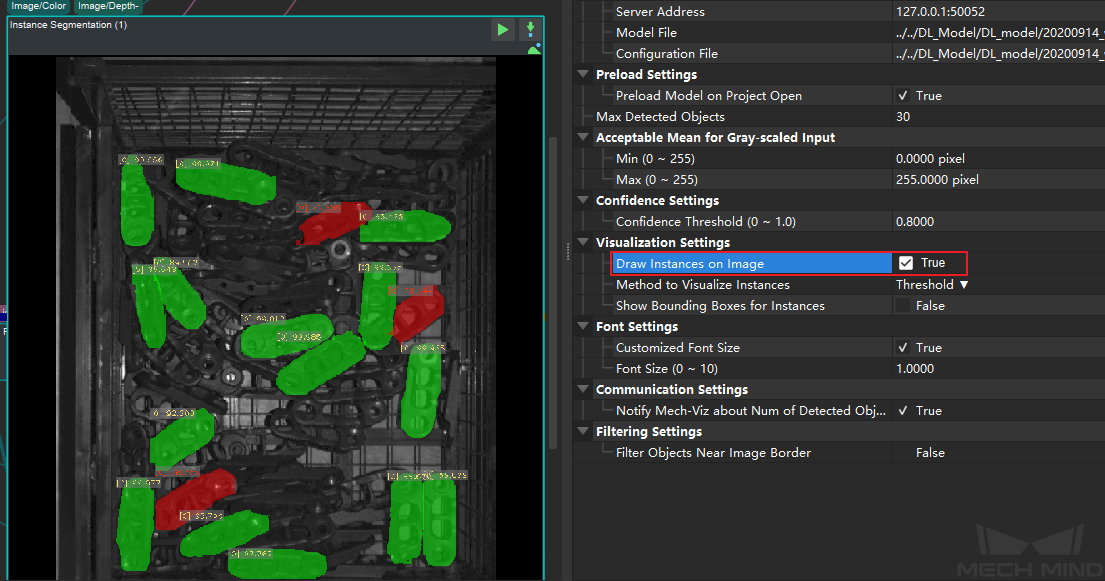
Figure2 Visualize Confidence Threshold
If the number of instances obtained by running at the current threshold is small or the result is not good enough, as shown in Figure 3 , the red data in the figure are instances with confidence lower than the threshold , which will not be output result. At this point, you can try to lower the threshold, as shown in Figure 4. After lowering the threshold, the number of instances as output results has increased significantly.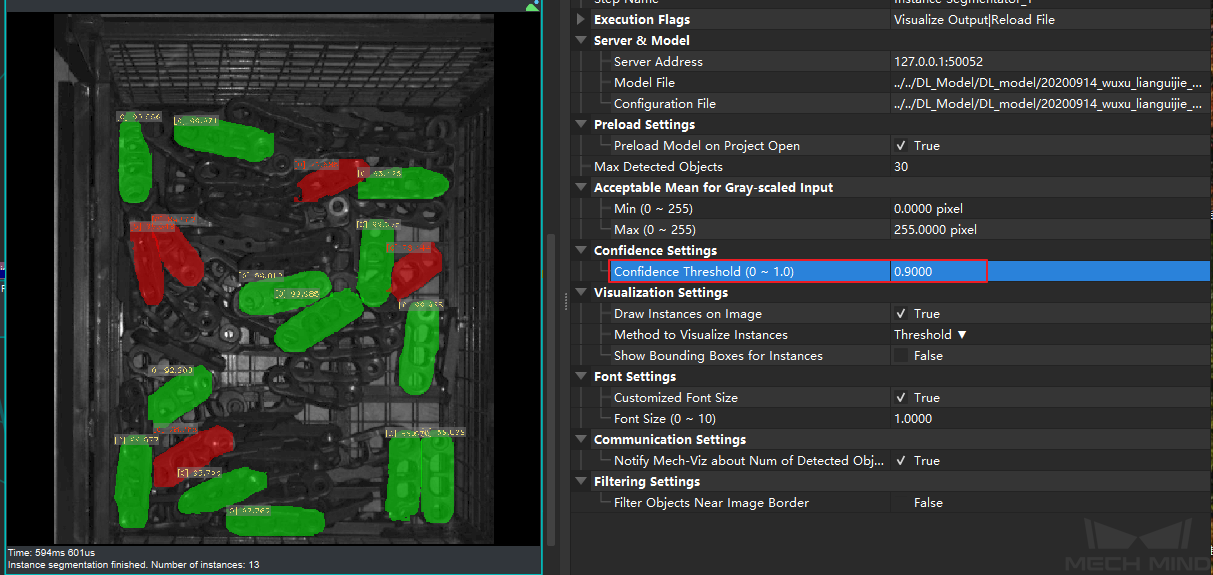
Figure3 Instance Segmentation Results under High Threshold
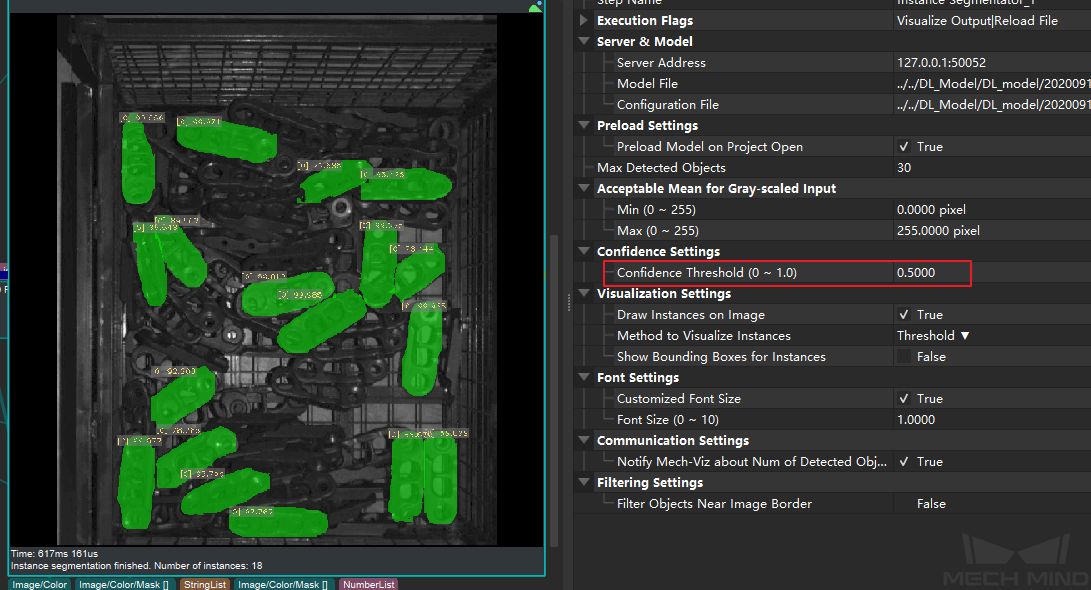
Figure4 Instance Segmentation Results under Low Threshold
If the result does not change much after adjusting the confidence threshold, the user can try to change the deep learning model, or check whether the object for instance segmentation is within the selected ROI.Visualization Settings
- Draw Instance on Image
- Method to Visualize Instances
- Show Bounding Boxes for Instances
Font Settings
- Customized Font Size
- Font Size
Communication Settings
- Notify Mech-Viz about Num of Detected Objects
Filtering Settings
- Filter Objects Near Image Border
- Width of Border
- Height of Border
- Display Predefined ROI
Common Procedures